• Home
  • Blog
  • About
  • Contact
    • Disclosure
    • Privacy Policy
  • SHOP
  • Widget area for main menu

    • Email
    • Facebook
    • Instagram
    • Pinterest
    • Twitter
    • YouTube
  • Skip to primary navigation
  • Skip to main content
  • Skip to primary sidebar

Jaime Costiglio

build - paint - sew

  • BUILD
    • BEDS
    • BENCHES
    • DESKS
    • DRESSERS
    • GAMES & TOYS
    • SCRAP WOOD
    • SHELVES
    • STORAGE
    • TABLES
  • TOOLS
  • PAINT
    • CRAFTS
    • FURNITURE
    • HOME DECOR
  • SEW
    • GIFTS
    • HOME DECOR
    • POUCHES
  • HANDBUILT HOLIDAY
    • 2021
    • 2019
    • 2018
    • 2017
    • 2016
    • 2015
    • 2014
    • 2013
  • GIFTS
    • BABIES
    • KIDS
    • FOR HER
    • FOR HIM
    • TEACHERS
    • WEDDINGS
  • SEASONAL
    • 4TH OF JULY
    • FALL
    • HALLOWEEN
    • CHRISTMAS
    • SUMMER
    • SPRING
    • ST. PATRICK’S DAY
    • THANKSGIVING
    • VALENTINE’S DAY
    • WINTER
  • SALTBOX PROJECT
    • BATHROOMS
    • DINING ROOM
    • EXTERIOR
    • FAMILY ROOM
    • FOYER / MUDROOM
    • KIDS BEDROOMS
    • KITCHEN
    • LIVING ROOM
    • MASTER BEDROOM
    • PLAYROOM
  • SCROLL SAW

DIY Colorblock Patchwork Pillow

August 7, 2013

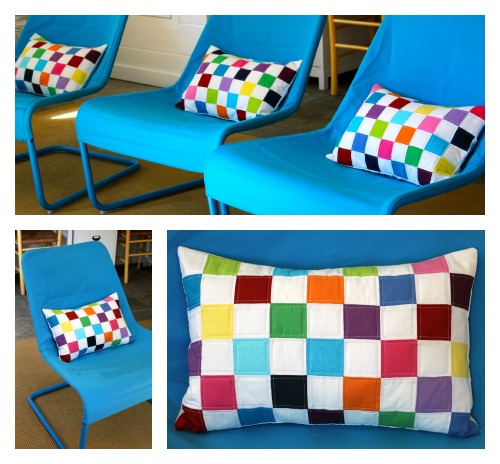
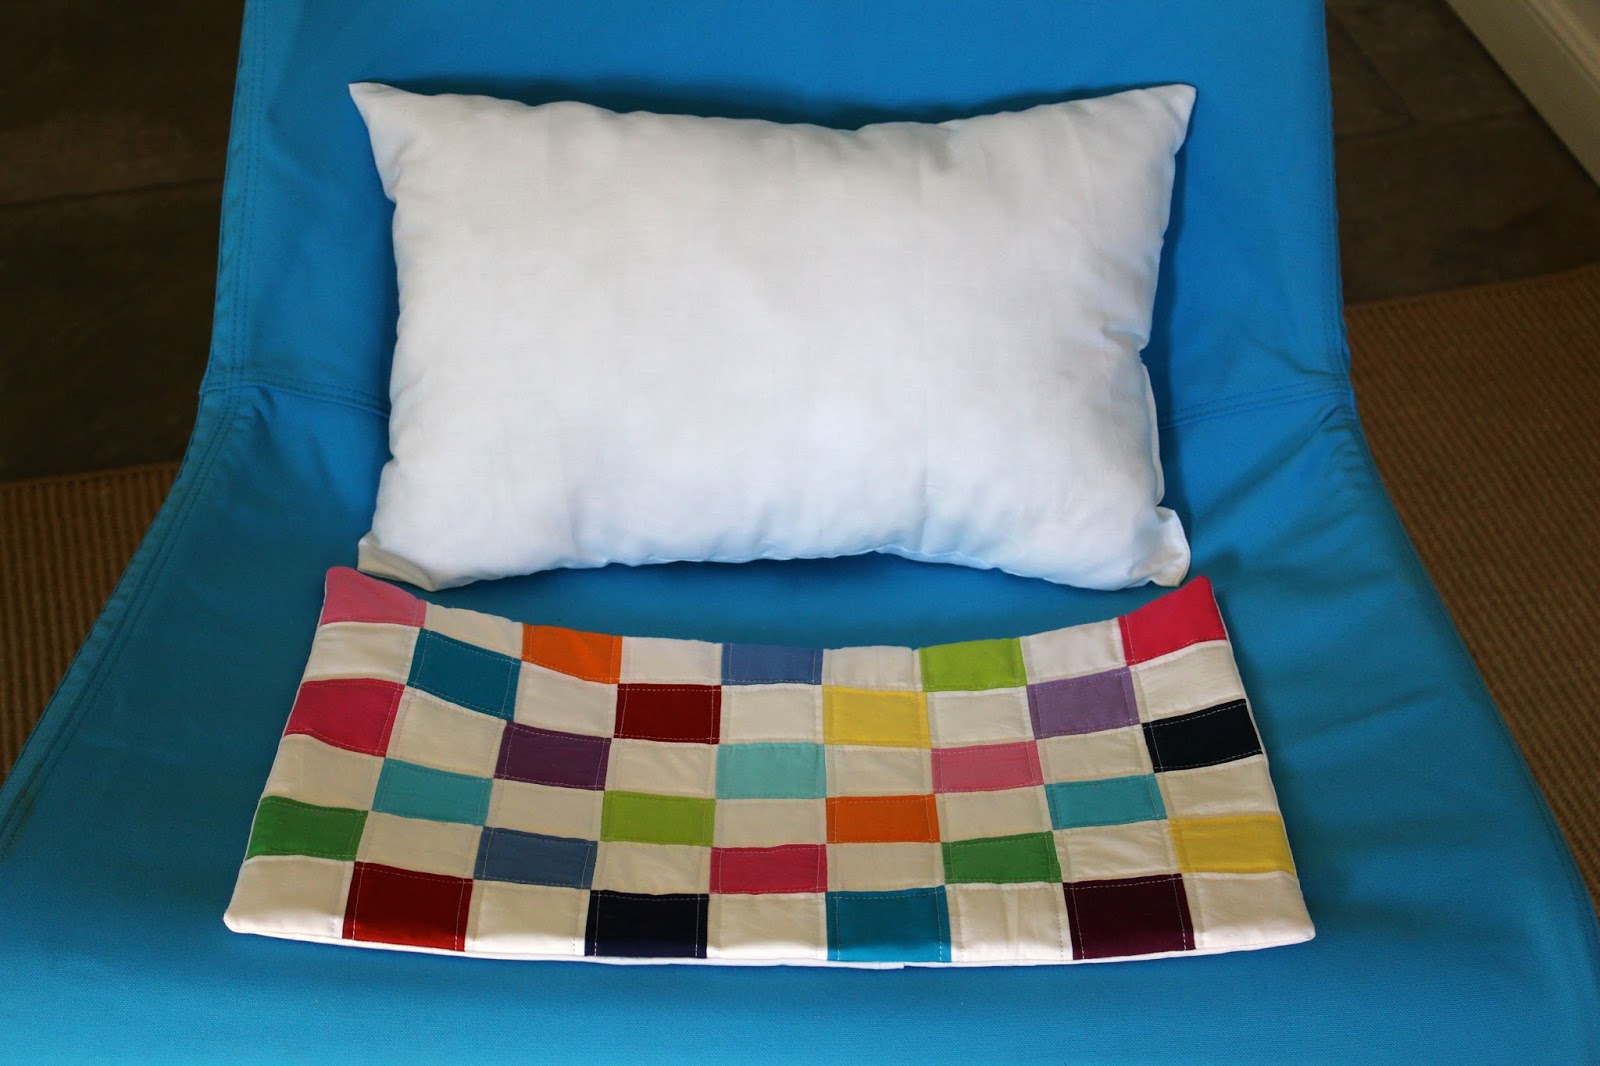
Using solid colors and white cotton I made lumbar patchwork pillows for my kids hangout space.

In lieu of a sofa we opted for three Ikea Locksta chairs.  They are extremely comfortable, washable, and easily movable which keeps the space open and versatile.  The solid bright blue is fresh and fun but I wanted to break it up with the colorblock patchwork pillows:

I used all scraps, mostly Kona cotton solids.
Here’s how to make the colorblock patchwork pillow:

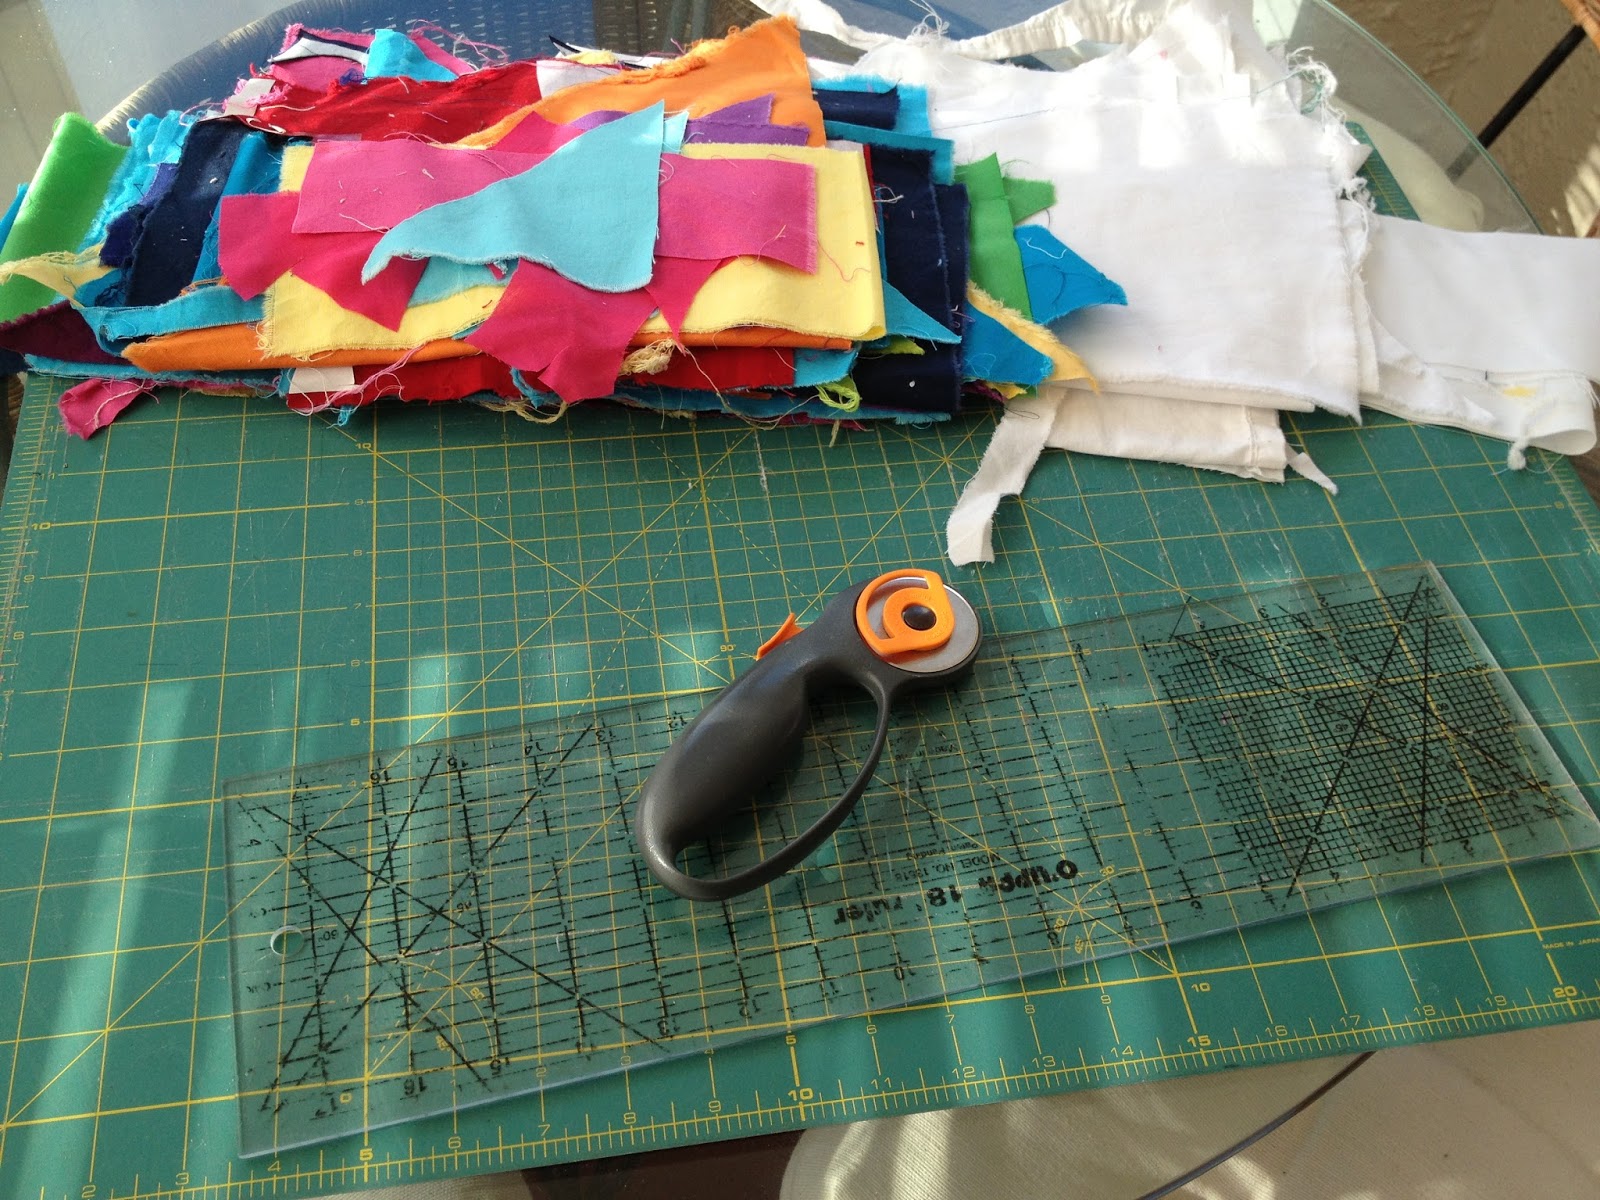
1. Gather solid and white scraps, rotary cutter, ruler and mat:
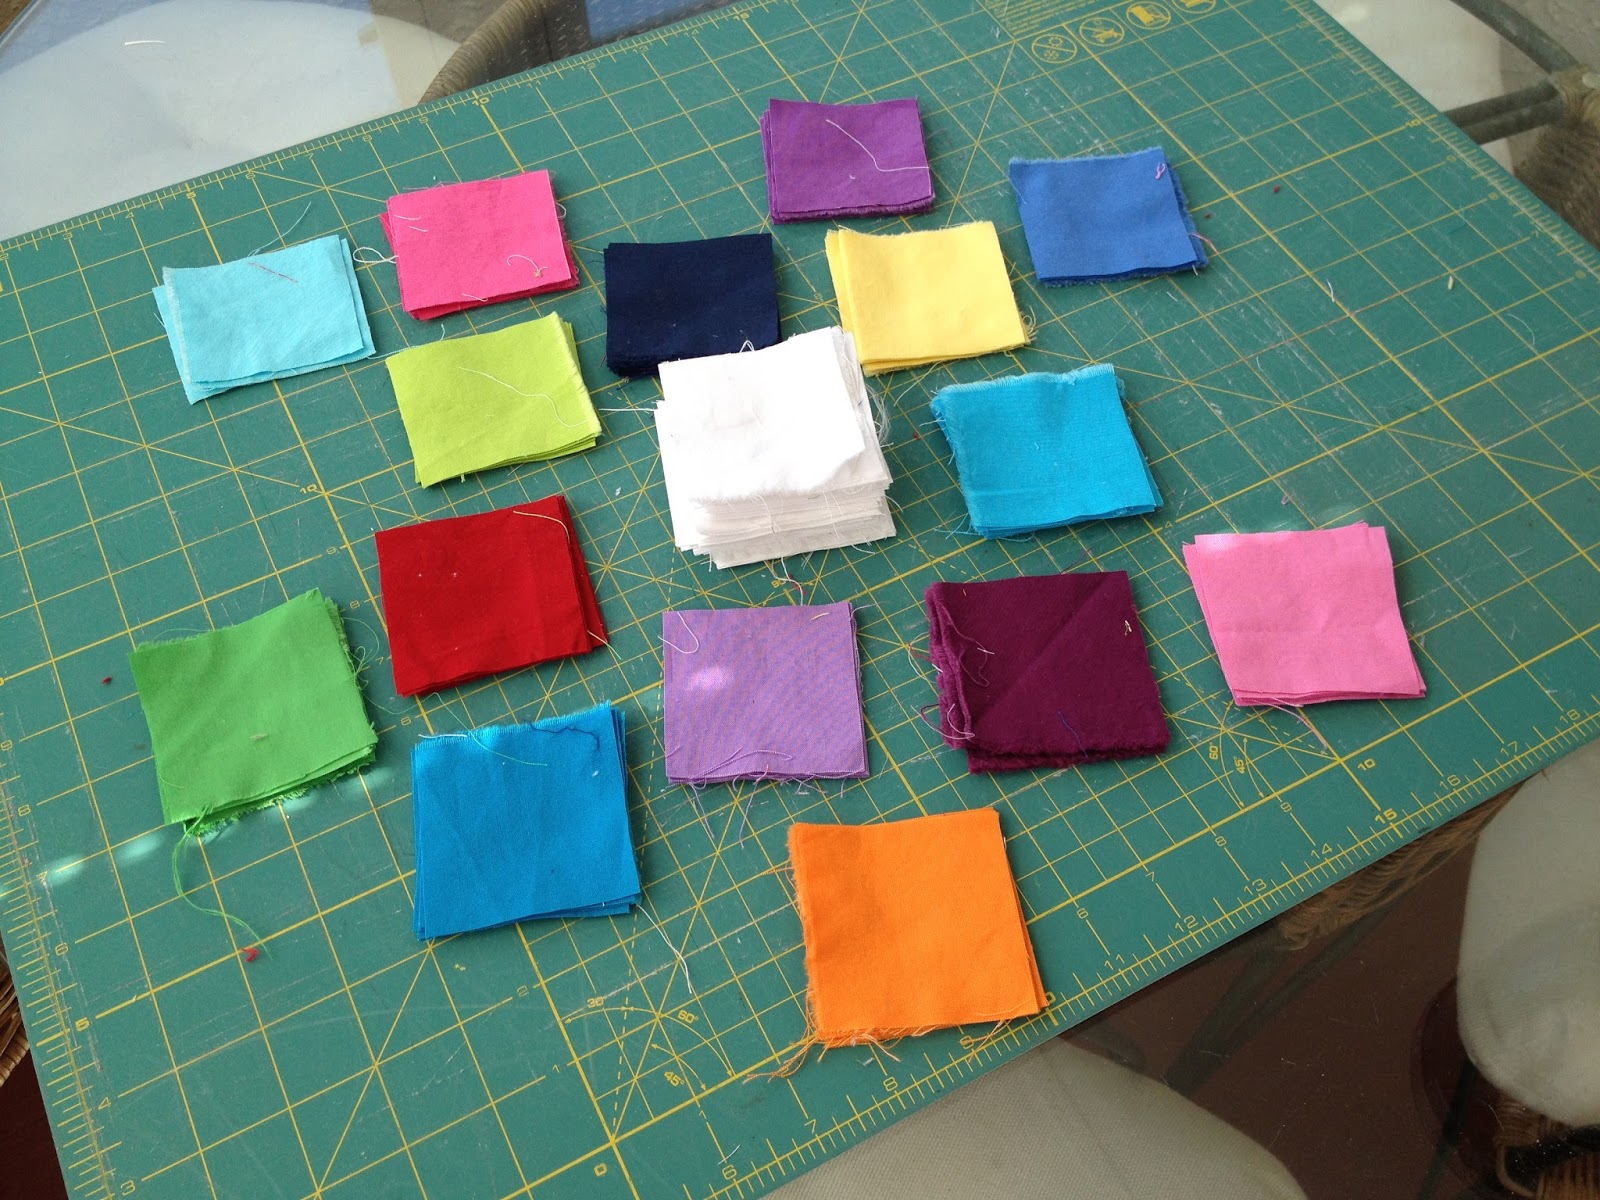
2. Cut 2 1/2″ squares.  Each pillow has 54 squares, 27 white and 27 color:

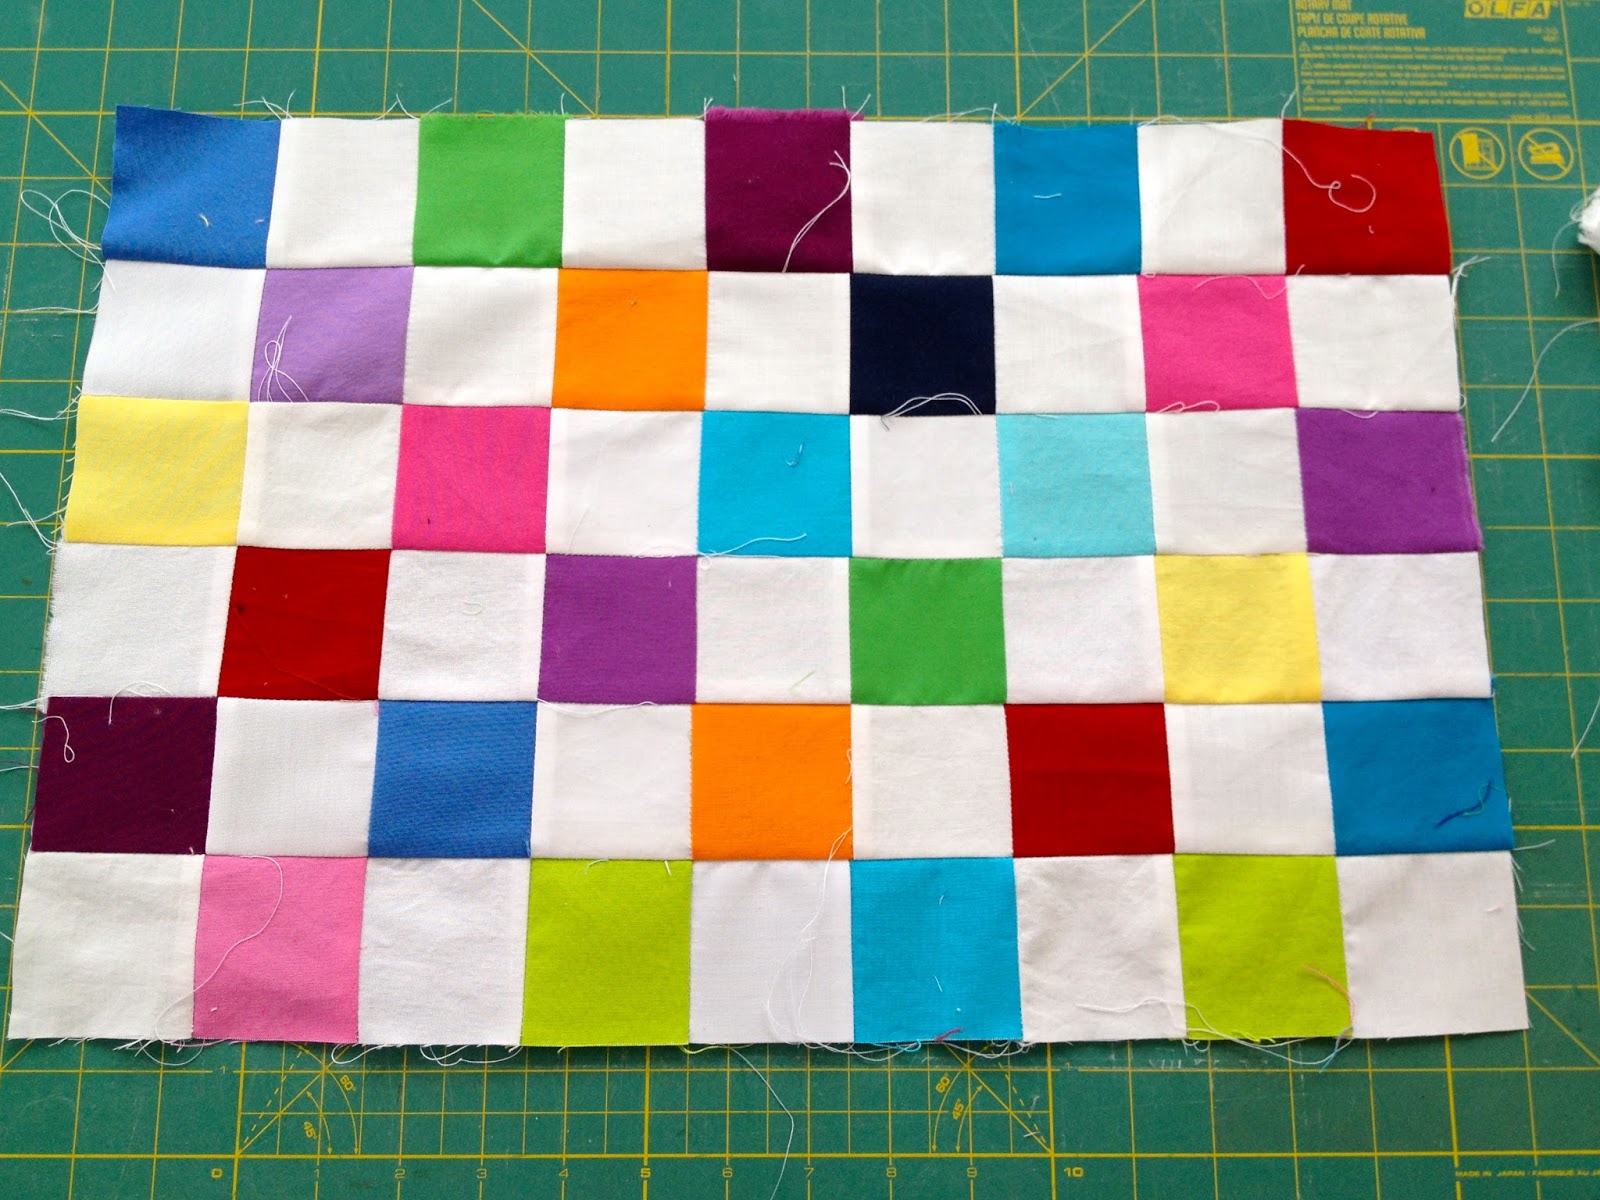
3. Layout pieces, 6 rows x 9 columns:

4. Sew rows using 1/4″ seam allowance:

5. To make quilted front layer backing (white cotton), batting and patchwork top then pin together:

6. Quilt using windowpane style:
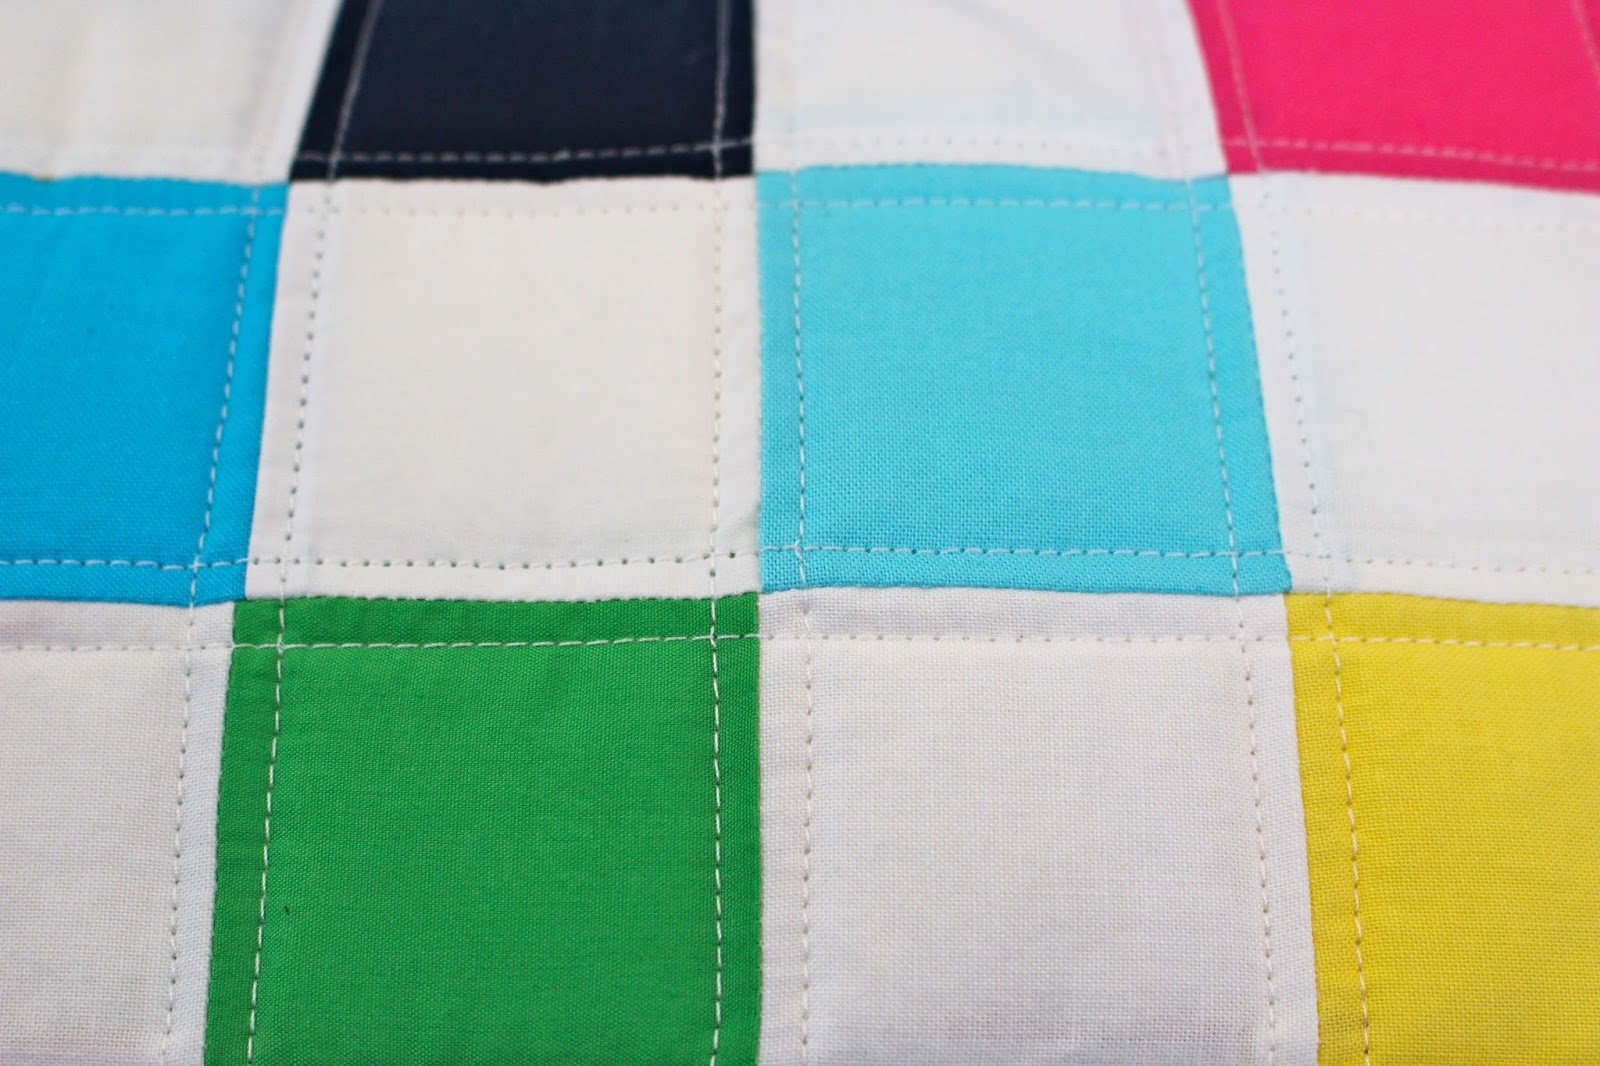
And trim excess:
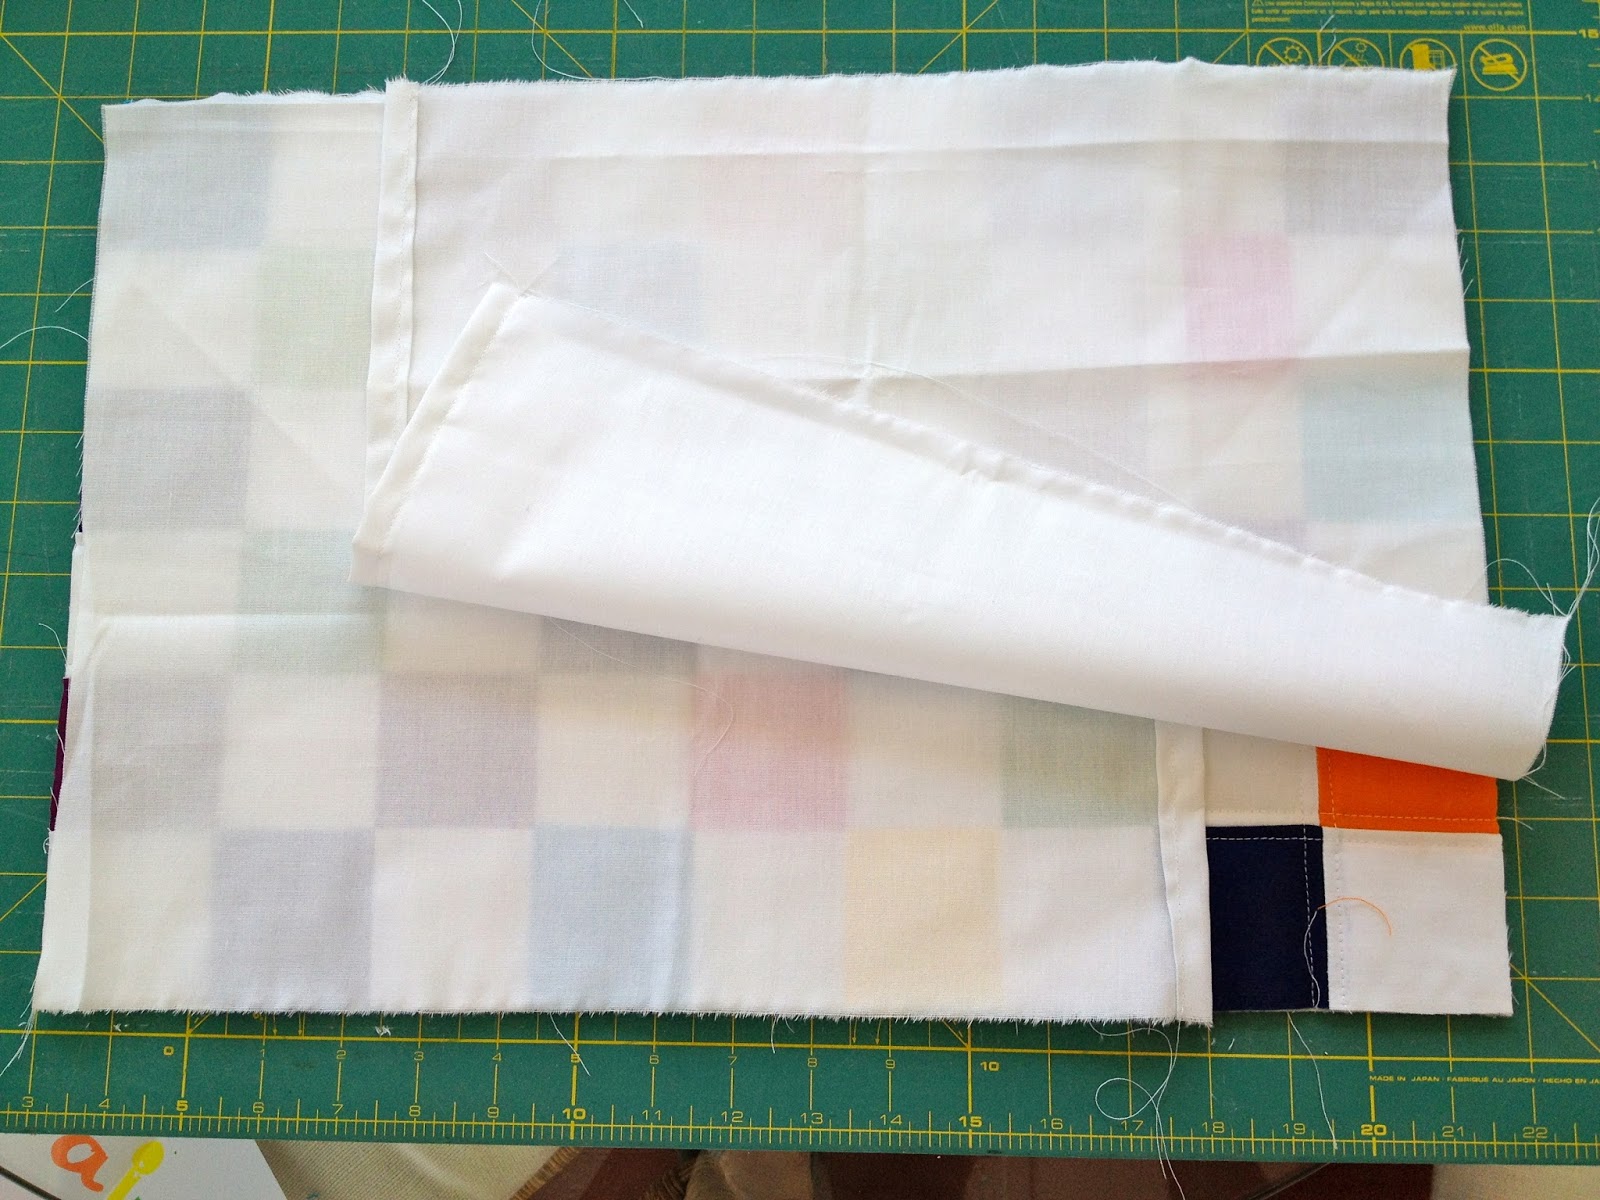
7. To create envelope backing cut 2 pieces of white cotton to fit, make a finished edge on one end then overlap (my overlap is extreme, 4″ will do), right sides together pin around edge and sew:

8. Make pillow form same size:

You may also like...

  • DIY Simple Personalized PillowsDIY Simple Personalized Pillows
  • DIY Monogrammed Lumbar PillowDIY Monogrammed Lumbar Pillow
  • Cross Stitch Monogram Ornament PlacecardCross Stitch Monogram Ornament Placecard
  • Rattan Console PlansRattan Console Plans
Share this post:

Filed Under: DIY, HOME DECOR, HOME DECOR, PLAYROOM, SALTBOX PROJECT, SEW, SEWING7 Comments

Reader Interactions

Comments

  1. Cassie @ Primitive & Proper says

    August 7, 2013 at 11:09 AM

    so fun! i love those!

    Reply
  2. Korrie@RedHenHome says

    August 7, 2013 at 3:05 PM

    These are SO cute! I love the windowpane quilting.

    Reply
  3. Amy Mccarthy says

    August 7, 2013 at 3:59 PM

    That is so fun and cute! You are amazing, I am continually inspired by your lovely projects!

    Reply
  4. DaiseyJayne.com says

    August 9, 2013 at 1:49 PM

    These are so cheerful and your work is just flawless!

    Reply
  5. Marianne says

    August 10, 2013 at 2:37 AM

    Hey I love these! so happy and vibrant. A great idea. I am visiting from http://www.sewpaintit.blogspot.com.au

    Reply
  6. " m(i)e " says

    August 10, 2013 at 10:51 AM

    ow ! I like this a lot !

    Reply
  7. the cape on the corner says

    August 31, 2013 at 2:33 PM

    love how colorful and fun these are. they look like a lot of work!

    Reply

Leave a Reply Cancel reply

Your email address will not be published. Required fields are marked *

Primary Sidebar

Hi! I’m Jaime

Jaime Costiglio

Hello!

Thank you for stopping by.
Join me for lots of DIY.

Read more

Get new posts via email

Handbuilt Holiday: Gift Project Plans

handbuilt holiday gift project plans

Collection of DIY gift project plans to build.

The Home Depot Tool Prospective

THD Prospective

Tools to consider for the DIYer.

Archives

The Home Depot Logo
Copyright © 2026 Jaime Costiglio · Custom site by Moonsteam Design

Privacy Policy