• Home
  • Blog
  • About
  • Contact
    • Disclosure
    • Privacy Policy
  • SHOP
  • Widget area for main menu

    • Email
    • Facebook
    • Instagram
    • Pinterest
    • Twitter
    • YouTube
  • Skip to primary navigation
  • Skip to main content
  • Skip to primary sidebar

Jaime Costiglio

build - paint - sew

  • BUILD
    • BEDS
    • BENCHES
    • DESKS
    • DRESSERS
    • GAMES & TOYS
    • SCRAP WOOD
    • SHELVES
    • STORAGE
    • TABLES
  • TOOLS
  • PAINT
    • CRAFTS
    • FURNITURE
    • HOME DECOR
  • SEW
    • GIFTS
    • HOME DECOR
    • POUCHES
  • HANDBUILT HOLIDAY
    • 2021
    • 2019
    • 2018
    • 2017
    • 2016
    • 2015
    • 2014
    • 2013
  • GIFTS
    • BABIES
    • KIDS
    • FOR HER
    • FOR HIM
    • TEACHERS
    • WEDDINGS
  • SEASONAL
    • 4TH OF JULY
    • FALL
    • HALLOWEEN
    • CHRISTMAS
    • SUMMER
    • SPRING
    • ST. PATRICK’S DAY
    • THANKSGIVING
    • VALENTINE’S DAY
    • WINTER
  • SALTBOX PROJECT
    • BATHROOMS
    • DINING ROOM
    • EXTERIOR
    • FAMILY ROOM
    • FOYER / MUDROOM
    • KIDS BEDROOMS
    • KITCHEN
    • LIVING ROOM
    • MASTER BEDROOM
    • PLAYROOM
  • SCROLL SAW

Kids Closet Makeover

February 5, 2011

A simple closet makeover for the kids.
Making better use of the space in the kids closet by adding shelves and a proper hanging rod.
Nothing fancy, but totally functional.
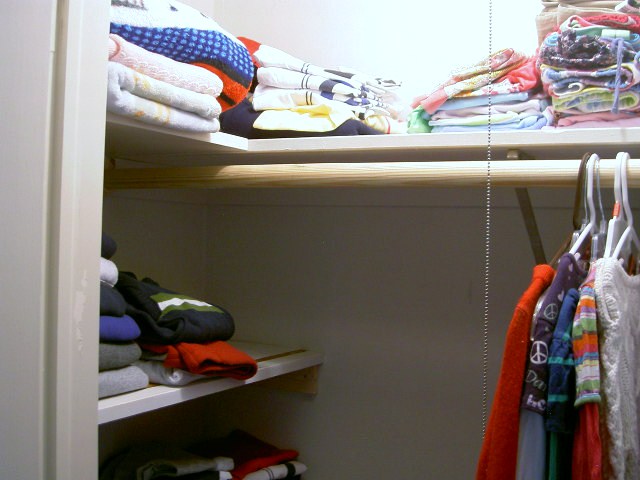
The before:

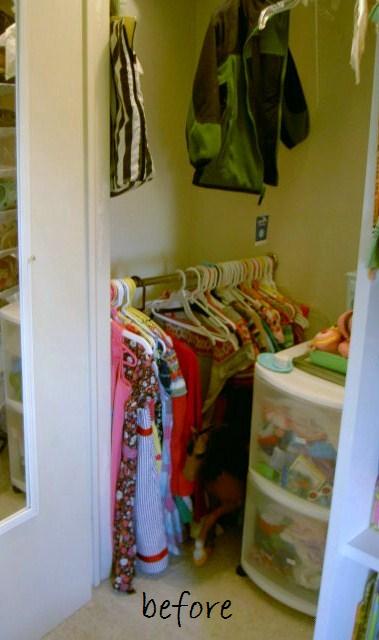
To be honest kids don’t need that much hanging space.  In my experience the majority of kids clothes get folded so I really needed more shelf space.
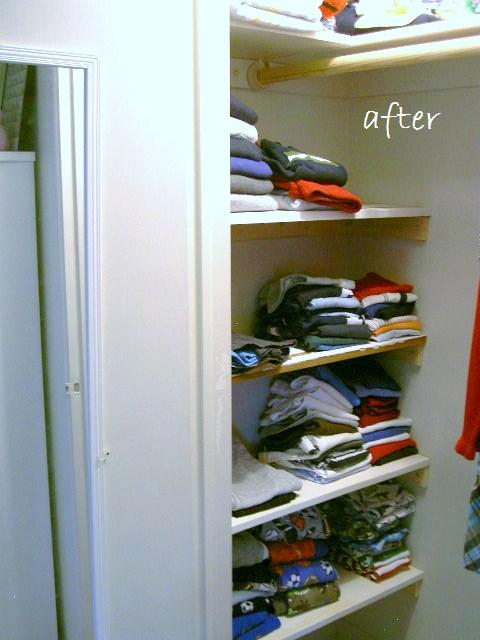
After making some shelves and adding a new hanging rod we have:
Before the hanging rod was this odd contraption with sliding metal hooks, totally not user friendly:
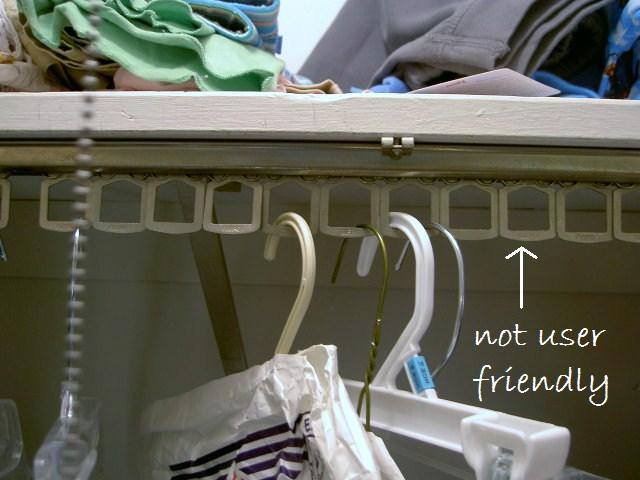
Seriously where do you find something like that?
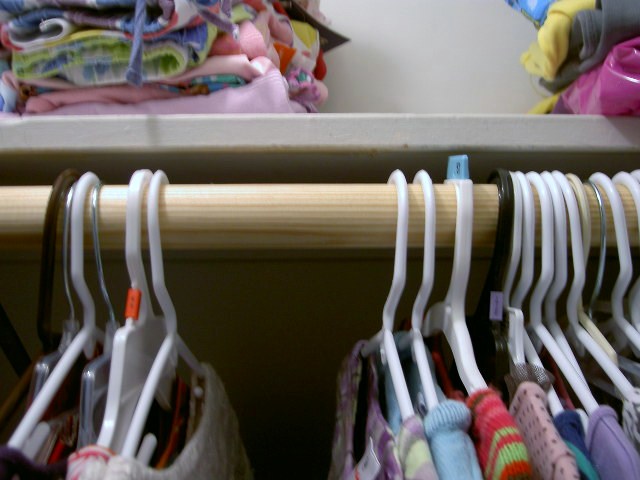
I installed a more standard, user friendly, regular old boring hanging closet rod:
Here’s the space before all emptied out.  Look at all that vertical space waiting for shelving!:
And during the shelf construction:
(I used 1×3 furring strips, mounted to the studs with 2″ screws and liquid nails and some scrap 1×12’s for the shelves.)
How about this awful corner up top before:
Can we have a shelf please?
Another look:
Total cost, about $7.  Worth every penny.
It’s so worth it to make your kids space super functional both for them and you.


You may also like...

  • Walk-In Closet Makeover (plus built-in plans)Walk-In Closet Makeover (plus built-in plans)
  • Built-Ins Makeover: Using a Paint SprayerBuilt-Ins Makeover: Using a Paint Sprayer
  • DIY Entryway Cubbies (bench portion)DIY Entryway Cubbies (bench portion)
  • “H” is for Horse“H” is for Horse
Share this post:

Filed Under: DIY, ORGANIZATION, SHELVES2 Comments

Reader Interactions

Comments

  1. Love Being A Nonny says

    February 5, 2011 at 4:05 PM

    F is for Fabulous!!!

    Reply
  2. Comeca Jones says

    February 9, 2011 at 11:58 AM

    Great use of space!

    Reply

Leave a Reply Cancel reply

Your email address will not be published. Required fields are marked *

Primary Sidebar

Hi! I’m Jaime

Jaime Costiglio

Hello!

Thank you for stopping by.
Join me for lots of DIY.

Read more

Get new posts via email

Handbuilt Holiday: Gift Project Plans

handbuilt holiday gift project plans

Collection of DIY gift project plans to build.

The Home Depot Tool Prospective

THD Prospective

Tools to consider for the DIYer.

Archives

The Home Depot Logo
Copyright © 2023 Jaime Costiglio · Custom site by Moonsteam Design

Privacy Policy