• Home
  • Blog
  • About
  • Contact
    • Disclosure
    • Privacy Policy
  • SHOP
  • Widget area for main menu

    • Email
    • Facebook
    • Instagram
    • Pinterest
    • Twitter
    • YouTube
  • Skip to primary navigation
  • Skip to main content
  • Skip to primary sidebar

Jaime Costiglio

build - paint - sew

  • BUILD
    • BEDS
    • BENCHES
    • DESKS
    • DRESSERS
    • GAMES & TOYS
    • SCRAP WOOD
    • SHELVES
    • STORAGE
    • TABLES
  • TOOLS
  • PAINT
    • CRAFTS
    • FURNITURE
    • HOME DECOR
  • SEW
    • GIFTS
    • HOME DECOR
    • POUCHES
  • HANDBUILT HOLIDAY
    • 2021
    • 2019
    • 2018
    • 2017
    • 2016
    • 2015
    • 2014
    • 2013
  • GIFTS
    • BABIES
    • KIDS
    • FOR HER
    • FOR HIM
    • TEACHERS
    • WEDDINGS
  • SEASONAL
    • 4TH OF JULY
    • FALL
    • HALLOWEEN
    • CHRISTMAS
    • SUMMER
    • SPRING
    • ST. PATRICK’S DAY
    • THANKSGIVING
    • VALENTINE’S DAY
    • WINTER
  • SALTBOX PROJECT
    • BATHROOMS
    • DINING ROOM
    • EXTERIOR
    • FAMILY ROOM
    • FOYER / MUDROOM
    • KIDS BEDROOMS
    • KITCHEN
    • LIVING ROOM
    • MASTER BEDROOM
    • PLAYROOM
  • SCROLL SAW

“C” is for Caddy

April 1, 2011

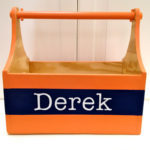
The knock off storage caddy.
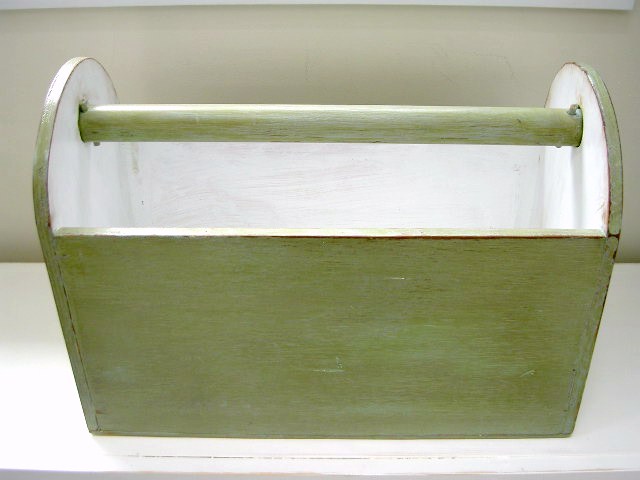
Total cost $0. 

I used scrap wood and leftover paint.

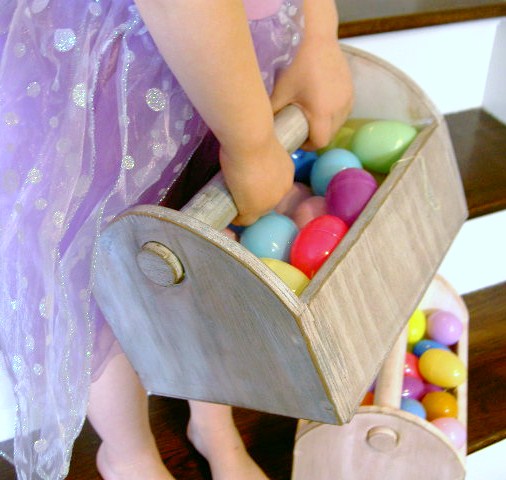
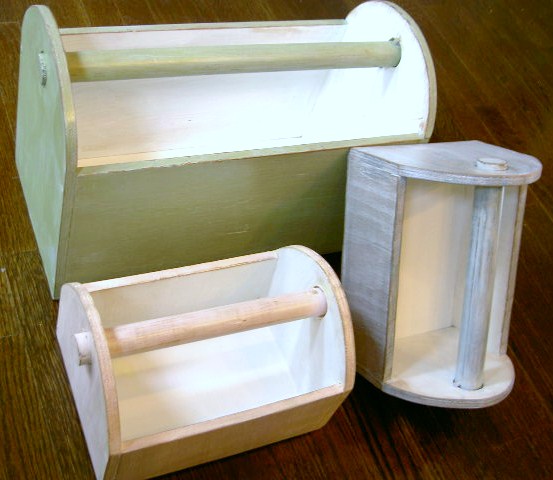
And I couldn’t resist making some mini caddies for Easter.

So cute for collecting eggs.

My caddy is loosely based on Ana White’s plans here. 

And this caddy from Pottery Barn kids:

Storage Caddy
image from Pottery Barn Kids

But I’ll save the $89 plus shipping thank you (yes that’s the real price) and use scrap wood pieces I had in the garage.

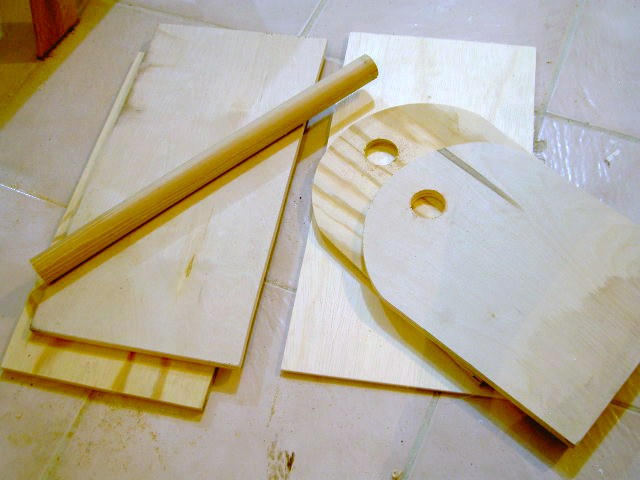
I used 1/2″ plywood pieces to keep the weight light and decided the size based on the longest scraps.

Here’s how I made the caddy:
(Same process for the mini caddy.)
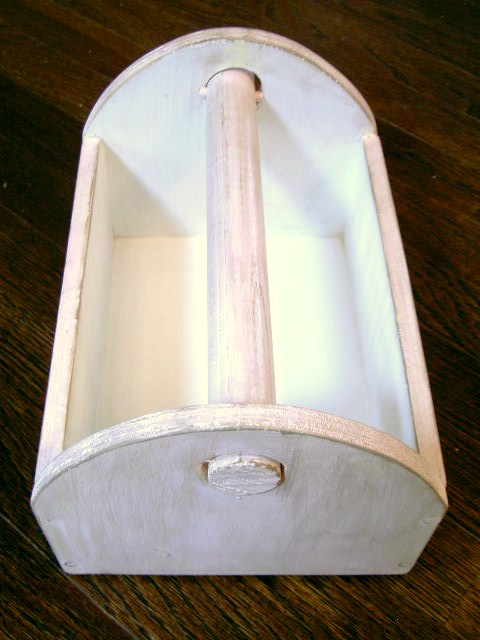
1. My pieces all cut:
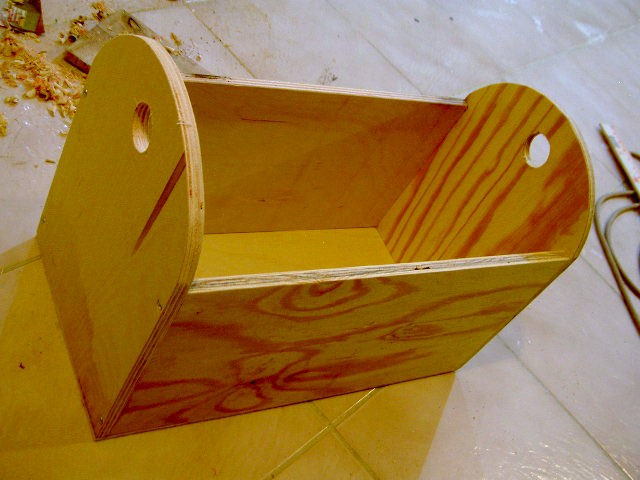
2. Assembled.
(This caddy measures 17.5″l x 12″h x 9″w.)

Now for the handle.
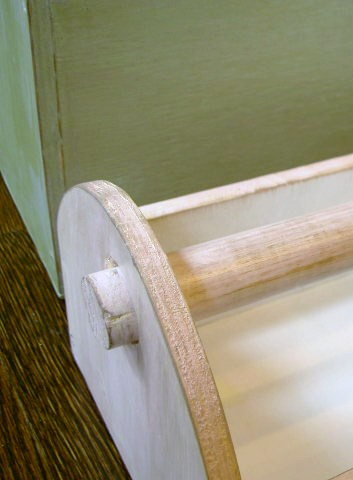
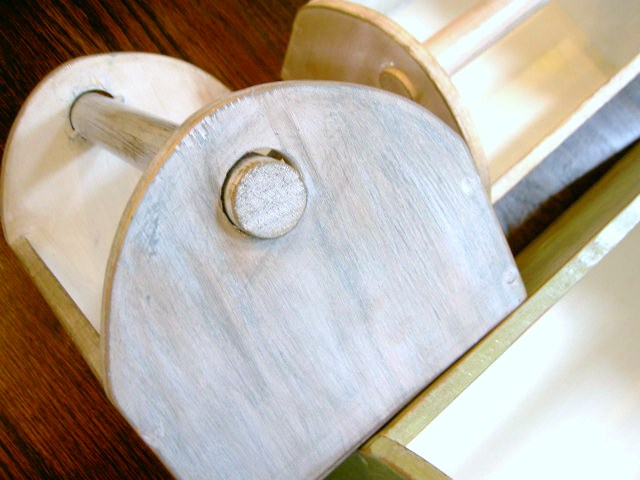
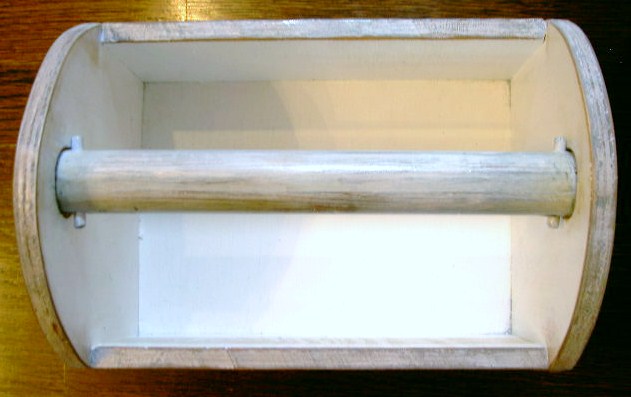
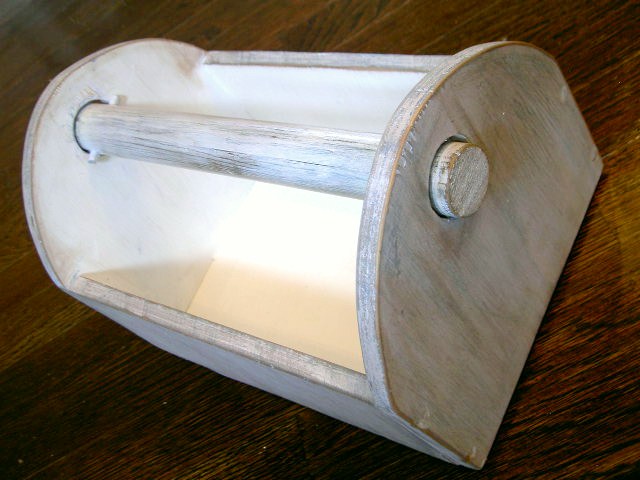
3. In order to keep the rod in place I drilled 1/4″ holes just inside the curved short ends:

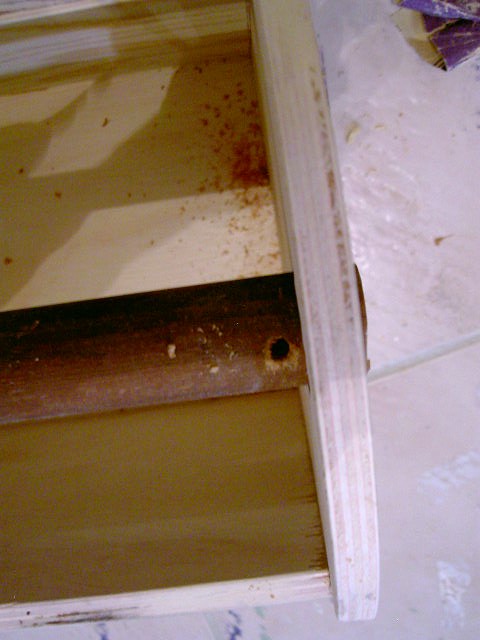
4. Slide in a 1/4″ dowel, leaving about 1/4″ on either side to stop the rod from sliding out.
(This picture is before I cut the dowel to size.)
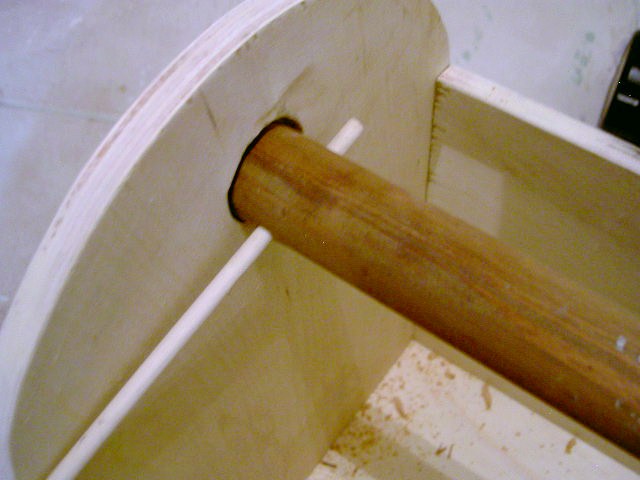
5. Glue the dowel into place so it’s secure.
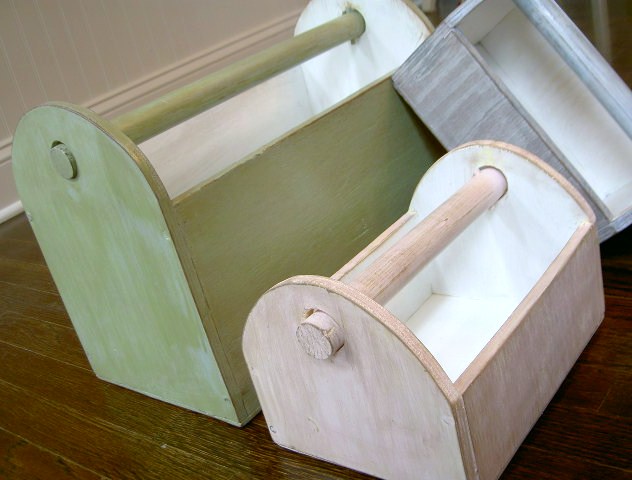
6. Paint the interior one coat semi-gloss white.
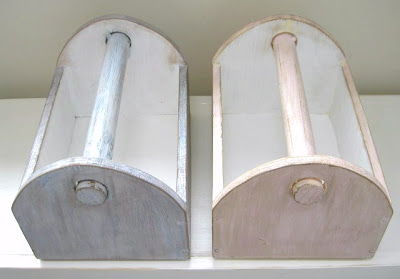
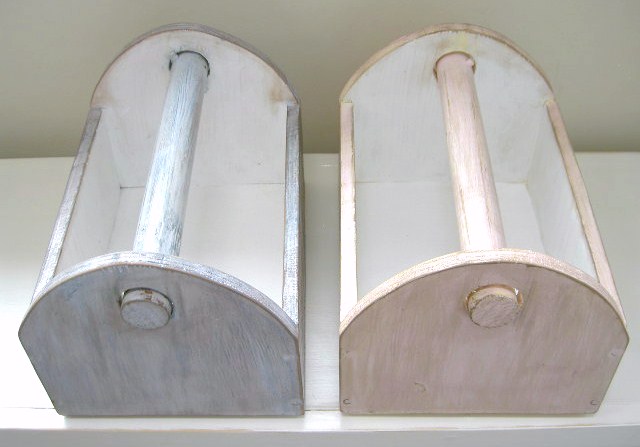
7. Paint exterior one coat BM wedgewood grey:
8. One coat Behr sage:
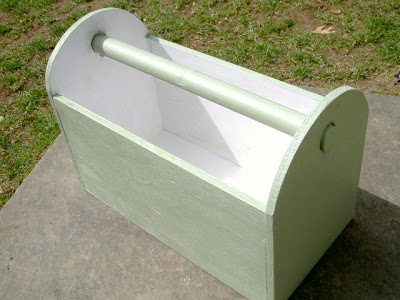
9. Sand with 120 grit to distress.
10. Stain with Minwax special walnut.
11. Seal with clear satin poly.
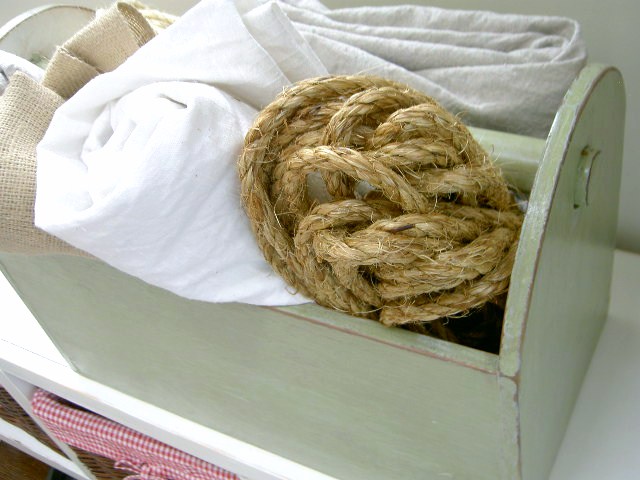
Love.
Fill with your favorites.

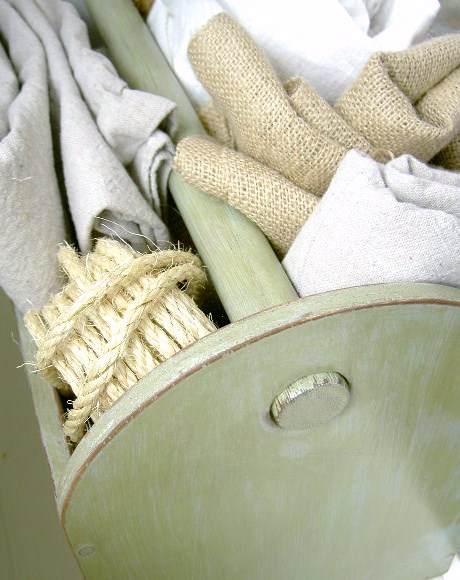
And some detailed pictures of the minis.
(The mini caddies measure 10.5″l x 8″w x 7″h.)

And the blue mini:

I will definitely be making more of these.
I’m linking up to:
Funky Junk's Saturday Nite Special  Photobucket The DIY Show Off MakingThumbnail for 'Made By You Monday'     Photobucket  http://linda-coastalcharm.blogspot.com/Running With GlitterSYS Thurs Transformation ThursdayThe Shabby Nest Chic on a Shoestring Decorating French Country Cottage Designer Garden Button    The Lettered CottageVisit thecsiproject.com fwf spring label

You may also like...

  • “W” is for Wood Favor Tags“W” is for Wood Favor Tags
  • DIY Pink Barbie PartyDIY Pink Barbie Party
  • “T” is for Trugs“T” is for Trugs
  • How to Personalize Any Wooden ObjectHow to Personalize Any Wooden Object
Share this post:

Filed Under: BUILD, DIY, GAMES & TOYS, GIFTS, HOME DECOR, KIDS, PAINT, SCRAP WOOD30 Comments

Reader Interactions

Comments

  1. Angie says

    April 1, 2011 at 8:09 PM

    ♥ it! And it actually seems to easy that I may give it a try! Have a great weekend!

    Angie
    Linen & Verbena

    Reply
  2. BeingBrook says

    April 1, 2011 at 8:30 PM

    Love the caddy! So many ways to use it. Turned out so great!

    Reply
  3. Sweet Little Smoothie says

    April 1, 2011 at 11:58 PM

    LOVE these! I always see cute caddys but I never thought to make one! Thanks for sharing 🙂

    Reply
  4. Tiff says

    April 2, 2011 at 12:00 AM

    'C' is for CUTE too!!! What a fantastic project! I can't wait to set up my workshop when I move house next week, you have inspired me! X

    Reply
  5. Amy of WhisperWood Cottage and Junkologie says

    April 2, 2011 at 12:16 AM

    You knocked it out of the park again! So darn cute!!

    Reply
  6. Sarah, Three Boys says

    April 2, 2011 at 2:50 AM

    Are you kidding me! AMAZING! Have you submitted this to knock of decor yet? Beckie would LOVE it!!!

    Reply
  7. [email protected] says

    April 2, 2011 at 3:05 AM

    Oh my goodness … I love this so much. I WANT ONE! But I'm not brave enough to make one …
    Maybe you should sell them! :)~
    New follower!
    ~Bec

    Reply
  8. Sawdust and Paperscraps says

    April 2, 2011 at 3:14 AM

    Awesome! Love the tiny dowel inside the larger one to keep it in place. Smart and oh so cute!

    Reply
  9. Carri @ Redefining C says

    April 2, 2011 at 3:23 AM

    Superb! Super cute!

    Reply
  10. UrbanCottageDecor.blogspot.com says

    April 2, 2011 at 5:16 AM

    These are adorable! Can I feature you in a post?

    Reply
  11. SANDI says

    April 2, 2011 at 1:53 PM

    Awesome caddies! thanks for sharing!

    Reply
  12. Trisha @ The Sweet Survival says

    April 2, 2011 at 11:23 PM

    Oh my gosh this is so adorable. I just spent a few hours searching the internet for a Easter basket I liked for Sawyer. This is perfect and I love the colors.

    Reply
  13. cajungal01 says

    April 3, 2011 at 3:58 AM

    I love these! I'm not sure where I need any just yet but I may have to figure it out. I've never made anything like that from scratch BUT I own a jigsaw (is that what you used?) so I guess I can try!
    ADORABLE!
    :0)
    ~robin

    Reply
  14. The Inspired Nest says

    April 4, 2011 at 2:03 AM

    Super cute! I painted one that my son made in wood shop! I love it! He made me another one this weekend and I can't wait to doll it up! I am loving the mini caddies!
    Lacy

    Reply
  15. AmieAnn says

    April 4, 2011 at 1:51 PM

    Oh my Gosh! These are sooo stinkin adorable~ Hope you will share them with my Pink Hippo Party @ http://pinkapotamus.blogspot.com/2011/04/pink-hippo-party-23.html

    Reply
  16. Krystine Stephenson says

    April 4, 2011 at 6:22 PM

    Those are so great! I love them! It really did turn out so great!

    http://lucyluvinyl.blogspot.com/

    Reply
  17. Susan says

    April 5, 2011 at 12:48 AM

    I love the tool box full of teddy bears!

    Reply
  18. Fishtail Cottage says

    April 5, 2011 at 3:46 AM

    fabulous and functional! love this xoxo, tracie

    Reply
  19. SJ @ Homemaker On A Dime says

    April 7, 2011 at 4:42 AM

    I love the way you incorporate the alphabets with your project. So appropriate to your blog's name. Love the caddy's look 🙂

    Reply
  20. Meg says

    April 8, 2011 at 4:04 AM

    That's so cool! I love it! What a fun "basket" for Easter!

    Reply
  21. Laura Ingalls Gunn says

    April 8, 2011 at 1:32 PM

    What a great knock off!

    Reply
  22. Sommer says

    April 8, 2011 at 11:51 PM

    Woohoo! These are great Jaime! I was just scouring through a bunch of scrap this afternoon and I think I'll have to make some for our egg hunt this year! Thanks for the great idea.

    Reply
  23. Debbie in Nashville says

    April 9, 2011 at 6:28 PM

    Lovely! Love that you made them with all leftover wood and paint, they turned out great!

    Reply
  24. The Muehli's says

    April 11, 2011 at 10:55 AM

    Love it! They look so great and so cool that you managed it with scrap. I'll be sharing this on my blog 🙂

    My easy Easter decor

    Tiffany

    Reply
  25. Creative Escapes says

    April 11, 2011 at 12:59 PM

    I made a similar one from Anna's plans – with a paper towel holder for a cleaning caddy – but I used 3/4 inch and it's so heavy – I think I am going to make some more like you did – they turned out so great! I love the finishing work too! They would make such cute easter baskets – I bought some cheap ones at Target – but – I may have to re-look at this and get making some for easter – thanks for the great idea!

    Reply
  26. Cristin @ Simplified Bee says

    April 11, 2011 at 2:23 PM

    You make it look so easy! I will order two 😉

    xo,
    cristin

    Reply
  27. LrSchwtz says

    April 13, 2011 at 3:45 AM

    This is a fantastic tutorial! I'd love for you to share it at my Share the Wealth Wednesday Link Party. http://www.laughloveandcraft.com

    Reply
  28. [email protected] Baking Bookworm says

    April 14, 2011 at 3:32 PM

    There are so many uses for these caddies! Plus, they seem like a job that I can do myself. 🙂

    Reply
  29. Mimi says

    April 16, 2011 at 9:57 PM

    Those totes are wonderful! Really cute. Thanks for sharing your talent!

    Reply
  30. Holly says

    April 29, 2011 at 1:37 AM

    Awesome! Super cute for an Easter basket!

    Reply

Leave a Reply Cancel reply

Your email address will not be published. Required fields are marked *

Primary Sidebar

Hi! I’m Jaime

Jaime Costiglio

Hello!

Thank you for stopping by.
Join me for lots of DIY.

Read more

Get new posts via email

Handbuilt Holiday: Gift Project Plans

handbuilt holiday gift project plans

Collection of DIY gift project plans to build.

The Home Depot Tool Prospective

THD Prospective

Tools to consider for the DIYer.

Archives

The Home Depot Logo
Copyright © 2023 Jaime Costiglio · Custom site by Moonsteam Design

Privacy Policy