• Home
  • Blog
  • About
  • Contact
    • Disclosure
    • Privacy Policy
  • SHOP
  • Widget area for main menu

    • Email
    • Facebook
    • Instagram
    • Pinterest
    • Twitter
    • YouTube
  • Skip to primary navigation
  • Skip to main content
  • Skip to primary sidebar

Jaime Costiglio

build - paint - sew

  • BUILD
    • BEDS
    • BENCHES
    • DESKS
    • DRESSERS
    • GAMES & TOYS
    • SCRAP WOOD
    • SHELVES
    • STORAGE
    • TABLES
  • TOOLS
  • PAINT
    • CRAFTS
    • FURNITURE
    • HOME DECOR
  • SEW
    • GIFTS
    • HOME DECOR
    • POUCHES
  • HANDBUILT HOLIDAY
    • 2021
    • 2019
    • 2018
    • 2017
    • 2016
    • 2015
    • 2014
    • 2013
  • GIFTS
    • BABIES
    • KIDS
    • FOR HER
    • FOR HIM
    • TEACHERS
    • WEDDINGS
  • SEASONAL
    • 4TH OF JULY
    • FALL
    • HALLOWEEN
    • CHRISTMAS
    • SUMMER
    • SPRING
    • ST. PATRICK’S DAY
    • THANKSGIVING
    • VALENTINE’S DAY
    • WINTER
  • SALTBOX PROJECT
    • BATHROOMS
    • DINING ROOM
    • EXTERIOR
    • FAMILY ROOM
    • FOYER / MUDROOM
    • KIDS BEDROOMS
    • KITCHEN
    • LIVING ROOM
    • MASTER BEDROOM
    • PLAYROOM
  • SCROLL SAW

“W” is for Wood Favor Tags

September 13, 2013

Paint: wood favor tags
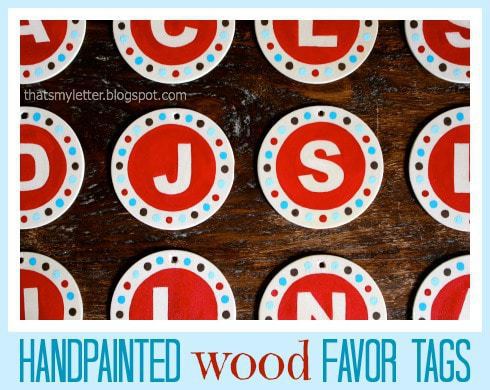
Handpainted wood favor tags for a bridal party.
They could be ornaments, gift tags, a nice way to personalize your bag, or just hang in your home:

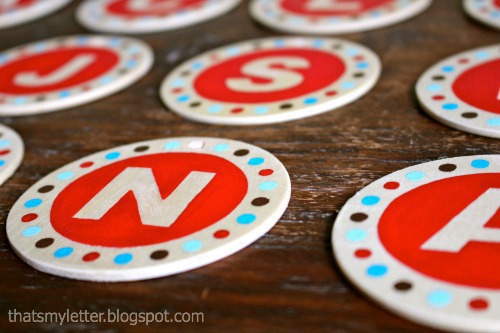
These favor tags were made specifically to match the wedding colors, red and turquoise:
Another version (done Spring of 2012) in navy:
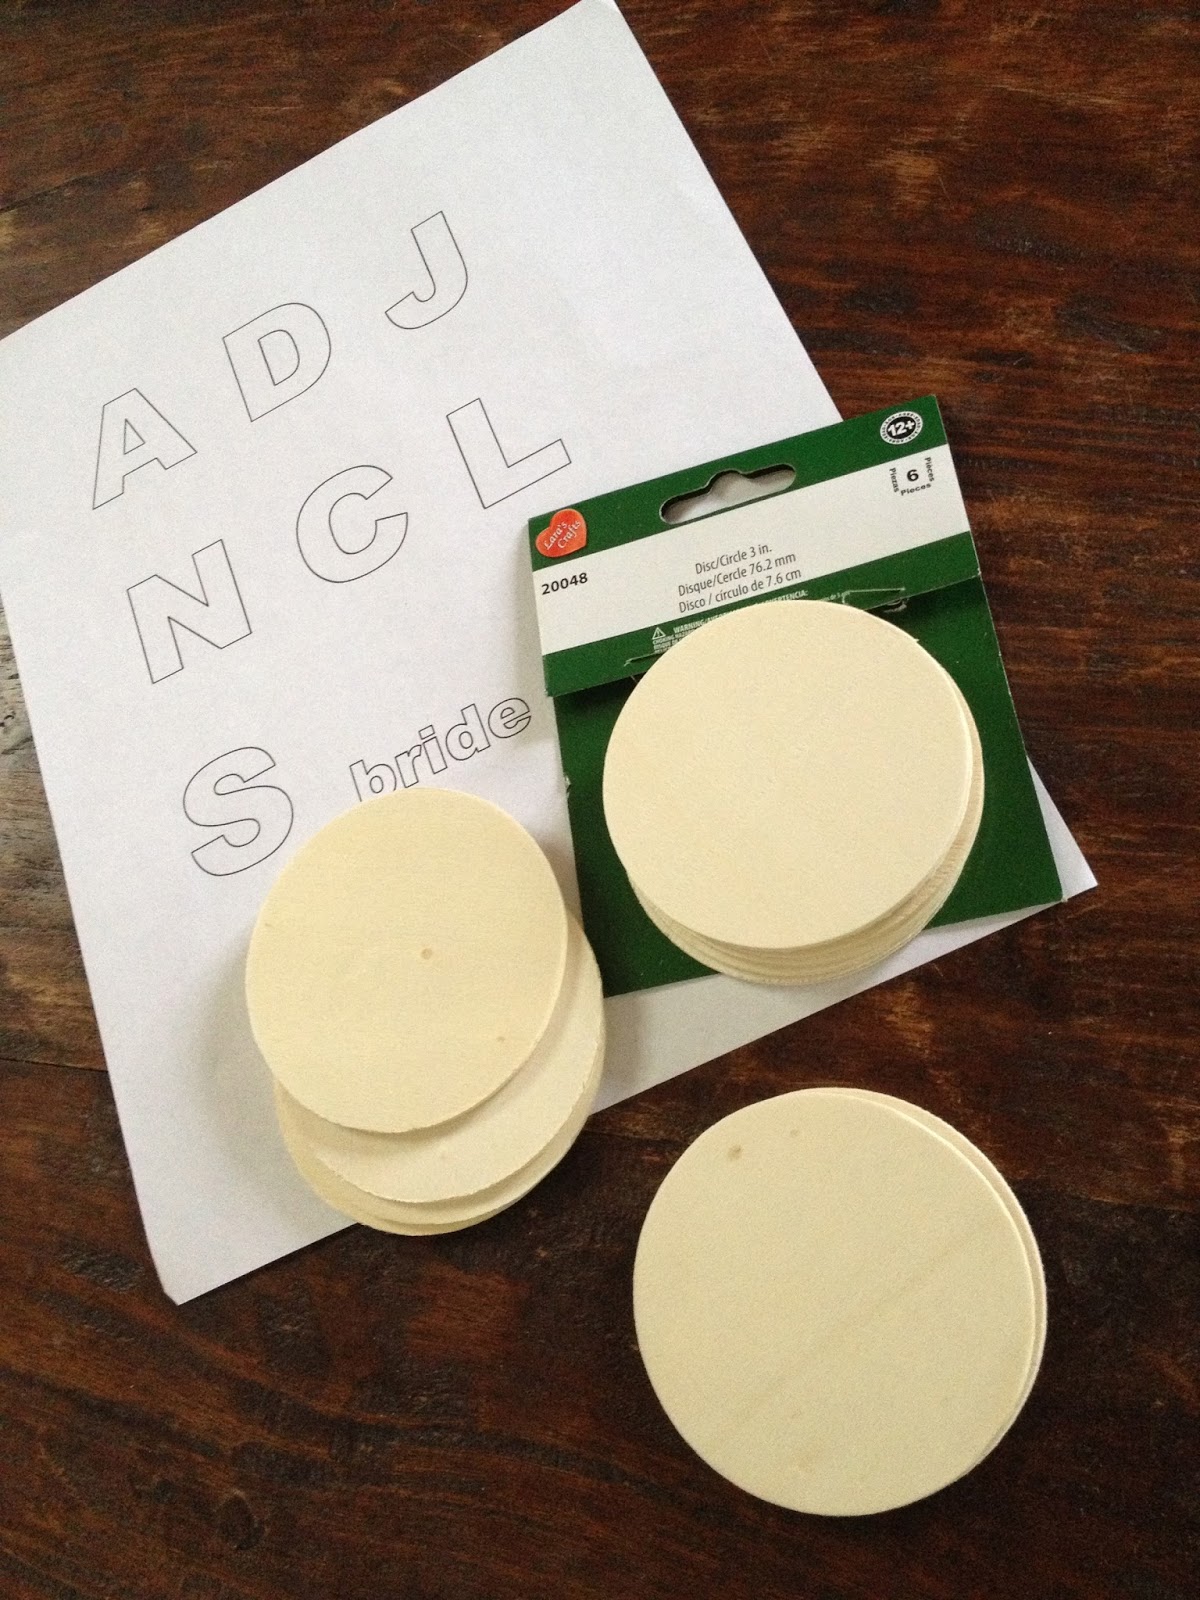
How to make handpainted wood favor tags:

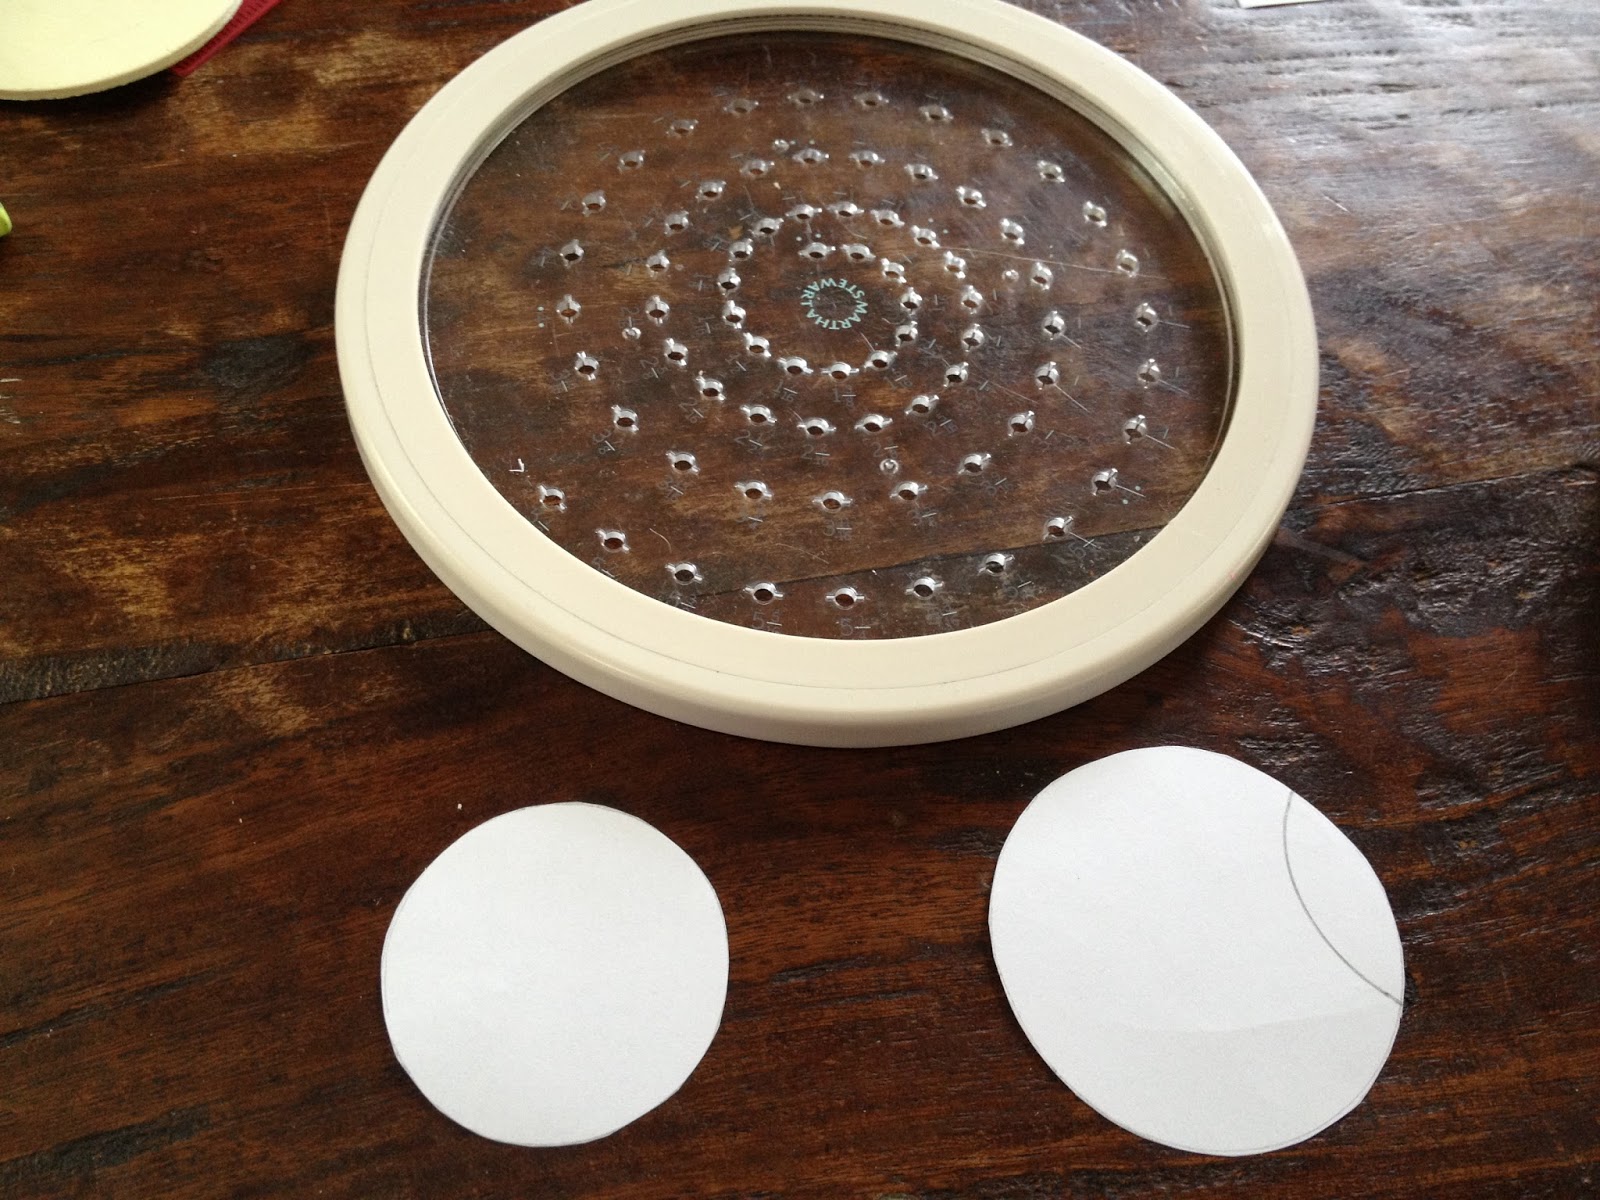
1. I used 3″ wood circlular disks (from Michaels or here).
Print out the letters, I used Arial font in bold at 120 point:
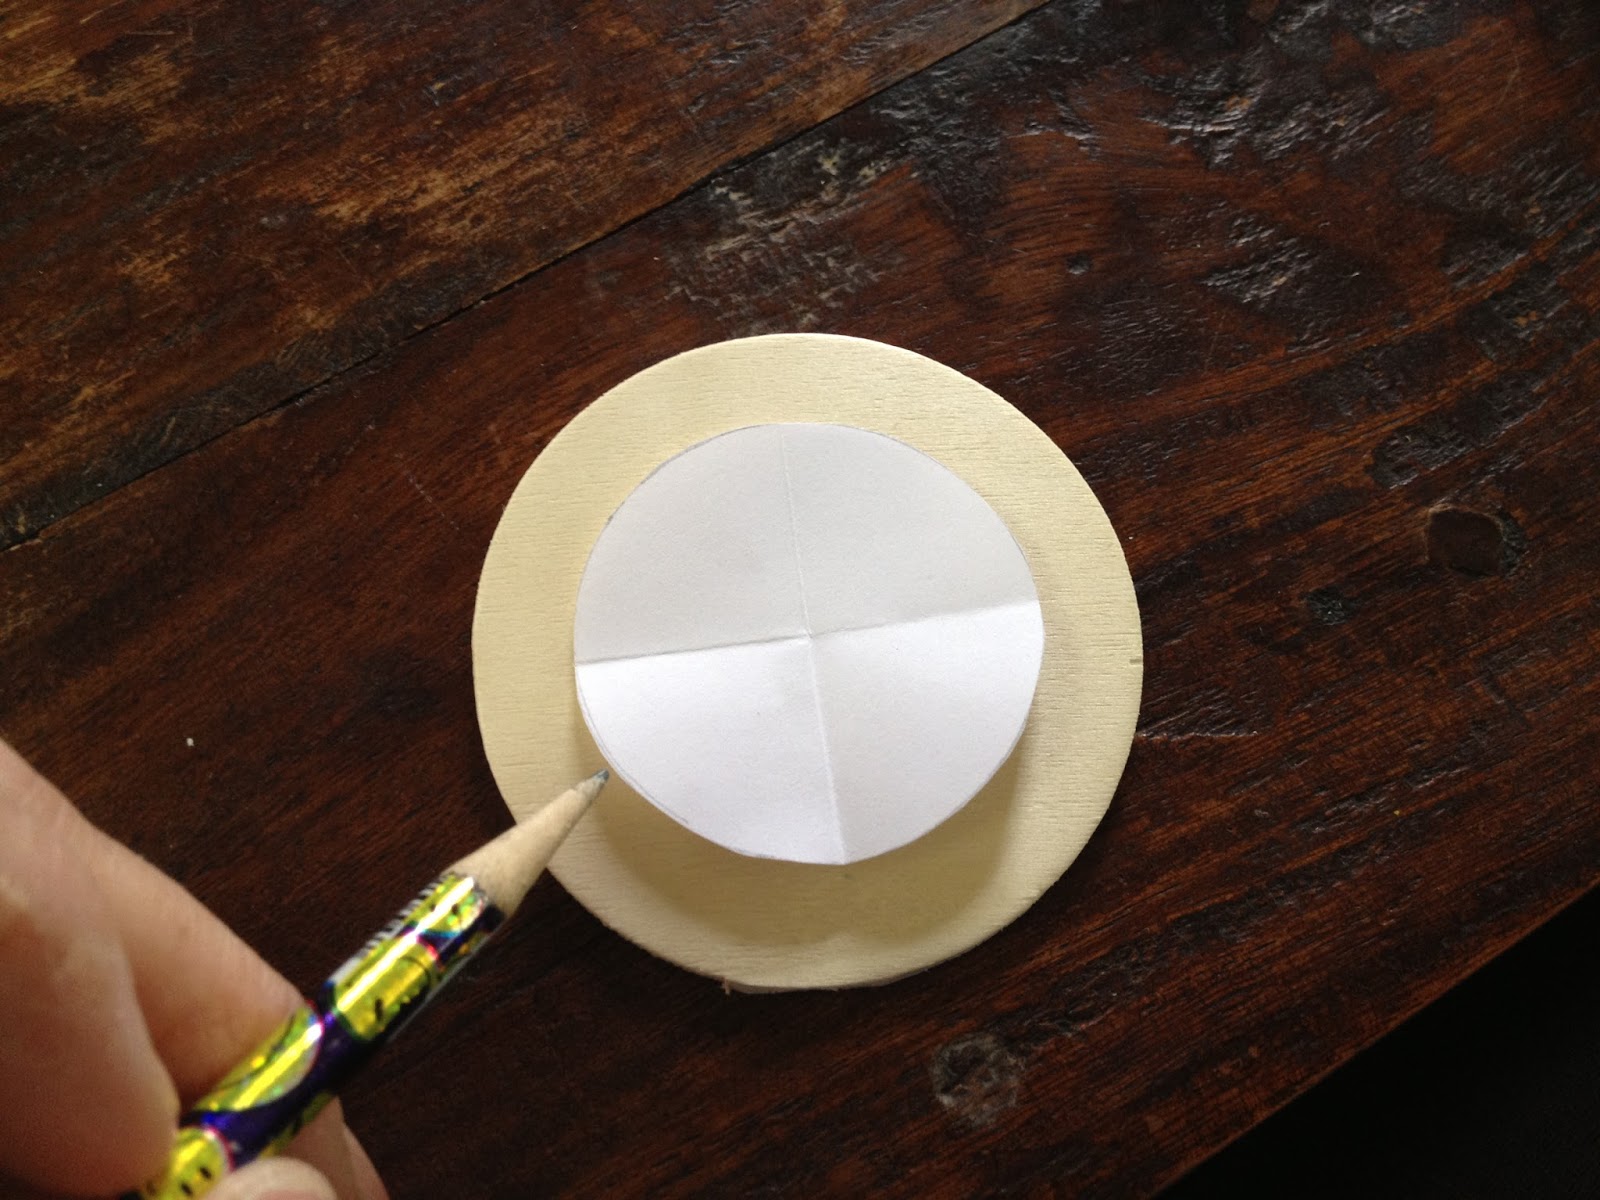
2. Find the center of the letter by folding into quarters.
Line up center of letter and center of disc then using a ball point pen trace the outline of the letter:

The pressure from the pen will leave an indent in the wood:

3. Make 2 paper circle templates, one slightly smaller than 3″ and one 1/8″ smaller yet:

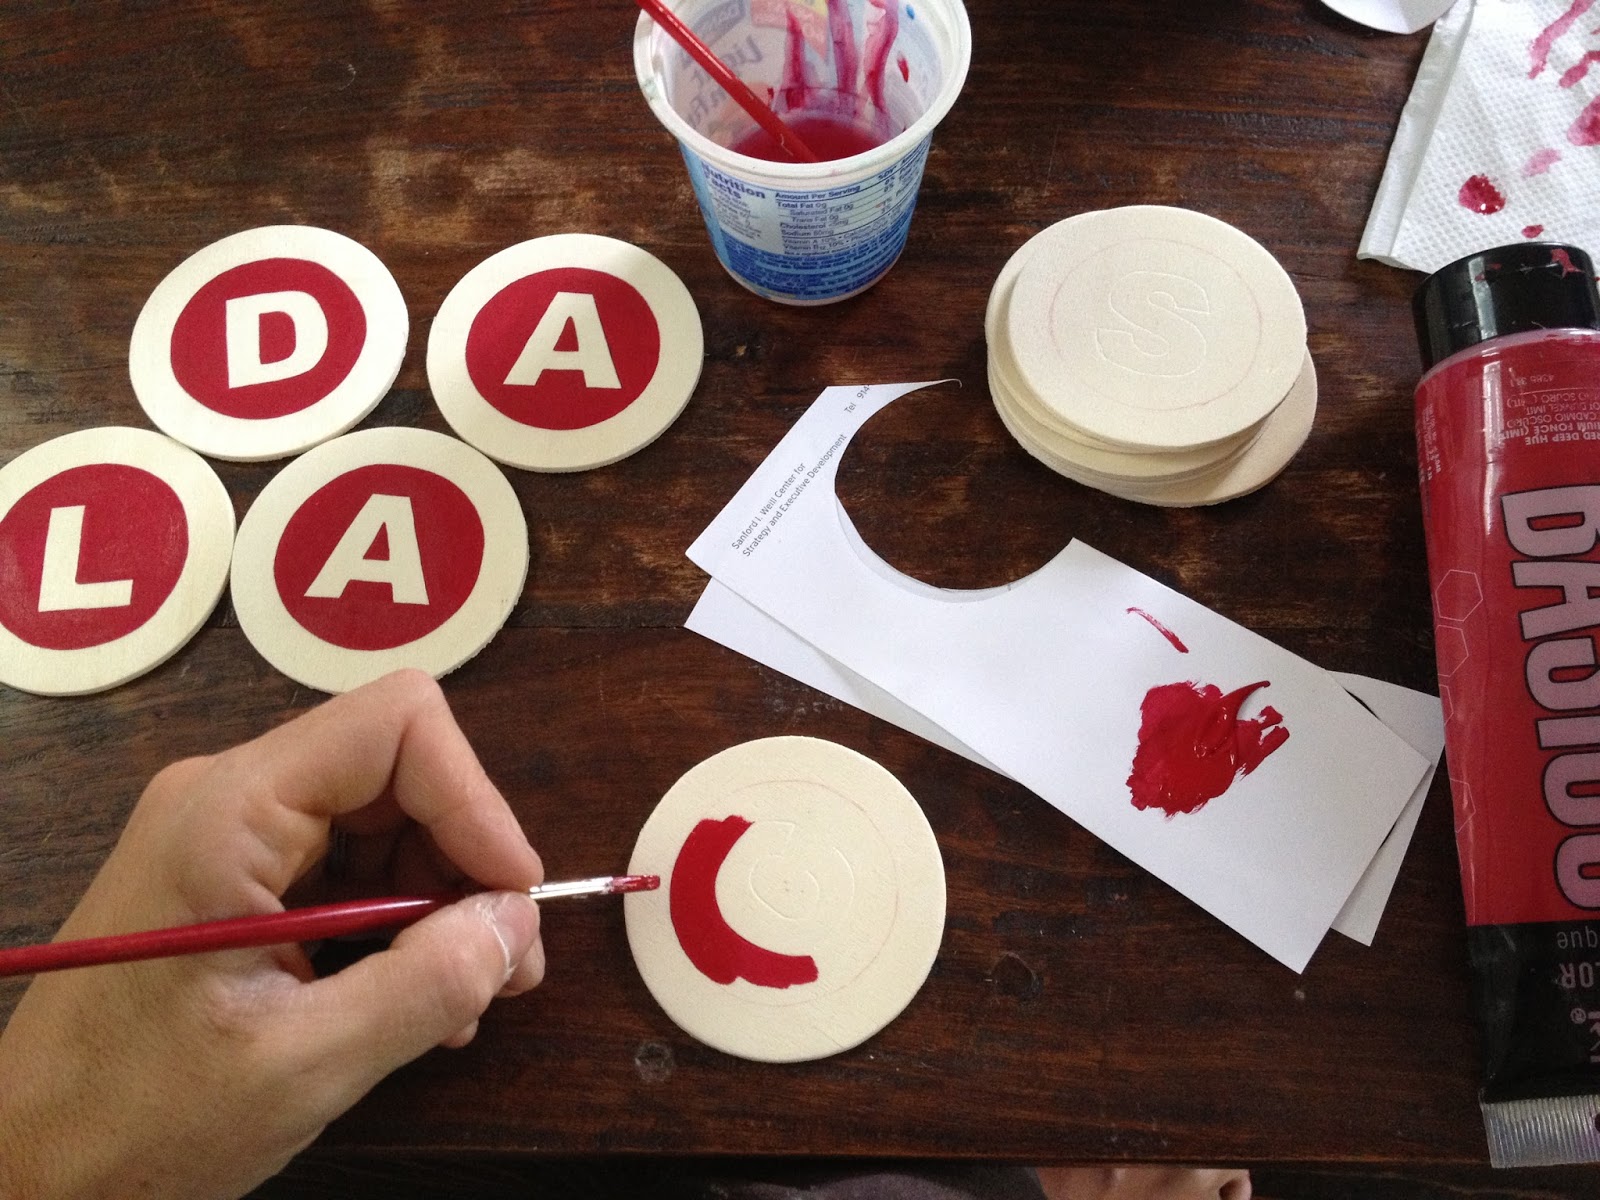
4. The smaller circle will become the red background area of the letter.
Center the cirlcle and trace around the edge:

5. Paint inside the circle and avoid painting inside the letter:

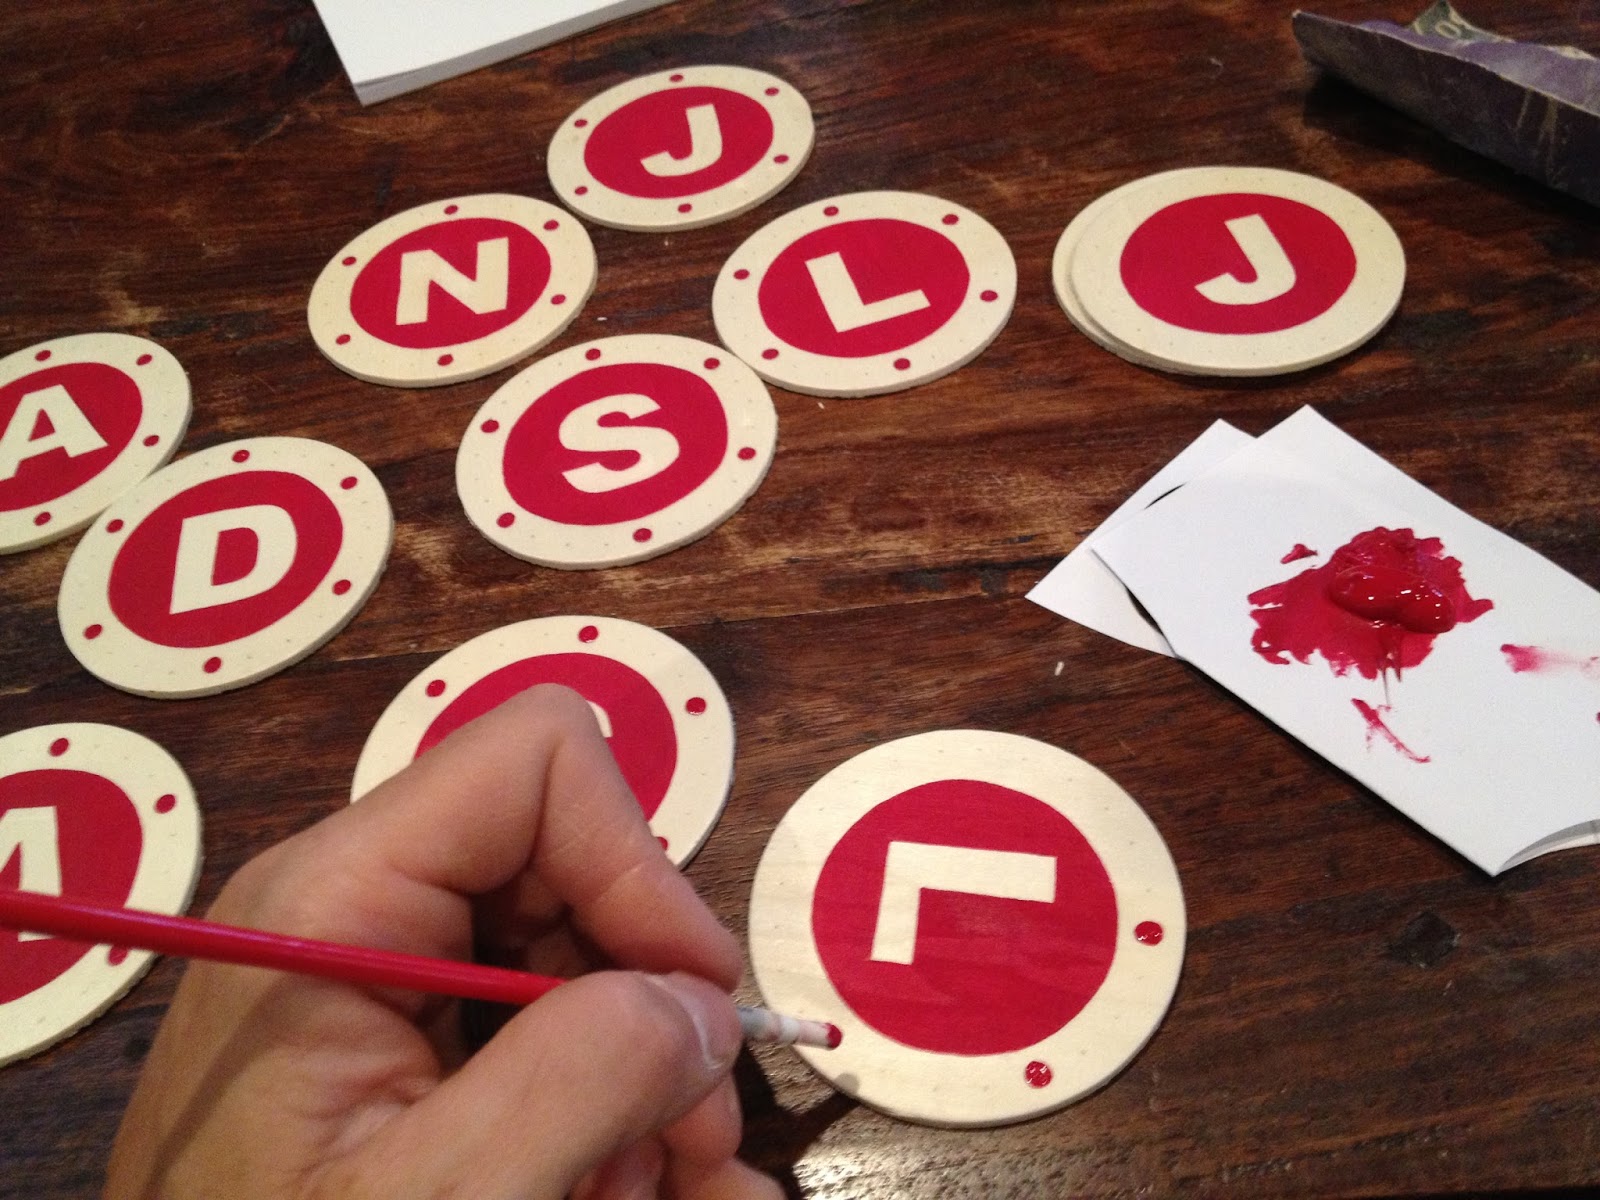
6. Using the larger paper circle template make equidistance notches for the dot border detail.:

7. Add dot border using end of paint brush:

8. Drill a hole at top center for string:

9. Seal with clear poly:
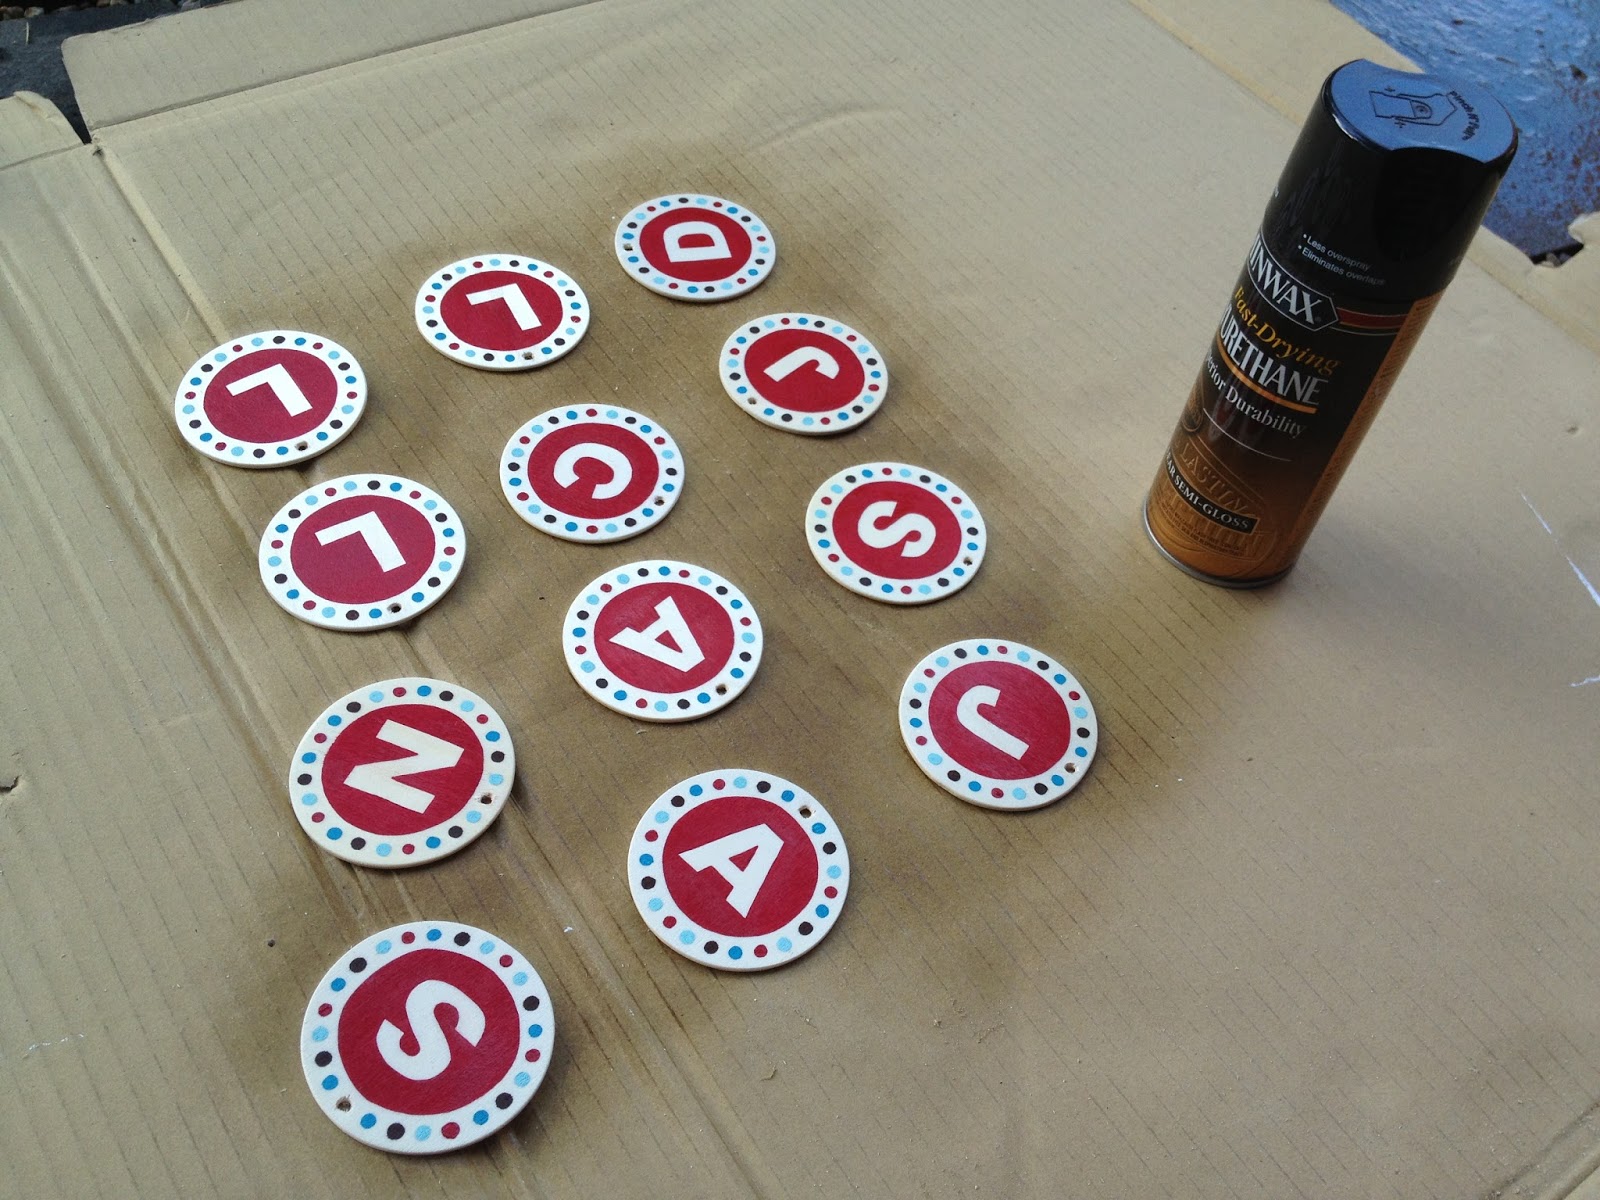
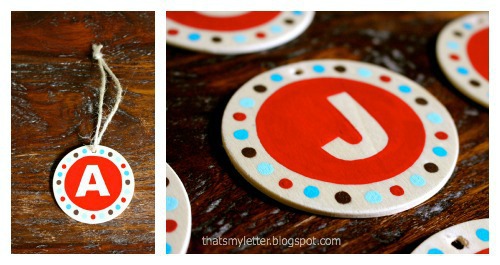
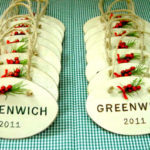
Add jute string and ready to hang, tie or give!
I’m linking up to:
SAS @ Funky Junk
Nifty Thrifty Sunday @ Nifty Thrifty Things
That DIY Party @ The DIY Showoff
Tutorials & Tips Tuesday @ Home Stories A to Z
The Scoop @ Lolly Jane
Strut Your Stuff @ Somewhat Simple
Transformation Thursday @ The Shabby Creek Cottage
Share Awesomeness Thur @ The 36th Avenue
Pretty Things Thursday @ Scissors & Spatulas
Flaunt it Friday @ Chic on a Shoestring
Frugal Friday @ The Shabby Nest
Furniture Feature Friday @ Miss Mustard Seed
SAS @ Just a Girl
Remodelaholics Anonymous @ Remodelaholic
inspiration board @ Carolyns Homework
Sunday Showcase Party @ Under the Table & Dreaming

You may also like...

  • “G” is for Greenwich“G” is for Greenwich
  • Cross Stitch Monogram Ornament PlacecardCross Stitch Monogram Ornament Placecard
  • “O” is for Ornaments #3“O” is for Ornaments #3
  • “C” is for Cake Party“C” is for Cake Party
Share this post:

Filed Under: CRAFTS, CRAFTS, DIY, FOR HER, FOR HIM, GIFTS, PAINT, TEACHERS, WEDDINGS4 Comments

Reader Interactions

Comments

  1. Our Pinteresting Family says

    September 13, 2013 at 12:34 PM

    These are adorable! I think they would look super cute tied to bouquets for bridesmaids and the bride too. 🙂

    Reply
  2. [email protected] says

    September 13, 2013 at 2:52 PM

    These are adorable!

    Reply
  3. Liz Lewis says

    September 13, 2013 at 10:30 PM

    I was going to say, "omg, these are adorable!" but it looks like two lovely ladies already beat me to it. Oh well, these.. rock! 🙂
    Liz
    http://www.liz-makes.com

    Reply
  4. Samantha says

    September 17, 2013 at 5:35 PM

    Yay for these!! The girls LOVED them and are def saving them to use as luggage tags. Thank you so much Jamie!

    Reply

Leave a Reply Cancel reply

Your email address will not be published. Required fields are marked *

Primary Sidebar

Hi! I’m Jaime

Jaime Costiglio

Hello!

Thank you for stopping by.
Join me for lots of DIY.

Read more

Get new posts via email

Handbuilt Holiday: Gift Project Plans

handbuilt holiday gift project plans

Collection of DIY gift project plans to build.

The Home Depot Tool Prospective

THD Prospective

Tools to consider for the DIYer.

Archives

The Home Depot Logo
Copyright © 2023 Jaime Costiglio · Custom site by Moonsteam Design

Privacy Policy