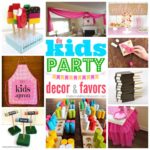
The classic little girl party theme: Barbie. There are a bazillion Barbie party ideas out there and quite a few you can do yourself!

I’m sharing a DIY Barbie birthday party with lots of pink decor: an easy ruffled tablecloth, DIY Barbie favors, a wall mounted TV cover, cupcake stand and more.
Full disclosure the Barbie cake is not a DIY project :), I ordered the cake from the bakery. But you could definitely make that too!

However this ruffled plastic pink tablecloth is a DIY project you can definitely manage with scissors a little clear packing tape.
*This post contains affiliate links.
Supplies:


Step 1: Unroll a good amount of the tablecover roll and fold over the top 1/3 just enough so the other 2/3 just grazes the floor.

Step 2: Gather the folded edge and use clear packing tape to secure to table edge.

You can see above how the long hanging portion of the tablecloth just grazes the floor. You don’t want it too long so people are stepping on it. Be sure you fold over enough to keep it off the floor but not too much that it looks short.
Cover the tabletop with a fabric cloth or other tablecover and add a contrasting runner if desired. Super easy and relatively inexpensive.

SHOP THIS PROJECT:

Now that you have the plastic tablecover roll on hand let’s use it to make more DIY decorations. For a big, bold statement that is inexpensive and requires very little skill try hanging plastic swags. This easy to hang plastic swag decor adds a ton of pink to this Barbie party!

Supplies:

Step 1: Adhere mini Command hooks in corners and middle (where ever you want the swag to attach to the wall).

Step 2: Gather the plastic tablecover and wrap with twist tie.

Step 3: Hook the twist tie loop onto Command hook.

Step 4: Add tulle bow to completely cover the Command hook.
SHOP THIS PROJECT:
I also made a temporary TV cover up birthday sign using canvas and a wood frame, see the how to here.

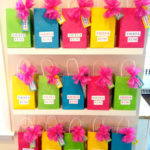
I sewed Barbie silhouette pouches as favors:

with pink polka dot lining

One for each cousin.

The Barbie silhouette idea came from the cupcake toppers:

I ordered the toppers from here.
And forgot to get a good picture until half the cupcakes were gone! I also built the cupcake stand / treat tower, find the details here.

For the school party I made cake pops, see how to here:

She was most excited about getting Barbie out of the cake:

And she’s wearing the pom pom party dress I made here:

Thank goodness I have a few months until the next birthday, it’s exhausting!

Disclaimer: The Barbie silhouette image belongs to Party Paper Creations and needs to be purchased from the Etsy shop for personal use.
So cute! I love the ruffled tablecloth, and I can't get over how you made everything down to the dress!! Crafty mom!
it looks like such a cute party! i love the details, the pouches, the dress…. all of it!
OMG! What an amazing job you have done. I will be adding some of your decorating ideas to my up and coming bithday bash for the special one. I hope you all had an amazing time. Thanks for sharing. Cheers SpecialK XoXo
I want you to come plan MY birthday party! So cute!
Looks like a wonderful, unforgettable birthday! Hope the little princess enjoyed her day!
Best,
Britta
I'm impressed with your little pouches….such a cute idea! Having a boy, it's fun to live vicariously through a little girl pink party!
Laura
What a fantastic turnout! I absolutely adore the clutches you made!
Lucky to little girl to have such a talented mom hosting the party! Thanks for the ideas on dressing up the plastic table cloths. ~ Maureen
This is such an adorable idea 🙂
Check out my blog!
http://rootedinhisgrace.blogspot.com/
You can really throw a party! What a lucky little girl.
Beautifully done! Love all the creative details you pulled together for this party. Kudos!
Great party and I love the step by step on the tablecloth. Tableskirts can be kind of pricey sometimes.
Love the DIY ruffly tablecloth idea. Looks like the party was a success!
I'm obsessed with the tablecloth skirt! Gonna have to remember this for my daughter's first birthday. I'm going to pin it right away! Thanks
I'd love if you could come link up at my first ever Tutorial Tuesday at Our Thrifty Ideas http://www.ourthriftyideas.com/2012/04/tutorial-tuesday-1.html
Ohhh…two of my most favorite things – pink and polka dots! Cute Jaime!
I would love for you to stop by and link this up to my Creative inspirations Party happening NOW! I would love to have you there!
Stacey of Embracing Change
http://staceyembracingchange.blogspot.com
Your DIY ruffled table cloth is pretty cute! Love how you made the curtain and the party dress! Fabulous!
Polyester Chair Covers
I am in love with the tablecloth. I think I may copy you for my Anni's birthday.
Totally diggn the plastic tablecloth used as drapping and putting a "ruffle" in it for the table, love it!
Paula
I love it all!
You are an awesome mom!
HUGS and blessings!
~Leslie
Cute! I love the ruffled tablecloth idea – easy and inexpensive!
Again – such a cute concept. Just thougth you'd like to know I used a variation of your idea for my daughter's birthday party this weekend. You can see it on my blog! http://alaynascreations.blogspot.com/2012/10/ruffled-tablecloth-tutorial-31-days-day.html
Thanks!
LOVE everything!!
Just curious….what did you use on TOP of the pink ruffle tablecloth?
The white and the polka dot pieces?
Thanks!!
Can't wait to use these ideas!!
Love the table cloth idea, and the barbie pouches are a great idea for favors!!
The table skirting idea is the best! I'm going to do that for my craft shows from now on. I use a cloth tablecloth for shows and I think I even have a roll of the white table covering. Your whole party looked awesome, I just don't have little kids anymore and grandkids are kind of far off at this point, lol. But I do plan to use the table skirt idea, thanks for an awesome tutorial!
I am featuring these ideas on my blog post (linked back to this blog post):
Wedding Series (Part 2): Finding Inspiration
I hope this is okay. If not, please just let me know and I will remove it immediately! I just love this project and it makes such a beautiful statement for any party/celebration!
WOW this is amazing stuff. Especially loved the way you made the table cover
Cheers
Dr Sonia
Cards Crafts School Projects
Very nice idea how to decorate a party.http://bowsbyrose.blogspot.com
Great ideas!
Hi I loved your ideas. I'm trying to find away to make a runner. How did you make that pink and white runner?
Hi, I love your ideas, please how many rolls of table cloth did you use?
My daughter would absolutely love it, great stuff.