Sew: personalized burp cloths

Use your regular sewing machine to make personalized burp cloths.
Set your machine to zig zag stitch and you can do this:

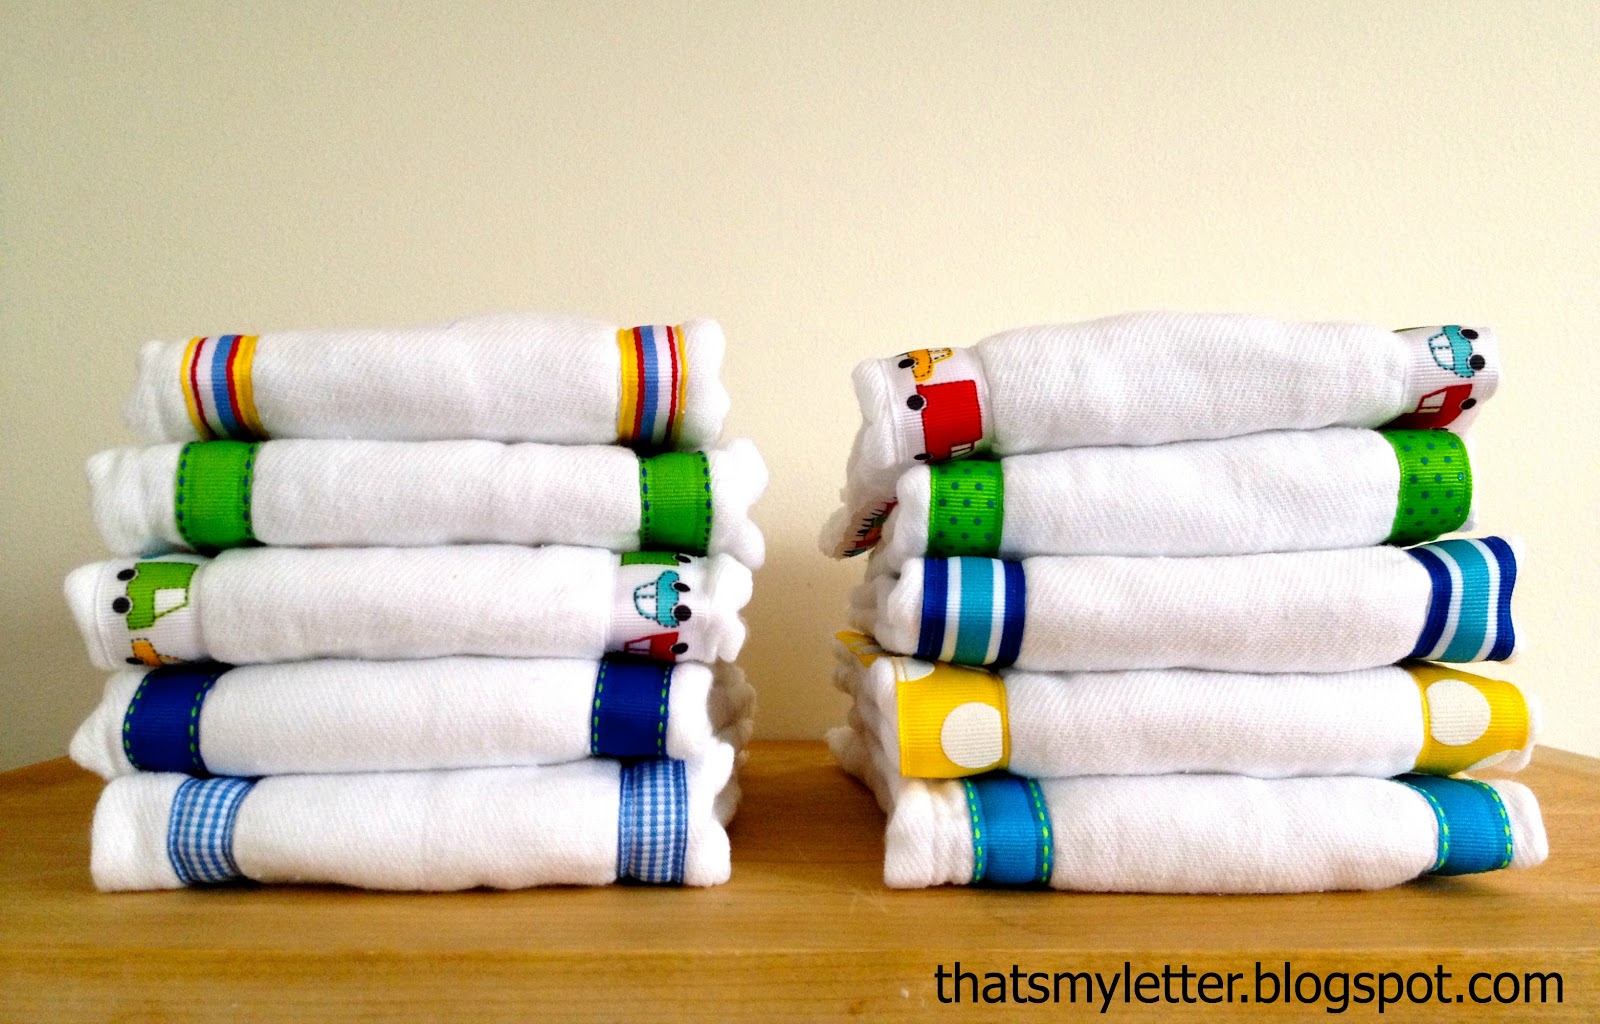
Or all these:

It’s really quite easy and fast and I will share my how to down below.
But first some more fun pictures.
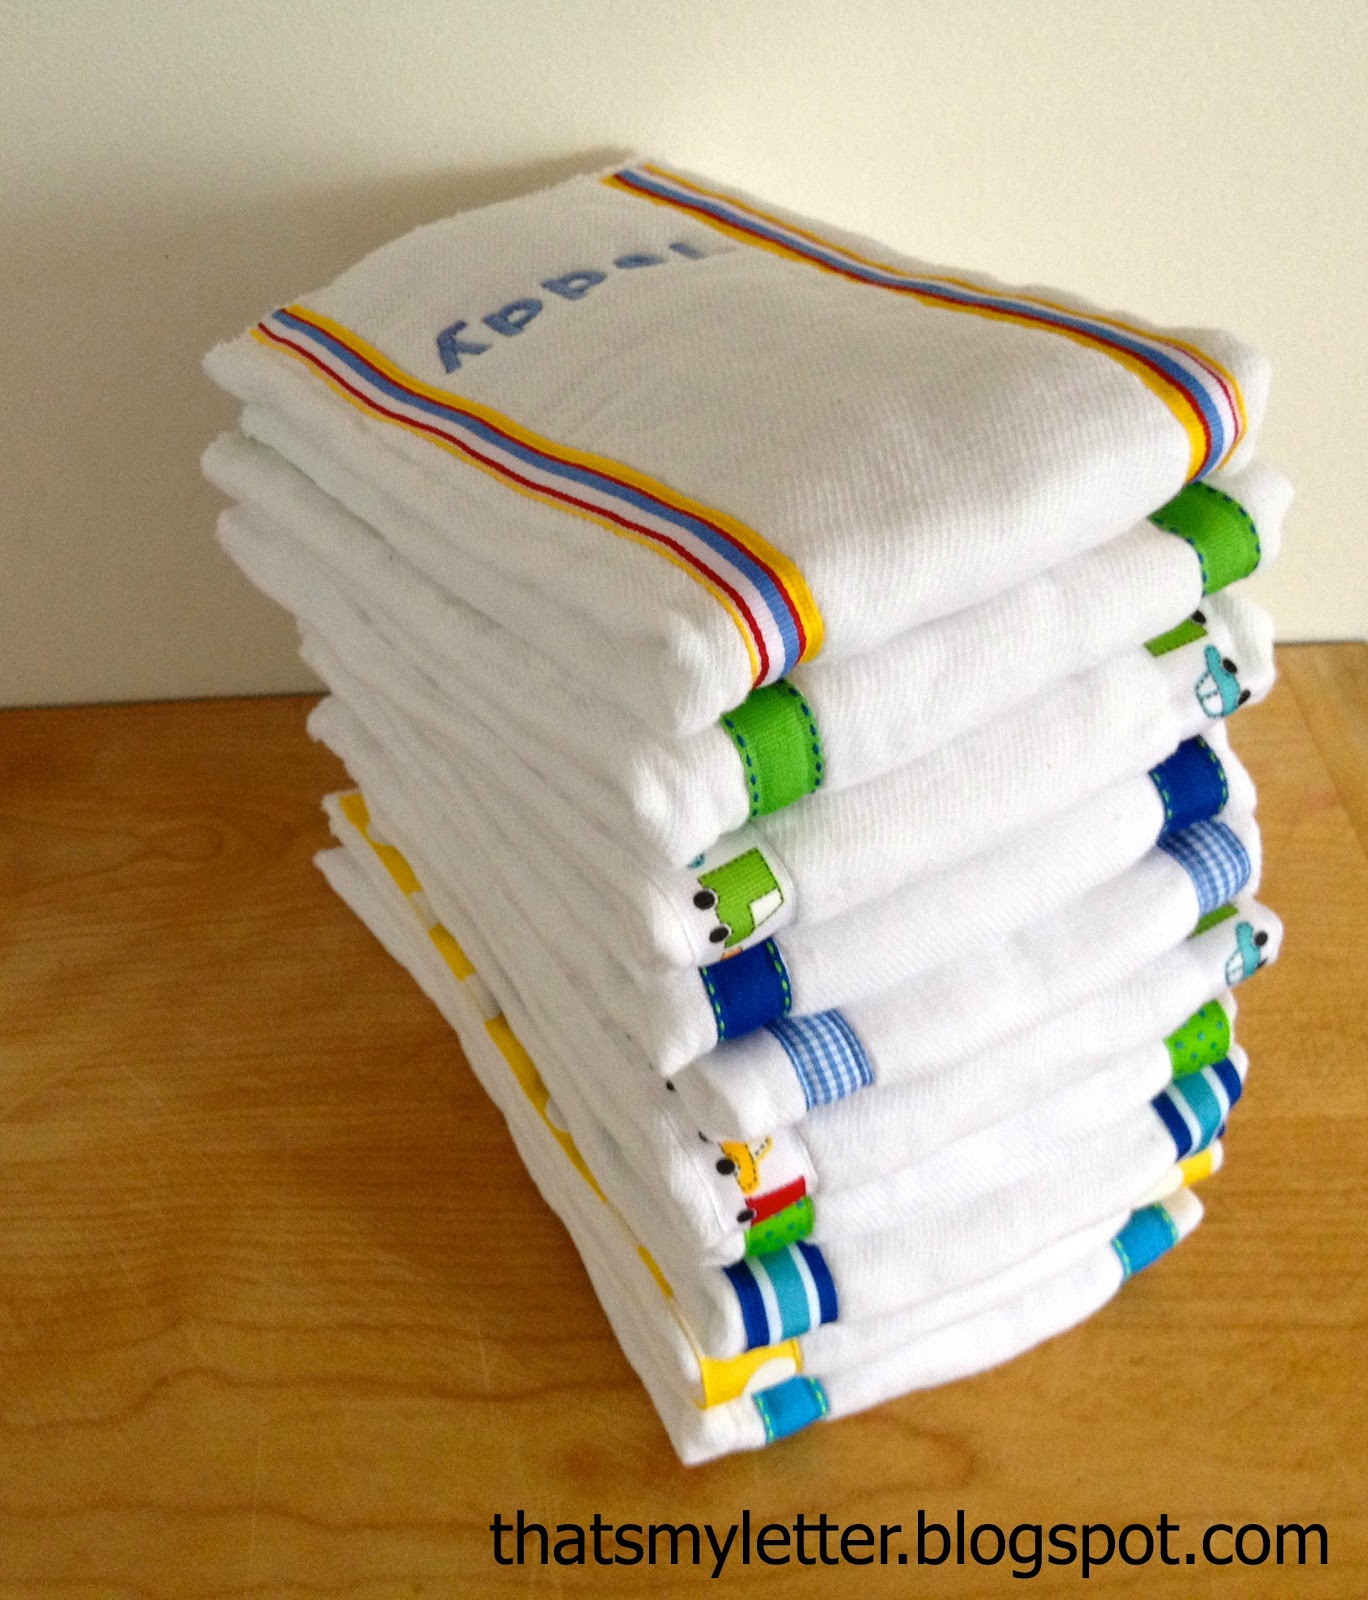
I love how they look all stacked up nice and neat, the ribbon adds just the right amount of color and punch without taking away from the true function of the burp cloth (to absorb all matters of baby liquids).
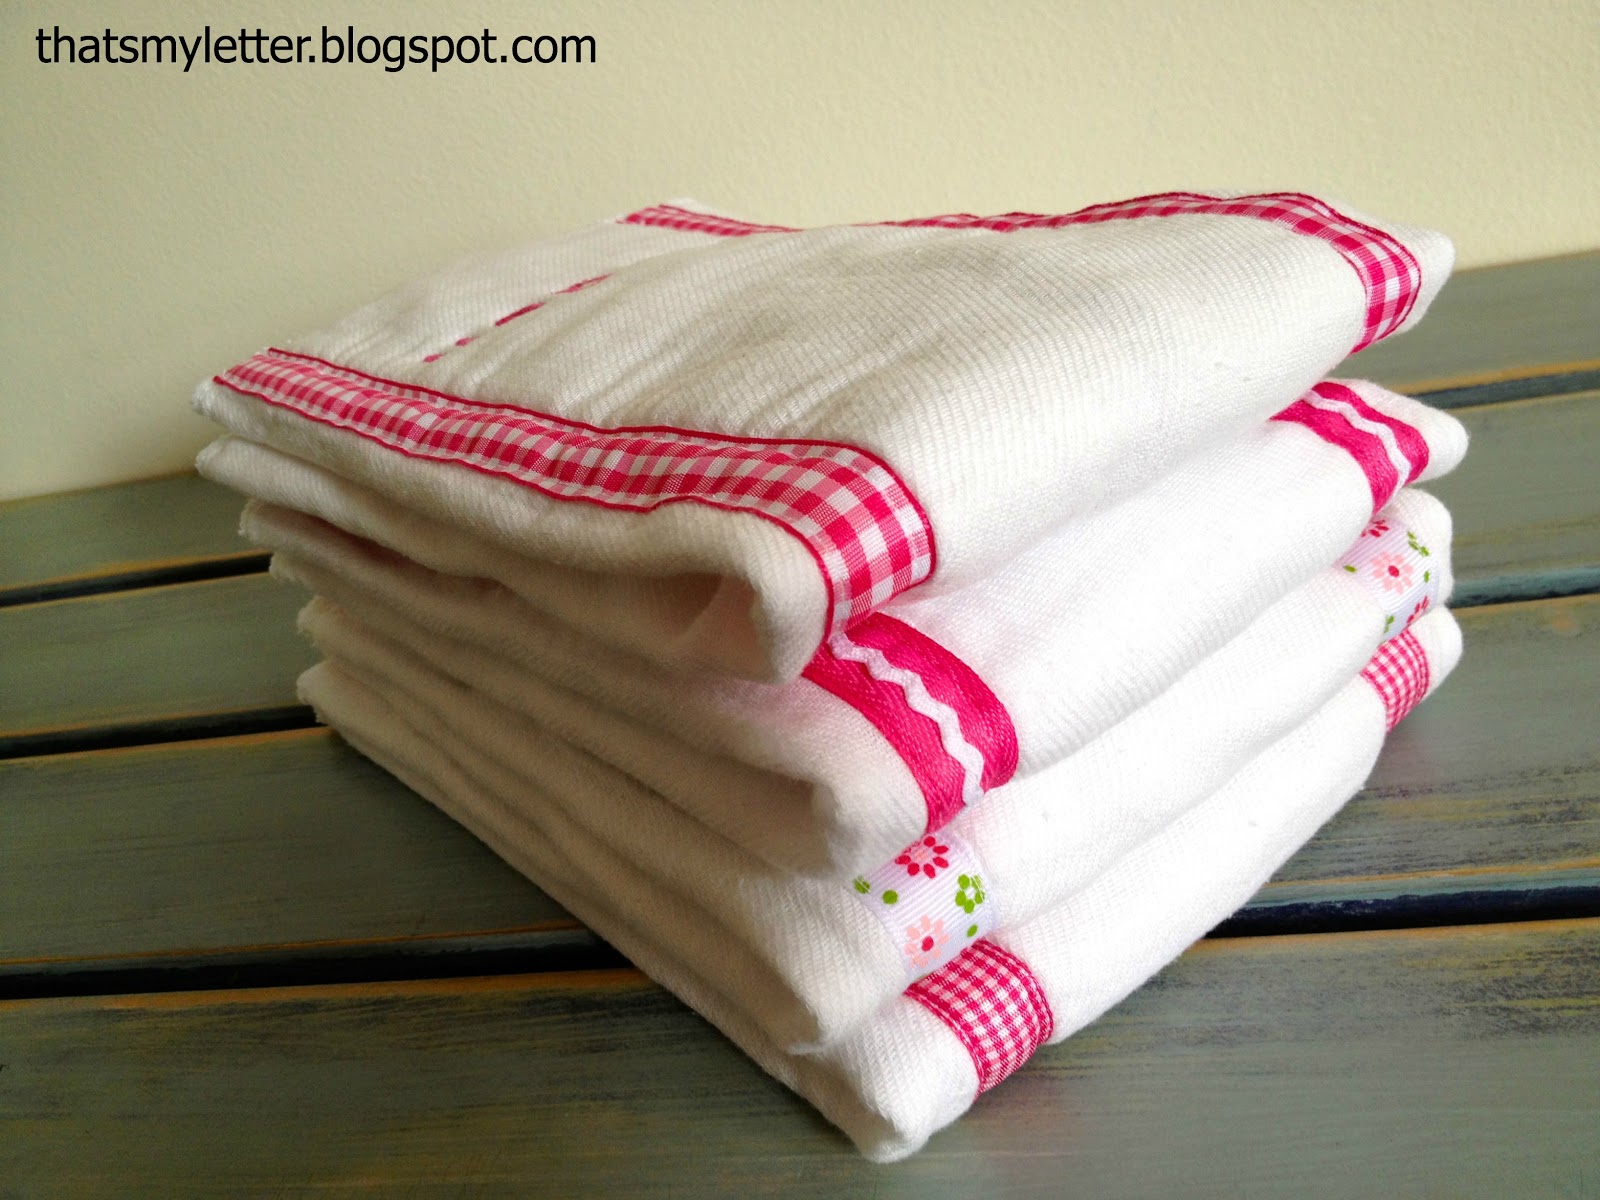
These few just have the ribbon detail and still are cute as can be:


But the girly colors take the cake:
Here’s how I personalize burp cloths:
1. Purchase cloth diapers, wash and dry:

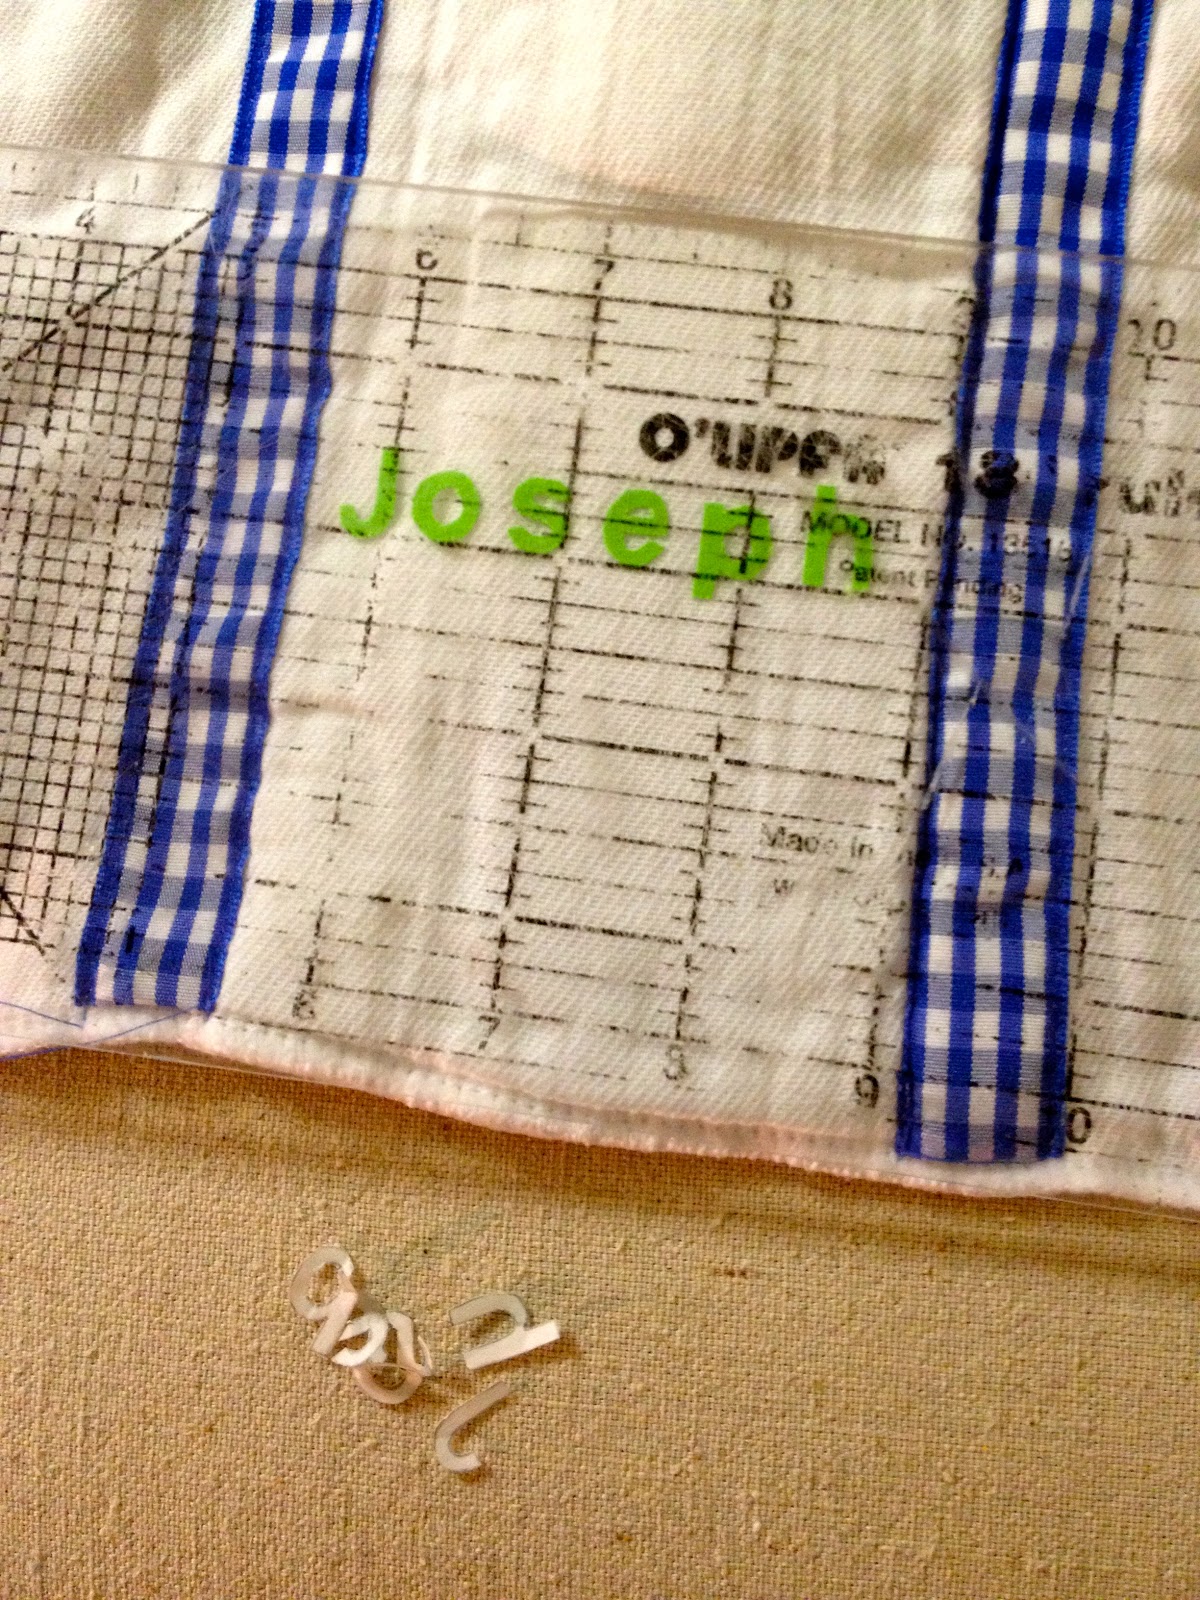
2. Straight stitch grosgrain ribbon in place using the center panel side seams as your guide:

3. Print lettering to fit middle panel.
I use Ariel font at 60 point for most names. You want a font that is consistent in thickness and bulky enough to make the cut out letters.
4. Apply double sided fusible interfacing (heat-n-bond) to wrong side of chosen fabric.
5. Using a light box place print out right side down then fabric right side down on top.
Trace letters onto paper backing of fusible.
(To see more on how to make fabric letters check my post here.)
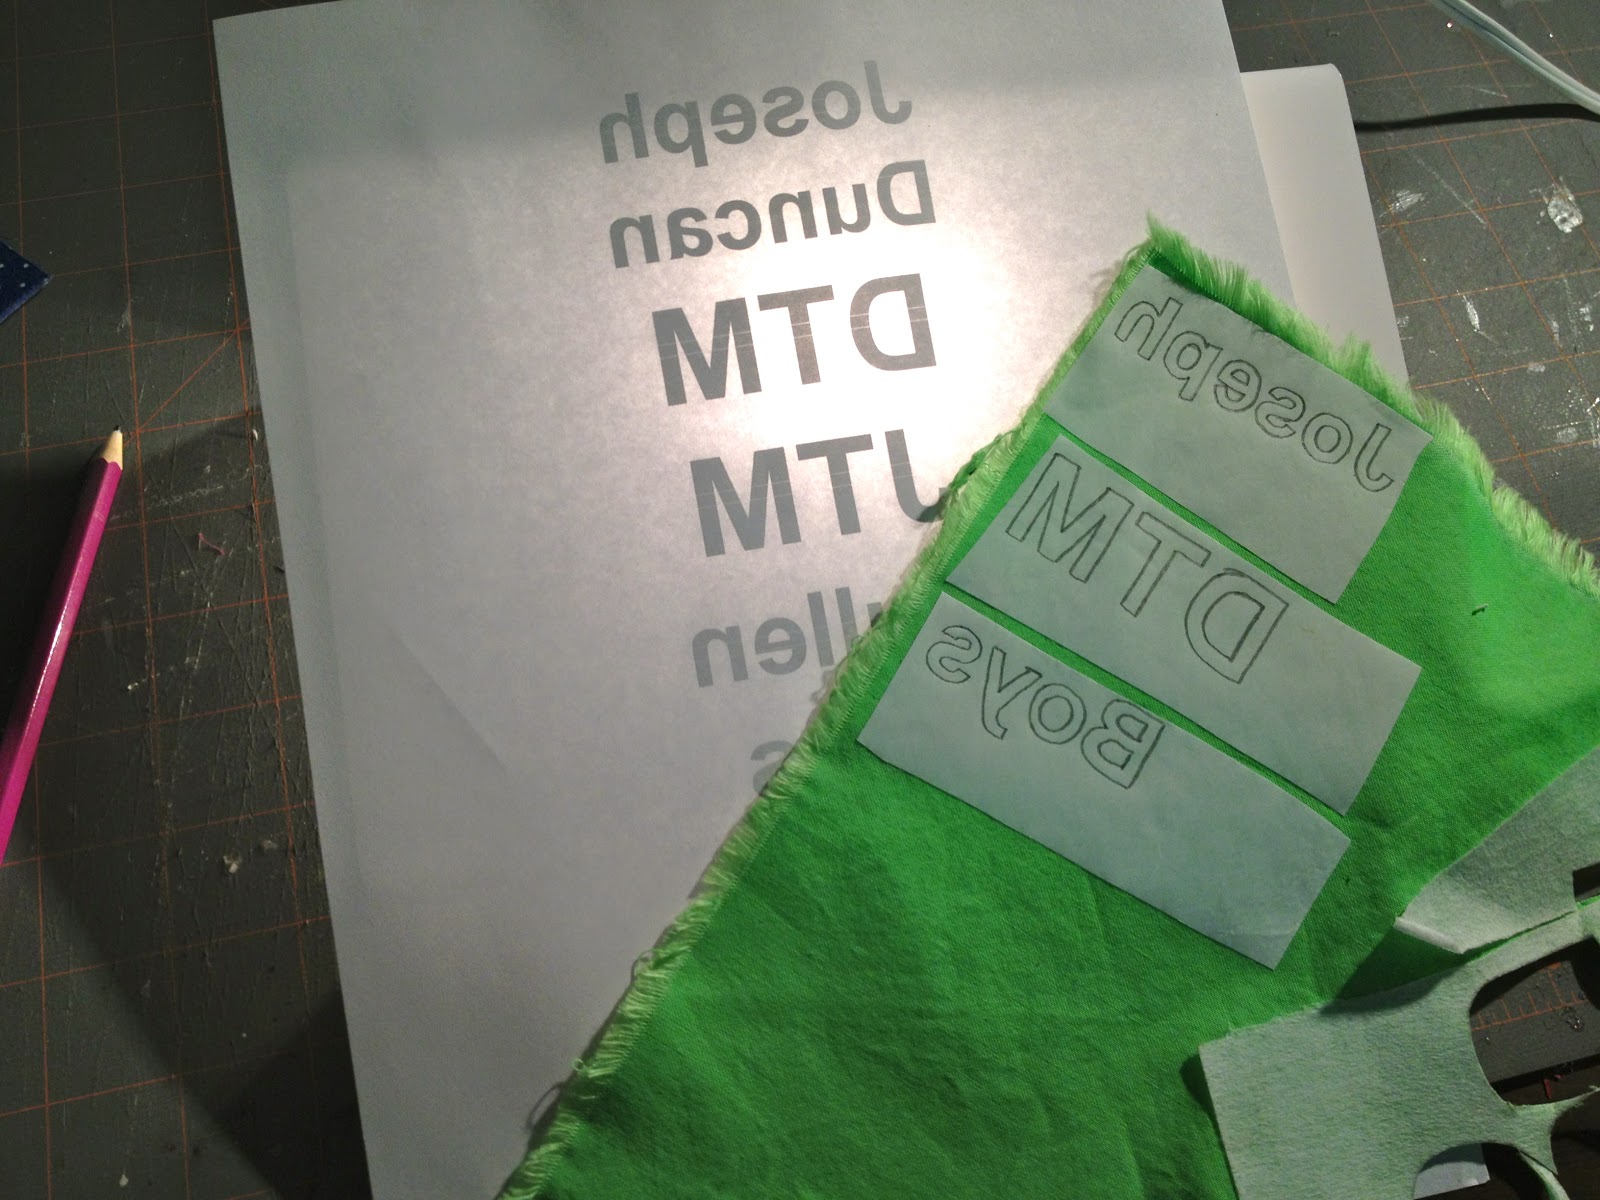
6. Cut out letters (keep paper backing in place).
Layout letters in center panel (I place mine 3″ from bottom edge) on burp cloth:
Then iron letters in place:

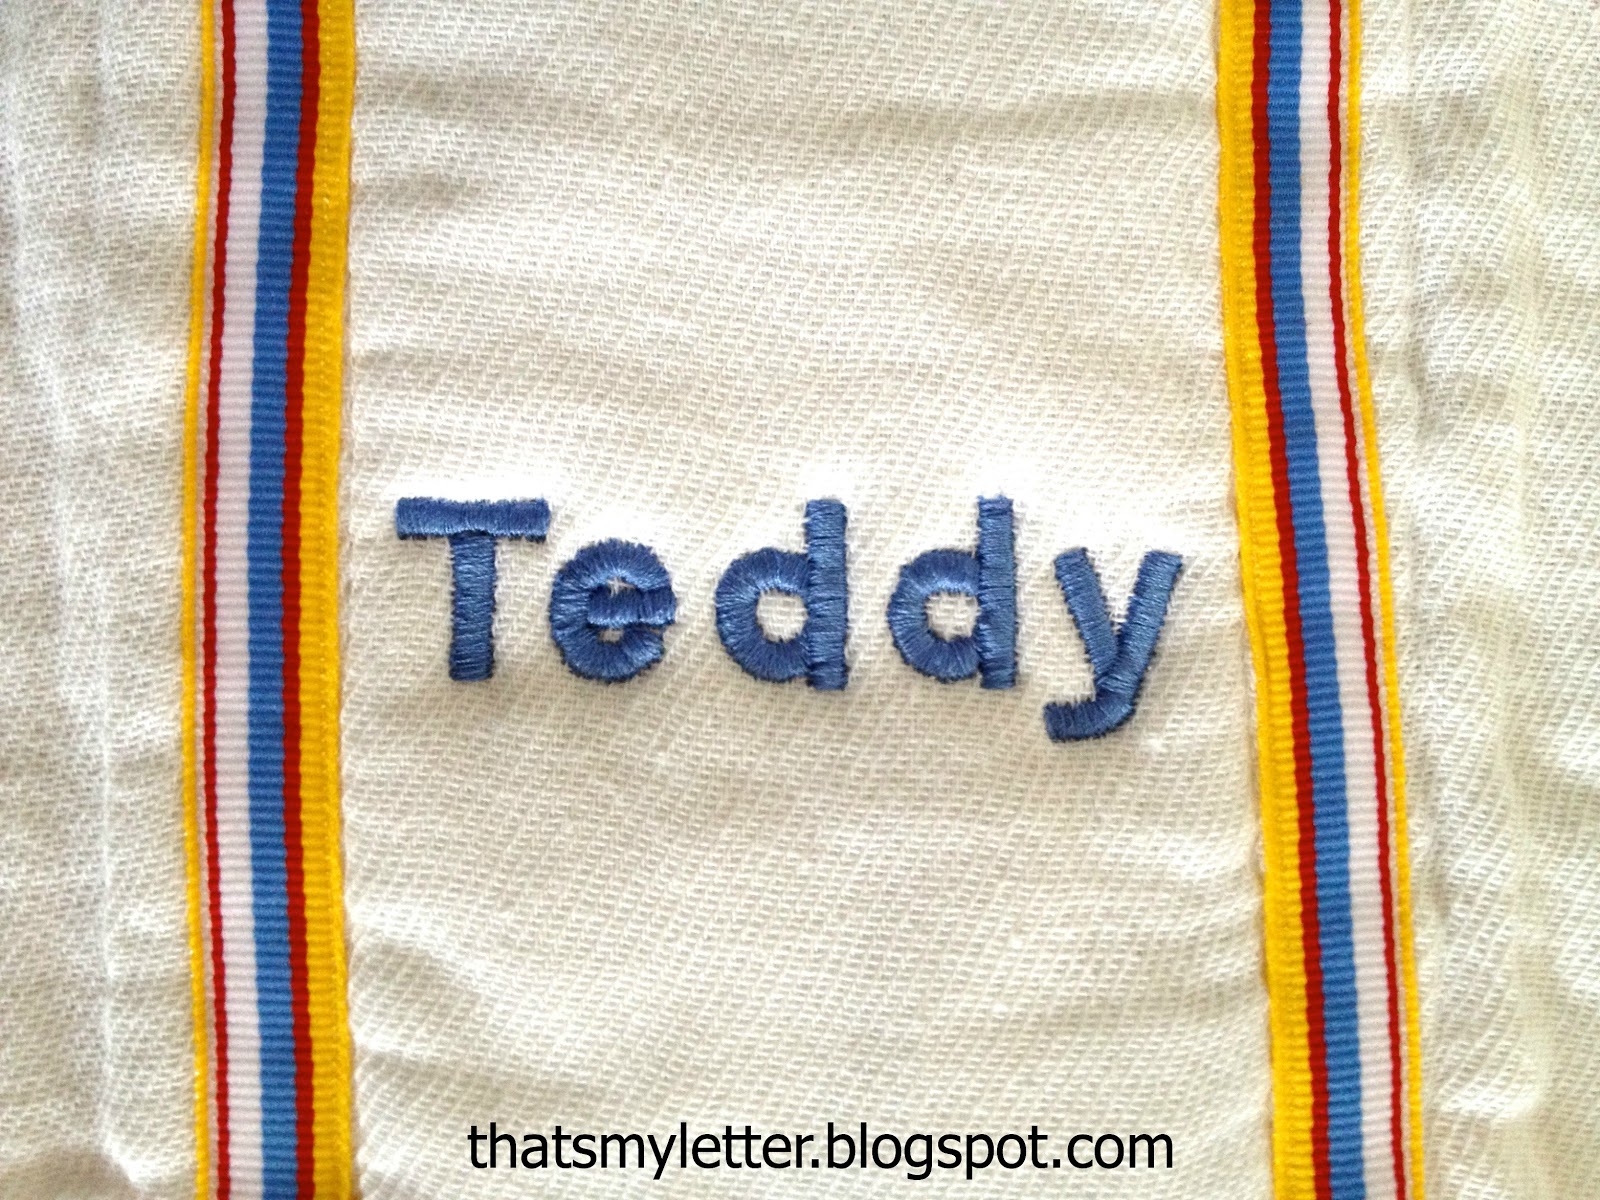
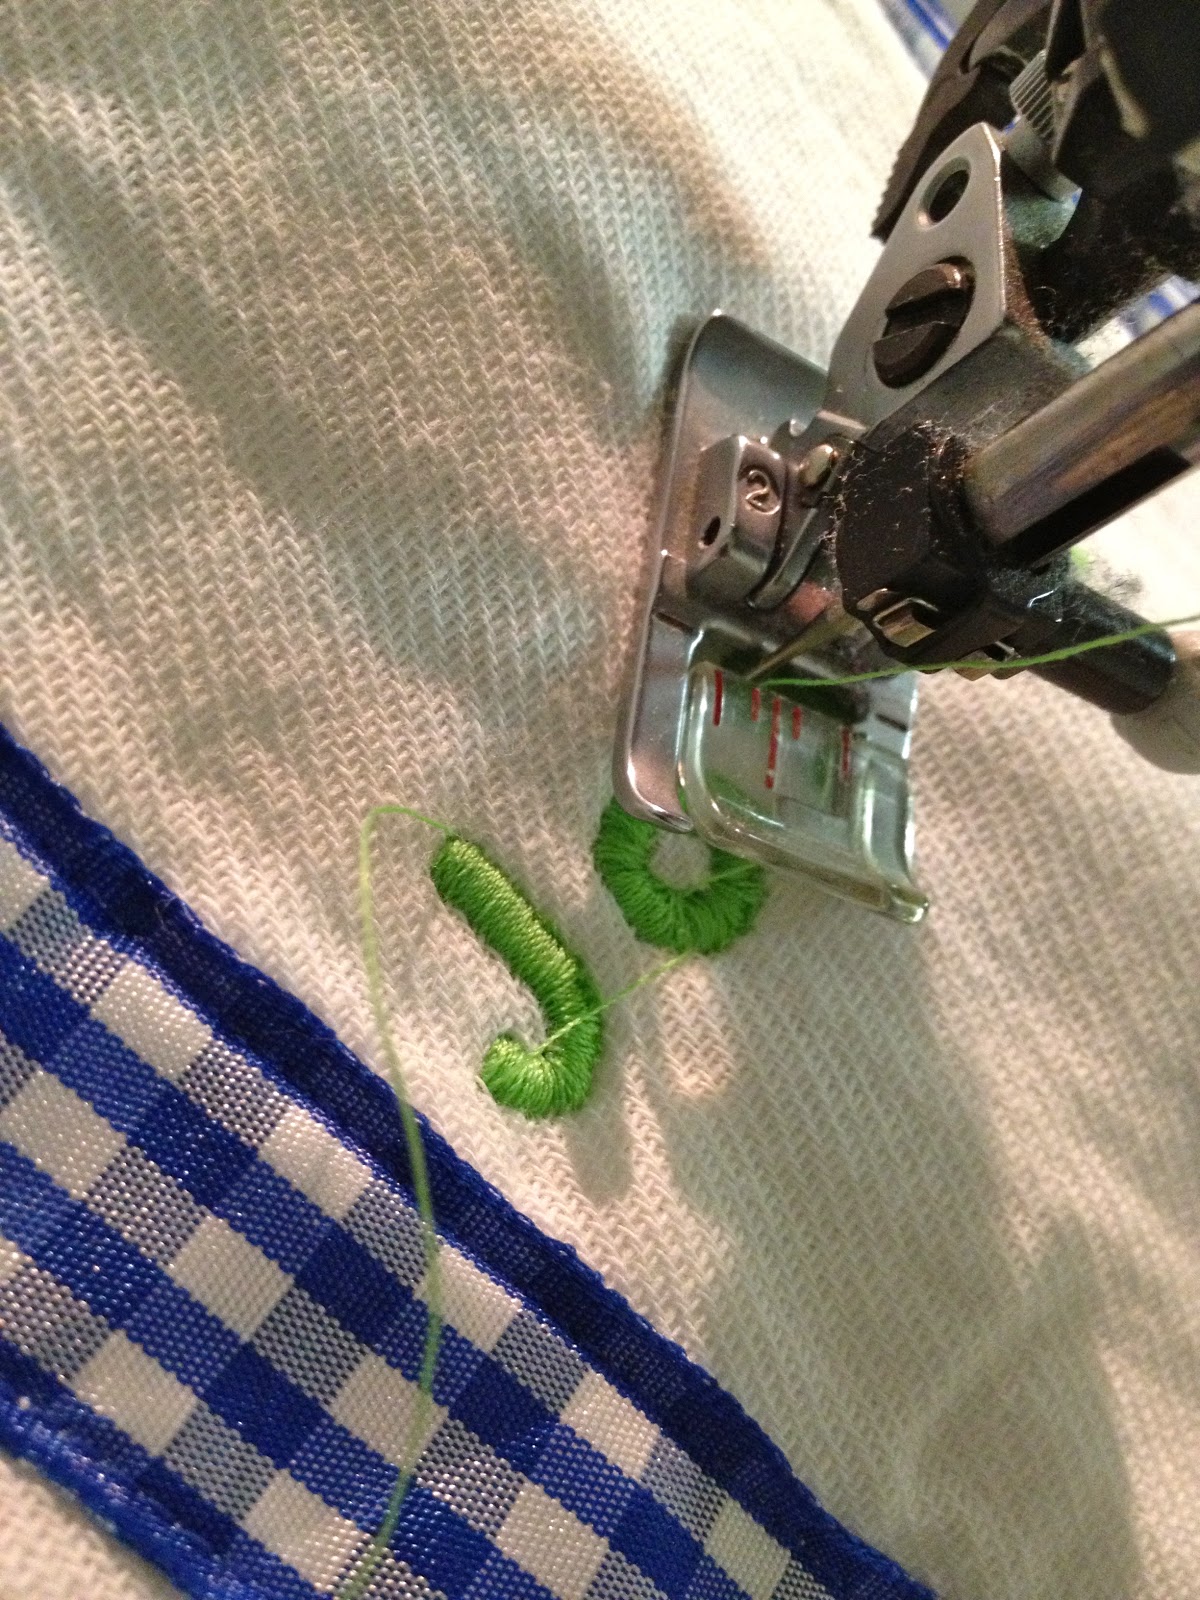
7. Set your zig zag stitch wide enough to cover the width of your letters.
Each machine is different but I use 2.5 width.
The fabric letters will serve as your sewing guide and provide a solid background in the event your stitches aren’t so snug.
Go slow and use your needle as a pivot, lifting the presser foot to turn the cloth as the letters curve:
8. Trim all your strings front and back.
Now make lots and stack them up for a very personal, very useful newborn baby gift:
I’m linking up to:
SAS @ Funky Junk
Sunday Showcase Party @ Under the Table & Dreaming
DIY Project Parade @ The DIY Showoff
Tutorials & Tips Tuesday @ Home Stories A to Z
Strut Your Stuff @ Somewhat Simple
Share Awesomeness Thur @ The 36th Avenue
Flaunt it Friday @ Chic on a Shoestring
Tickled Pink @ 504 Main
Frugal Friday @ The Shabby Nest
SAS @ Just a Girl
inspiration board @ Carolyns Homework
Textiles @ Freckled Laundry
Weekend Bloggy Reading @ Serenity Now
Textiles @ Freckled Laundry
Weekend Bloggy Reading @ Serenity Now


These are adorable. Such a cute idea!
Adorable. I love the idea of putting their name on it. Well done my friend.