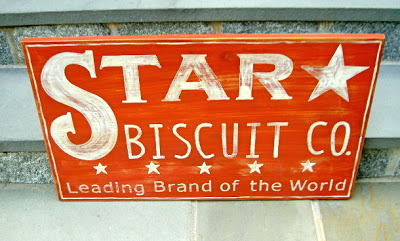
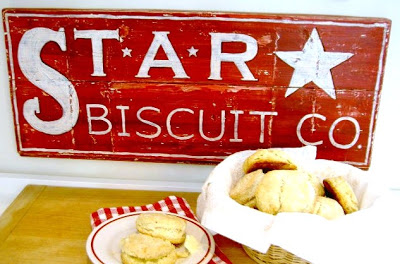
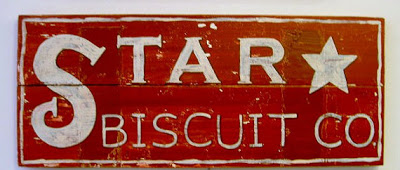
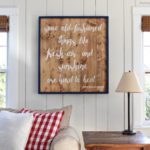
My third biscuit sign.


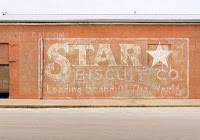
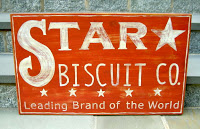
A custom order from Paula who wanted the sign to be much more like this inspiration photo.

image via Pinterest
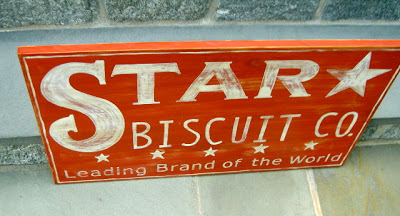
Paula requested the size (30″w x 18″h) and style so I was able to make it for her.


Previously I had done biscuit sign #1 here:

and #2, which are very similar:

But #3 is bigger and more in keeping with the original inspirational photo.
Here’s how I made the sign:
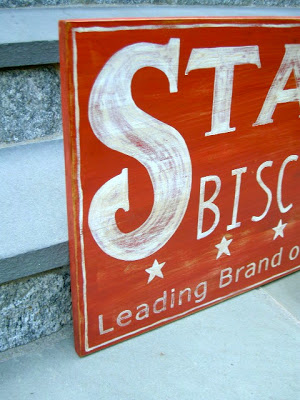
1. Cut piece of 3/4″ pine to size, paint 2 coats custom mix pale reddish orange.
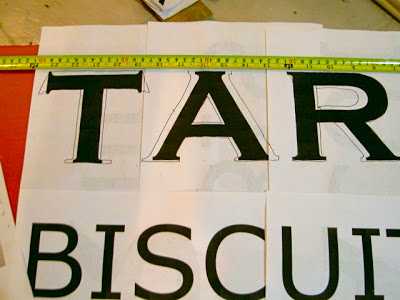
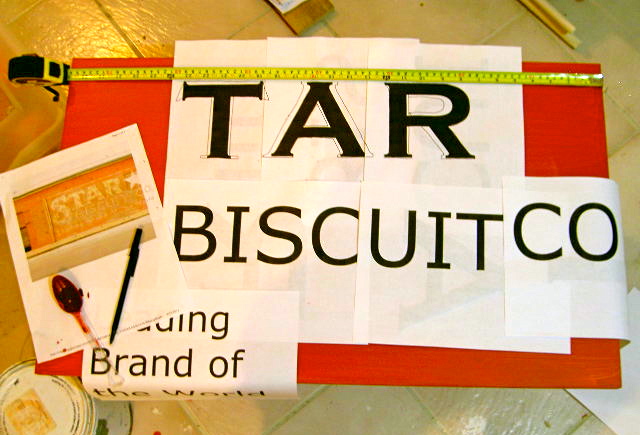
2. Print out letters and layout on wood board:
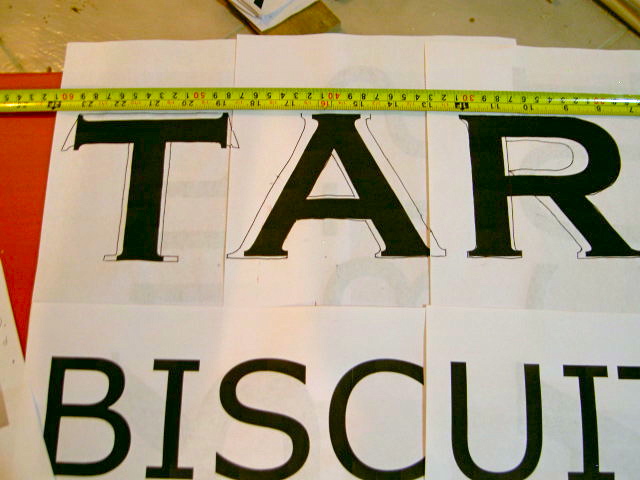
3. Trace letters with ballpoint pen to make indent in wood.
Here I modified the T-A-R to be slightly wider and more like the inspiration:
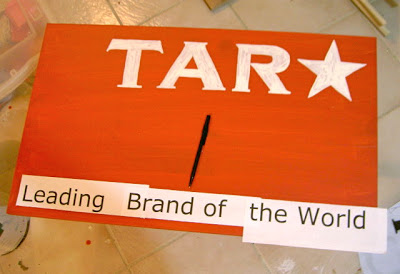
4. Paint in outline, I used off white. Let dry and repeat process for all lettering:

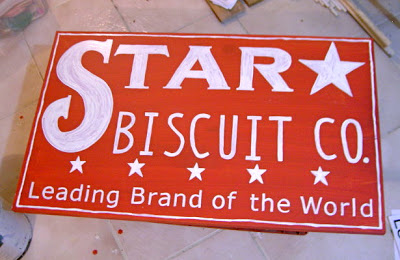
5. All painting complete.

6. Sand with 120 grit on mouse, stain with Minwax dark walnut, seal with clear satin poly.
It’s pretty darn close to the inspiration with my own tiny touches:
I hope Paula enjoys her new sign. I loved the challenge.

I’m linking up to:
http://www.504main.com/
http://shabbynest.blogspot.com/
http://chiconashoestringdecorating.blogspot.com/
http://shabbynest.blogspot.com/
http://chiconashoestringdecorating.blogspot.com/
http://www.remodelaholic.com/
http://frenchcountrycottage.blogspot.com/, http://justagirlblog.com/, http://www.lovelycraftyhome.com/
http://lollyjaneboutique.blogspot.com/, http://funkyjunkinteriors.blogspot.com/, http://www.iheartnaptime.net/
http://sistersofthewildwest.blogspot.com/
http://www.bystephanielynn.com/
http://www.thegirlcreative.com/
http://thediyshowoff.blogspot.com/
http://thediyshowoff.blogspot.com/
http://www.skiptomylou.org/, http://makingtheworldcuter.blogspot.com/, http://linda-coastalcharm.blogspot.com/
http://www.homestoriesatoz.com/
http://www.abeachcottage.com/
http://tatertotsandjello.blogspot.com/
http://www.myuncommonsliceofsuburbia.com/
http://delightfulorder.blogspot.com/, http://www.theshabbychiccottage.net/
http://www.somewhatsimple.com/
jaime, i truly think you are the queen of signage! your signs come out so nicely eery time!
gorgeous! How do you keep cranking this stuff out? Absolutely amazing. BTW thanks for the sweet comment today:) This stuff works no joke!
Well, no wonder you loved the challenge…you did a magnificent job on the sign. I know she loves it to pieces.
xo bj
The sign is wonderful — what fun to decorate with! Thanks for the "how-to" information.
Hi Jaime, It's me…owner of this lovely sign! You did a great job and I can't wait to see it on my wall! Thanks!!
Well, that's cool! It turned out so good! I'm a sucker for stars, so of course I love it.
Your signs are always so great looking! This is no exception.
I loved this sign the first time I saw it. You do a super job. I would really like to try making one. Thanks for the tips.
Love it! This sign is fabulous!
Susan
I enjoy seeing all of your signs, but this is one of my favorites. Thank you so much for sharing your tips on how to make them. Once of these days I might just get brave enough to try it!
Another great sign. I LOVE this one too. I shared on Facebook! Thanks for linking up!
I never thought of tracing around the letters to make an imprint in the wood. Thanks bunches!
This really caught my eye! Love the color and charm of this sign!
Wow…that is awesome! Love it!
I think I like #3 the best. Very cool and authentic looking!
Wow! I can't believe you can paint a sign just by outlining letters through computer paper! I've never seen anyone do that. Your sign is beautiful! I want to be able to do this, but I don't think my hand is that steady to paint within the lines…plus your outside border line is perfect!
What a great sign! The color and the detail are wonderful!
So cute! love this!!!
Really cute!! What a fun challenge.
Thank you SOOOOOOOOOOOOOO much for posting this. I am usaually a cookie girl, BUT I am going to put down my piping bags to try this. If it doesn't work, I'm hoping you have an ETSY shoppe, LOL!
Your signs are wonderful! I think you did a SUPER job matching the original!
I LOVE wooden signs.. really great idea to trace the lettering with ballpoint pen over the paper and painting directly. I want to try that instead of stencils next time!
I love this, my new obsession is vintage signs. Thanks for sharing
awesome job come see what I shared at http://shopannies.blogspot.com