• Home
  • Blog
  • About
  • Contact
    • Disclosure
    • Privacy Policy
  • SHOP
  • Widget area for main menu

    • Email
    • Facebook
    • Instagram
    • Pinterest
    • Twitter
    • YouTube
  • Skip to primary navigation
  • Skip to main content
  • Skip to primary sidebar

Jaime Costiglio

build - paint - sew

  • BUILD
    • BEDS
    • BENCHES
    • DESKS
    • DRESSERS
    • GAMES & TOYS
    • SCRAP WOOD
    • SHELVES
    • STORAGE
    • TABLES
  • TOOLS
  • PAINT
    • CRAFTS
    • FURNITURE
    • HOME DECOR
  • SEW
    • GIFTS
    • HOME DECOR
    • POUCHES
  • HANDBUILT HOLIDAY
    • 2021
    • 2019
    • 2018
    • 2017
    • 2016
    • 2015
    • 2014
    • 2013
  • GIFTS
    • BABIES
    • KIDS
    • FOR HER
    • FOR HIM
    • TEACHERS
    • WEDDINGS
  • SEASONAL
    • 4TH OF JULY
    • FALL
    • HALLOWEEN
    • CHRISTMAS
    • SUMMER
    • SPRING
    • ST. PATRICK’S DAY
    • THANKSGIVING
    • VALENTINE’S DAY
    • WINTER
  • SALTBOX PROJECT
    • BATHROOMS
    • DINING ROOM
    • EXTERIOR
    • FAMILY ROOM
    • FOYER / MUDROOM
    • KIDS BEDROOMS
    • KITCHEN
    • LIVING ROOM
    • MASTER BEDROOM
    • PLAYROOM
  • SCROLL SAW

“B” is for Bins

January 23, 2011

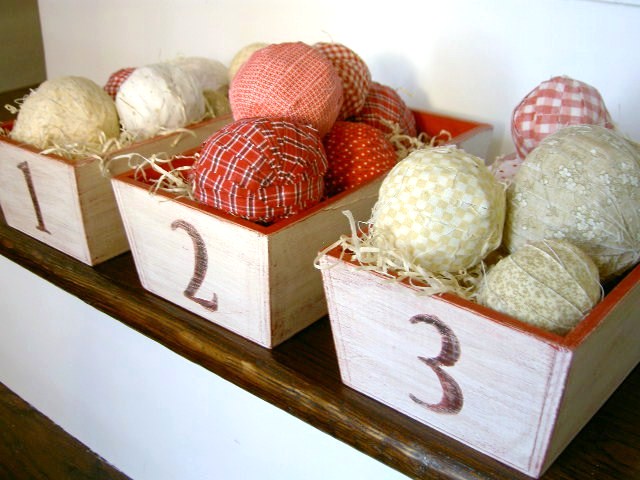
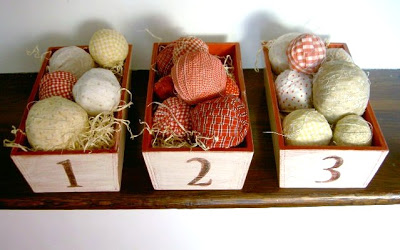
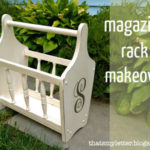
A wooden bin transformation.
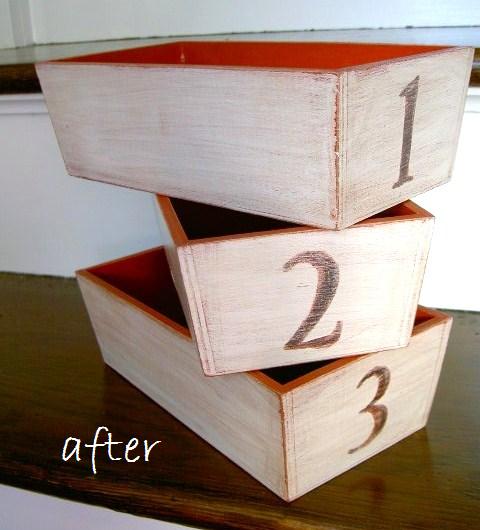
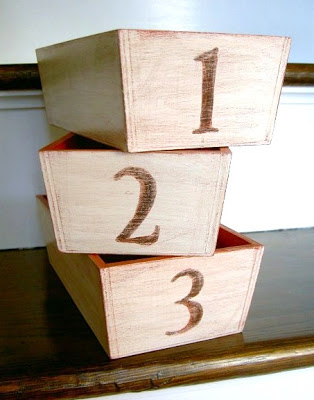
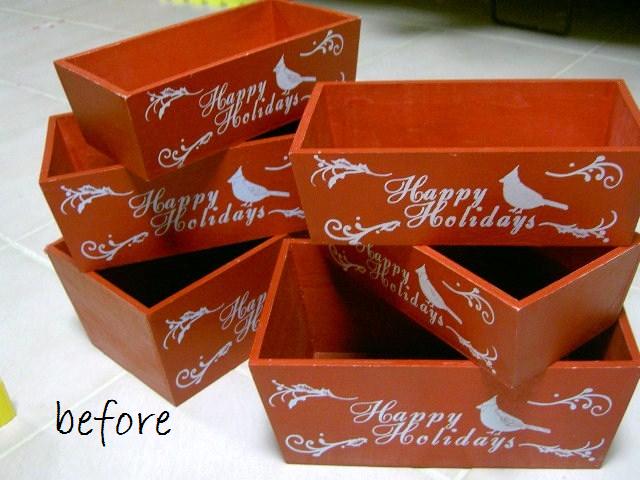
Yes this is the before picture:
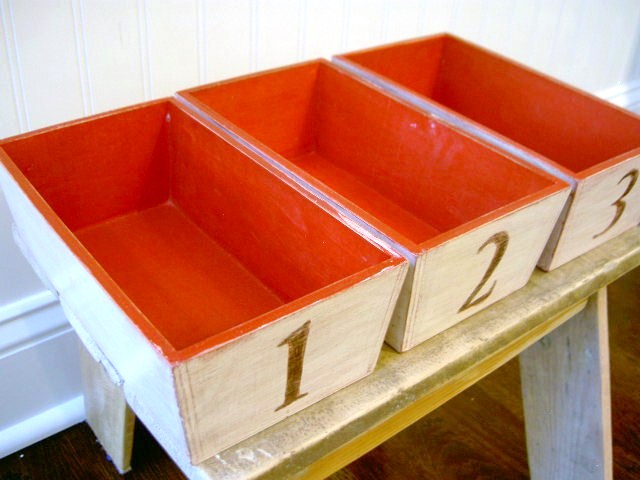
And the after:
It’s shocking what you can do with Christmas items marked down 90% off and a little paint. 
These bins were only .59 cents each.  Now I think I should’ve bought all that was on the shelf.

I’m always thinking, what could I do with that, how can I change that to make it great or useful?
Clearly the “Happy Holidays” motif wasn’t going to cut it.

And I’m always thinking ahead, red or green on sale at Christmas is perfect for Valentine’s and St. Pat’s Day.
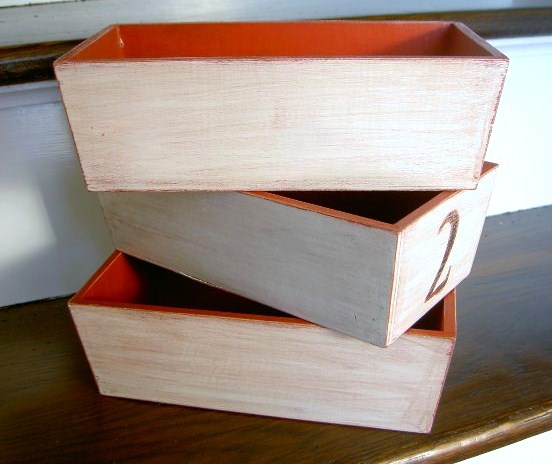
Just look at the inside, such a great contrast with the new outside:

Here’s how I transformed the bins:
Painted one thick coat Behr Off-White satin finish.

Stenciled numbers on, first brown paint then black, sanded with 120 grit sandpaper, stained with Minwax special walnut and sealed with clear satin poly.
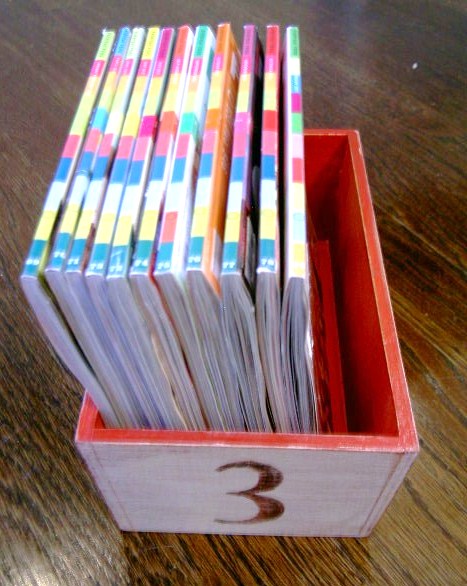
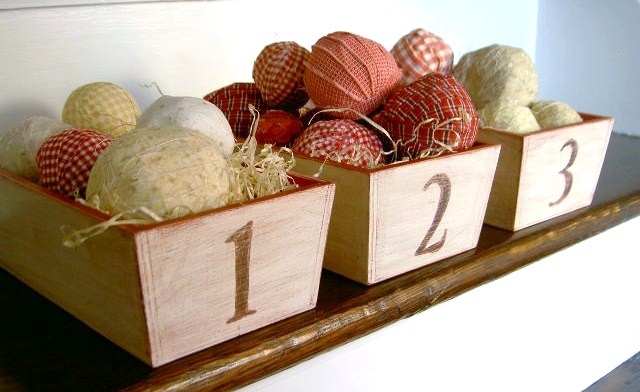
Now what do we put in them?

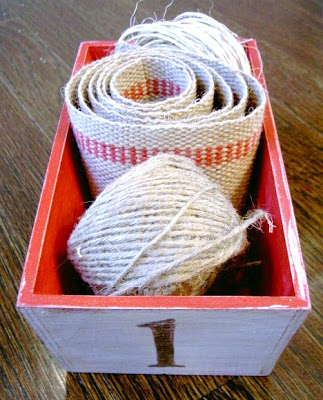
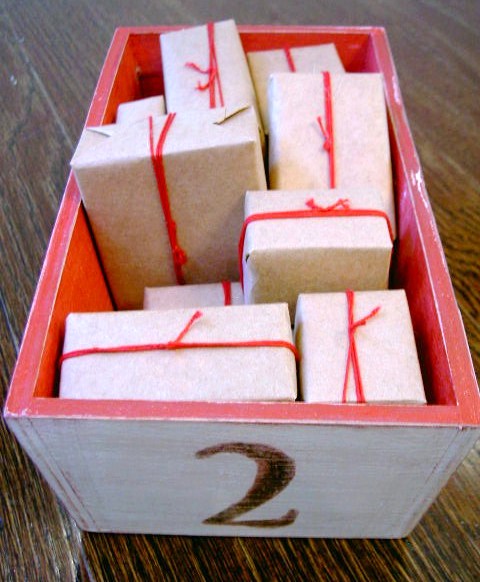
(Sorry kids those boxes are empty!)
Loving my transformed wooden bins.
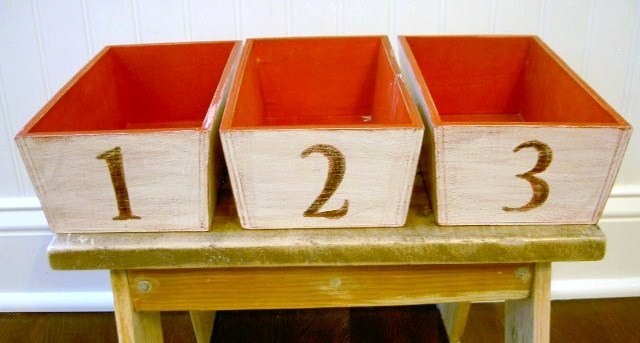
One last side by side:
So easy, so worth .59 cents.
Click here to see the Valentine’s version of these bins.
I’m linking up to:
cottage instincts
The DIY Show Off

You may also like...

  • Family Room RefreshFamily Room Refresh
  • Magazine Rack MakeoverMagazine Rack Makeover
  • Nightstand MakeoverNightstand Makeover
  • “S” is for Saddle“S” is for Saddle
Share this post:

Filed Under: CRAFTS, CRAFTS, DIY, PAINT22 Comments

Reader Interactions

Comments

  1. Stephanie says

    January 24, 2011 at 2:32 AM

    Nice job!! Those are adorable! I'd have never thought of redoing Christmas clearance items… that's genius! 🙂 ~Stephanie from Buttermilk Hill (www.buttermilkhill.com)

    Reply
  2. Madigan at madiganmade says

    January 24, 2011 at 2:56 AM

    These are darling! I love numbers on stuff… how cute and versatile!

    Reply
  3. Nanniepannie says

    January 24, 2011 at 3:16 AM

    I like your thinking and I like your boxes. Keep creating and keep inspiring.

    Reply
  4. Pam says

    January 24, 2011 at 3:45 AM

    They turned out so cute. I love anything with numbers on them and also have a collection of rag balls, so am loving this project. What a great buy at 90% off! 🙂

    Reply
  5. Lori says

    January 24, 2011 at 2:00 PM

    What an awesome project!! I just love them and I'm kicking myself for not buying some when I had the chance.

    Reply
  6. [email protected] says

    January 24, 2011 at 10:44 PM

    adorable boxes. great idea

    Reply
  7. Holly Austin says

    January 25, 2011 at 12:38 AM

    What a great idea! Now I'm going to be on the look-out for cheap ugly boxes 🙂

    Reply
  8. Deanne says

    January 25, 2011 at 1:16 AM

    Great job, they looks so cute- love the numbers!

    Reply
  9. Christina @ The Tattered Tag says

    January 25, 2011 at 8:21 AM

    These boxes are so charming. So glad I stumbled upon your blog via Between Naps on the Porch, happy to be a new follower. Please consider linking up your wonderful bins to my blog bash K.I.S.S.=Keep It Simple Sunday.

    http://thetatteredtag.blogspot.com

    Reply
  10. Angela says

    January 25, 2011 at 9:09 AM

    I love your boxes so handy, and what a great find.
    You gave me a whole new insight on what to look for when hunting for sales.
    xoxox,
    Angela.

    Reply
  11. Heidi says

    January 25, 2011 at 7:59 PM

    Wow, these are really cool! I love the look! Great place to stash things, too!
    Hugs, Heidi

    Reply
  12. THE.PAINTED.STUDIO says

    January 25, 2011 at 9:28 PM

    What a great way to repurpose those boxes. Too cute. Makes me wish I found some on clearance after Christmas. 🙂

    ]Cheryl

    http://www.paintedstudio.blogspot.com

    Reply
  13. Carmen @ Life with Sprinkles on Top says

    January 28, 2011 at 3:56 AM

    I love them! What a fabulous idea. I actually saw these on clearance but I can't remember where. Where did you buy them? Now I wish I'd bought some.

    Reply
  14. Amanda says

    January 28, 2011 at 12:55 PM

    These are so cute, I wish I could find me some!

    Reply
  15. Jen says

    January 28, 2011 at 3:14 PM

    Those are awesome! I love how you redid them! I think I will look at clearance items a little different.

    I would love to have you come and link up to Fantastic Friday at http://ironvioletdesigns.blogspot.com

    Thanks

    Reply
  16. Sommer says

    January 28, 2011 at 4:20 PM

    Ooooh I LOVE these! They are right up my alley! I would be delighted if you would share these at my VIP party today =)

    http://designergarden.blogspot.com/2011/01/vip-party-2.html

    Reply
  17. Paige @ The Wandering Cottage says

    January 28, 2011 at 8:53 PM

    These are great little organizers!

    Reply
  18. Shirley @These Moments of Mine says

    January 28, 2011 at 9:39 PM

    Love these! They look terrific!

    Reply
  19. Robin {keephomesimple} says

    February 5, 2011 at 7:33 AM

    I LOVE how creative you got with a Christmas clearance item! These bins are so chic! I hope you don't mind, but I featured them on my budget friendly inspiring ideas post here:
    http://keephomesimple.blogspot.com/2011/02/budget-friendly-inspiration-week-2.html

    Thanks for the inspration and I hope you have a great weekend!
    ~Robin

    Reply
  20. Silver Lining Decor says

    February 8, 2011 at 5:00 AM

    Hi! I'm a new follower 🙂 I saw these bins at Michael's and thought about doing the same thing! Now I wish I had! Yours turned out great!
    ~Rachel
    http://www.silverliningdecor.blogspot.com

    Reply
  21. Vanessa says

    February 10, 2011 at 8:38 PM

    Wow! These are great! So simple and stylish!

    Reply
  22. SweetSugarBelle says

    July 12, 2011 at 7:30 AM

    So impressed with your work!

    Reply

Leave a Reply Cancel reply

Your email address will not be published. Required fields are marked *

Primary Sidebar

Hi! I’m Jaime

Jaime Costiglio

Hello!

Thank you for stopping by.
Join me for lots of DIY.

Read more

Get new posts via email

Handbuilt Holiday: Gift Project Plans

handbuilt holiday gift project plans

Collection of DIY gift project plans to build.

The Home Depot Tool Prospective

THD Prospective

Tools to consider for the DIYer.

Archives

The Home Depot Logo
Copyright © 2023 Jaime Costiglio · Custom site by Moonsteam Design

Privacy Policy