• Home
  • Blog
  • About
  • Contact
    • Disclosure
    • Privacy Policy
  • SHOP
  • Widget area for main menu

    • Email
    • Facebook
    • Instagram
    • Pinterest
    • Twitter
    • YouTube
  • Skip to primary navigation
  • Skip to main content
  • Skip to primary sidebar

Jaime Costiglio

build - paint - sew

  • BUILD
    • BEDS
    • BENCHES
    • DESKS
    • DRESSERS
    • GAMES & TOYS
    • SCRAP WOOD
    • SHELVES
    • STORAGE
    • TABLES
  • TOOLS
  • PAINT
    • CRAFTS
    • FURNITURE
    • HOME DECOR
  • SEW
    • GIFTS
    • HOME DECOR
    • POUCHES
  • HANDBUILT HOLIDAY
    • 2021
    • 2019
    • 2018
    • 2017
    • 2016
    • 2015
    • 2014
    • 2013
  • GIFTS
    • BABIES
    • KIDS
    • FOR HER
    • FOR HIM
    • TEACHERS
    • WEDDINGS
  • SEASONAL
    • 4TH OF JULY
    • FALL
    • HALLOWEEN
    • CHRISTMAS
    • SUMMER
    • SPRING
    • ST. PATRICK’S DAY
    • THANKSGIVING
    • VALENTINE’S DAY
    • WINTER
  • SALTBOX PROJECT
    • BATHROOMS
    • DINING ROOM
    • EXTERIOR
    • FAMILY ROOM
    • FOYER / MUDROOM
    • KIDS BEDROOMS
    • KITCHEN
    • LIVING ROOM
    • MASTER BEDROOM
    • PLAYROOM
  • SCROLL SAW

DIY Bench with Numbers

February 2, 2012

Build a rustic bench with painted numbers:

A special request from a friend.

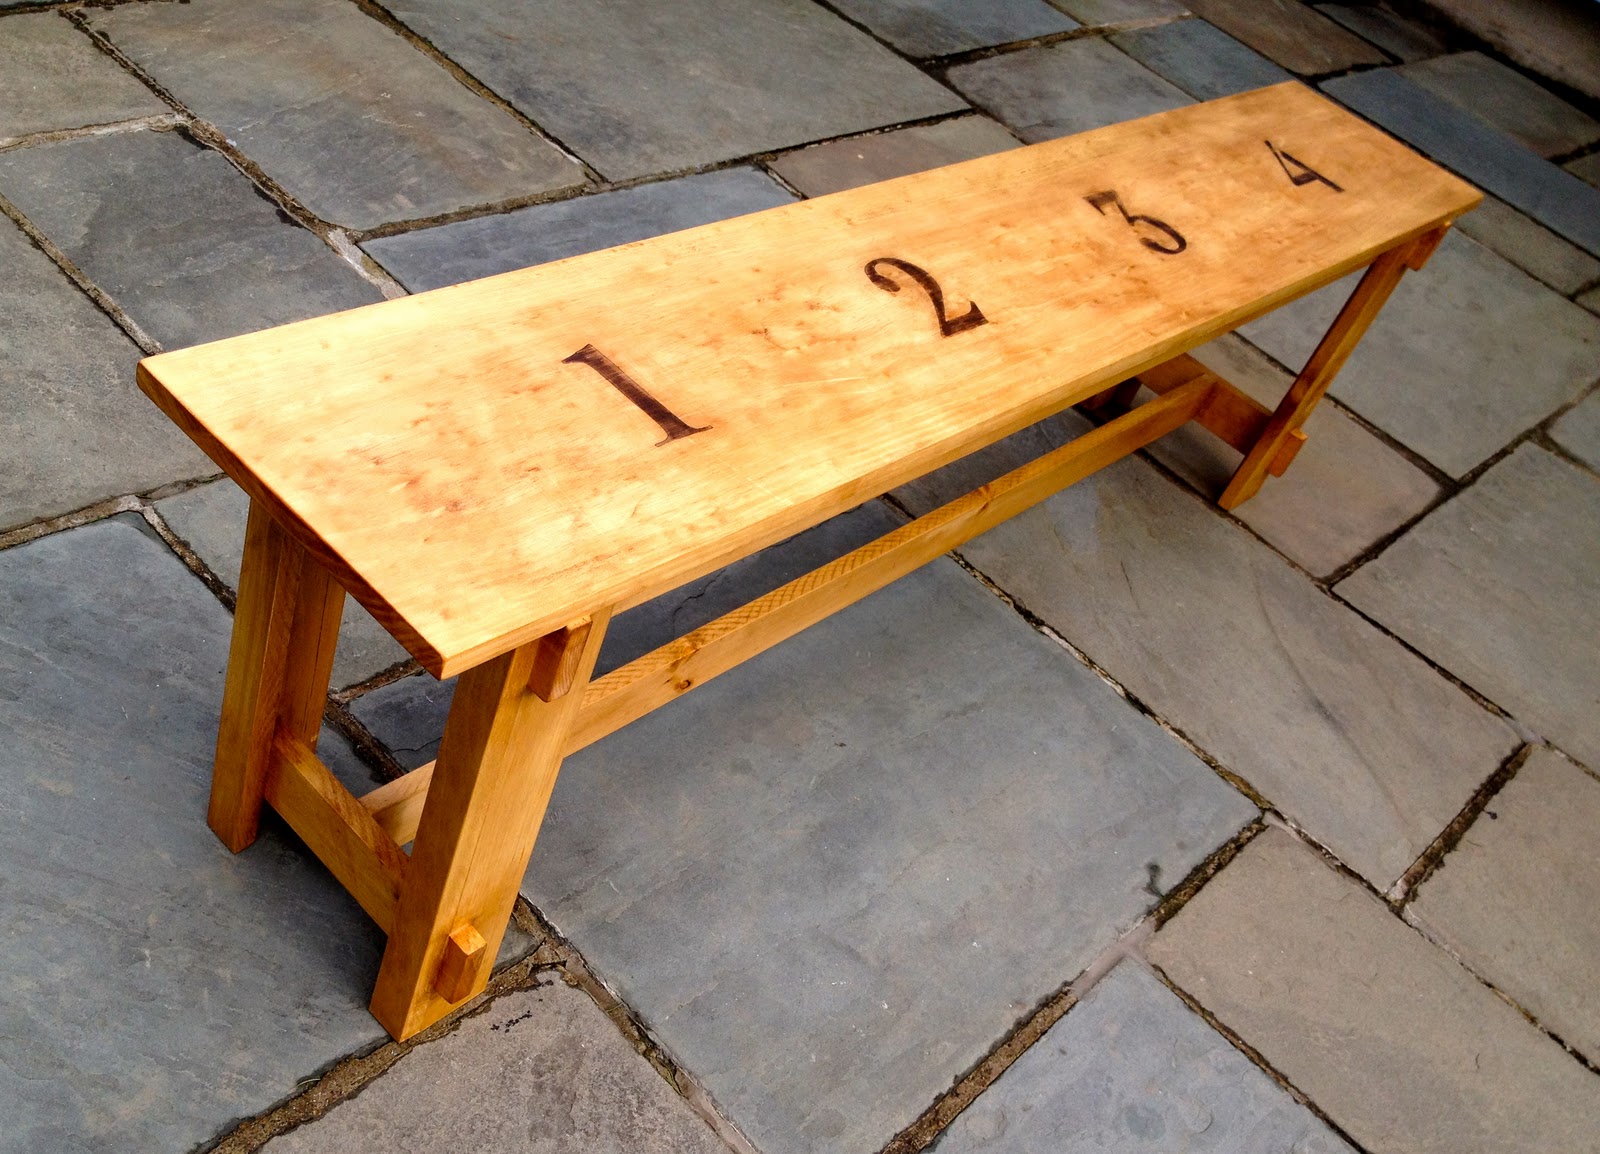
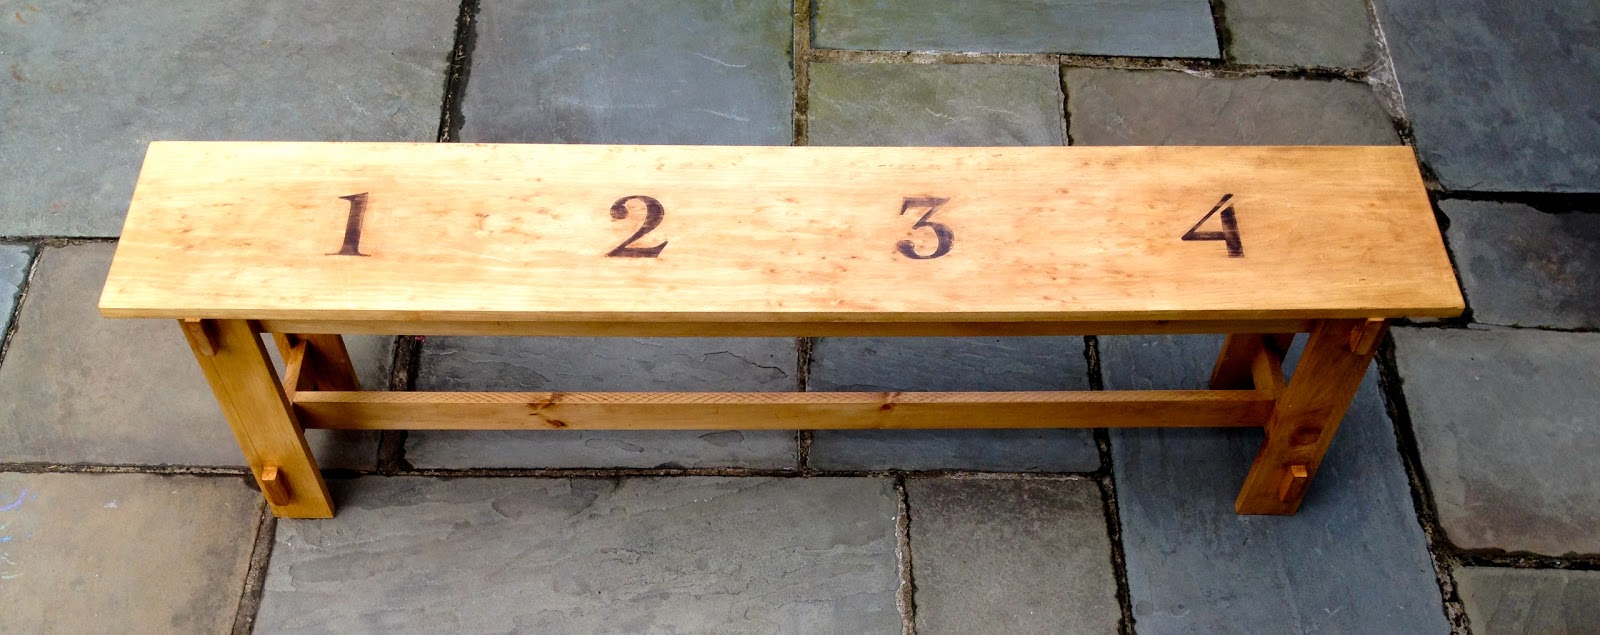
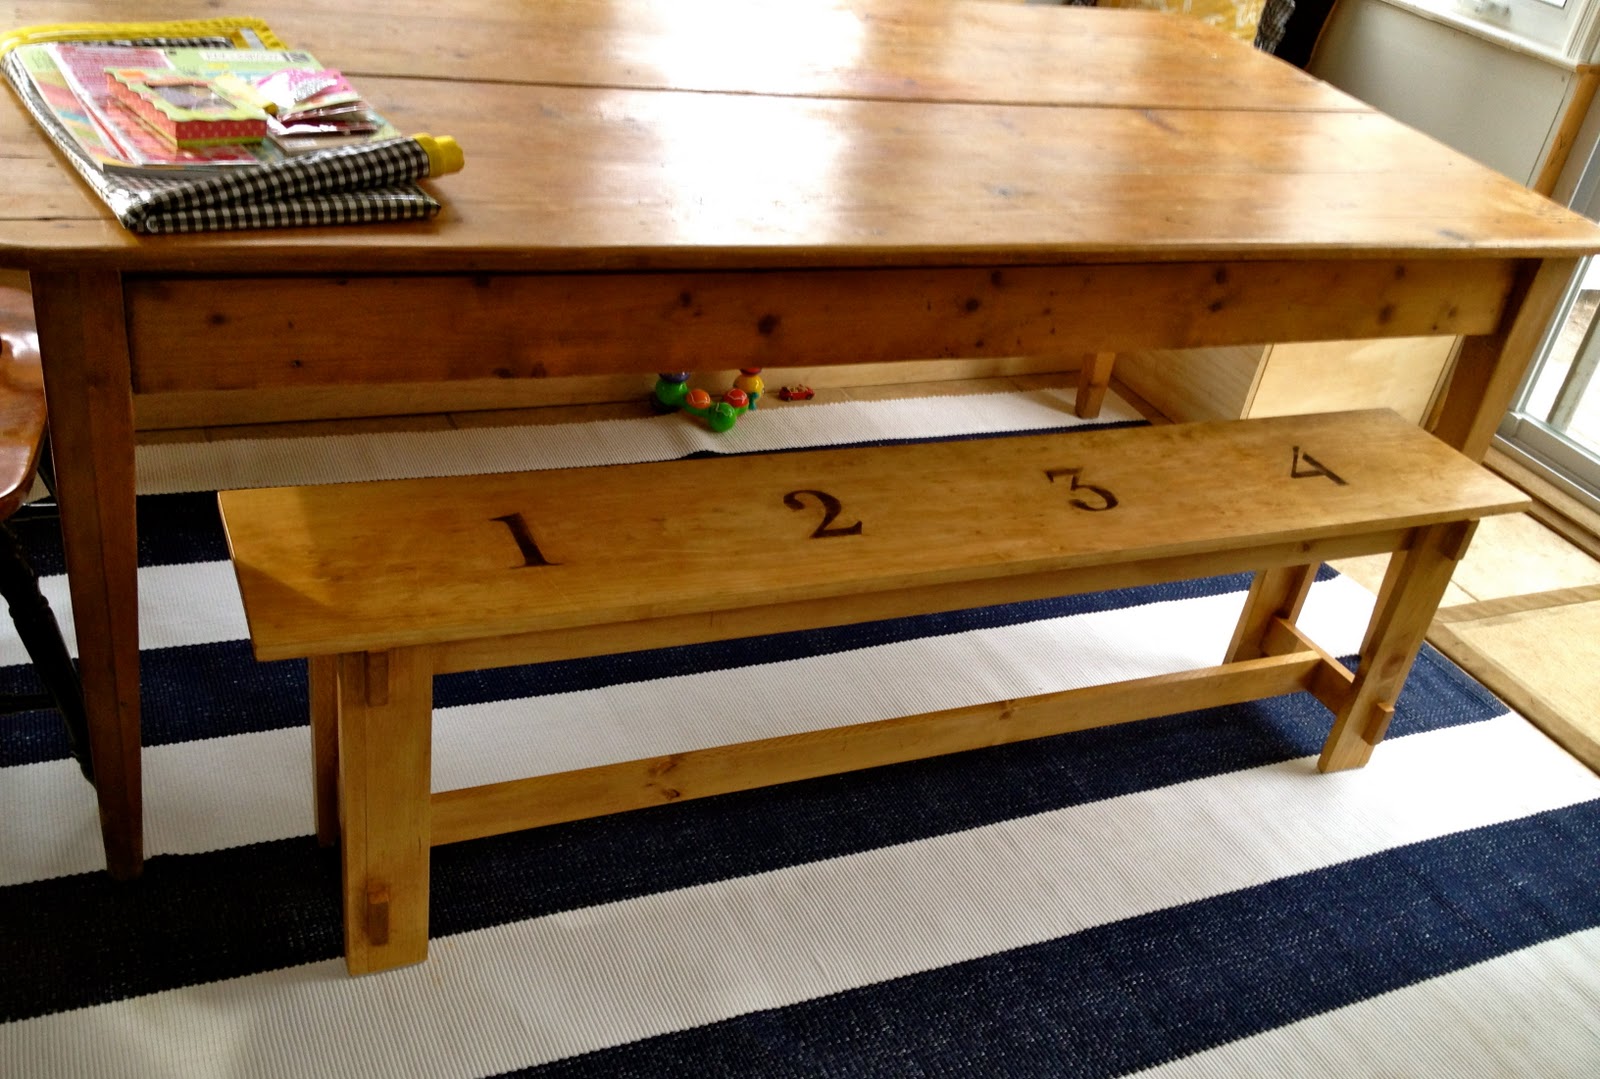
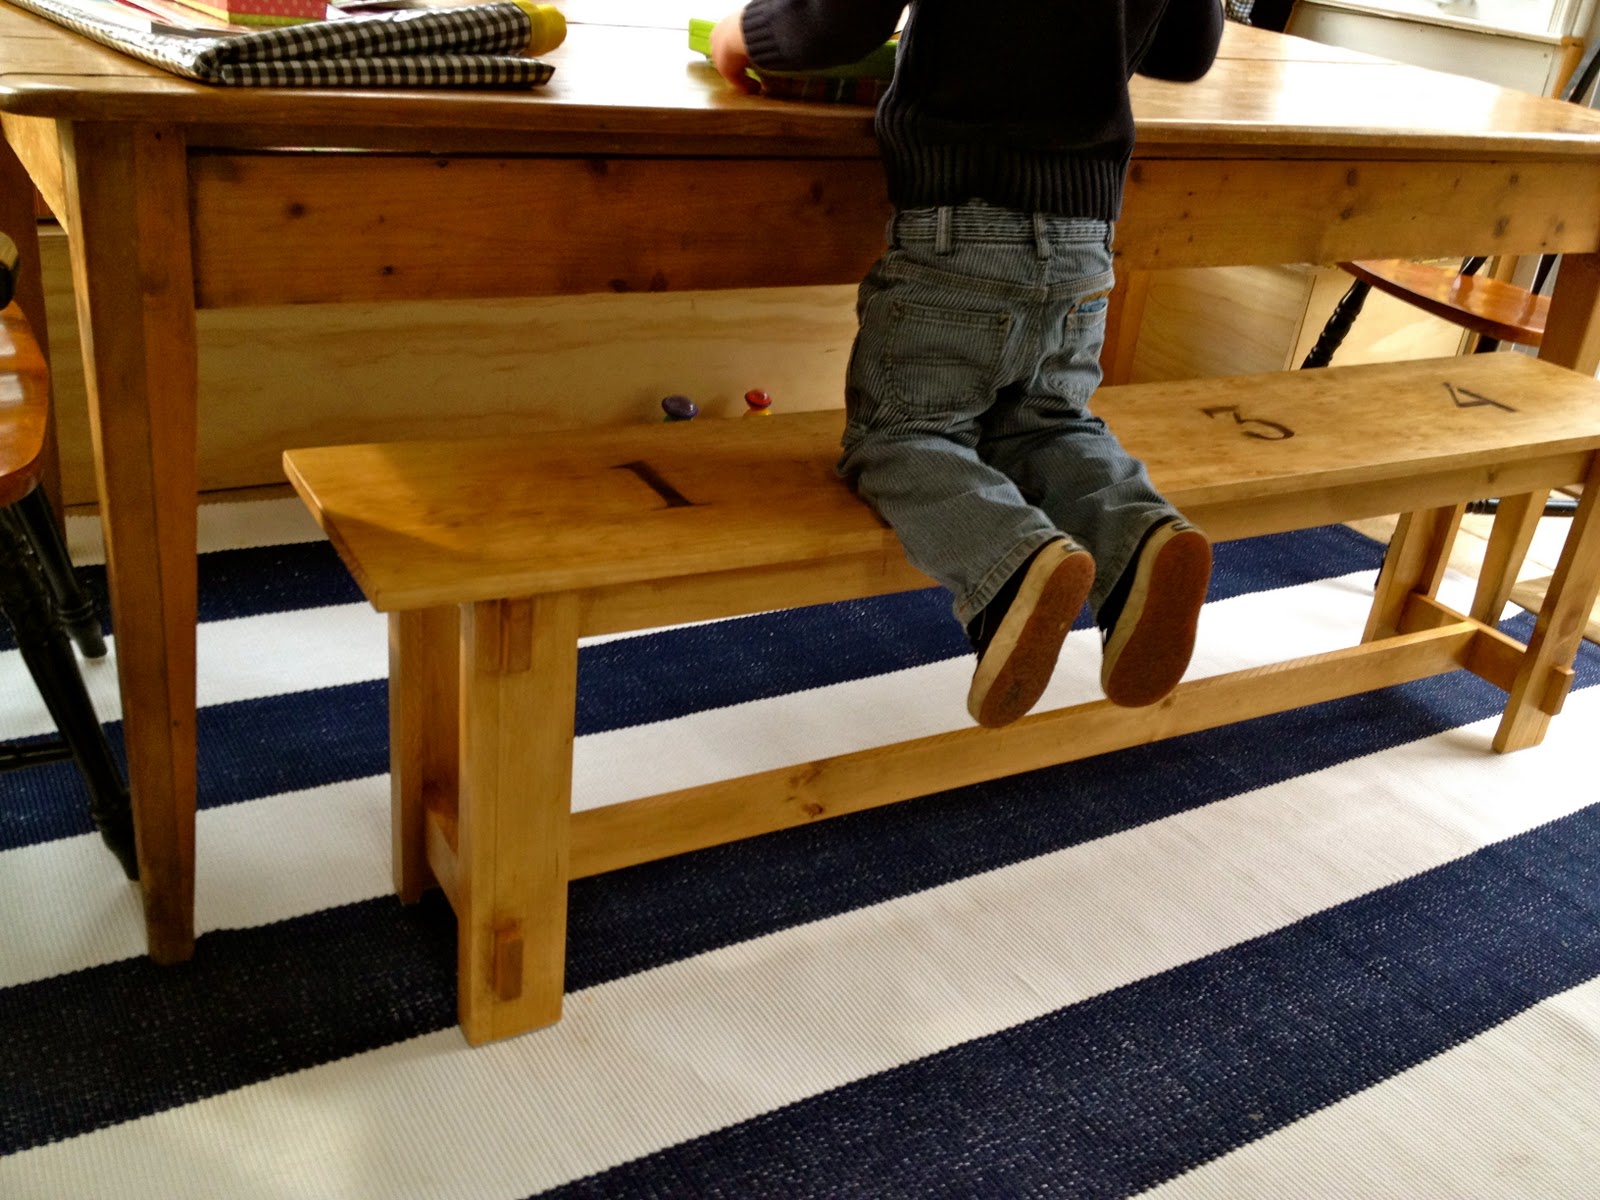
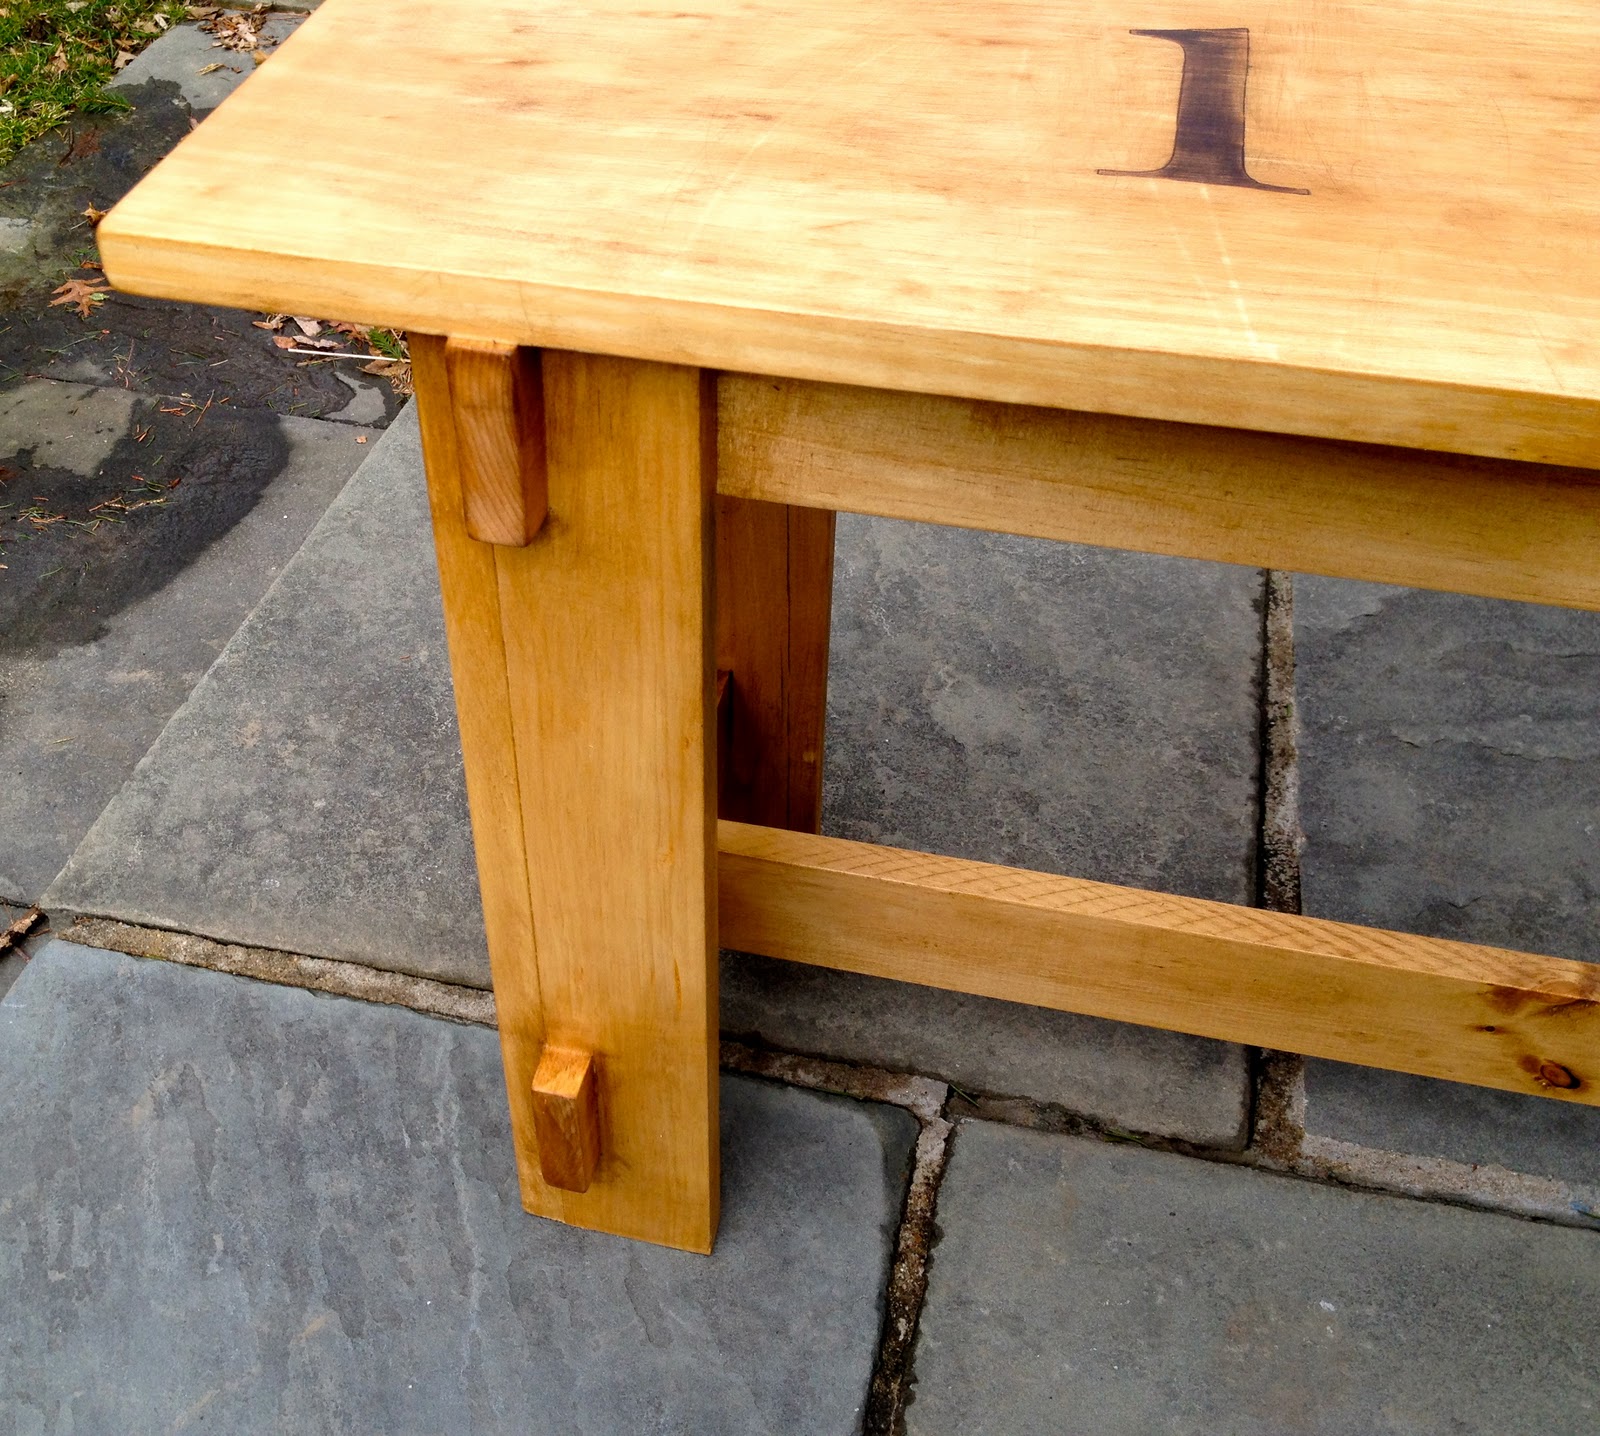
Built to fit her dining table, the bench measures 64″ long.

I used plans from Ana White here and adjusted the cuts for the longer bench.
My friend had the idea to add the numbers 1 – 4, she has 4 kids:

And here’s the fourth little one getting his first try on the bench:

Here’s how I made the bench:

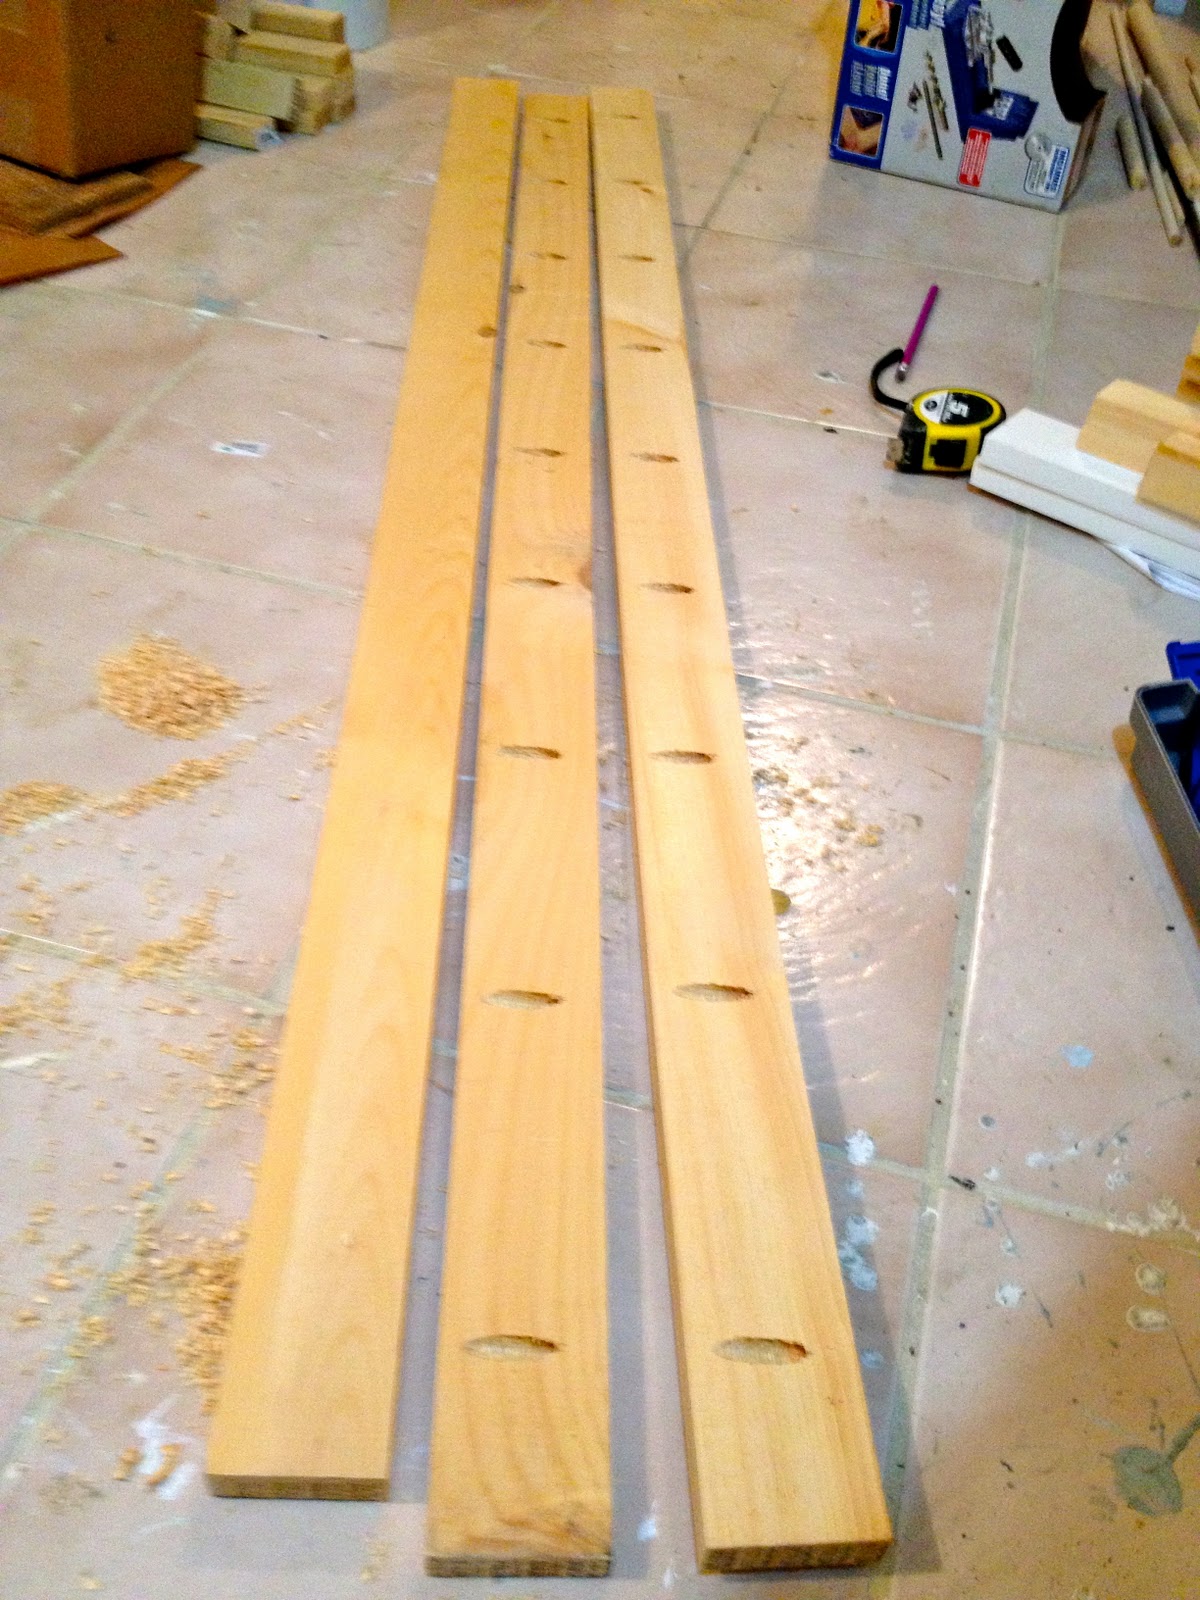
1. Cut pieces as per Ana’s plans here adjusting the length for 64″:
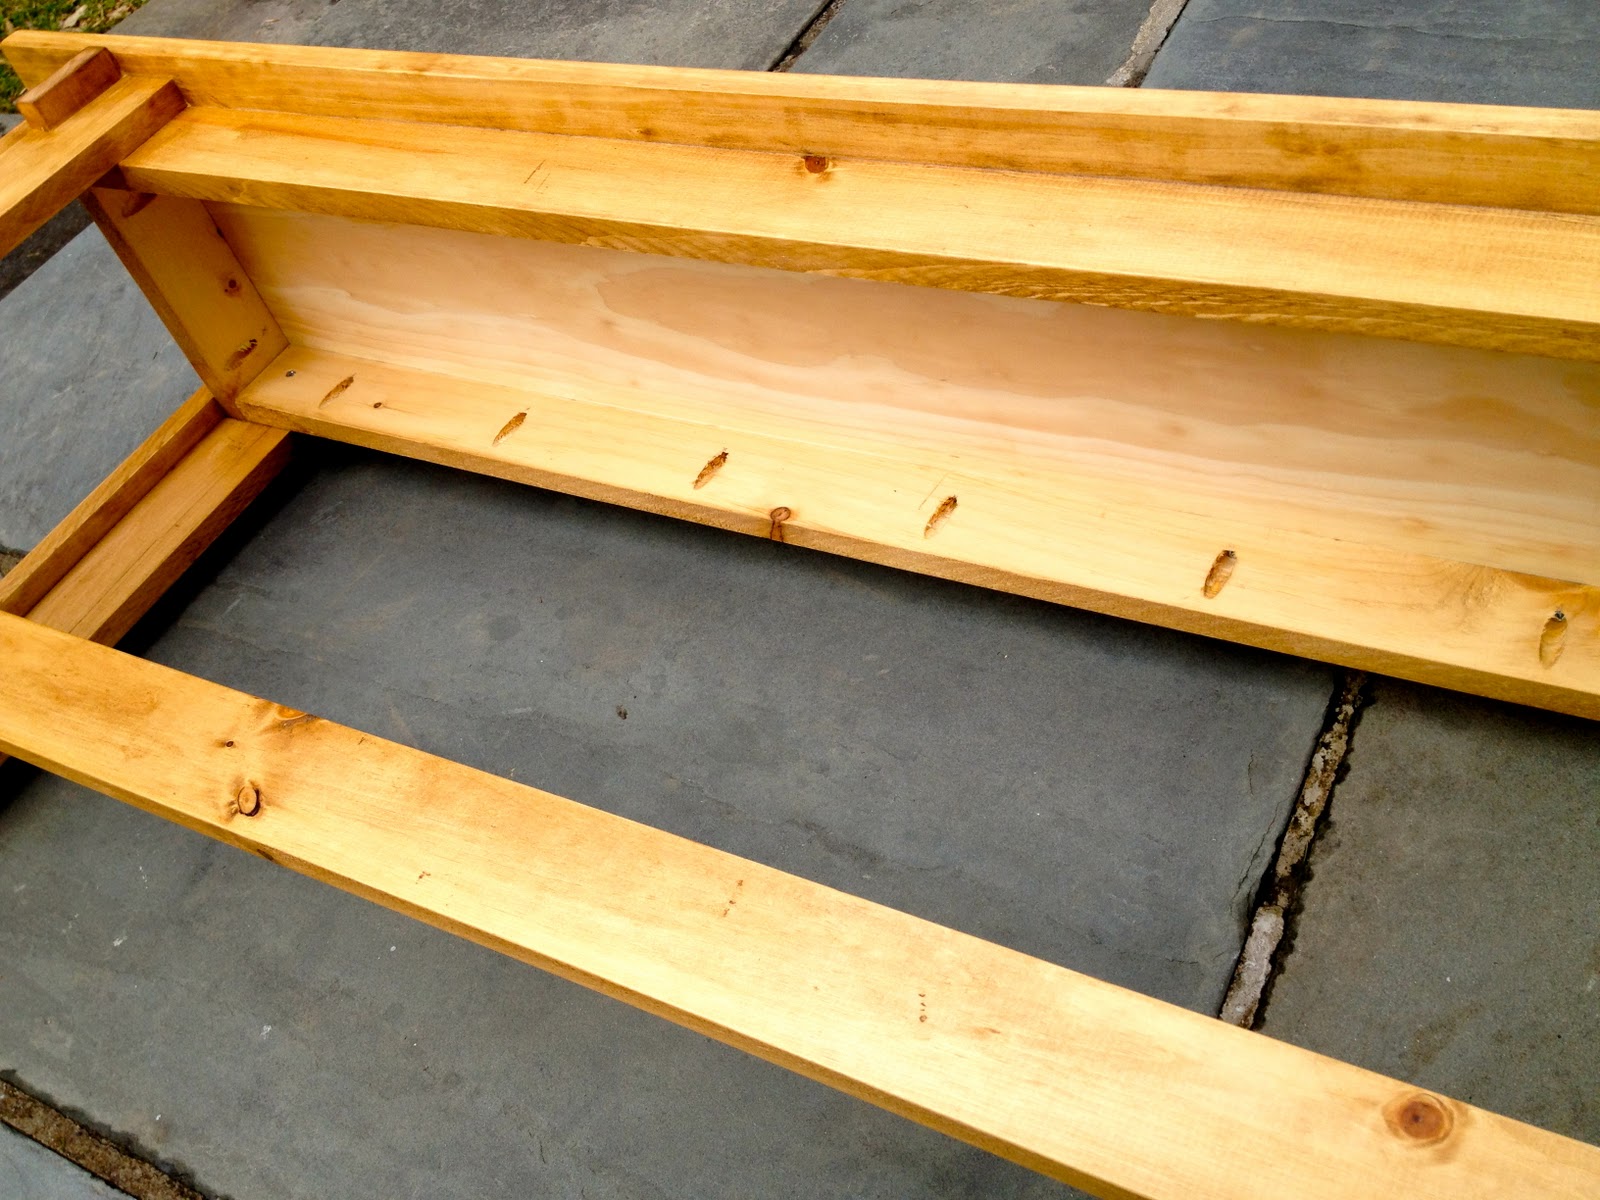
2. Using a Kreg jig (my newest tool, a gift from a very special friend!!  thank you),
Drill the pocket holes in all apron pieces:

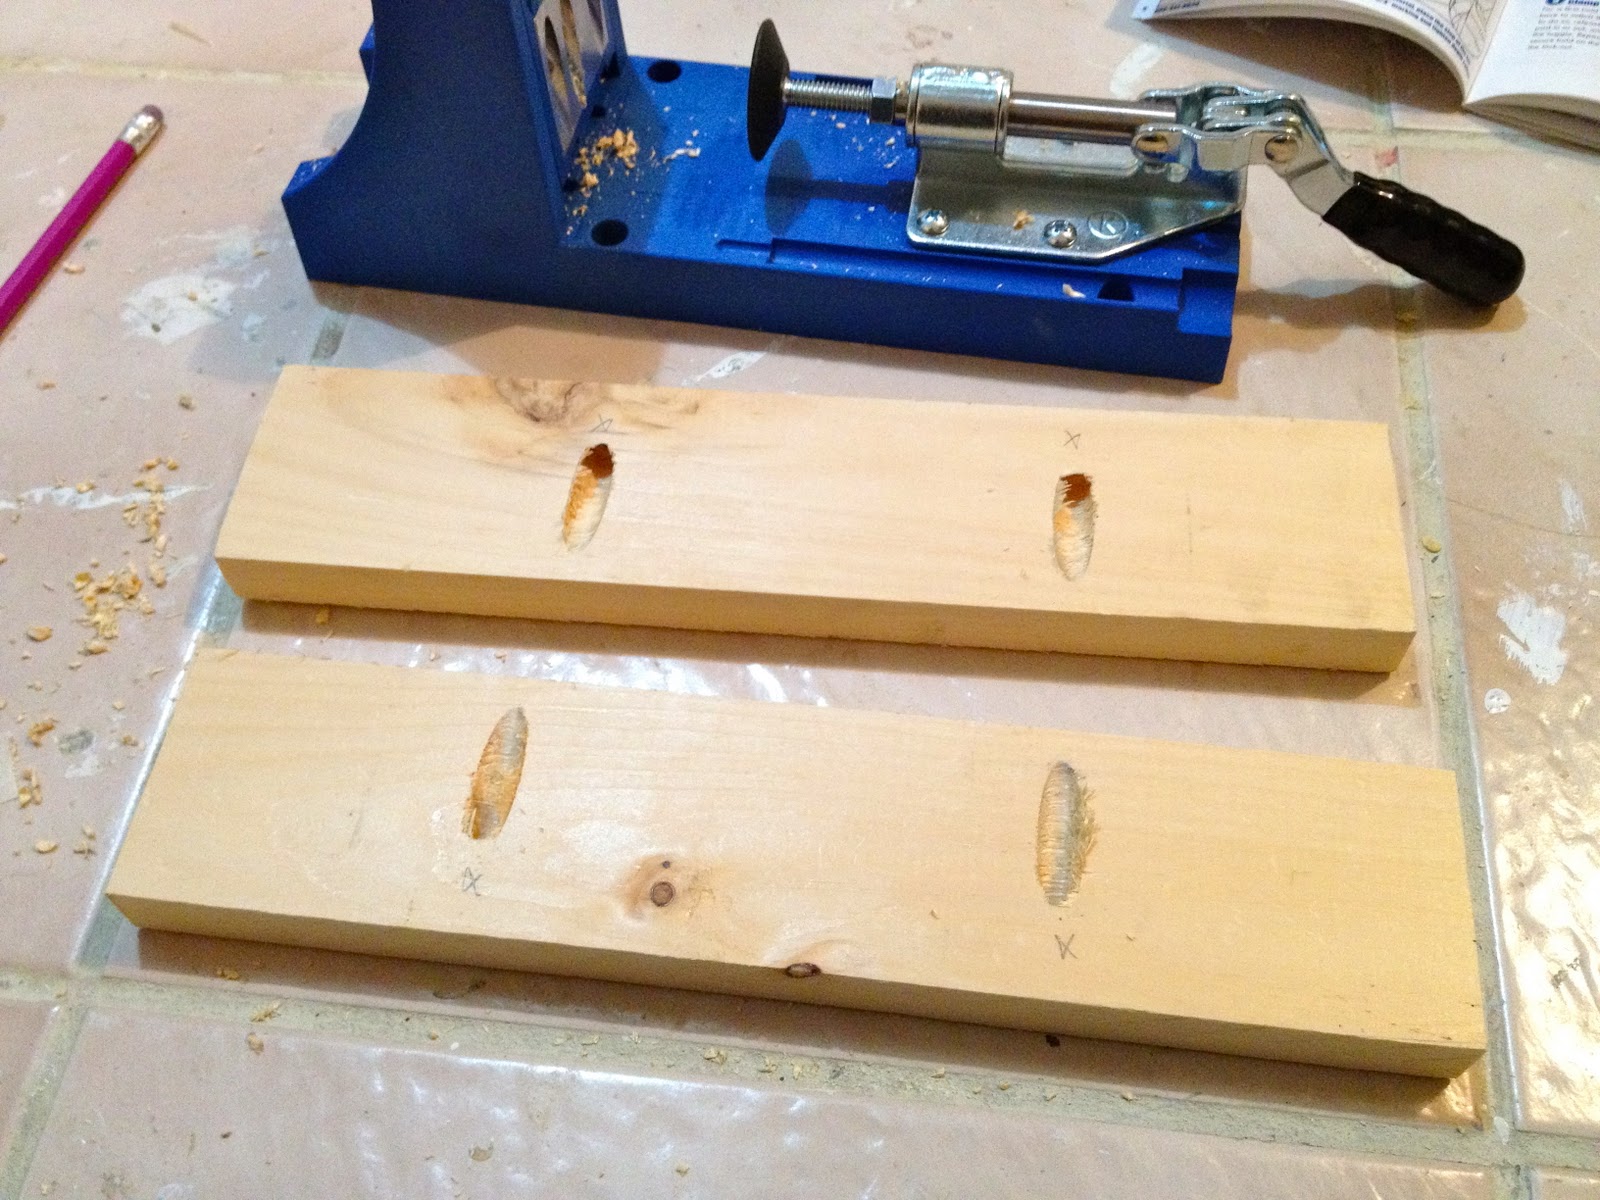
I might have gone overboard with the pocket holes in the long aprons but you should place them every 6″ – 8″.

3. Assemble the legs:

4. Assembly complete:

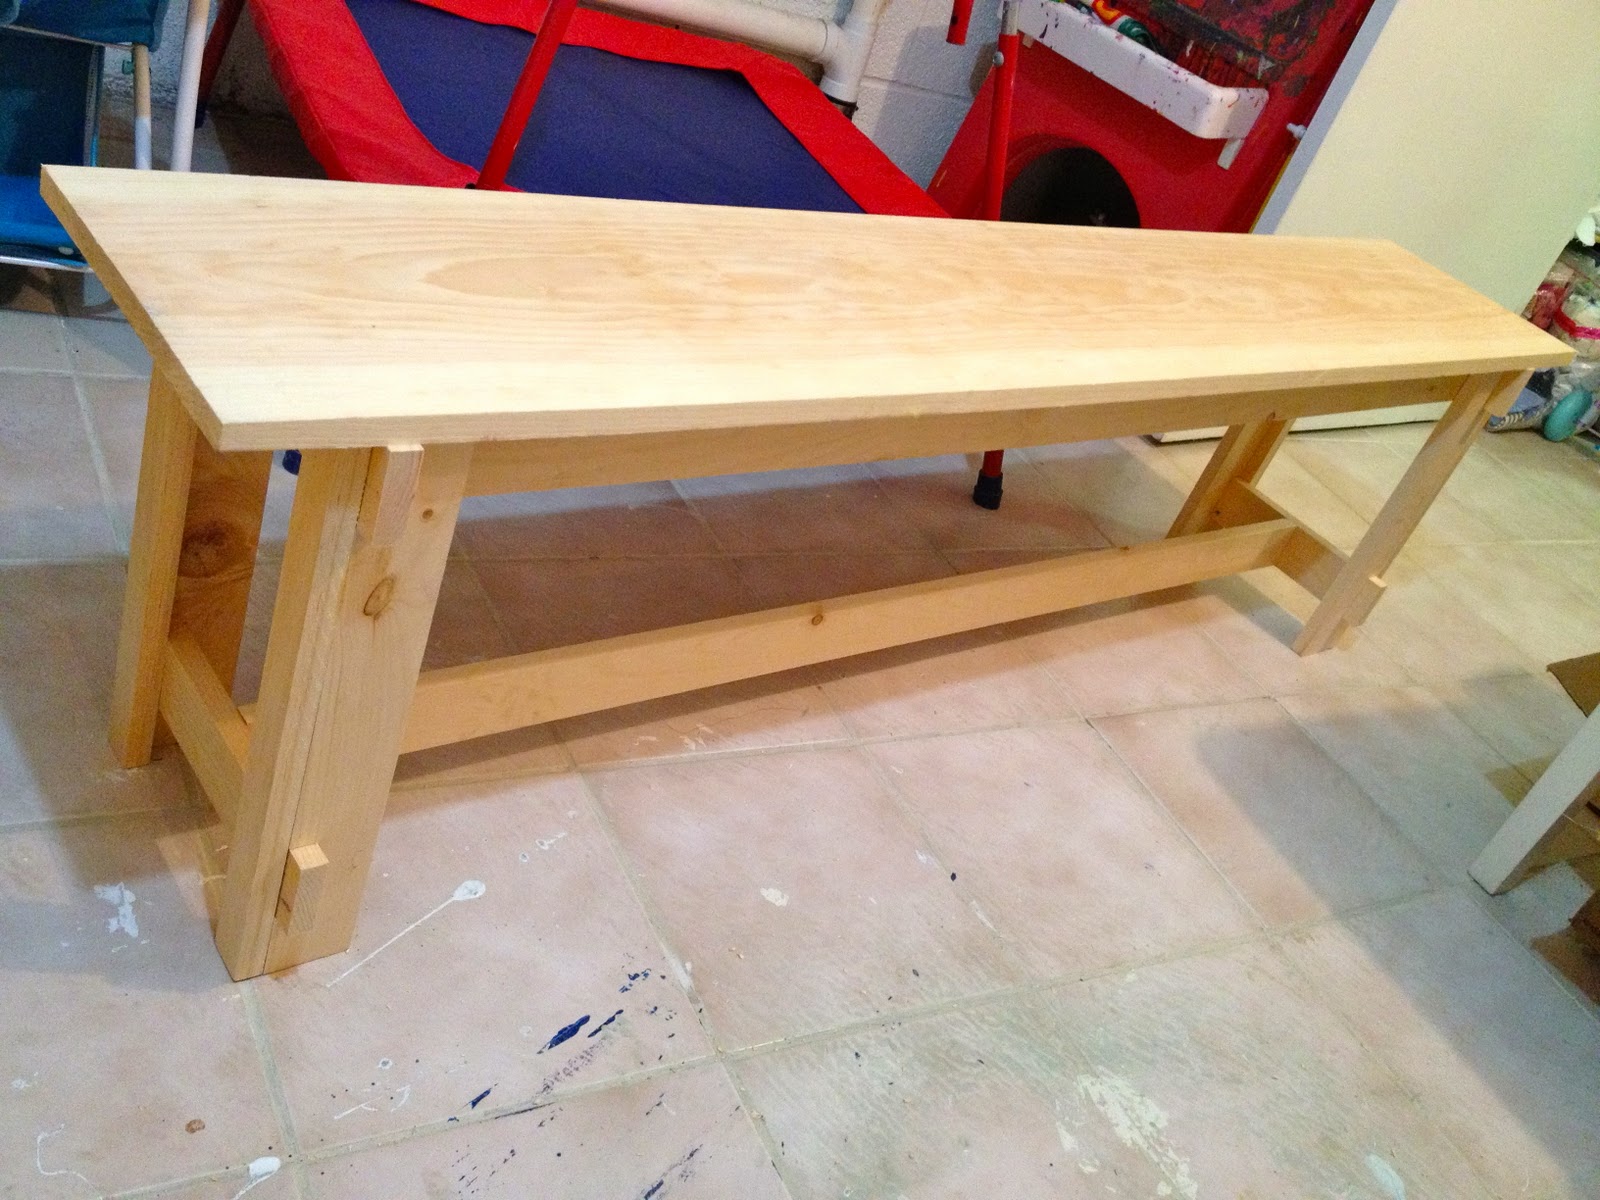
5. Sand and stain one coat Minwax Ipswich Pine.
Print out numbers to fit:

6. Trace number with ballpoint pen which leaves indent in wood.
Paint inside indent, first brown:

7. Then thin coat of black:

8. Sand to distress numbers then stain Minwax Early American.
Seal with two coats clear satin poly.

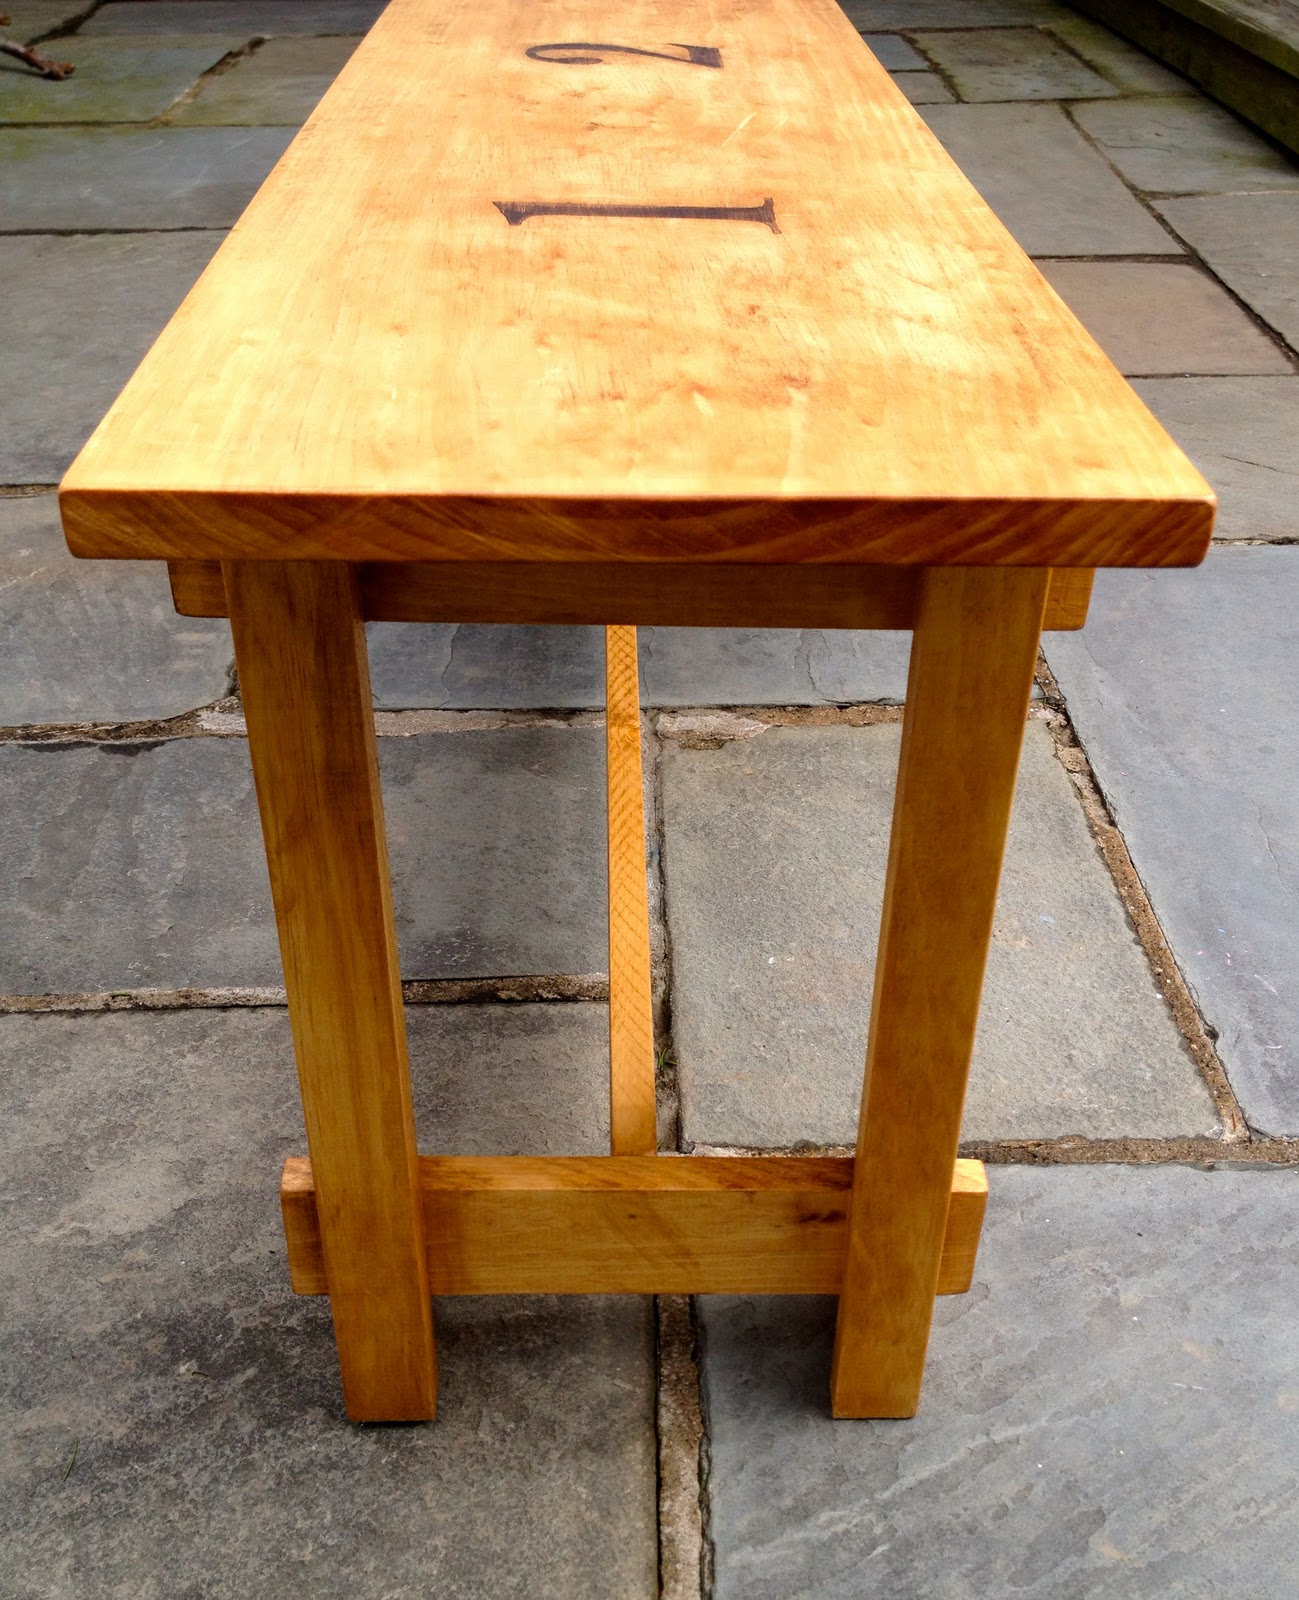
Dare you to find any visible screw heads, I could not have made this piece look the way it does without the Kreg jig.

And just for kicks here are all those pocket holes:
I owe a big thank you to my friend for the jig and another thank you to my other friend for another great project.
Hope her kids enjoy their new bench.

You may also like...

  • DIY Replica Vintage Shelving (free plans)DIY Replica Vintage Shelving (free plans)
  • DIY 3 Drawer Nightstand with PlansDIY 3 Drawer Nightstand with Plans
  • DIY Multipurpose Work TableDIY Multipurpose Work Table
  • DIY Freestanding Kitchen Pantry CabinetDIY Freestanding Kitchen Pantry Cabinet
Share this post:

Filed Under: BENCHES, BUILD, DIY, FURNITURE17 Comments

Reader Interactions

Comments

  1. Cassie @ Primitive & Proper says

    February 2, 2012 at 4:47 PM

    oh i really like this bench! i like the warm tone and the numbers!

    Reply
  2. Lisa Scibilia says

    February 2, 2012 at 5:44 PM

    Jaime, this has to be one of my favorite projects of yours! The numbers are so cute for the littles!

    Reply
  3. Katy says

    February 2, 2012 at 6:47 PM

    love the bench. ANd her rug. I had one like that but the white stripes got so dirty I had to put it away. 🙁
    anyway good job!

    Reply
  4. [email protected] Road says

    February 2, 2012 at 9:08 PM

    I love it! And I want one! This usually happens when I visit your blog, you know. I find new things to want every time. 🙂

    Reply
  5. BeingBrook says

    February 2, 2012 at 11:52 PM

    Love it!! This is on my build list before summer for my back deck. Love the numbers!

    Reply
  6. Backwoods Cottage Pam says

    February 3, 2012 at 2:02 AM

    Don't you just love that Kreg Jig? I can't wait to dig into my next building project with mine! Great job, the numbers are a great touch.

    Reply
  7. Lolly Jane says

    February 4, 2012 at 3:27 AM

    Do you ever slow down?! You're too talented, girl. LOVE this!

    Reply
  8. [email protected] says

    February 4, 2012 at 4:30 AM

    You are amazing! Love the bench; love the numbers!

    Reply
  9. Inspire Me Heather says

    February 5, 2012 at 12:16 PM

    Fabulous Jaime!!!

    Reply
  10. The DIY Show Off says

    February 5, 2012 at 3:23 PM

    Your home is just filled with the cutest DIY accents! This one reminds me of a bench we have on the barn patio. It's white but exact same placement of numbers 1-4! lol

    Thanks so much for sharing in the DIY Project Parade, Jaime…I always love seeing your latest! 😉

    Roeshel

    Reply
  11. Ann says

    February 6, 2012 at 2:46 AM

    An incredible looking bench. Love it.

    Reply
  12. pinktoesandpowertools.com says

    February 6, 2012 at 4:44 PM

    The bench turned out fantastic Jaime! Love the numbers. You are going to be even quicker with your projects now that you've got that Kreg jig 🙂 I always feel like such a slacker when I compare your list of completed projects to mine, lol!

    Reply
  13. Cyndi ✪ Blue Star says

    February 7, 2012 at 3:29 AM

    OK, I am SUCH a sucker for numbers! I found you from Uncommon Slice and I'm so glad I did! I'm a new blogger and now your newest follower! Check out my post on numbers: http://bluestarantiques.blogspot.com/2012/01/its-numbers-thing.html

    Cyndi

    Reply
  14. Danielle says

    February 7, 2012 at 1:28 PM

    I love this bench. It is so sweet and love the numbers. Your method for doing the numbers is great too!

    Reply
  15. Ellie says

    February 7, 2012 at 5:46 PM

    Oh, this is perfection! I want one of these in the worst way, but sadly I haven't conquered the world of power tools yet. Go you!

    Reply
  16. Christina at I Gotta Create! says

    February 8, 2012 at 1:27 AM

    FABULOUS bench!!! Love the shape, details and the painted numbers <3

    Reply
  17. Desiree @ The 36th AVENUE says

    February 9, 2012 at 3:00 AM

    Sticker for you my friend! This bench is amazing!

    Reply

Leave a Reply Cancel reply

Your email address will not be published. Required fields are marked *

Primary Sidebar

Hi! I’m Jaime

Jaime Costiglio

Hello!

Thank you for stopping by.
Join me for lots of DIY.

Read more

Get new posts via email

Handbuilt Holiday: Gift Project Plans

handbuilt holiday gift project plans

Collection of DIY gift project plans to build.

The Home Depot Tool Prospective

THD Prospective

Tools to consider for the DIYer.

Archives

The Home Depot Logo
Copyright © 2023 Jaime Costiglio · Custom site by Moonsteam Design

Privacy Policy