• Home
  • Blog
  • About
  • Contact
    • Disclosure
    • Privacy Policy
  • SHOP
  • Widget area for main menu

    • Email
    • Facebook
    • Instagram
    • Pinterest
    • Twitter
    • YouTube
  • Skip to primary navigation
  • Skip to main content
  • Skip to primary sidebar

Jaime Costiglio

build - paint - sew

  • BUILD
    • BEDS
    • BENCHES
    • DESKS
    • DRESSERS
    • GAMES & TOYS
    • SCRAP WOOD
    • SHELVES
    • STORAGE
    • TABLES
  • TOOLS
  • PAINT
    • CRAFTS
    • FURNITURE
    • HOME DECOR
  • SEW
    • GIFTS
    • HOME DECOR
    • POUCHES
  • HANDBUILT HOLIDAY
    • 2021
    • 2019
    • 2018
    • 2017
    • 2016
    • 2015
    • 2014
    • 2013
  • GIFTS
    • BABIES
    • KIDS
    • FOR HER
    • FOR HIM
    • TEACHERS
    • WEDDINGS
  • SEASONAL
    • 4TH OF JULY
    • FALL
    • HALLOWEEN
    • CHRISTMAS
    • SUMMER
    • SPRING
    • ST. PATRICK’S DAY
    • THANKSGIVING
    • VALENTINE’S DAY
    • WINTER
  • SALTBOX PROJECT
    • BATHROOMS
    • DINING ROOM
    • EXTERIOR
    • FAMILY ROOM
    • FOYER / MUDROOM
    • KIDS BEDROOMS
    • KITCHEN
    • LIVING ROOM
    • MASTER BEDROOM
    • PLAYROOM
  • SCROLL SAW

“B” is for Bench #4

March 25, 2011

A bench makeover.

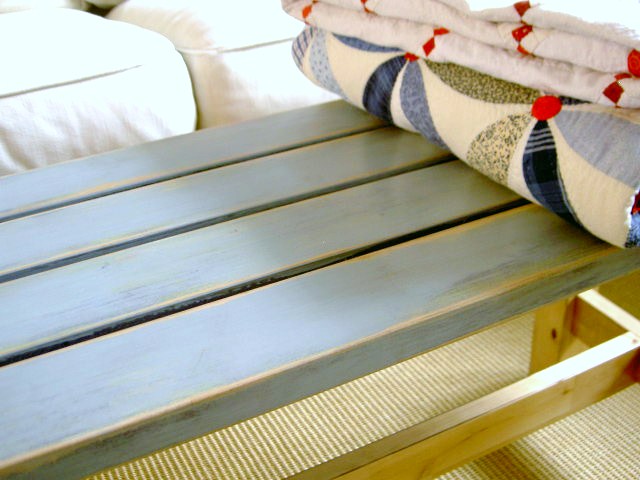
This bench went from out-of-the-box boring to beautiful blue.

I purchased this bench back in August to use at the dining table for the kids, easy in – easy out.  It was always meant to be temporary.  Then I found chairs for the dining table and the bench became a coffee table.

The kids like the open floor space in the living room to play but still need a surface to put books on, to draw and color, for drinks, etc.
The bench serves that purpose well.

Although it was fine in it’s original state I wanted to make it my own.

Here’s how I did it:

1. Sanded with 120 grit to remove poly and rough up edges.
2. Applied Minwax special walnut stain to legs only:

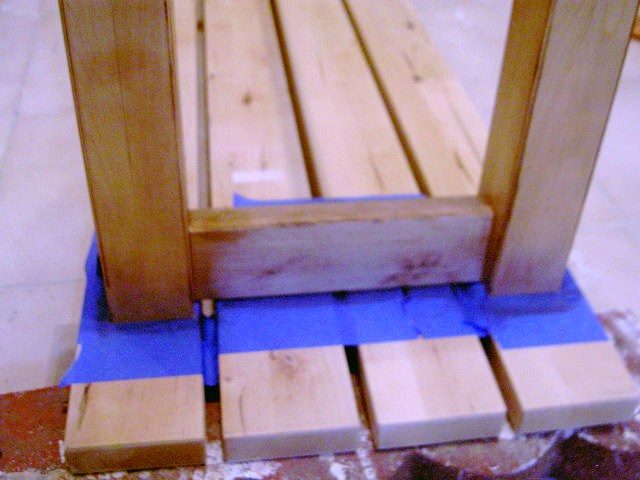
3. One coat Kilz primer on slats:

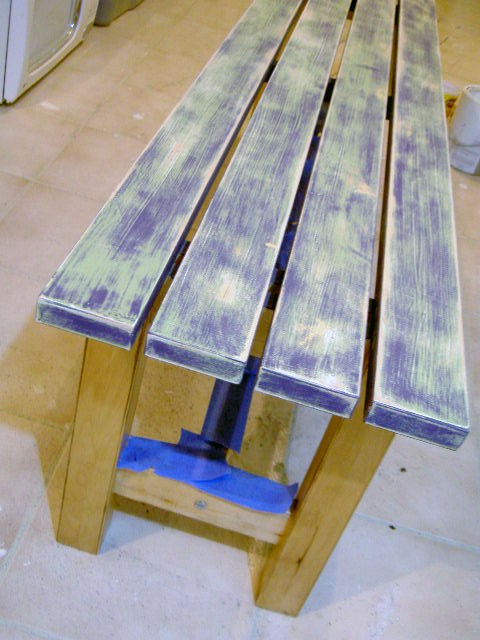
4. One coat paint Behr sage:

5. One coat paint Behr vintage velvet:

6. Sanded with 120 grit:

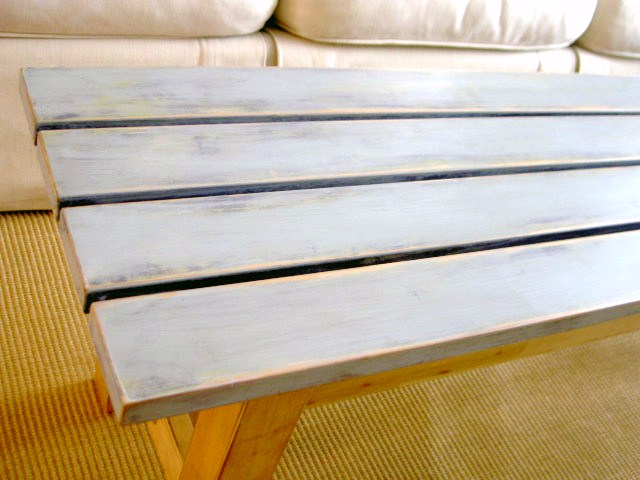
7. One coat paint watered-down white.

8. One coat BM buxton blue:

9. Sanded 120 grit to distress.
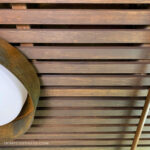
10. Applied Minwax special walnut stain.
11. Applied one coat satin poly.
Basically I layered up the paint using colors I already had, then distressed and stained it.
It’s a bit coastal but fits right in.
I’m linking up to:
Funky Junk's Saturday Nite Special Photobucket The DIY Show Off Thumbnail for 'Made By You Monday' Making http://linda-coastalcharm.blogspot.com/Photobucket  The Lettered Cottage grabtt SYS Thurs Transformation ThursdayFurniture Feature Fridays The Shabby Nest Chic on a Shoestring Decorating   

You may also like...

  • How to Install a Slat CeilingHow to Install a Slat Ceiling
  • Ceiling Makeover: Exposed Wood BeamsCeiling Makeover: Exposed Wood Beams
  • Family Room RefreshFamily Room Refresh
  • DIY Polka Spot Table MakeoverDIY Polka Spot Table Makeover
Share this post:

Filed Under: DIY, FURNITURE, FURNITURE, PAINT25 Comments

Reader Interactions

Comments

  1. Susan @ homeroad.net says

    March 25, 2011 at 12:30 PM

    This bench is beautiful! Come link up today! http://www.homeroad.net
    Have a great day!
    Susan

    Reply
  2. Allison@FabRehab says

    March 25, 2011 at 7:56 PM

    That is a fabulous finish and great tutorial! Love it!

    Reply
  3. Deanna says

    March 26, 2011 at 12:45 AM

    Came out great, good job!

    Reply
  4. Stacy of KSW says

    March 26, 2011 at 4:27 AM

    I'm looking for a bench just like this to serve as a fill in for stools at the breakfast bar till my kids are older. They just like to stand and watch or help momma stir and bake stuff right now. Mind sharing where you found yours? Great job!!!

    Reply
  5. Suzanne@Meridian Road says

    March 26, 2011 at 10:16 AM

    How pretty! I love the layered paint treatment! It's definitely coastal.

    Reply
  6. Delightblog.blog says

    March 27, 2011 at 12:56 AM

    Hello, found you at homeroad link party just a few entries down from mine. Love the blue color of the bench!
    Linda

    Reply
  7. Sommer says

    March 27, 2011 at 4:19 PM

    GORGEOUS! The color is so soothing and subtle and pretty. I would love to have you share this at my VIP party today =) http://designergarden.blogspot.com/2011/03/vip-party-8.html

    Reply
  8. The Autocrat: Haley says

    March 27, 2011 at 6:28 PM

    Oh I am in love! I really like how you left part of it natural. I soooo need to make one!

    Reply
  9. Laurel says

    March 28, 2011 at 4:46 PM

    Looks great! Love how the color turned out 🙂 Laurel@chippingwithcharm

    Reply
  10. Lynn@ The Vintage Nest says

    March 29, 2011 at 12:55 AM

    Coastal is great. I love the open work on it and the color is wonderful. 🙂

    Reply
  11. Grace @ Sense and Simplicity says

    March 29, 2011 at 1:43 AM

    I love how you made it your own – it looks so pretty and yet will stand up to the wear and tear of kids and coffee mugs.

    Reply
  12. MariaT says

    March 29, 2011 at 12:54 PM

    love the colors, turned out wonderful!

    Reply
  13. m e g a n says

    March 29, 2011 at 12:58 PM

    adorable and i love the distressed look!

    Meg

    Reply
  14. Angie @ Thrifty Like Me says

    March 29, 2011 at 1:35 PM

    Love this! Thanks for sharing!

    Reply
  15. Mariaelena says

    March 29, 2011 at 4:28 PM

    I love all of your benches…this one is great…don't miss out on entering my giveaway over on my blog….spread the word too!!!
    thanks for sharing..Mariaelena

    Reply
  16. Cassie @ Primitive & Proper says

    March 29, 2011 at 5:51 PM

    that is so soft and pretty!

    Reply
  17. Beth@The Stories of A to Z says

    March 29, 2011 at 11:16 PM

    Great paint technique! It looks beachy chic!

    Reply
  18. The DIY Show Off says

    March 30, 2011 at 12:06 PM

    I love the paint technique and the results! Beautiful job! 🙂

    Thanks so much for sharing in the DIY Project Parade. I love seeing your creativity linked up!

    Roeshel

    Reply
  19. Lee and Beth says

    March 30, 2011 at 2:19 PM

    That is beautiful!! I love the paint technique you used. I have always been too afraid to try new paint techniques, but your bench looks so pretty, I'm going to have to try it someday!
    Hope you have a wonderful day.
    Beth.

    Reply
  20. Paulette, Jvona & Rachel says

    April 1, 2011 at 2:07 AM

    OMGosh! I have that same bench. I had to round off the corners because it kept on gouging the wall, and scratching up my table legs. Yours looks FANTASTIC! What a great inspiration piece.
    -Paulette

    Reply
  21. Stacey@A Sort Of Fairytale says

    April 1, 2011 at 2:54 AM

    love it! the layered paint is so soft, yet rich looking. great job, i am so impressed with your paint skills!!
    🙂

    Reply
  22. Teresa says

    April 1, 2011 at 3:56 AM

    Wow I love this, all those colors, it's amazing how it turned out, Wonderful job!

    Reply
  23. Tiff @ Making The World Cuter says

    April 2, 2011 at 11:41 PM

    It looks fantastic! 🙂 I will be featuring this over at Making the World Cuter tomorrow-great job!
    hugs-
    Tiff

    Reply
  24. Tammy @ Type A says

    April 7, 2011 at 2:34 PM

    it look great, nice job. i have a party that goes from tues-thurs, i would love you shared this. http://typeadecorating.blogspot.com/2011/04/anything-goes-party-11.html

    Reply
  25. Alison says

    April 7, 2011 at 3:15 PM

    Love it!

    Reply

Leave a Reply Cancel reply

Your email address will not be published. Required fields are marked *

Primary Sidebar

Hi! I’m Jaime

Jaime Costiglio

Hello!

Thank you for stopping by.
Join me for lots of DIY.

Read more

Get new posts via email

Handbuilt Holiday: Gift Project Plans

handbuilt holiday gift project plans

Collection of DIY gift project plans to build.

The Home Depot Tool Prospective

THD Prospective

Tools to consider for the DIYer.

Archives

The Home Depot Logo
Copyright © 2026 Jaime Costiglio · Custom site by Moonsteam Design

Privacy Policy