• Home
  • Blog
  • About
  • Contact
    • Disclosure
    • Privacy Policy
  • SHOP
  • Widget area for main menu

    • Email
    • Facebook
    • Instagram
    • Pinterest
    • Twitter
    • YouTube
  • Skip to primary navigation
  • Skip to main content
  • Skip to primary sidebar

Jaime Costiglio

build - paint - sew

  • BUILD
    • BEDS
    • BENCHES
    • DESKS
    • DRESSERS
    • GAMES & TOYS
    • SCRAP WOOD
    • SHELVES
    • STORAGE
    • TABLES
  • TOOLS
  • PAINT
    • CRAFTS
    • FURNITURE
    • HOME DECOR
  • SEW
    • GIFTS
    • HOME DECOR
    • POUCHES
  • HANDBUILT HOLIDAY
    • 2021
    • 2019
    • 2018
    • 2017
    • 2016
    • 2015
    • 2014
    • 2013
  • GIFTS
    • BABIES
    • KIDS
    • FOR HER
    • FOR HIM
    • TEACHERS
    • WEDDINGS
  • SEASONAL
    • 4TH OF JULY
    • FALL
    • HALLOWEEN
    • CHRISTMAS
    • SUMMER
    • SPRING
    • ST. PATRICK’S DAY
    • THANKSGIVING
    • VALENTINE’S DAY
    • WINTER
  • SALTBOX PROJECT
    • BATHROOMS
    • DINING ROOM
    • EXTERIOR
    • FAMILY ROOM
    • FOYER / MUDROOM
    • KIDS BEDROOMS
    • KITCHEN
    • LIVING ROOM
    • MASTER BEDROOM
    • PLAYROOM
  • SCROLL SAW

Doll Size Farmhouse Bed #10

February 7, 2012

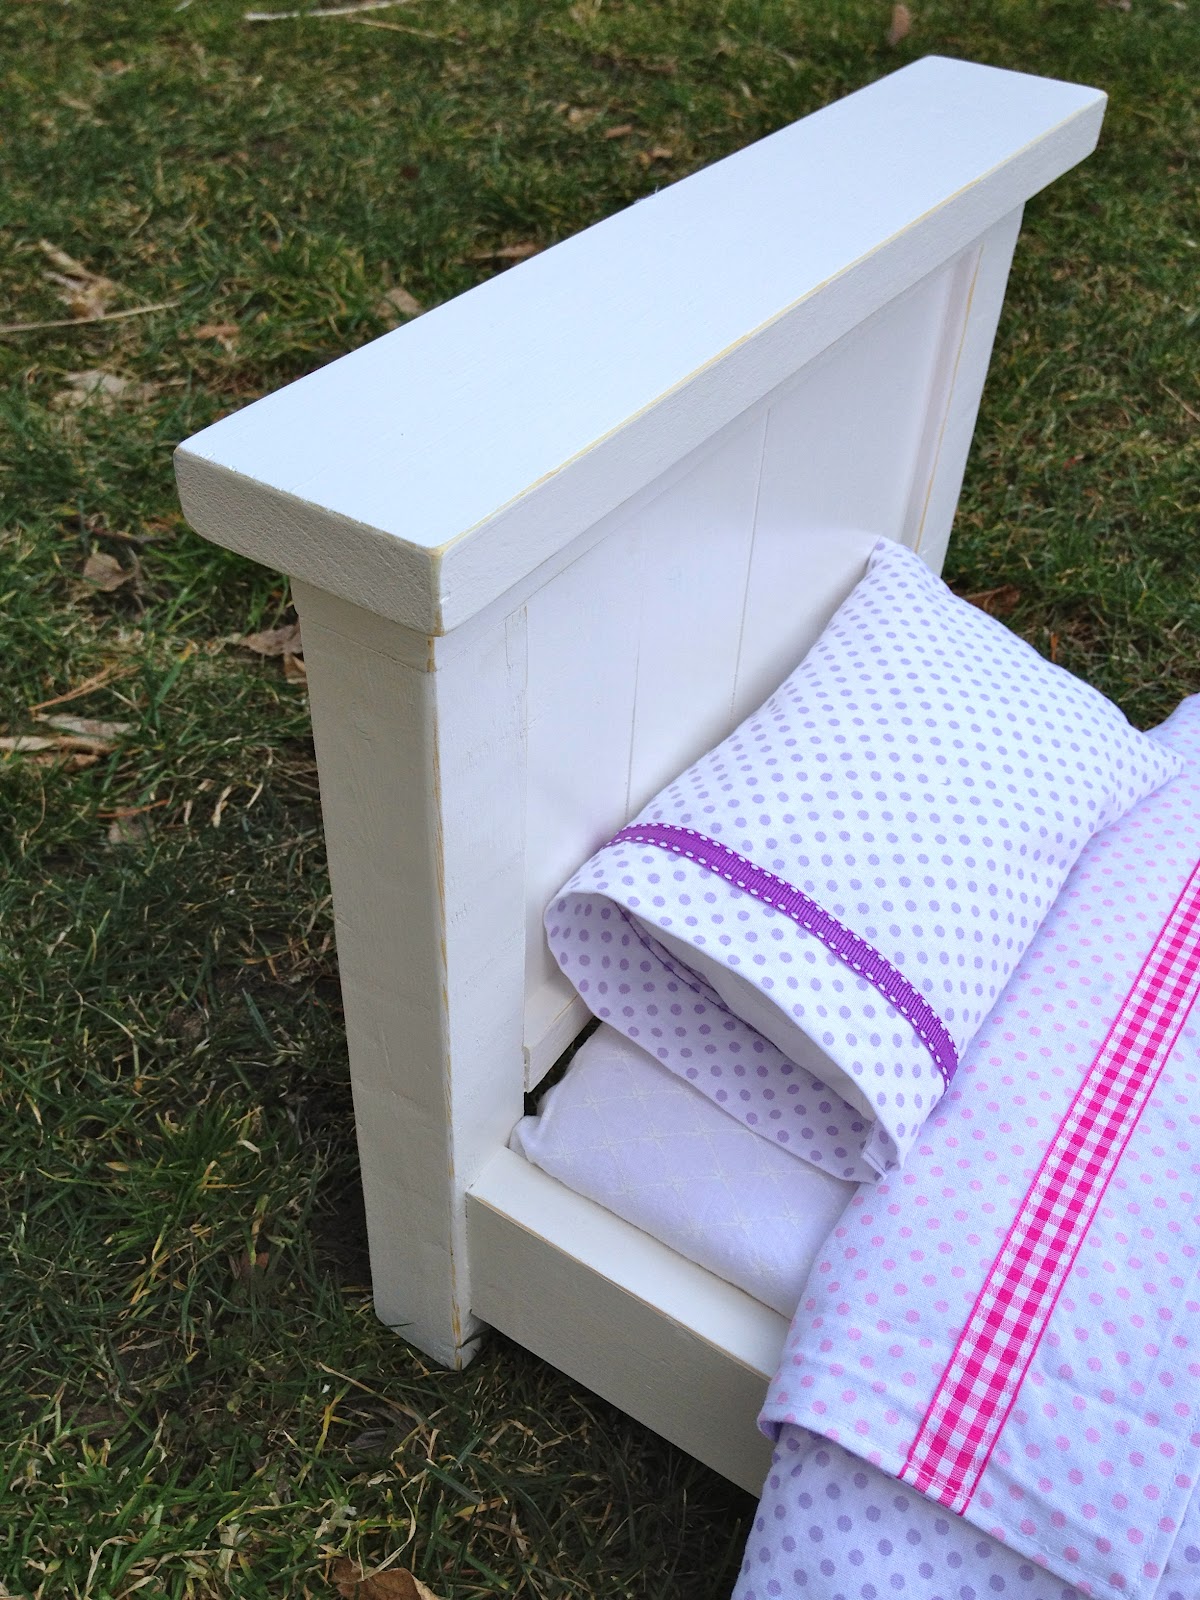
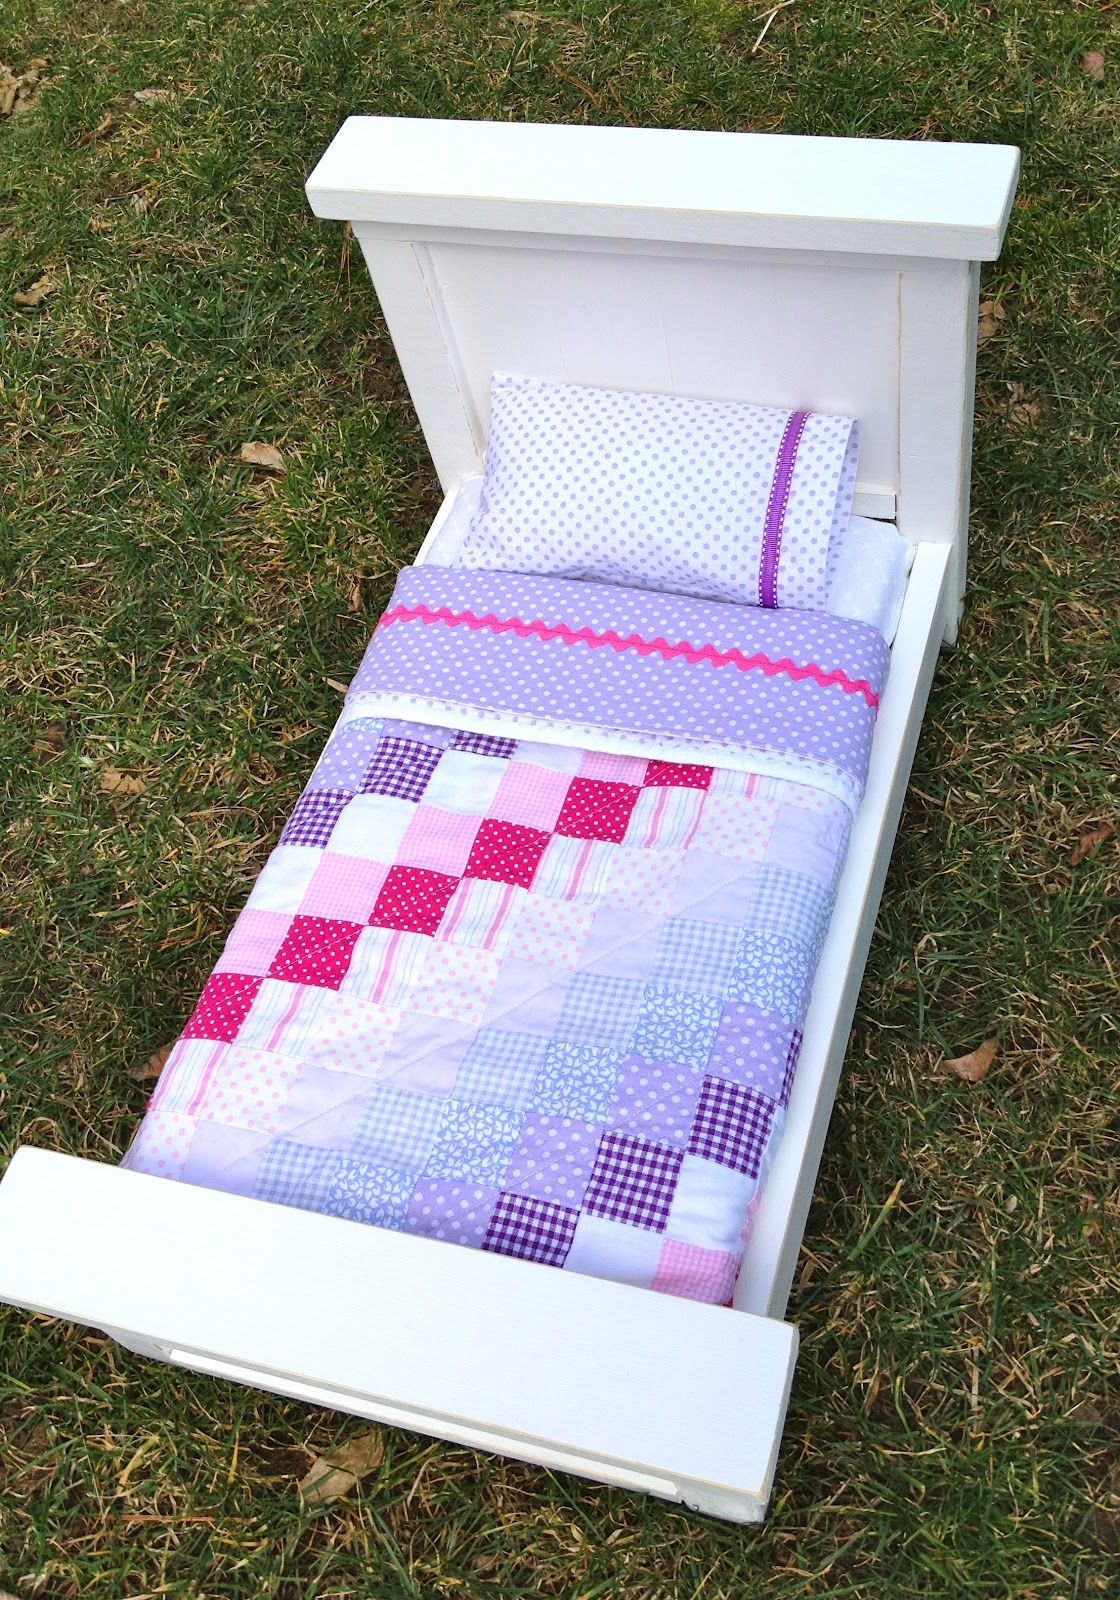
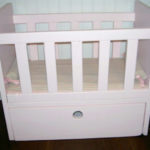
Built: Farmhouse style doll bed with bedding:

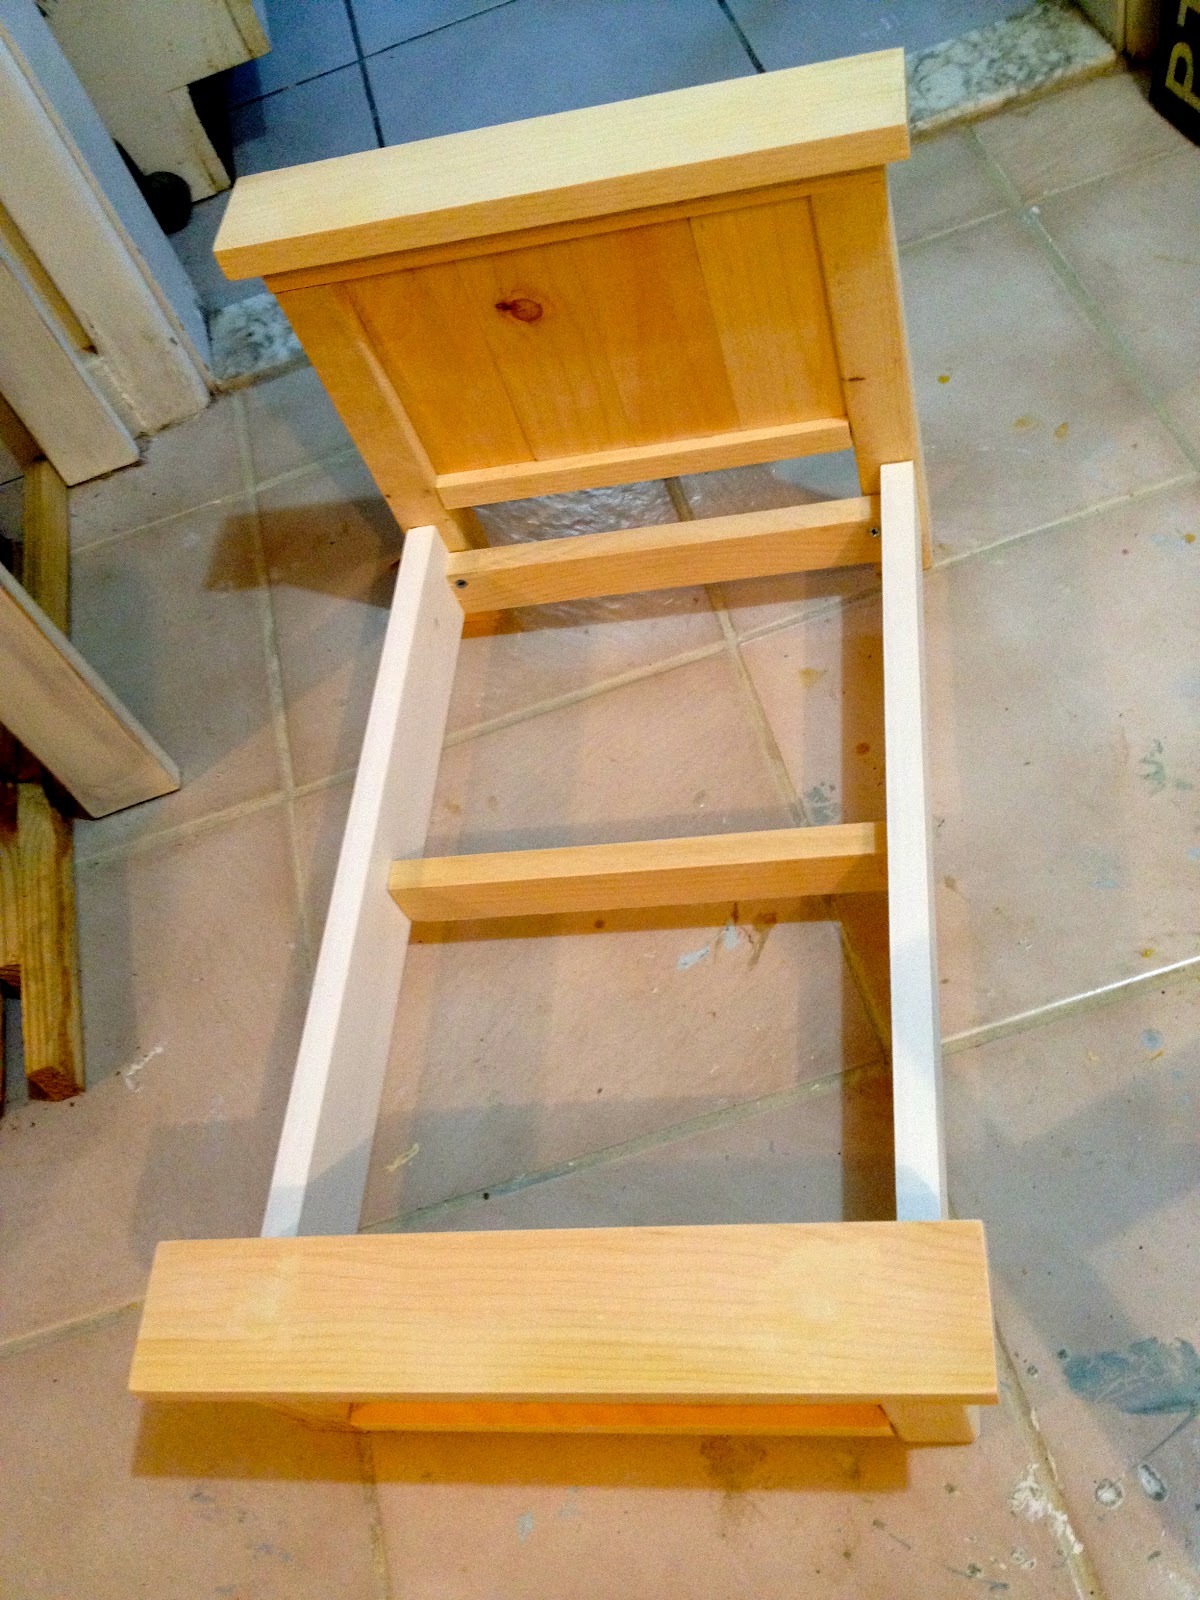
I modified Ana White’s plans here, removing one slat to make the bed narrower.

A special request for a little girl’s birthday, she wanted pink and purple bedding.

Here’s how I made the bed and bedding:

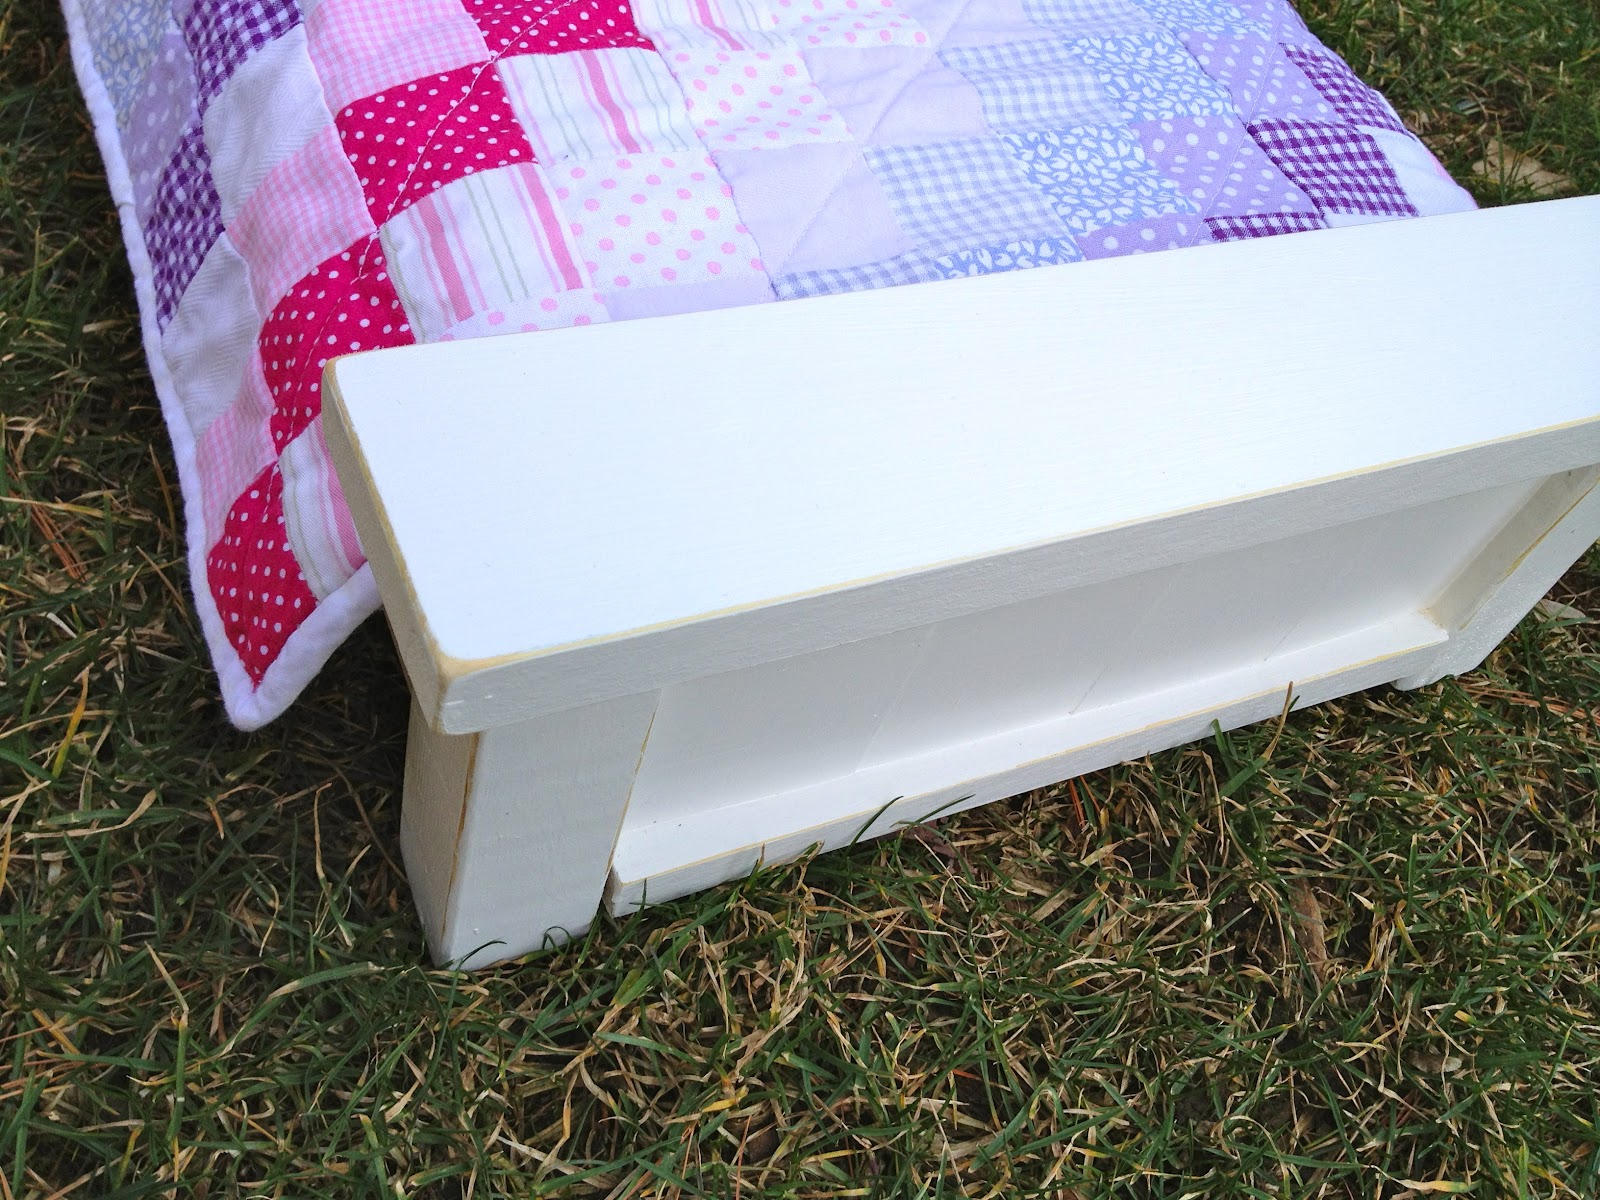
1. Construct the bed per Ana’s plans here, modifying the width one less slat:
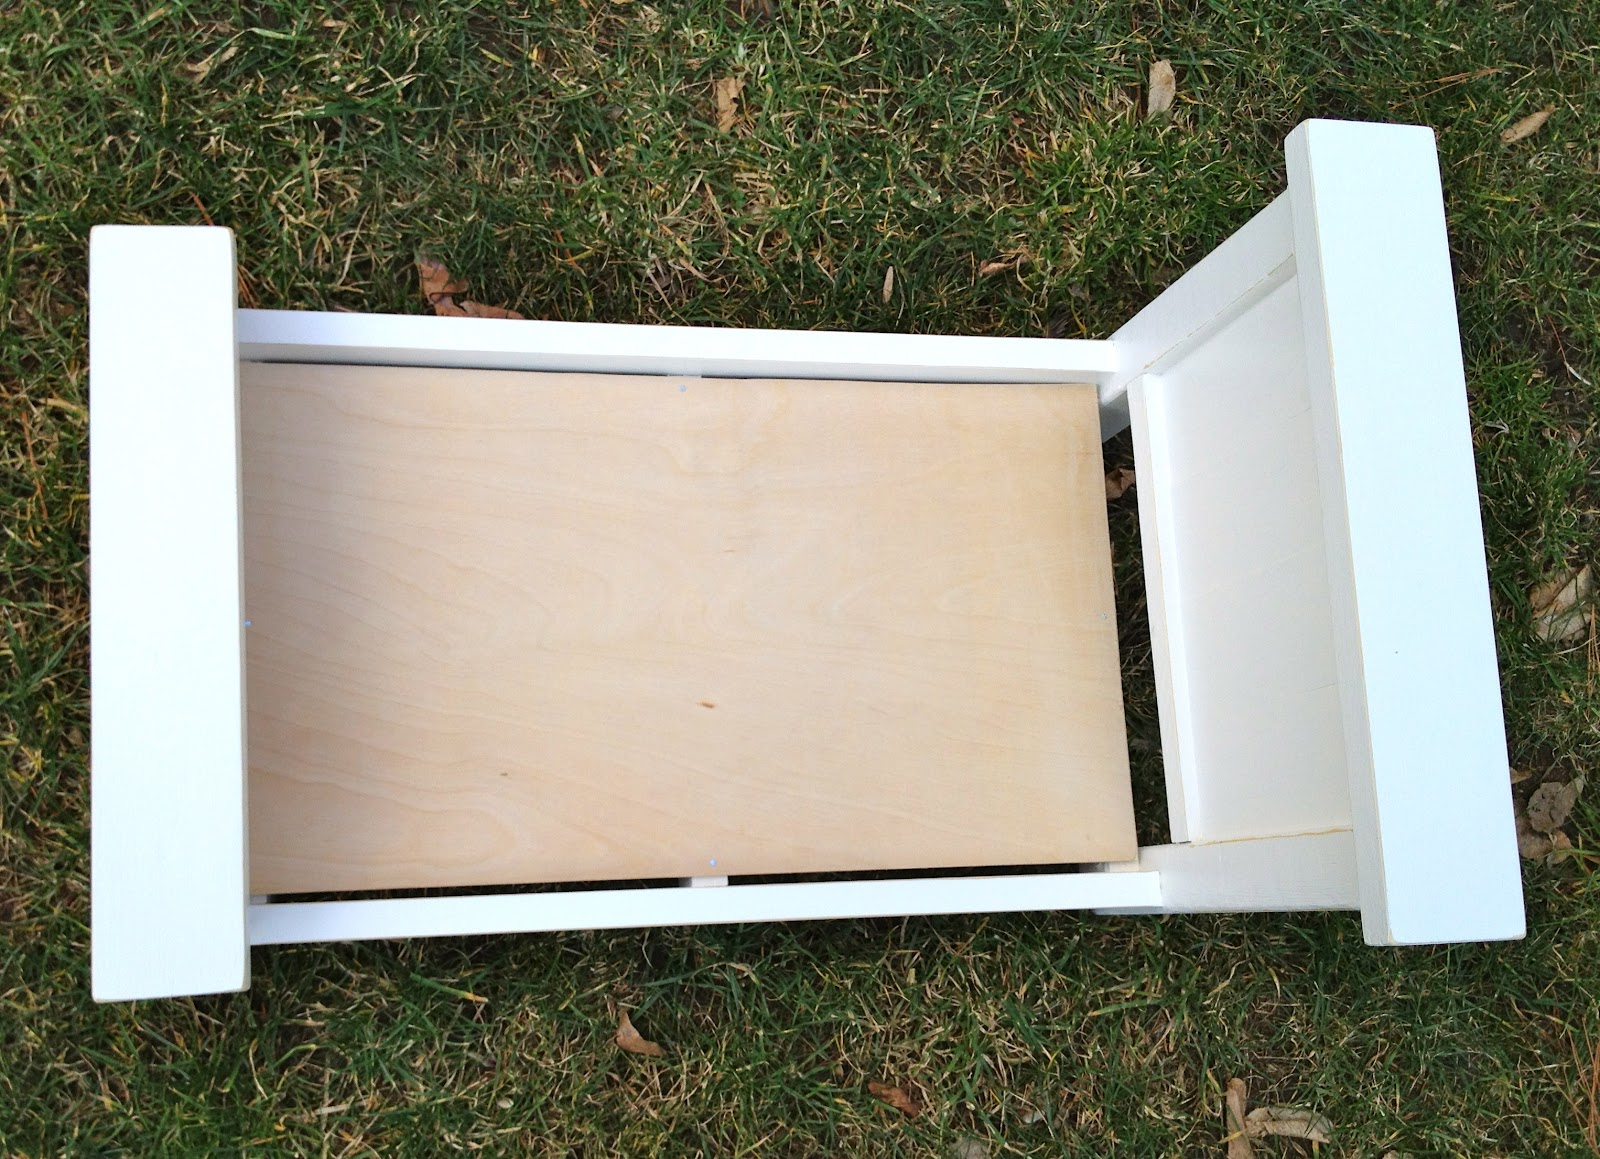
2. Prime, paint two coats Behr Swiss Coffee.
Lightly distress edges and seal with wipe on clear satin poly.
Attach mattress base piece:

3. The mattress is made from mattress topper foam, cut to size, wrapped with quilt batting and covered with white cotton sewn shut:

4. For the quilt cut 2″ strips and layout pattern:
5. Strip piece then sew all rows together.
(For a more complete quilt assembly how-to click here.)

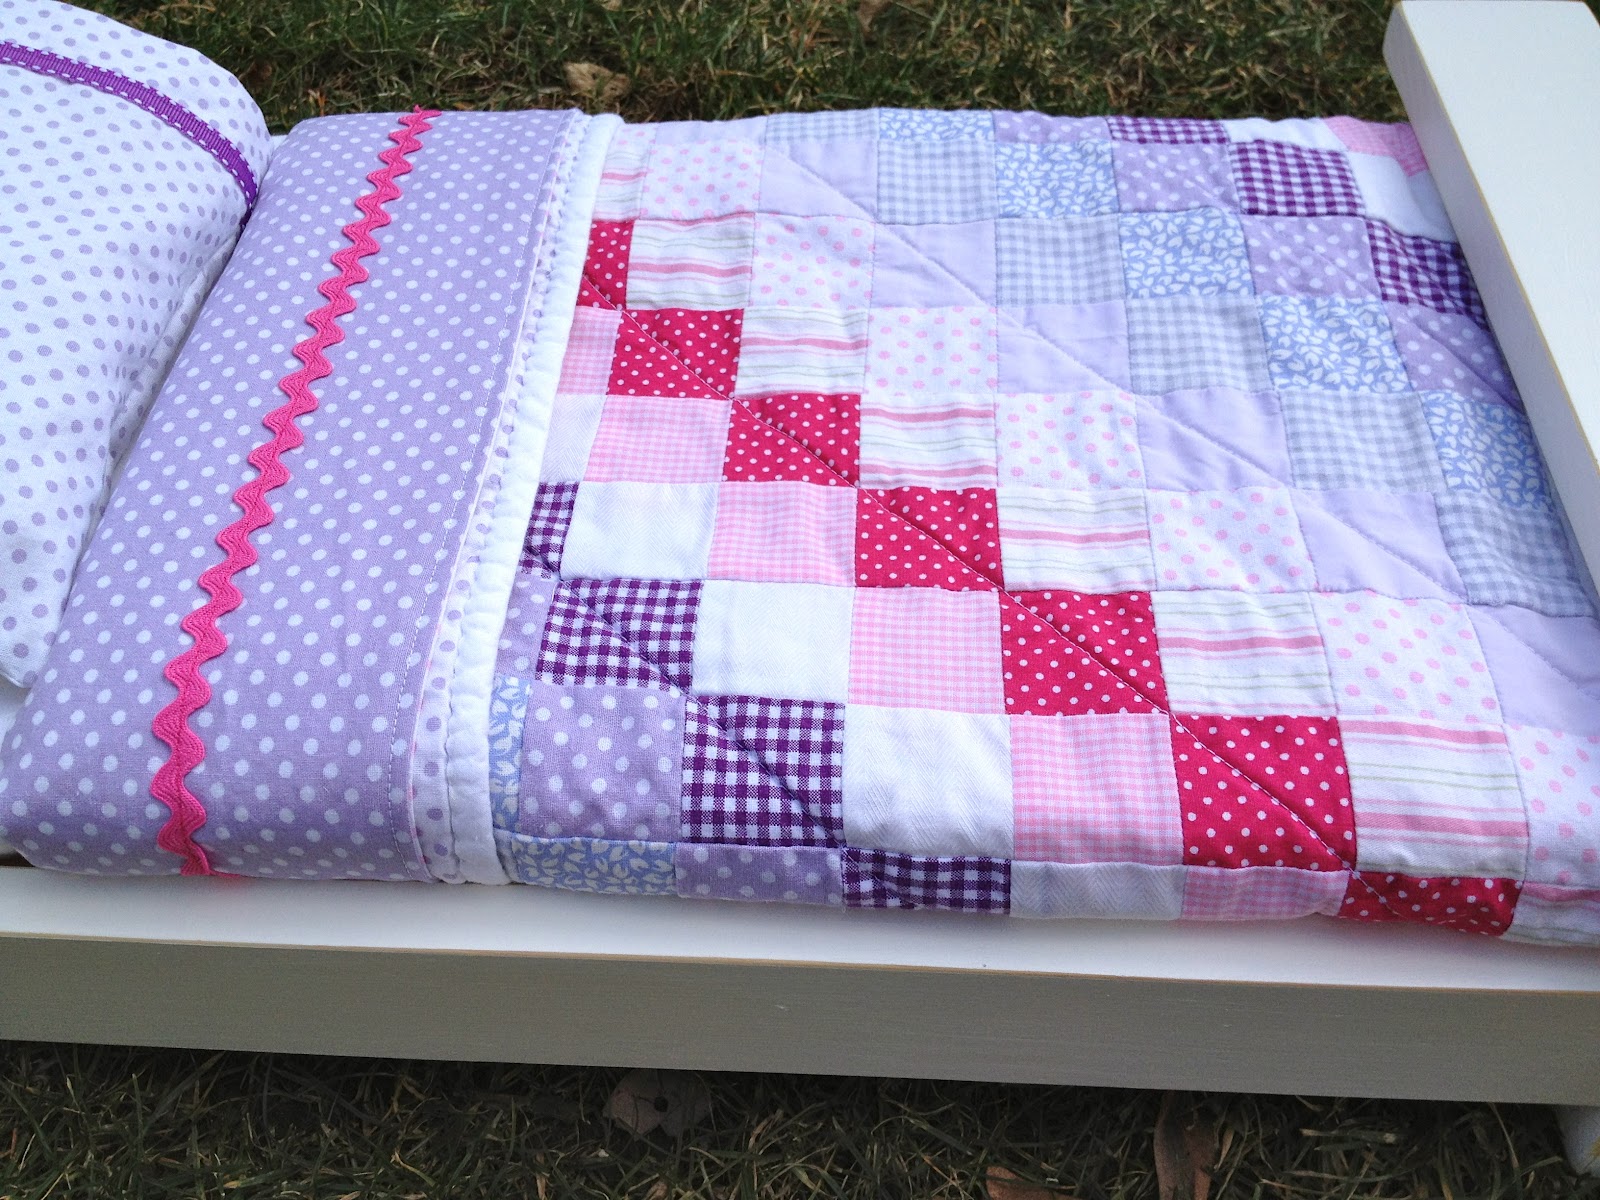
6. The quilt is backed with polka dot fabric and edged with white cotton binding:

7. The sheet is double sided, sew your ribbon details first then right sides together.
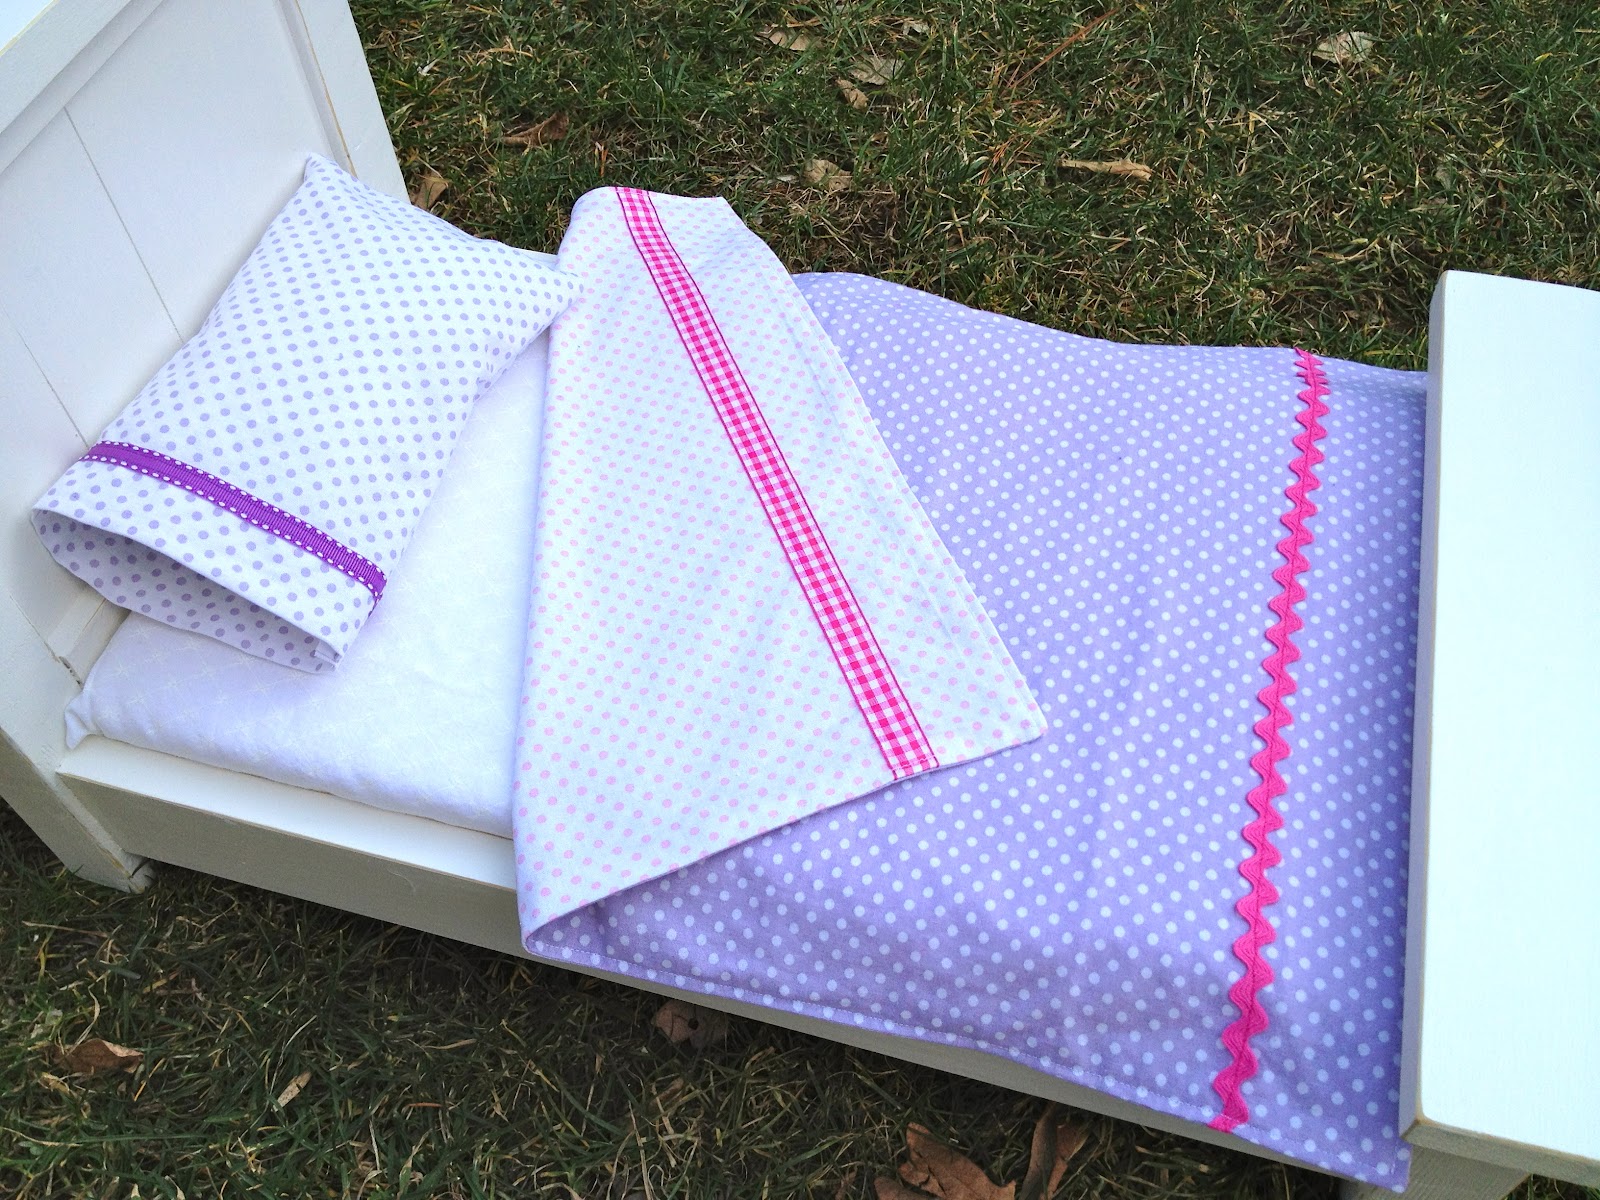
Perfect fit for the American Girl dolls.

Happy Birthday Caitlin!

You may also like...

  • DIY Orange Doll Bunk BedsDIY Orange Doll Bunk Beds
  • DIY Vintage Style Doll CribDIY Vintage Style Doll Crib
  • DIY Flatware Storage BoxDIY Flatware Storage Box
  • DIY Doll Crib with Storage DrawerDIY Doll Crib with Storage Drawer
Share this post:

Filed Under: BEDS, BUILD, DIY, FURNITURE, GAMES & TOYS, GIFTS, KIDS, SEW, SEWING3 Comments

Reader Interactions

Comments

  1. Cassie @ Primitive & Proper says

    February 8, 2012 at 1:19 AM

    so so cute!!! i bet your kids are so happy you ca just build all this awesome stuff for them!

    Reply
  2. Amanda @ Serenity Now says

    February 14, 2012 at 2:49 AM

    Precious!! I love the bedding–so pretty. My girls would love this. Visiting from Home Stories A to Z. Hope you'll stop by my blog too. 🙂

    Reply
  3. ukarmymom says

    November 7, 2012 at 2:14 AM

    Jaime, My husband just finished the Farmhouse Bed from Ana White as directed. I would like to make a quilt like yours but to fit the other dimensions. I just measure the foam mattress and it is 27 x 21 as my husband lengthened it when someone said it was hard to get the doll in it. So how many different fabrics do I need for the quilt and should I do 3 inch squares or what. I don't sew, so I need to keep it simple..lol. We are going to VA in less than a week so I need to get busy so I can take it to our granddaughter's. Any help would be appreciated. Thank you! Alicia

    Reply

Leave a Reply Cancel reply

Your email address will not be published. Required fields are marked *

Primary Sidebar

Hi! I’m Jaime

Jaime Costiglio

Hello!

Thank you for stopping by.
Join me for lots of DIY.

Read more

Get new posts via email

Handbuilt Holiday: Gift Project Plans

handbuilt holiday gift project plans

Collection of DIY gift project plans to build.

The Home Depot Tool Prospective

THD Prospective

Tools to consider for the DIYer.

Archives

The Home Depot Logo
Copyright © 2026 Jaime Costiglio · Custom site by Moonsteam Design

Privacy Policy