A knock off flatware storage box.
Except the flatware is still in the kitchen drawer so we’ll call this the homework supplies box.

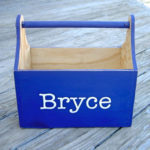
I made a knock off of Pottery Barn’s flatware storage box:

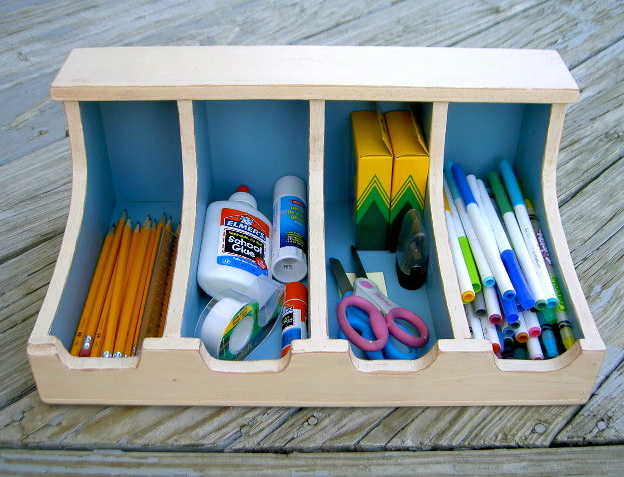
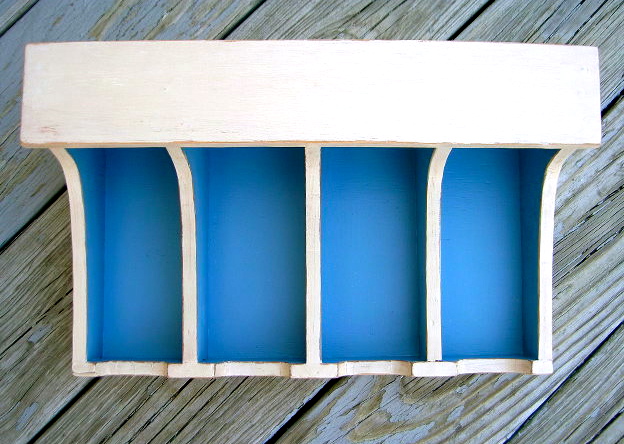
Minus the French and add some color on the interior and you have this:
The typical after school homework session begins and immediately I get:
“Mom, I can’t find a pencil, I need a red marker, where’s the glue stick?”
No more, it’s all here in one box ready for homework time.
Here’s how I made the supply box:
1. Using 1/2″ plywood scraps cut your pieces:
1 – top 16.25″ x 3″
1 – bottom face 16.25″ x 2″ with four notches jigsawed (see picture)
5 – dividers 9″ x 5.5″ (see picture below)
Use 1/4″ plywood:
1 – back 15.5″ x 5.5″
1 – bottom 15.5″ x 10″

2. Nail dividers to bottom face piece and back:
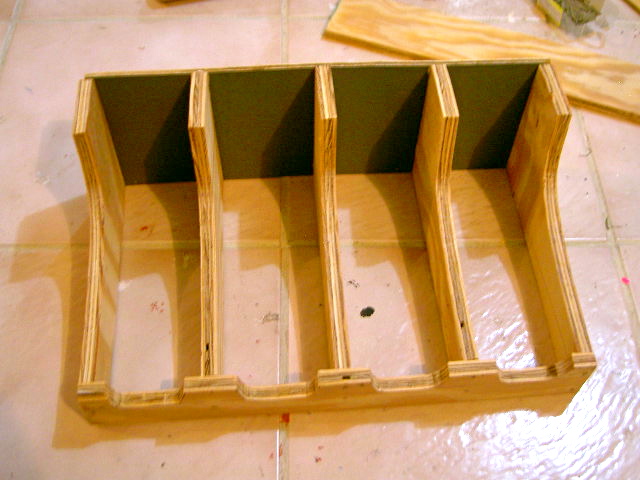


3. Nail bottom and top on:

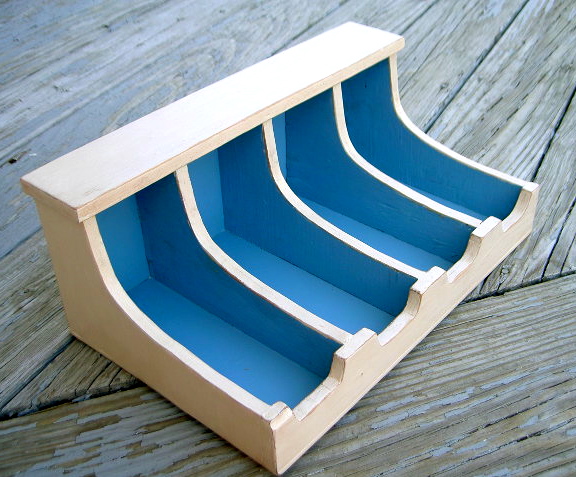
4. Paint interior 2 coats BM whipple blue.
Paint exterior 2 coats BM durango dust.
Distress with sandpaper.
Stain with Minwax cherry.
Seal with satin poly.

Detail of the distressing:
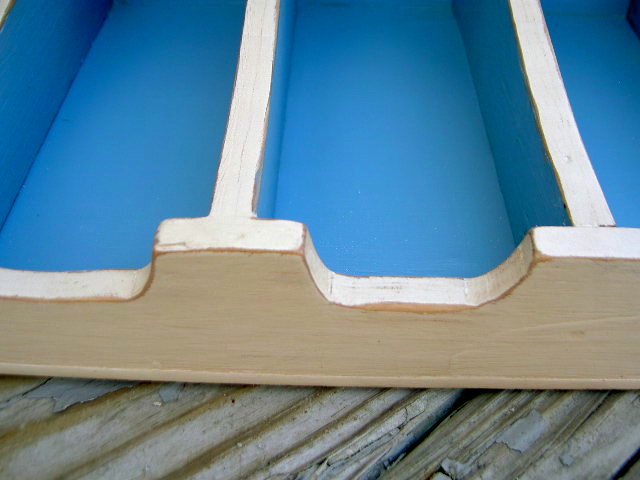
Much more fun with the blue interior.
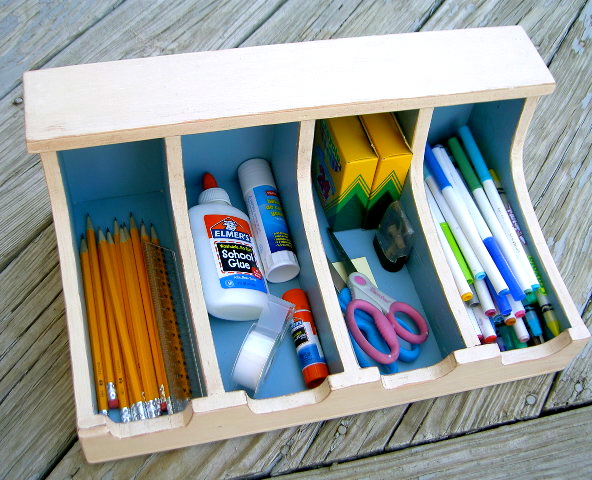
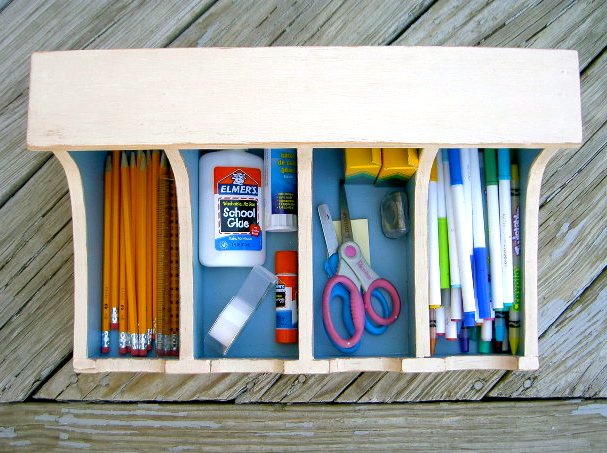
Now fill it up with all the necessary supplies:

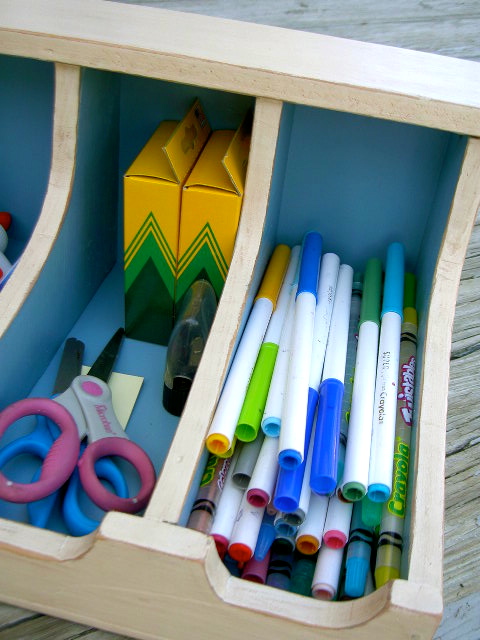
No more searching for pencils, glue, rulers. Let the homework begin with ease.


Jaime – what a great idea to use it to hold paper supplies! So functional and cute.
I agree, much more fun with the blue interior.
What a great idea!
Oh no, no… "F" is for Fantastic! I love this! I loved it when I saw the original and now I love the school supply box! Great idea!
Susan
i want to make one of these tomorrow. thanks. for the tutorial
Gorgeous! I love the idea and you did a great job recreating this organizer. Please come and link up at my Mommy Monday linky party!
YOU ROCK MY SOCKS! This is THE BEST!!! What a great idea!! I love yours even more than the inspiration version!
Jaime, that is AWESOME! I love the blue paint. I can think of lots of uses for this. I think I'm going to try to make one. 🙂
Yeah, I wish I was this handy. You are amazing and the tray for school supplies looks terrific. Found you through A to Z link party.
Oksana @ http://www.ordermatters.com/blog
Looks awesome! My crew goes back in two weeks so we are getting our homework station set up this week too.
Emily
domesticdeadline.blogspot.com
What a fun idea. Love how it is all organized & in one spot. Would love for you to link this up to my (wow me) wednesday link party going on right now on my blog. 🙂 (I'm a new follower, too!)
Ginger
gingersnapcrafts.blogspot.com
I'd love for you to come and link this project up to my party. I just love it and am so impressed that you made the whole thing.
Love this idea for a craft room too. Pinned it to my craft room idea board 🙂
It looks great, love the blue!!!
WOW! Love the idea and tutorial!!
I'd love for you to link up to our Crafts for Under Twenty Somethings party going on now until Saturday!!
Melanie
http://bearrabbitbear.blogspot.com/2011/08/crafts-for-under-twenty-somethings_24.html
I would never have thought about using a flatware box for school supplies and I love the idea. Thanks so much for sharing, new follower!
Brie from darlingdoodles.blogspot.com
Oh No! Another great project I HAVE to make!
THIS is exactly what I have been looking for, for in the office. I just didn't know it until now!
Thanks you for posting the tutorial.
I am a new follower.
Wow! Great job. I love how you use it for craft/homework supplies. I would love to have you share this post at my new Saturday link party at http://rustic-crafts.com 🙂
Ha! I was just joking to my boyfriend that I was going to get him a silverware tray to put all his knick-knacks on this desk in. I guess you proved it really is a good idea! I'll have to show him. 😉
Wow, you are not only clever you are also super organised! I'm very impressed!
Best wishes,
Natasha @ 5 Minutes Just for Me
Great project!
Love it! Great job!
I love your idea! It's perfect!
This comes under the heading of 'why on earth didn't I think of this earlier?'. A homework station? D'oh. Would save so much time. Yours looks terrific!! Might just have to steal this idea…
Love this. So glad you did the tutorial because I definitely want to make one of these!
What a great tutorial. Love everthing about this and so many uses! I have it up on my FB!
Made two for our 8 & 5 year old grandsons. Great organizer for their school supplies!