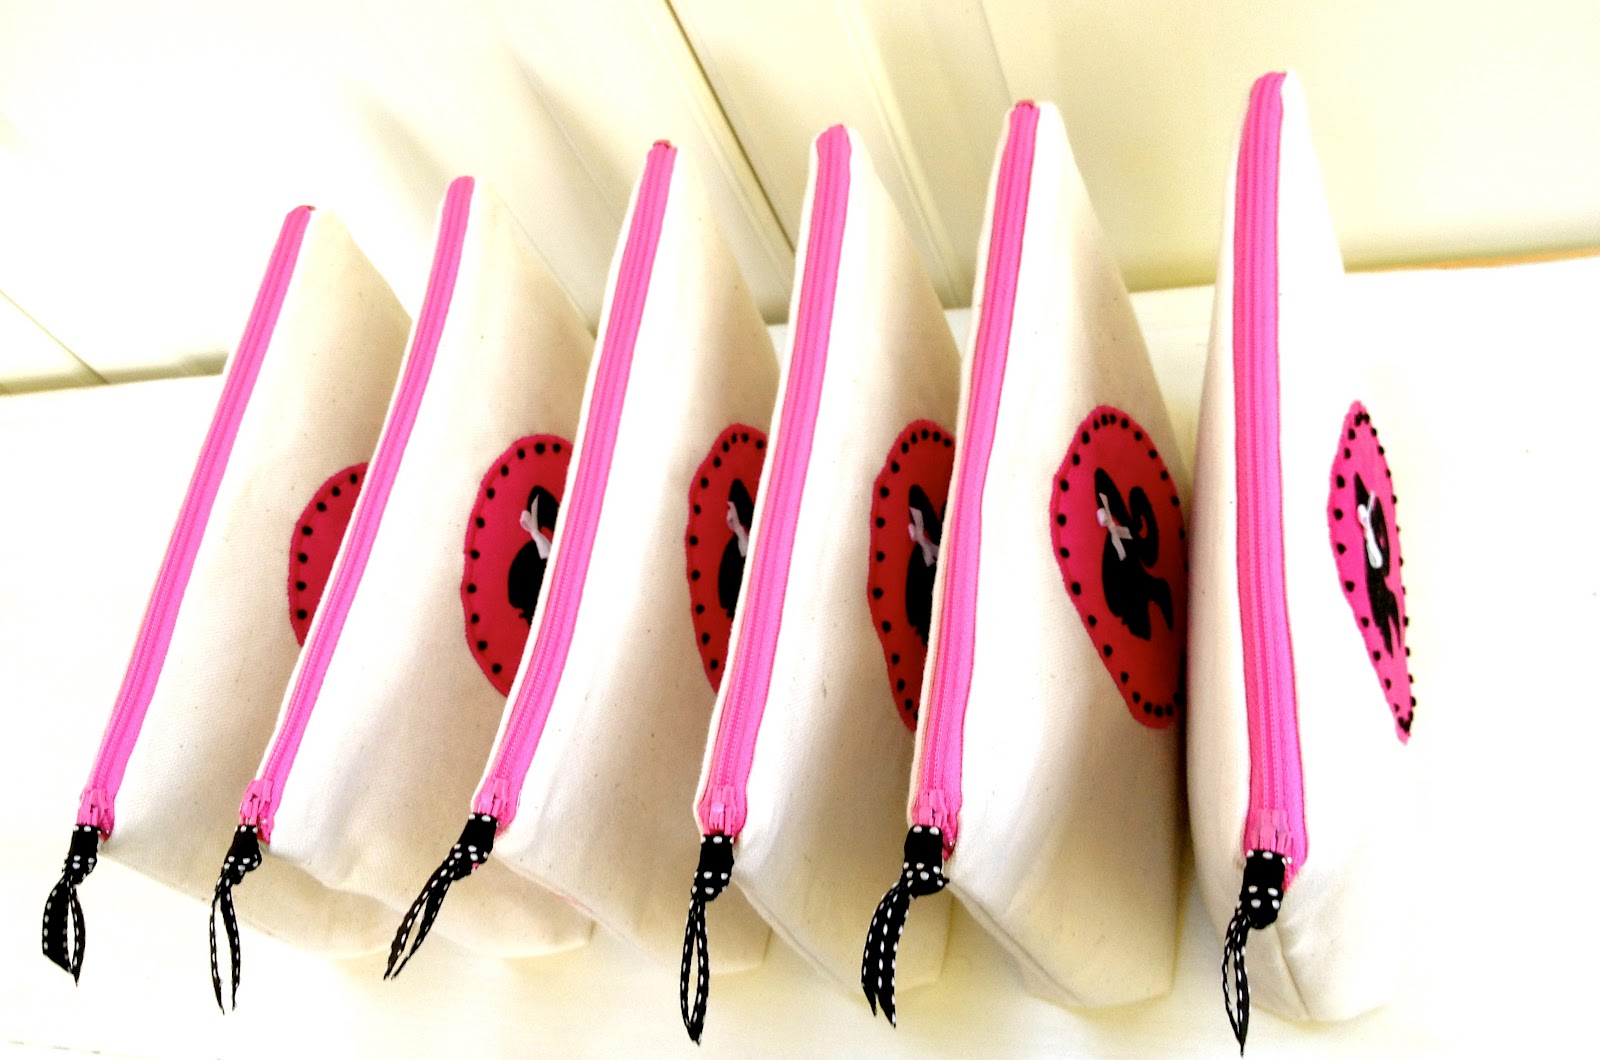
Sew: Barbie silhouette pouches
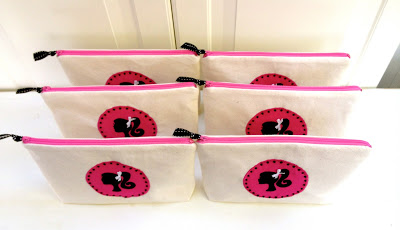


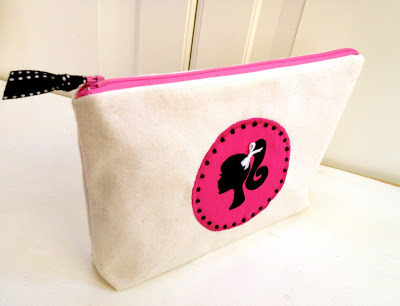
Birthday party favors for my girl #2 who is turning 6.

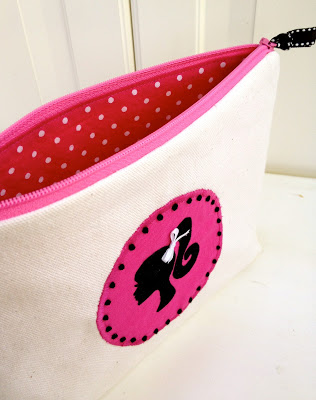
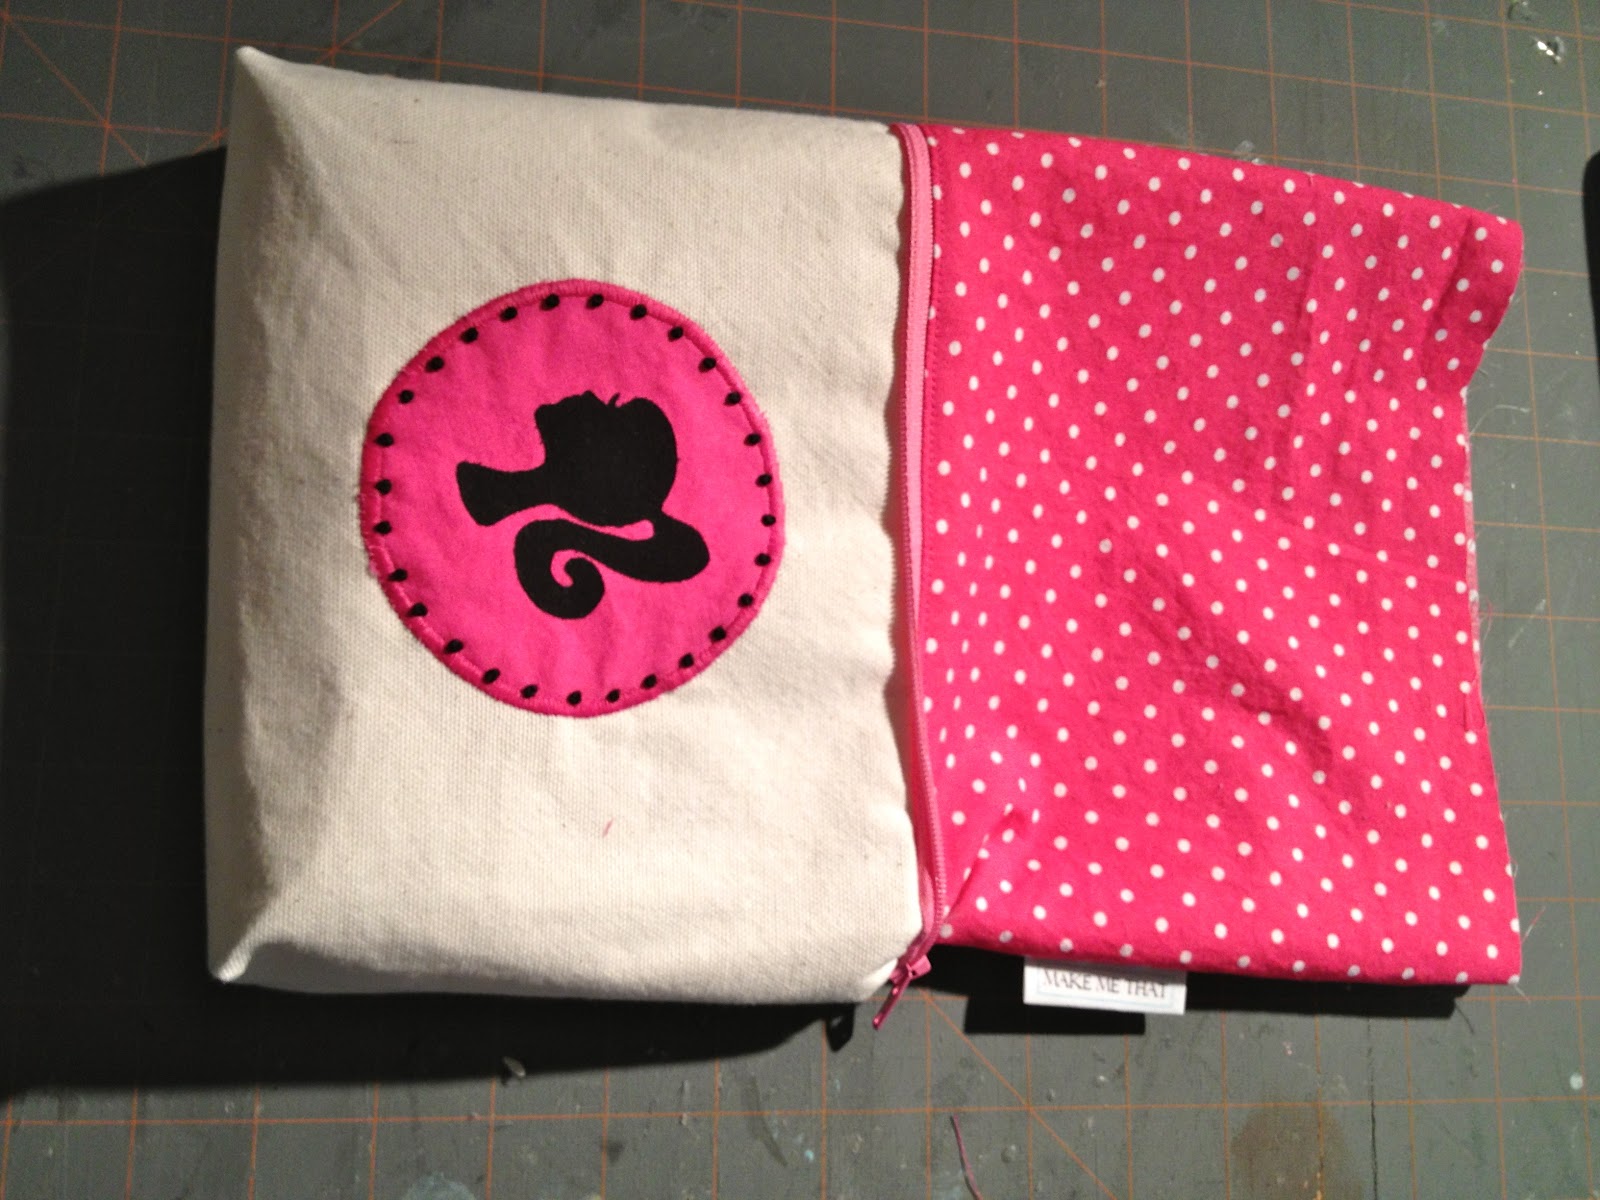
Complete with pink and white polka dot lining:

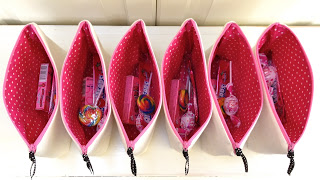
And some candy goodies:

Here’s how I made the Barbie pouches:
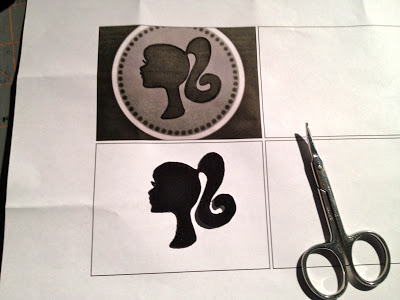
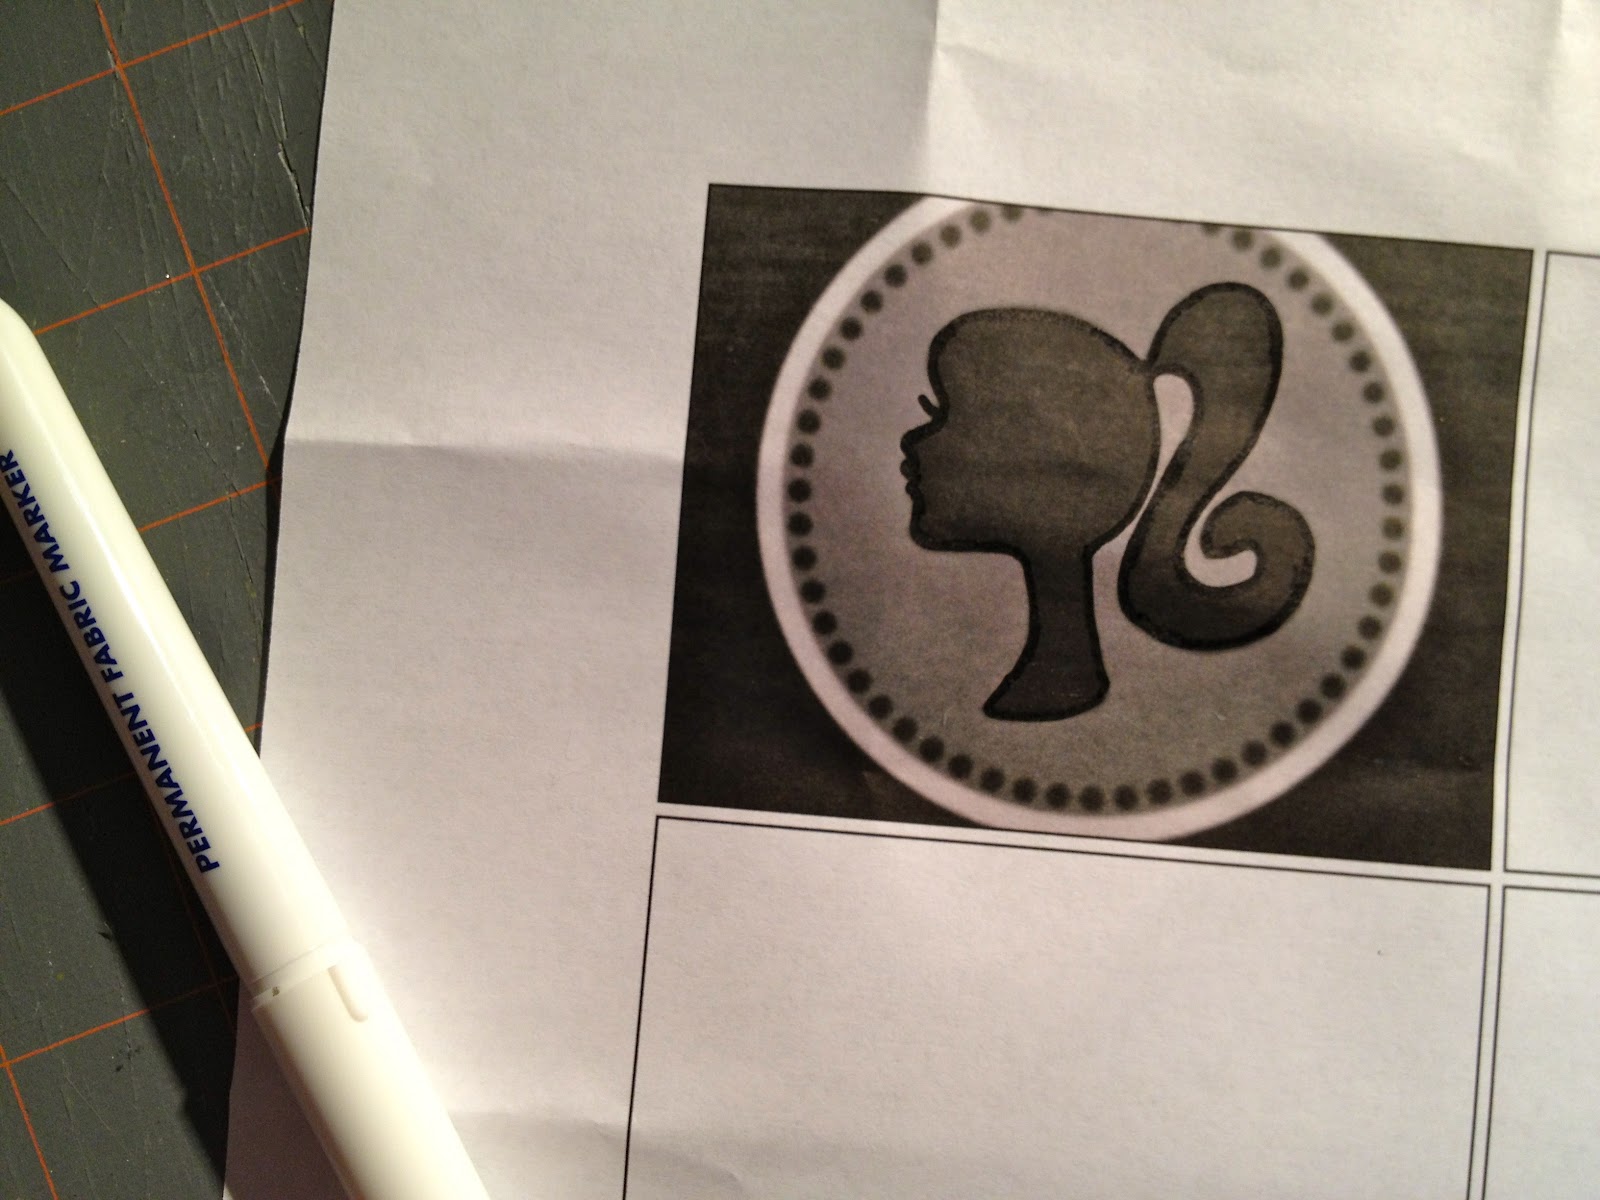
1. Using the cupcake toppers graphic I ordered from Party Paper Creations on Etsy, take a screenshot of the silhouette and print in black and white.
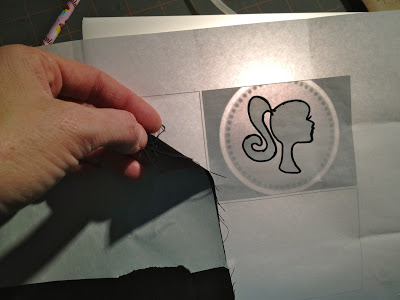
Trace the outline of the silhouette with a black Sharpie:
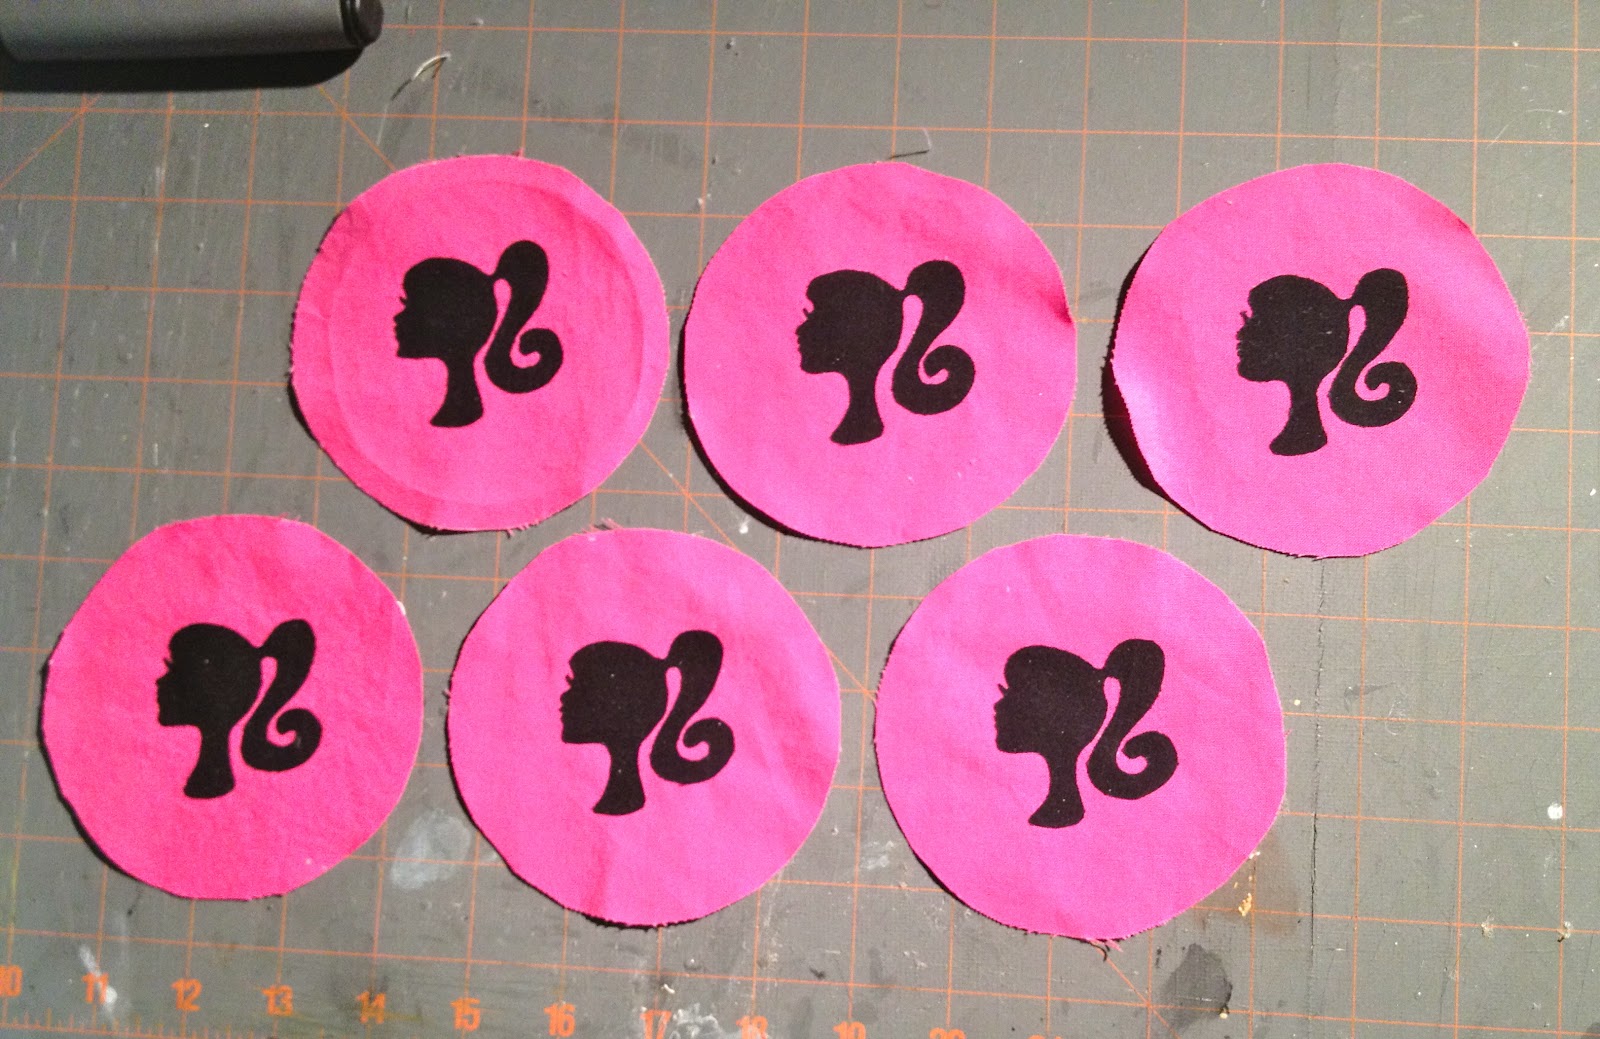
2. Apply double sided fusible webbing to the wrong side of black cotton fabric.
Using a light box place the silhouette right side down then fabric right side down on top:

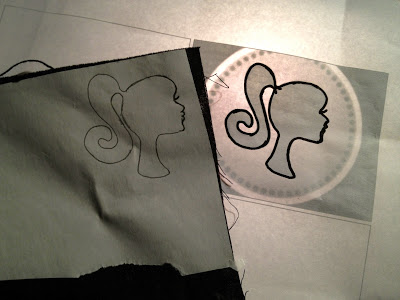
3. Trace outline of silhouette onto paper fusible backing:

4. Cut out fabric on traced line, be extra careful around the eyelashes:

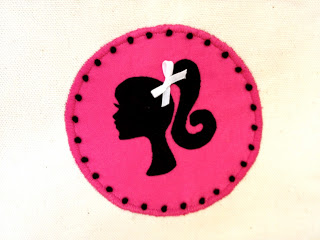
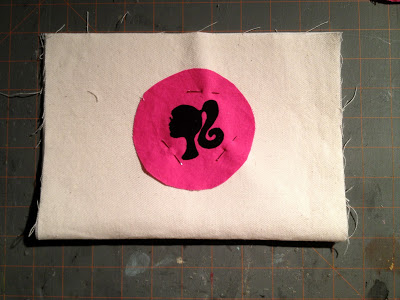
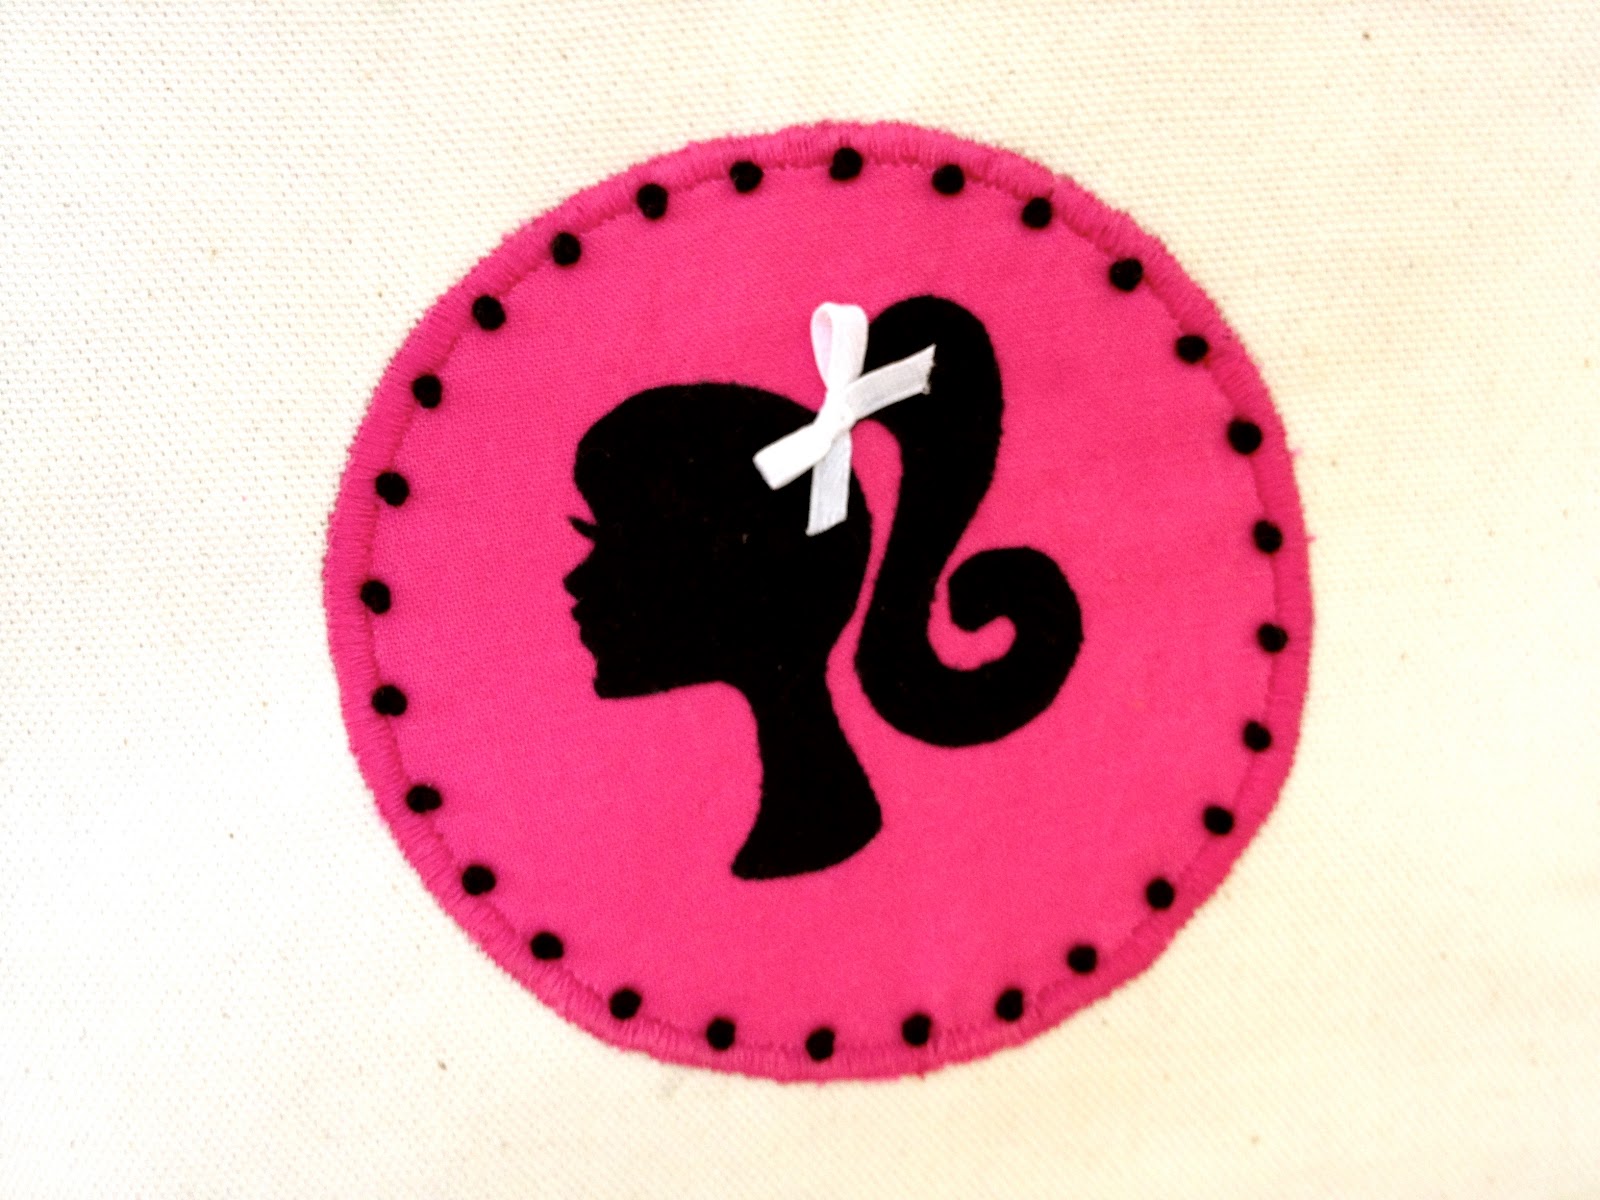
5. Iron silhouette onto pink cotton circle, in the end I used 3.5″ circles:
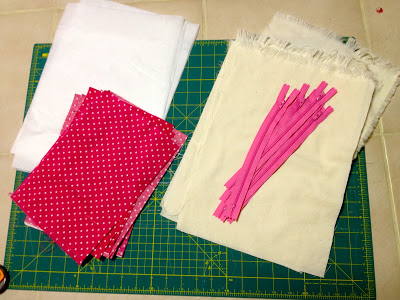
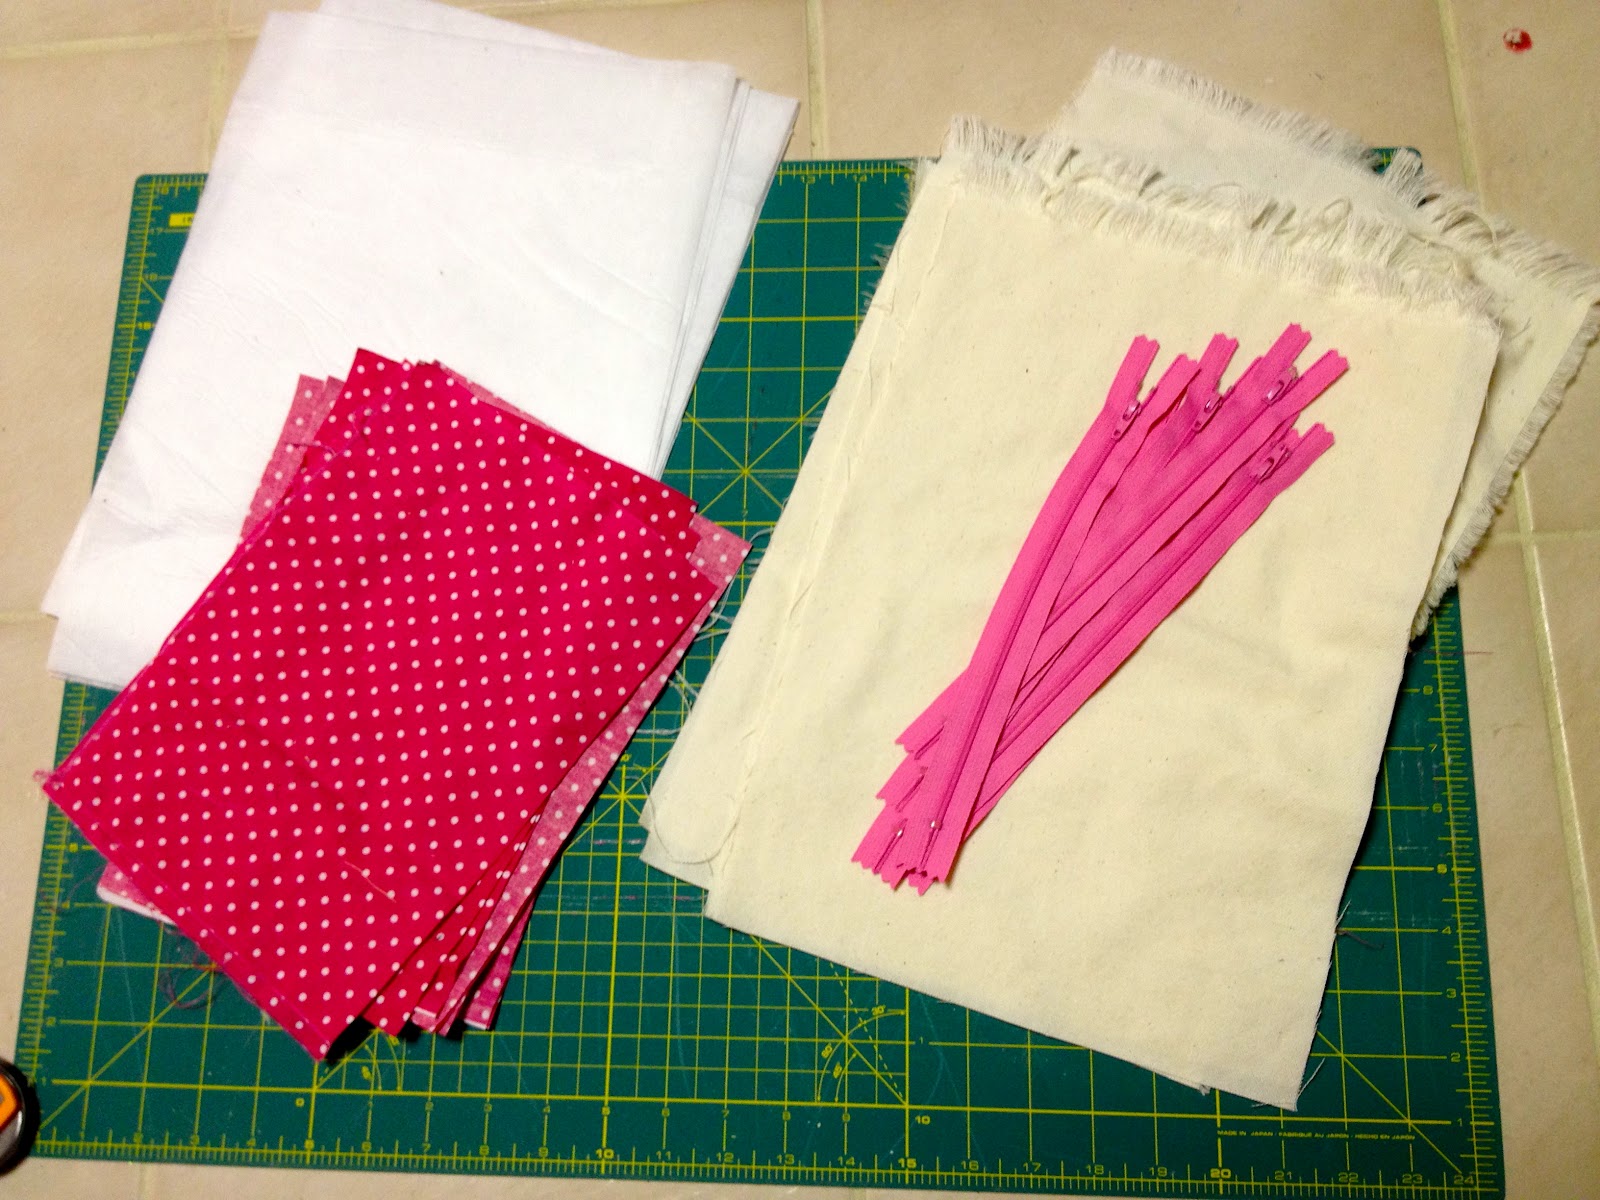
6. Prepare pouch pieces:
1 – cotton canvas 10″ x 14″
1 – med. weight fusible interfacing 10″ x 14″
2 – polka dot lining 10″ x 7″
1 – 9″ pink zipper
(I buy the zippers in bulk from zip-it on Etsy, she has tons of colors and sizes.)
7. Iron interfacing to wrong side of canvas piece.
Pin pink circle centered on canvas:

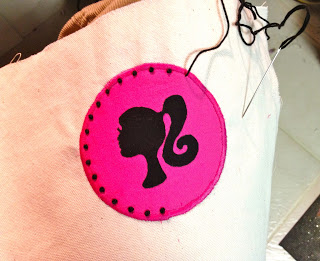
8. Zig zag stitch around pink circle.
Add black french knots on the inside edge of stitches:

9. Add white ribbon bow to ponytail with tack stitch.
Be sure to fray chek the ends.

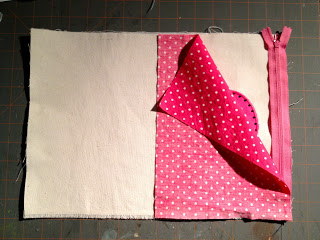
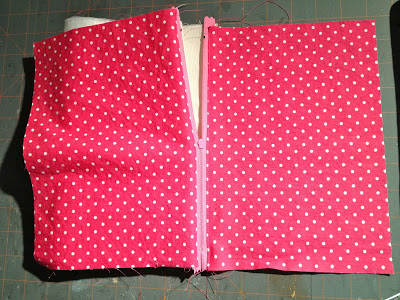
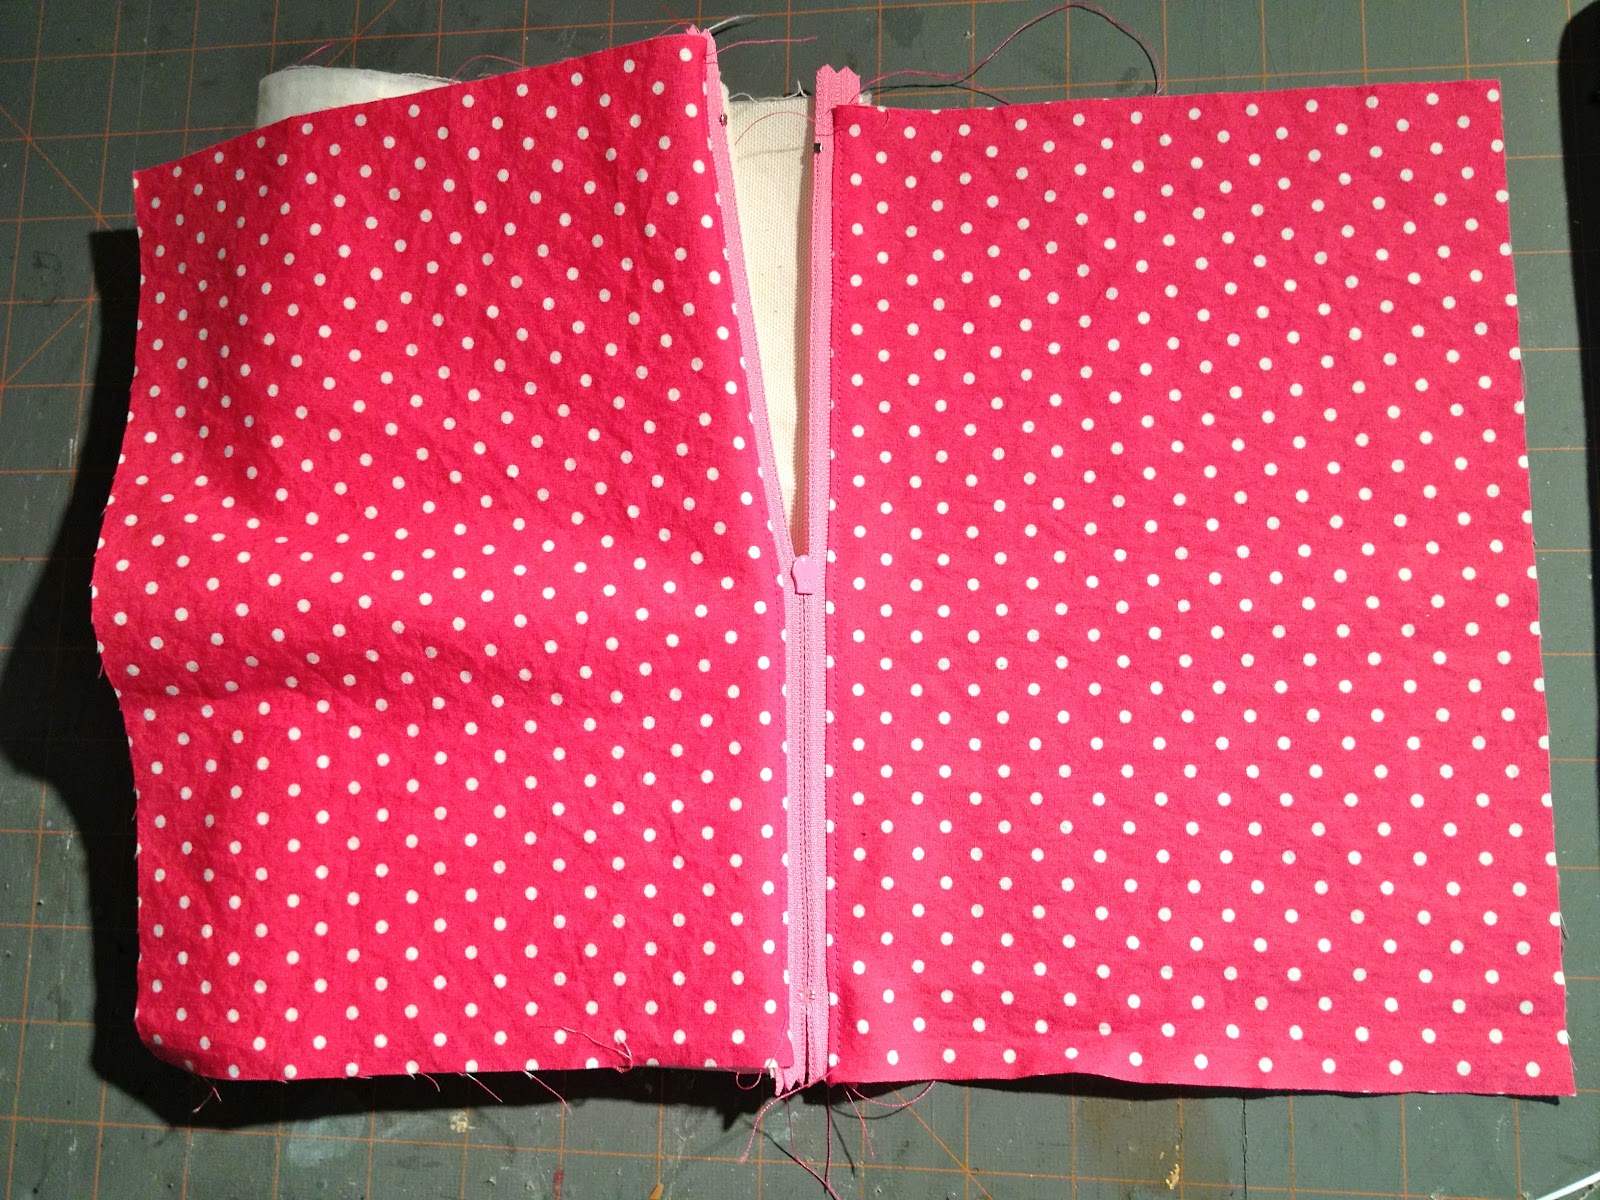
10. Now place zipper at top edge, then lining piece right side down.
Use a zipper foot to sew seam.

11. Be sure to top stitch lining down into pouch as seen here:
This will prevent the lining from getting caught in the zipper.

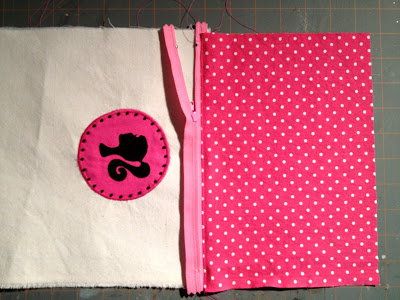
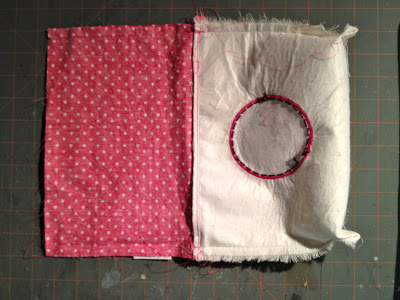
12. Repeat process for other side of zipper attaching to other end of canvas:
13. Then sew side seams and miter corners:

14. Trim off the mitered pieces and turn right side out:
15. Press lining side seams open and press in raw edge 1/2″ at bottom.
Straight stitch bottom edge shut:

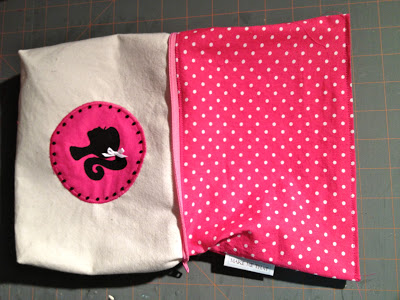
16. Push lining down into pouch.
Add ribbon to zipper pull, again use fray chek on cut ends:

17. Fill with candy or treats:

Ready for all the girls at the party:

And still so sweet on it’s own, Barbie you never grow old.

Disclaimer: The Barbie silhouette image belongs to Party Paper Creations and needs to be purchased from the Etsy shop for personal use.
I’m linking up to:
Whatcha Got Weekend @ Lolly Jane
SAS @ Funky Junk
Weekend Wrap Up @ Tatertots & Jello
Sundae Scoop @ I Heart Naptime
Sister Sunday @ Sisters of the Wild West
Sunday Showcase Party @ Under the Table & Dreaming
Just Something I Whipped Up @ The Girl Creative
DIY Project Parade @ The DIY Showoff
Made by You Mondays @ Skip to My Lou
Making the World Cuter @ Making the World Cuter
Nifty Thrifty @ Coastal Charm
Tuesday Treasures @ My Uncommon Slice of Suburbia
Tutorials & Tips Tuesday @ Home Stories A to Z
Good Life @ A Beach Cottage
Delightfully Inspiring @ Delightful Order
Transformation Thursday @ The Shabby Creek Cottage
Strut Your Stuff @ Somewhat Simple
Share Awesomeness Thur @ The 36th Avenue
Flaunt it Friday @ Chic on a Shoestring
Tickled Pink @ 504 Main
Frugal Friday @ The Shabby Nest
SAS @ Just a Girl
Feathered Nest @ French Country Cottage
Remodelaholics Anonymous @ Remodelaholic
These are awesome! You've got one lucky girl!!
Geniale!!!!complimenti e baci!!!
These are so cute! I l♥ve Barbie!
Really LO-VE-LY !!!!!
Danielle is right, your daughter is very lucky!!!
I love these so much! Pinning them!
These are SO cute! Lucky girls to get to come home with one of these!
Those are adorable! Megan
Here I was all proud of myself for making some of your pouches for Pip's birthday party (which were a big hit btw!!) and then I visit and see your Barbie decoration. I bow to your awesomeness–these are fantastic!!
And this just confirms it. I know you don't sleep. You just get too much done to do that too.
What lucky girls to get one of those as a party favor. I think those are just wonderful.
My little one is too young to be into Barbie yet, but I think this is so cute! Saving this post for a few years down the road when I am sure we will have a Barbie bash! Stopping by from Homework. http://www.bearrabbitbear.com
Those are so cute! What a lucky little girl~she's going to have a fun party.
how fun are those! you've got a lucky little girl!
WOW! This is too cute!
Mrs. Delightful
http://www.ourdelightfulhome.blogspot.com
Too cute! Thanks for the tutorial! I love Barbie!
http://www.facebook.com/Shabby.Chic.Creationz
Too cute! Thanks for the tutorial! I love Barbie!
http://www.facebook.com/Shabby.Chic.Creationz