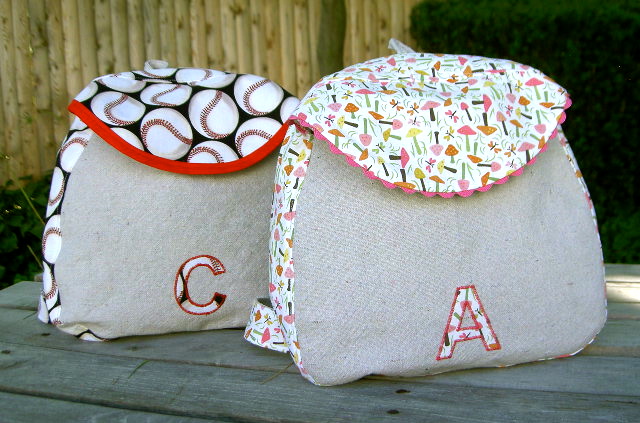
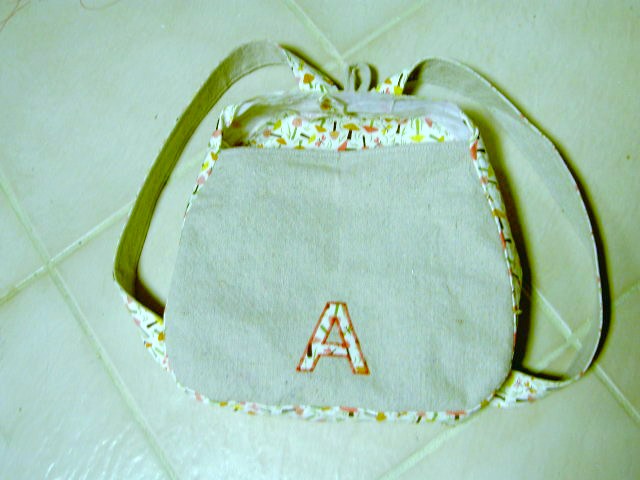
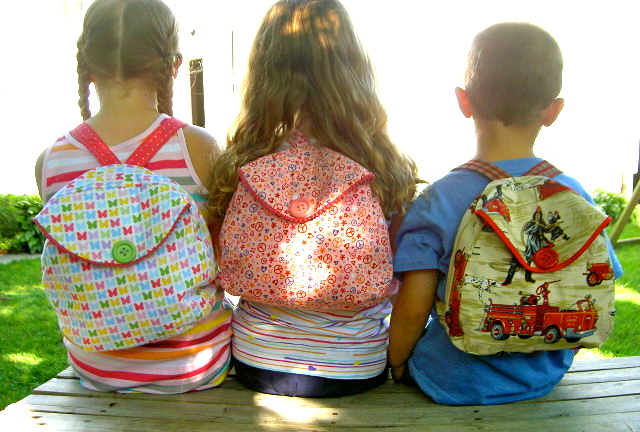
Canvas backpack with fat quarter fabric.

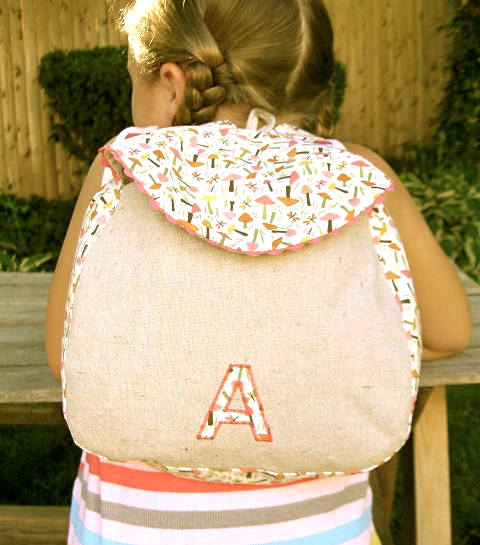
Kid size.
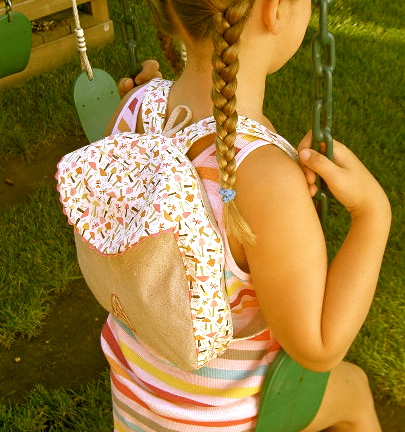
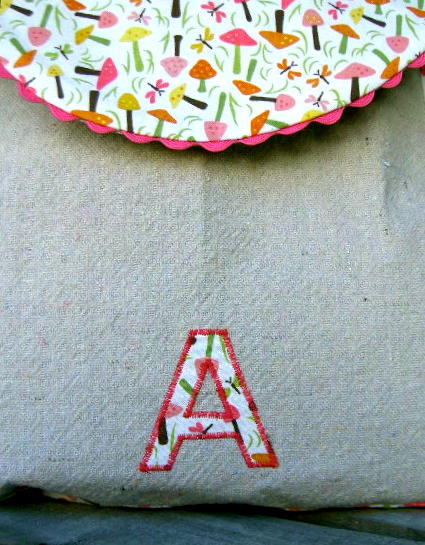
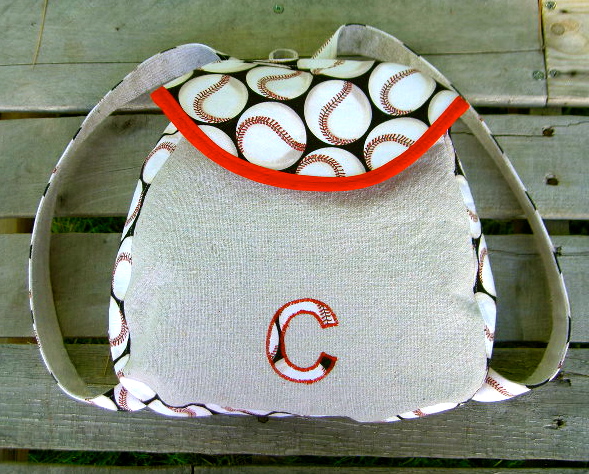
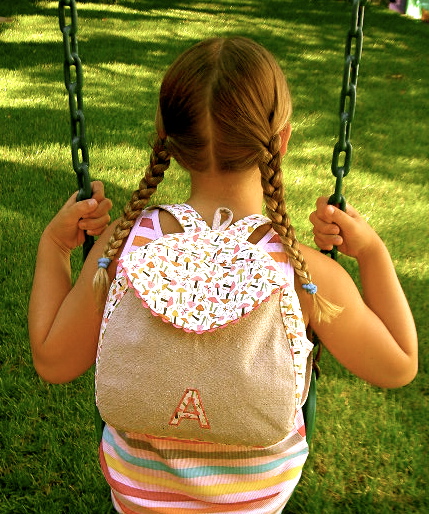
With a monogram because EVERYTHING must be personalized these days.

These are for my niece and nephew.
A little summer fun gift.
Here’s how I made the backpacks:
1. Using the basic pattern from here cut out your pieces.
From the canvas cut: back, front, front flap and straps
From the fat quarter cut: back, side piece (in 2 halves), front flap and straps
Plus fusible interfacing for all pieces.

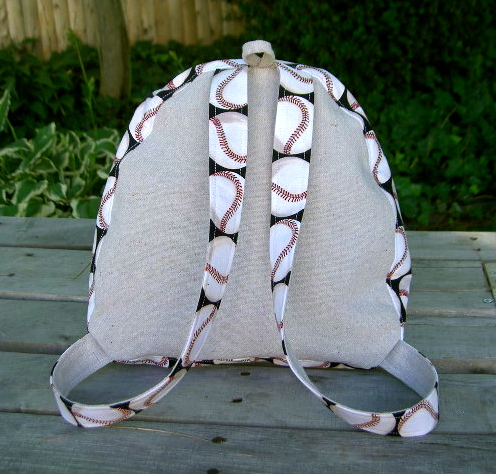
2. Sew your straps, right sides together of one canvas and one print then press open, press seam allowance in for other side and straight stitch.
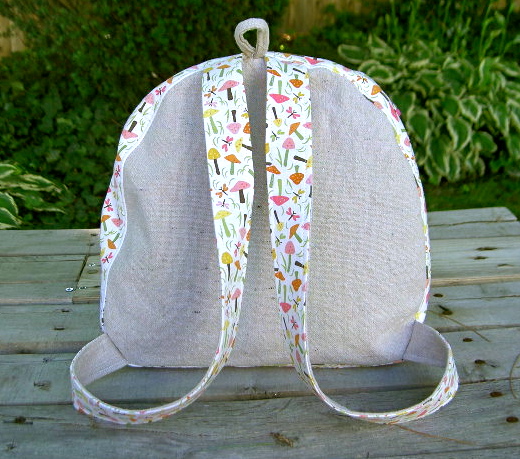
3. Attach straps to canvas back piece, I also added a loop of canvas at top.
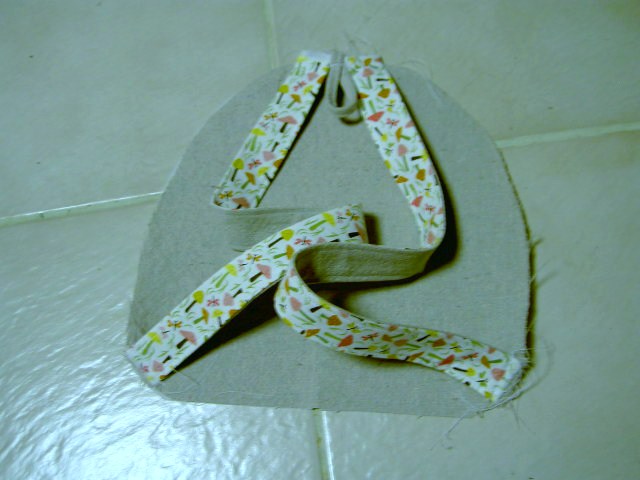
4. Sew side piece all around back piece:
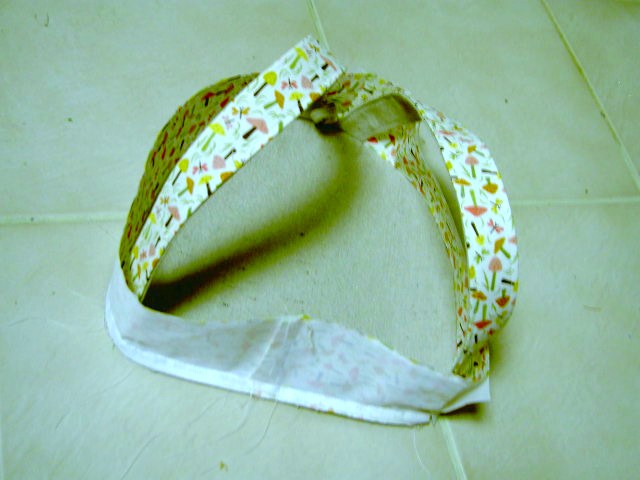
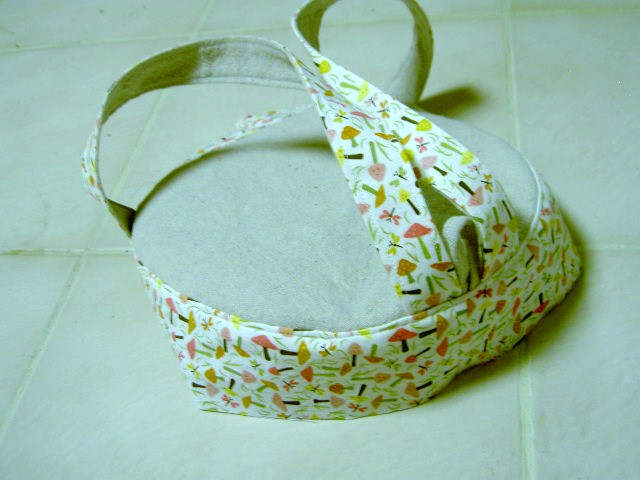
5. Flat line the back print piece to the canvas (on the interior of the backpage), then zig zag (or serge) all along the seam allowance for less fraying:

5. I top stitched along the side sections for a more finished look, optional:
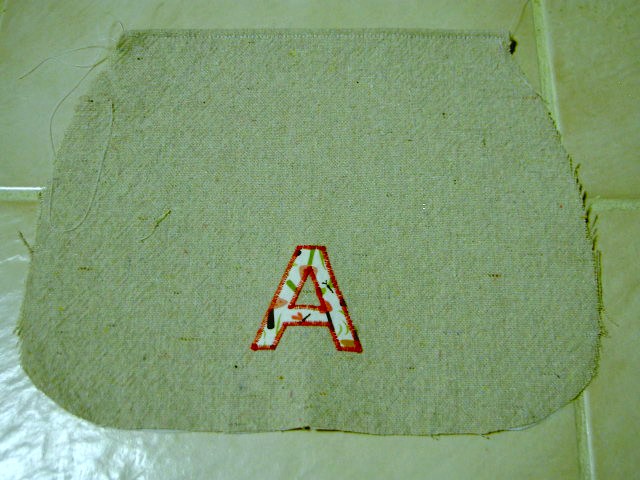
6. Prepare front canvas piece with initial monogram and fold over twice and top stitch top edge:
7. Sew front piece to side piece and top stitch on side piece:
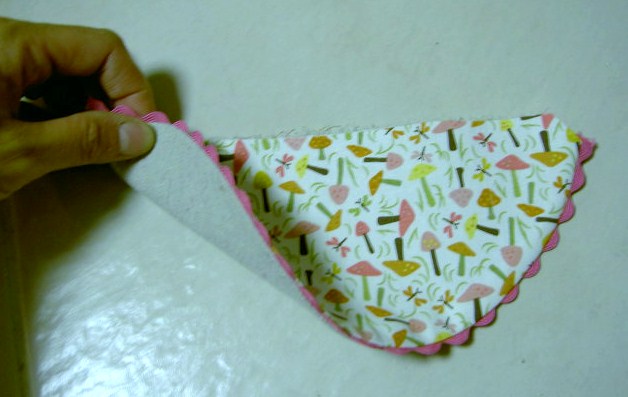
8. Prepare front flap piece by sewing right sides together and adding ric rac detail:
9. Attach front flap to side piece at top, lining up to be centered.
I used big snaps on these backpacks.
Magnetic purse closures would be great if you remember to insert them before construction.
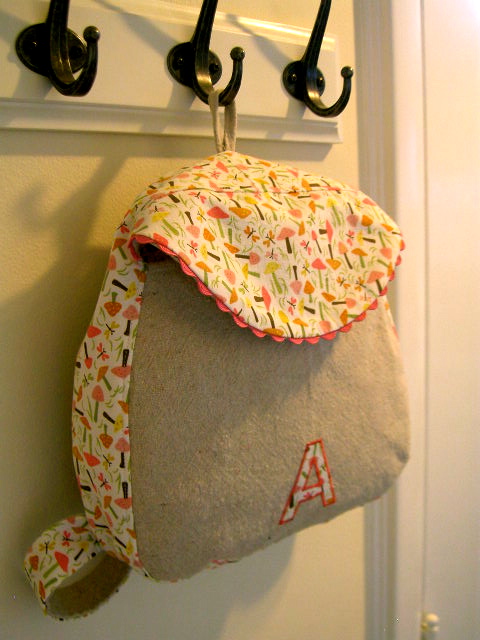
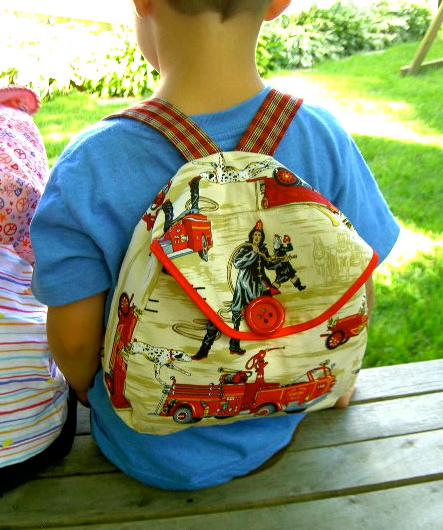
Detail of the hook feature:
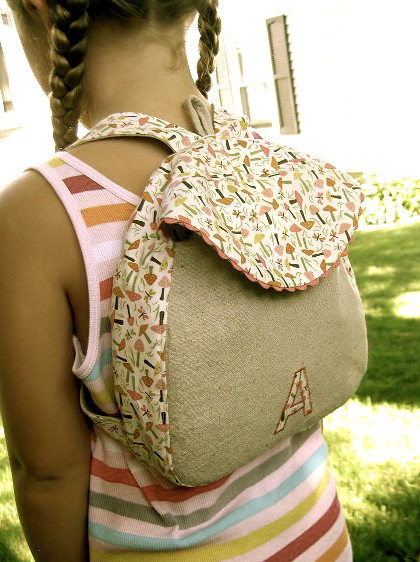
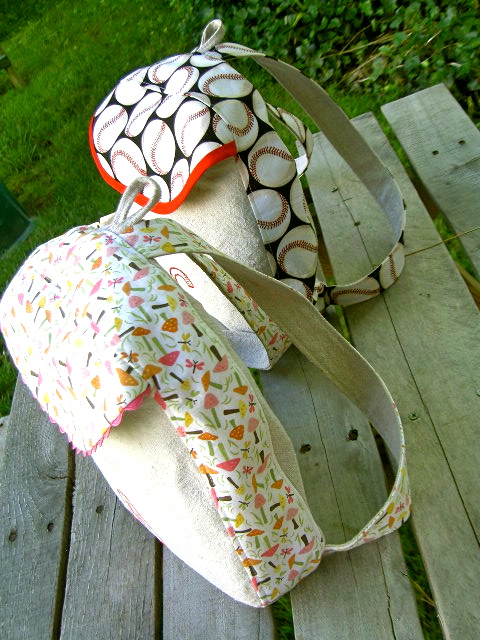
I made one girl and one boy version:


The straps make for a fun detail:

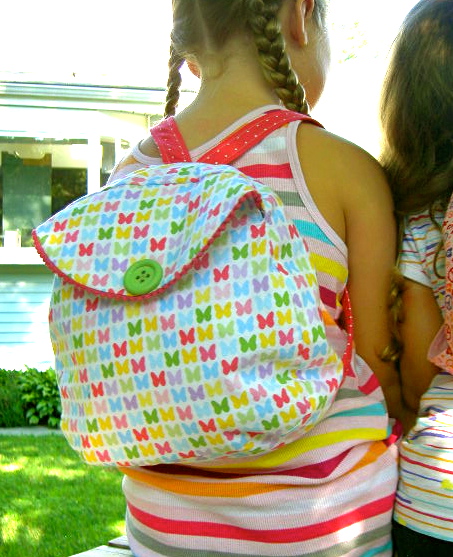
To make it fun for my kids at the fabric shop I let them each pick a half yard of fun fabric and then promise to make something with it.
They got the prototype backpacks, I used big buttons for the closure on theirs:
Making some fun summer memories.
I’m linking up to: http://www.theshabbychiccottage.net/, The 36th Avenue.
http://frenchcountrycottage.blogspot.com/
http://chiconashoestringdecorating.blogspot.com/
http://www.somewhatsimple.com/
http://shabbynest.blogspot.com/
http://www.remodelaholic.com/
http://tatertotsandjello.blogspot.com/
http://www.lovelycraftyhome.com/
http://lollyjaneboutique.blogspot.com/, http://www.iheartnaptime.net/
http://sistersofthewildwest.blogspot.com/
http://www.bystephanielynn.com/
http://www.thegirlcreative.com/
http://funkyjunkinteriors.blogspot.com/, http://thediyshowoff.blogspot.com/
http://funkyjunkinteriors.blogspot.com/, http://thediyshowoff.blogspot.com/
http://www.skiptomylou.org/
http://makingtheworldcuter.blogspot.com/, http://linda-coastalcharm.blogspot.com/
http://www.homestoriesatoz.com/
http://www.myuncommonsliceofsuburbia.com/
http://www.abeachcottage.com/
http://firefliesandjellybeans.blogspot.com/
http://delightfulorder.blogspot.com/
http://www.504main.com/
http://www.freckledlaundry.com/
http://theletteredcottage.net/
http://thecsiproject.com/
http://www.abeachcottage.com/
http://firefliesandjellybeans.blogspot.com/
http://delightfulorder.blogspot.com/
http://www.504main.com/
http://www.freckledlaundry.com/
http://theletteredcottage.net/
http://thecsiproject.com/

Now those ARE cute! Nice size too, perfect for the little ones1
Ahhhh they are they are the sweetest.
those are too cute! emmy would especially love that!
I just found your blog…loved looking at all your wonderful projects. The backpacks are so adorable!!
~Cindy~
Darling backpack and darling blog…so glad to have found you!
Very cute!
Those are the cutest darn backpacks I have ever seen!!!!
Those are adorable! What kid wouldn't want one?
How adorable! Can't wait to give it a try!
How adorable! Can't wait to give it a try!
This is so cute! you did a great job. Love it
Ali
http://www.foundintheali.blogspot.com
Definitely adding this to my "To Make" list. Thanks so much for sharing. I love the canvas.
I found you via TT&J Weekend Wrap Up. My post is two before yours. I'm your newest follower and would love if you would follow me back. (especially since I am a newer blogger!)
Mallory
purplestpecalin.blogspot.com
Hi there- found you through the Sunday Showcase hop and am a new follower. I can totally see my nieces wearing these. Thanks for the inspiration. I hope you have time to follow my life in South Africa by http://withoutcomplexities.blogspot.com
I hope you had a great weekend!
Just wanted to let you know I LOVE your blog and am your newest follower! 🙂
I would love to make these for my nieces and nephews. They would think I was so cool!! Too bad I don't know how to sew, I have really got to learn. LOVE them!
These backpacks are fabulous! Great work – and you make them look so easy! Thanks for sharing the tute!
I would love if you came over and linked this project to my weekly Round Tuit party at:
http://jembellish.blogspot.com/
Have a great week!
Jill @ Creating my way to Success
Thank you for sharing! I might get up the courage to try this. I would love it if you would link up to my Tuesday Confessional link party going on now: http://www.craftyconfessions.com/2011/07/tuesday-confessional-link-up-2.html. I hope to see you soon!
~Macy from Confessions of a SAHM
What ADORABLE backpacks! Your niece and nephew are so lucky! If you get a chance, I'd love for you to share them at the Tuesday To Do Party!
http://blackberryvine.blogspot.com/2011/07/tuesday-to-do-17-and-16-list-makers.html
Smiles!
Jami
This is so awesome, I bet they love it! I love every version you did. I featured you today on my kids gift roundup as part of my Christmas In July series 🙂
http://sunshineandchaucer.blogspot.com/2011/07/christmas-in-july-kids-gifts.html
Love that fire engine fabric , now following xx Ava
Stopping by from Shabby Chic Cottage, Transformation Thursday. I'm working on totes using canvas and print fabric, so this caught my eye, you did a fabulous job! The kids will love them!
This is a really cute idea…and if you sew, a great gift idea for someone!!! I can't wait to try this out! Thank you for sharing!
I have been wanting to make my daughter a new backpack. Right now she has a hideous furry one with a 3D butterfly! I am pinning your awesome tutorial so that I can find it again when I get a spare minute to sew. Thanks for sharing!
Very cute! I love the style of the back packs. Thanks for linking with air your laundry Friday! xo Jami
I almost bought a backpack today! now these are cute and i will try to make my own! these are just darling!
come link it to my woot woot wednesday party!
http://www.tootsiewootsieboutique.blogspot.com
These are great! So cute!
adorable! such a sweet gift idea.
Thanks for the great tutorial! I just made one for my son for Christmas. He's really going to love it!
Ahhhh! I will be your BFF if you could tell me the name of that m multi-colored butterfly fabric?? I got a fat quarter of it about 6 months ago and the info was NOT on the selvedge! And now I've used it all and want more!!
These are adorable. I can't wait to make one for my granddaughter who will be starting pre-school for the 1st time in September.
These are adorable!!! I'm making two right now.
I ran into a snag though. The length that you gave for the side piece is about an inch too short. At least, it was for me. Hope this helps others. Also, did you sew the ends of the side seam together before you sewed it to the back?
Thanks for sharing!!!
Jayne
http://hisheartandhome.com/