• Home
  • Blog
  • About
  • Contact
    • Disclosure
    • Privacy Policy
  • SHOP
  • Widget area for main menu

    • Email
    • Facebook
    • Instagram
    • Pinterest
    • Twitter
    • YouTube
  • Skip to primary navigation
  • Skip to main content
  • Skip to primary sidebar

Jaime Costiglio

build - paint - sew

  • BUILD
    • BEDS
    • BENCHES
    • DESKS
    • DRESSERS
    • GAMES & TOYS
    • SCRAP WOOD
    • SHELVES
    • STORAGE
    • TABLES
  • TOOLS
  • PAINT
    • CRAFTS
    • FURNITURE
    • HOME DECOR
  • SEW
    • GIFTS
    • HOME DECOR
    • POUCHES
  • HANDBUILT HOLIDAY
    • 2021
    • 2019
    • 2018
    • 2017
    • 2016
    • 2015
    • 2014
    • 2013
  • GIFTS
    • BABIES
    • KIDS
    • FOR HER
    • FOR HIM
    • TEACHERS
    • WEDDINGS
  • SEASONAL
    • 4TH OF JULY
    • FALL
    • HALLOWEEN
    • CHRISTMAS
    • SUMMER
    • SPRING
    • ST. PATRICK’S DAY
    • THANKSGIVING
    • VALENTINE’S DAY
    • WINTER
  • SALTBOX PROJECT
    • BATHROOMS
    • DINING ROOM
    • EXTERIOR
    • FAMILY ROOM
    • FOYER / MUDROOM
    • KIDS BEDROOMS
    • KITCHEN
    • LIVING ROOM
    • MASTER BEDROOM
    • PLAYROOM
  • SCROLL SAW

“B” is for Baby

November 15, 2011

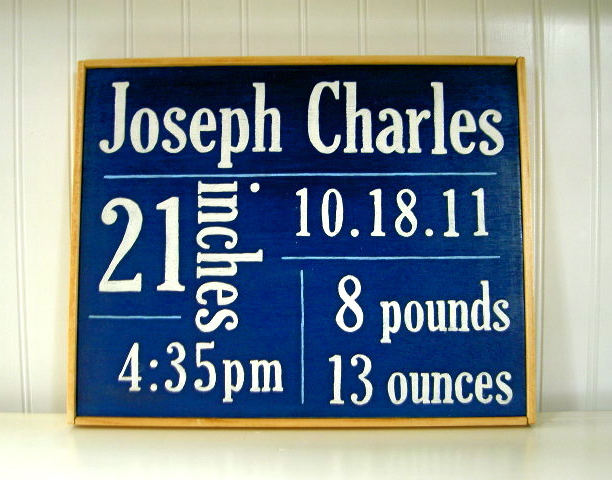
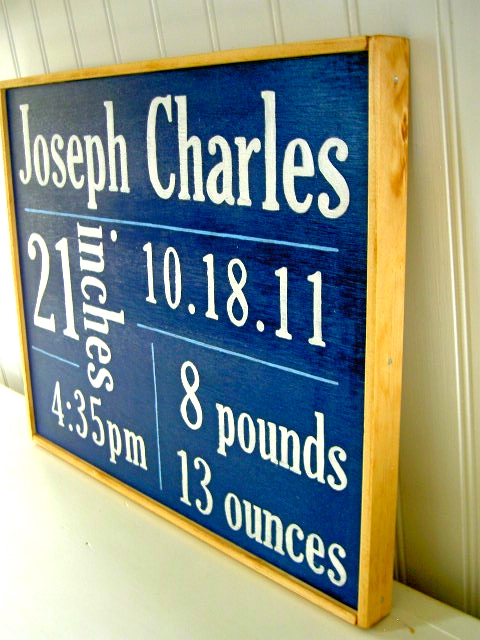
Handpainted baby stats wall art:
 A gift for a friend who just had baby #4.

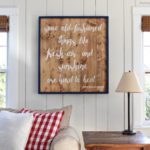
Inspired by this project by April at A Kitchen Table for Two:
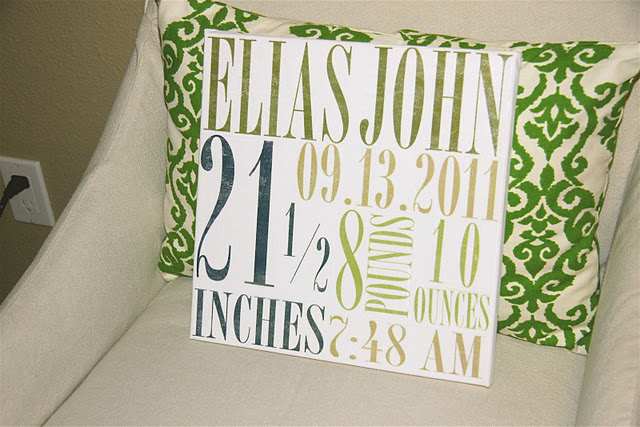
I handpainted my sign for a slightly different look.

Here’s how I made the sign:


1. Cut 3/4″ plywood to size.
Prime.
Paint 2 coats Behr Lake Blue.
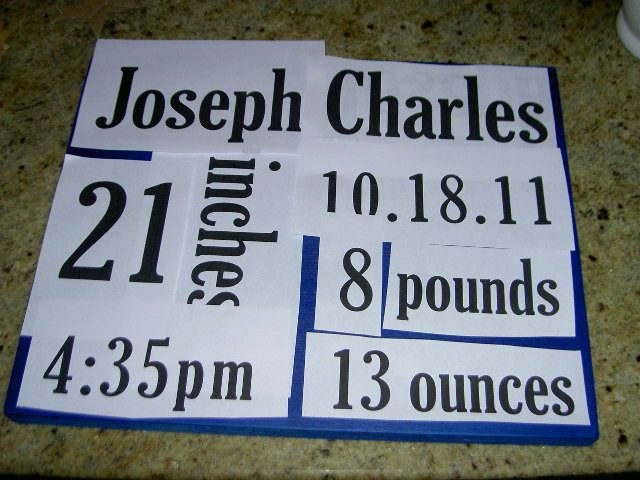
Print out text and arrange:

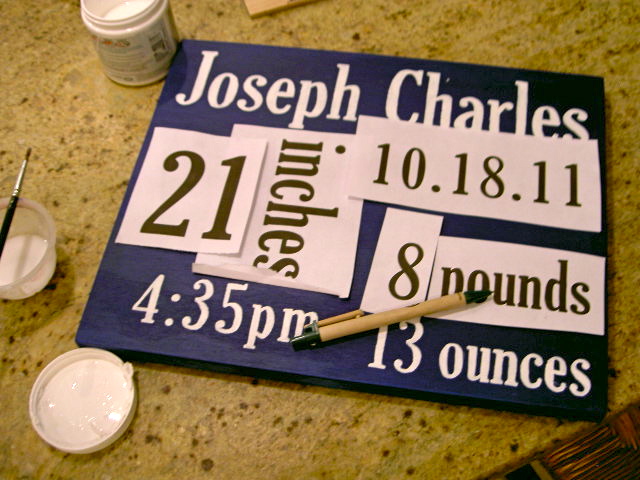
2. Trace text using a ballpoint pen to create indent in wood.
Remove paper and paint inside and on indent.
Work text by text, don’t try to trace the entire sign at once.

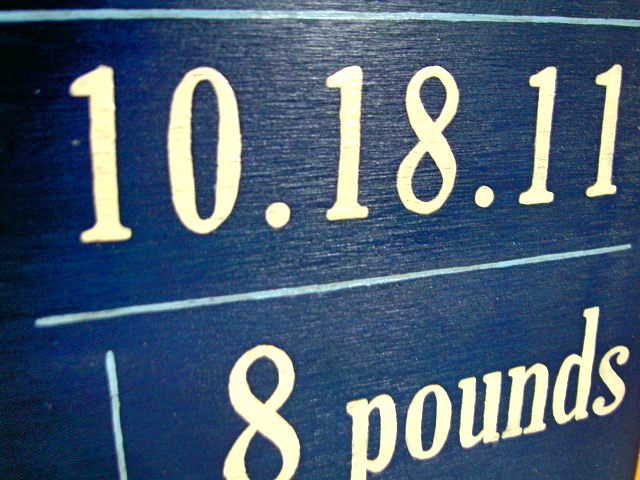
3. All text painted:

4. Add straight lines to break up text and fill voids:
Distress with sandpaper very lightly, stain with Minwax Ipswich Pine.
Seal with clear acrylic.
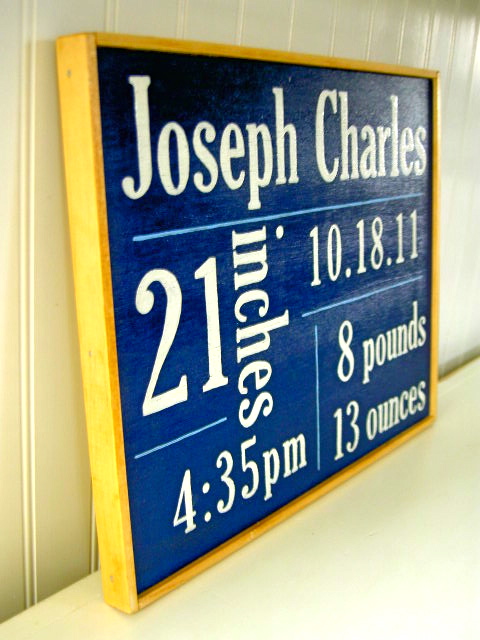
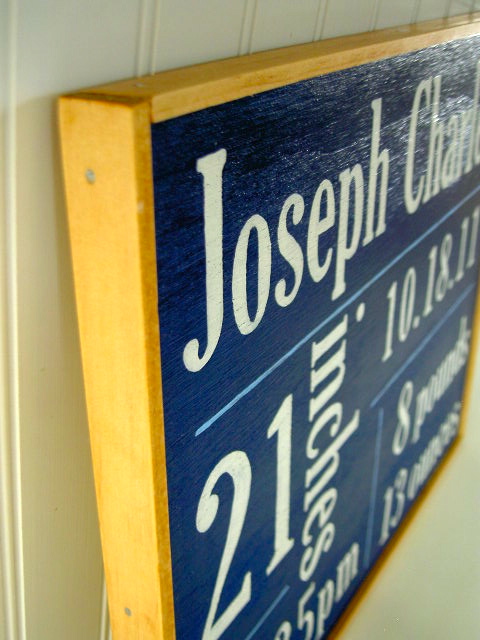
5. Frame using 1/4″ x 7/8″ lattice:
Cut top and bottom pieces, attach with wood glue and 3/8″ finish nails.
Then cut sides and attach.
6. Stain wood frame pieces:
7. Attach sawtooth hanger on back.
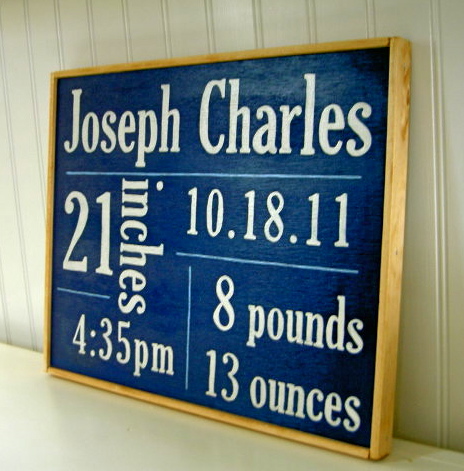
A unique, one-of-a-kind, piece of art for the prince of the family.

I’m linking up to:

Whatcha Got Weekend @ Lolly Jane
SAS @ Funky Junk
Weekend Wrap Up @ Tatertots & Jello
Sundae Scoop @ I Heart Naptime
Sister Sunday @ Sisters of the Wild West
Sunday Showcase Party @ Under the Table & Dreaming
Just Something I Whipped Up @ The Girl Creative
DIY Fall Festival @ The DIY Showoff
Made by You Mondays @ Skip to My Lou
Making the World Cuter @ Making the World Cuter
Nifty Thrifty @ Coastal Charm
Tuesday Treasures @ My Uncommon Slice of Suburbia
Tutorials & Tips Tuesday @ Home Stories A to Z
Good Life @ A Beach Cottage
Delightfully Inspiring @ Delightful Order
Transformation Thursday @ The Shabby Creek Cottage
Strut Your Stuff @ Somewhat Simple
Share Awesomeness Thur @ The 36th Avenue
Flaunt it Friday @ Chic on a Shoestring
Tickled Pink @ 504 Main
Frugal Friday @ The Shabby Nest
SAS @ Just a Girl
Feathered Nest @ French Country Cottage
Remodelaholics Anonymous @ Remodelaholic
inspiration board @ Carolyns Homework
Tuesday Timeout @ Reasons to Skip the Housework

You may also like...

  • DIY Handpainted SignDIY Handpainted Sign
  • No Tricks Only Treats Handpainted SignNo Tricks Only Treats Handpainted Sign
  • “C” is for Chore Chart“C” is for Chore Chart
  • “M” is for Mantel Artwork“M” is for Mantel Artwork
Share this post:

Filed Under: BABIES, DIY, GIFTS, HOME DECOR, PAINT9 Comments

Reader Interactions

Comments

  1. Peggy57 says

    November 15, 2011 at 7:21 PM

    Hi Jaime, what a great idea for a baby gift. I love it. You make it sound so easy to make a sign. Thanks for sharing.

    Reply
  2. Erin says

    November 16, 2011 at 5:28 AM

    He will love it when he's a little bigger! Until then, his mom will love it for him:)

    Reply
  3. Schmitt´s says

    November 16, 2011 at 8:57 AM

    I found your blog a few days ago and wonna tell you, how much I love it!
    Your ideas and realisations are wonderful!
    But most of all it´s really great, that you offer so much tutorials to your readers. Thank you very much!

    Best wishes,
    Britta

    Reply
  4. Kimberly @ The Brown Eyes Have It says

    November 17, 2011 at 5:01 AM

    That is really cute! I'm so glad I found it today, my cousin's wife just had her baby today. Now I can get this gift right out to her.

    Reply
  5. Suzanne@Meridian Road says

    November 17, 2011 at 6:17 PM

    That would be such a fun addition to a nursery! Cute! I like the lines you added.

    Reply
  6. A Vintage Green says

    November 20, 2011 at 3:32 AM

    Great tutorial. A real keeper for the lucky new family.
    -Joy

    Reply
  7. Jessica says

    November 22, 2011 at 4:09 AM

    I love it! These are on my project list to make for both of my kids. I am following your blog now.

    Reply
  8. mommyiscoocoo says

    November 23, 2011 at 3:06 AM

    What an AWEOMSE idea! Simple and yet so precious. You always want to remember everything about the moment your baby was born. Love it!

    Reply
  9. LeighAnn says

    November 28, 2011 at 7:38 PM

    So beautiful and unique!

    Reply

Leave a Reply Cancel reply

Your email address will not be published. Required fields are marked *

Primary Sidebar

Hi! I’m Jaime

Jaime Costiglio

Hello!

Thank you for stopping by.
Join me for lots of DIY.

Read more

Get new posts via email

Handbuilt Holiday: Gift Project Plans

handbuilt holiday gift project plans

Collection of DIY gift project plans to build.

The Home Depot Tool Prospective

THD Prospective

Tools to consider for the DIYer.

Archives

The Home Depot Logo
Copyright © 2026 Jaime Costiglio · Custom site by Moonsteam Design

Privacy Policy