• Home
  • Blog
  • About
  • Contact
    • Disclosure
    • Privacy Policy
  • SHOP
  • Widget area for main menu

    • Email
    • Facebook
    • Instagram
    • Pinterest
    • Twitter
    • YouTube
  • Skip to primary navigation
  • Skip to main content
  • Skip to primary sidebar

Jaime Costiglio

build - paint - sew

  • BUILD
    • BEDS
    • BENCHES
    • DESKS
    • DRESSERS
    • GAMES & TOYS
    • SCRAP WOOD
    • SHELVES
    • STORAGE
    • TABLES
  • TOOLS
  • PAINT
    • CRAFTS
    • FURNITURE
    • HOME DECOR
  • SEW
    • GIFTS
    • HOME DECOR
    • POUCHES
  • HANDBUILT HOLIDAY
    • 2021
    • 2019
    • 2018
    • 2017
    • 2016
    • 2015
    • 2014
    • 2013
  • GIFTS
    • BABIES
    • KIDS
    • FOR HER
    • FOR HIM
    • TEACHERS
    • WEDDINGS
  • SEASONAL
    • 4TH OF JULY
    • FALL
    • HALLOWEEN
    • CHRISTMAS
    • SUMMER
    • SPRING
    • ST. PATRICK’S DAY
    • THANKSGIVING
    • VALENTINE’S DAY
    • WINTER
  • SALTBOX PROJECT
    • BATHROOMS
    • DINING ROOM
    • EXTERIOR
    • FAMILY ROOM
    • FOYER / MUDROOM
    • KIDS BEDROOMS
    • KITCHEN
    • LIVING ROOM
    • MASTER BEDROOM
    • PLAYROOM
  • SCROLL SAW

“A” is for Acorn Wreath

August 29, 2013

Craft: glittered acorn wreath
Make a simple circle wreath from acorns and glitter.
Our driveway is littered with acorns just asking to be used in a project.

Acorns are plentiful this time of year and make for great Fall decor:

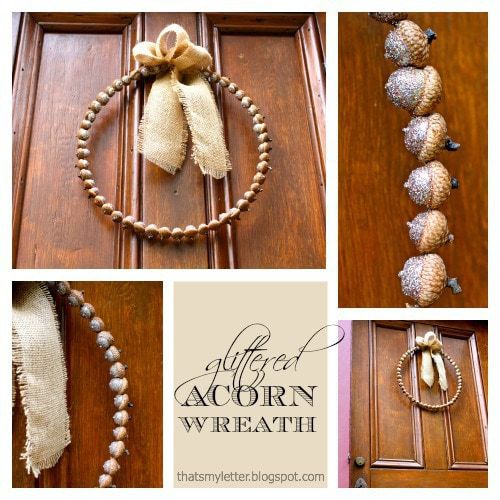
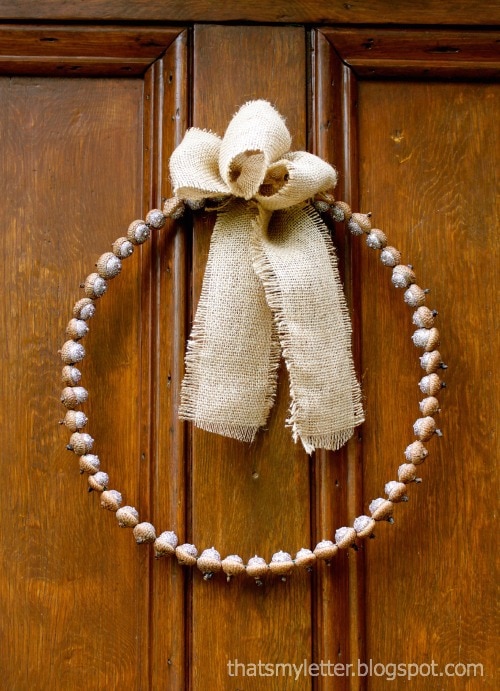
This glittered acorn wreath hangs on our new front door ready for Fall to come knocking.
Here’s how to make a glittered acorn wreath:

1. Gather acorns, at least 50.
2. Wash and bake at 350 for 20 minutes.  (It will NOT smell nice.)
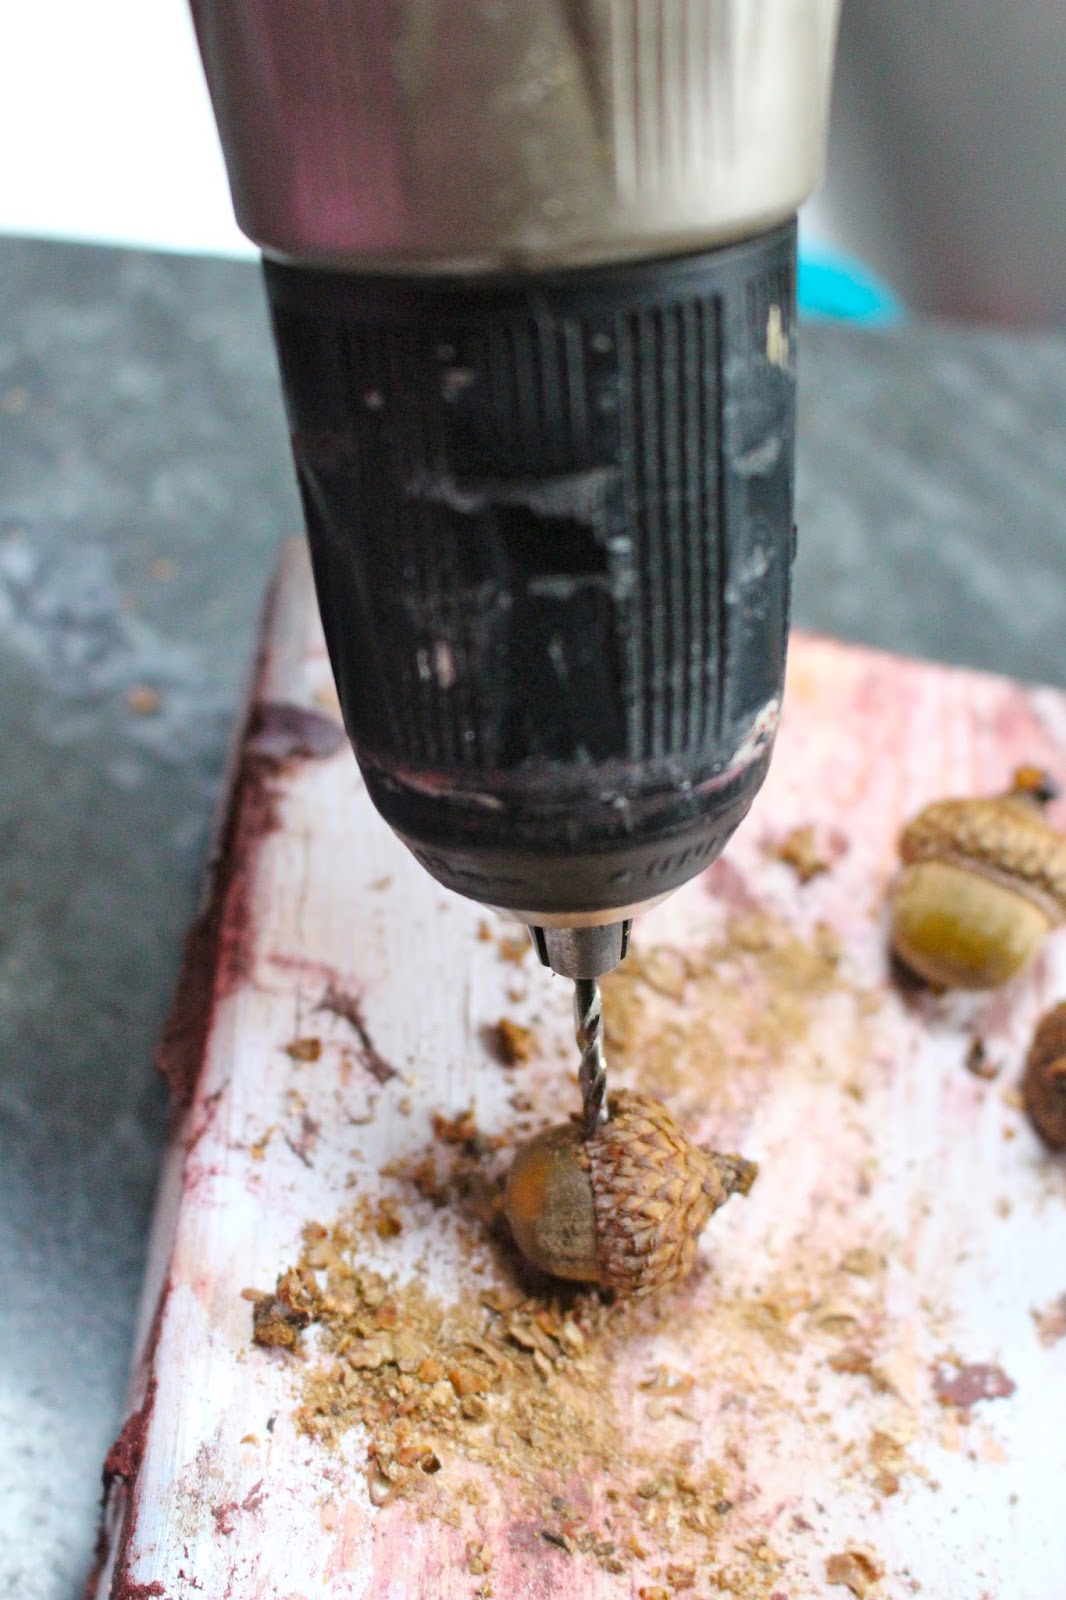
3. Using a 7/64 drill bit make a whole at the fattest part of the acorn cap going straight through to the other side:
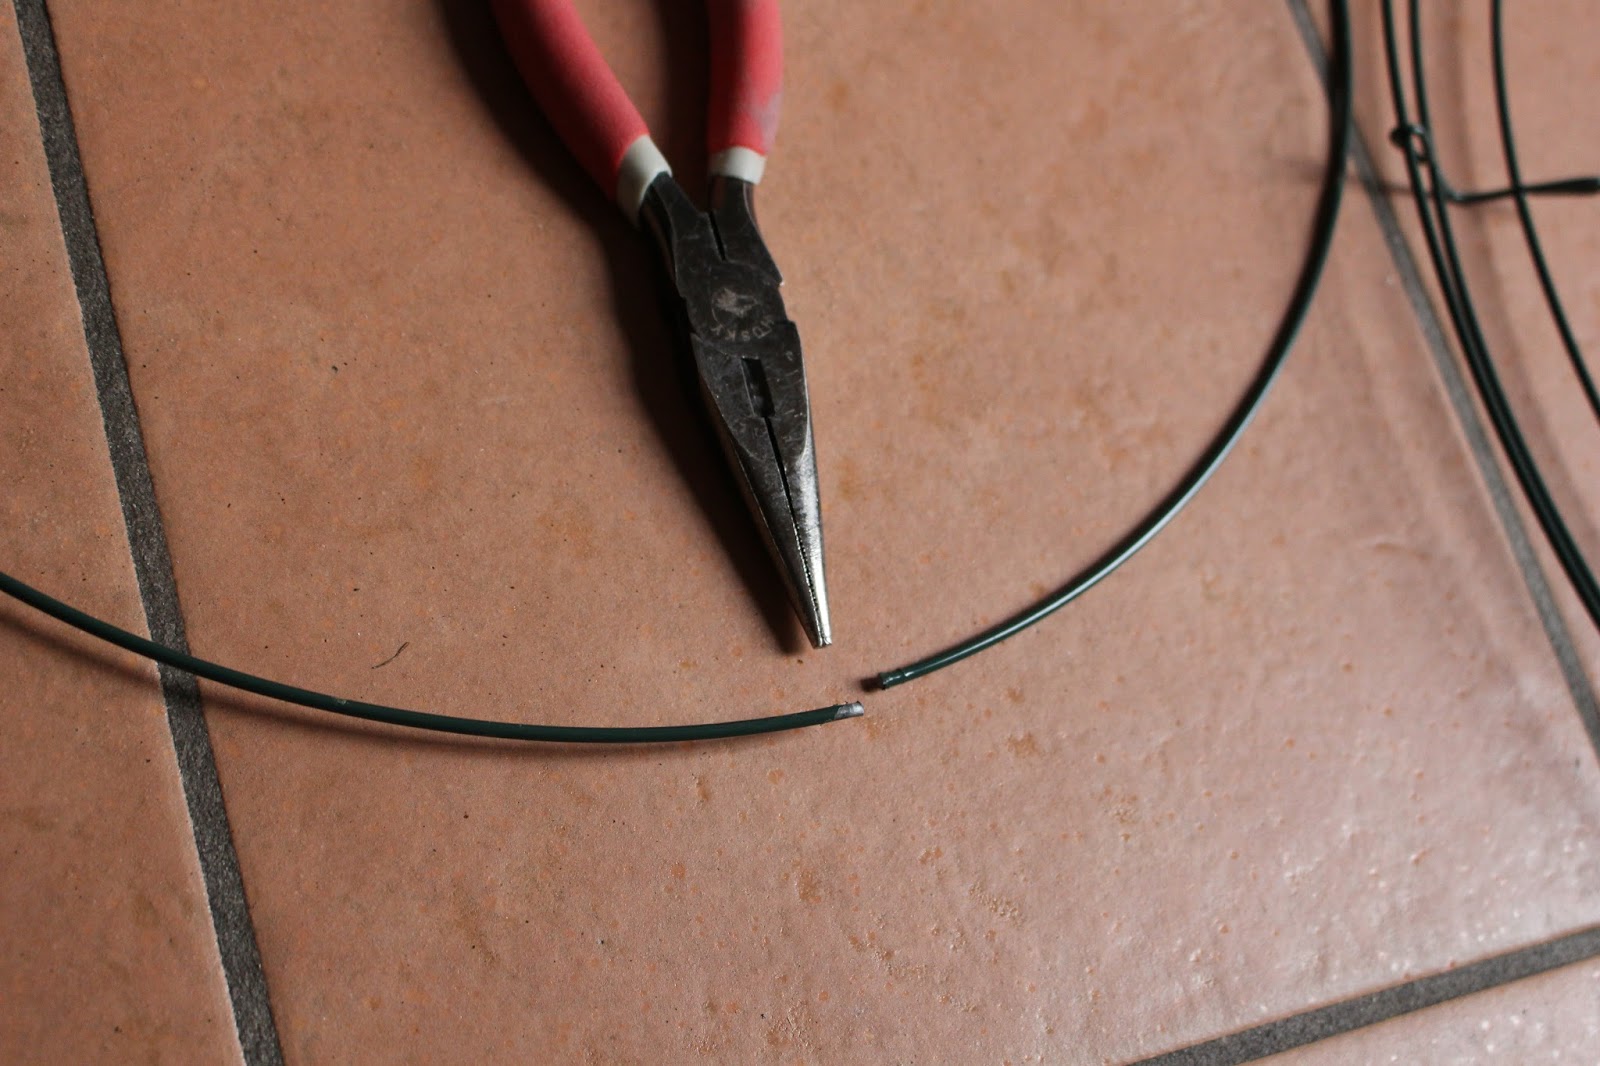
4. Prepare wire ring.  I used an existing wire wreath form and popped off the center (smallest) ring:
5. Make a break in the ring where it was naturally welded together:

6. Start stringing acorns onto end of wire ring:
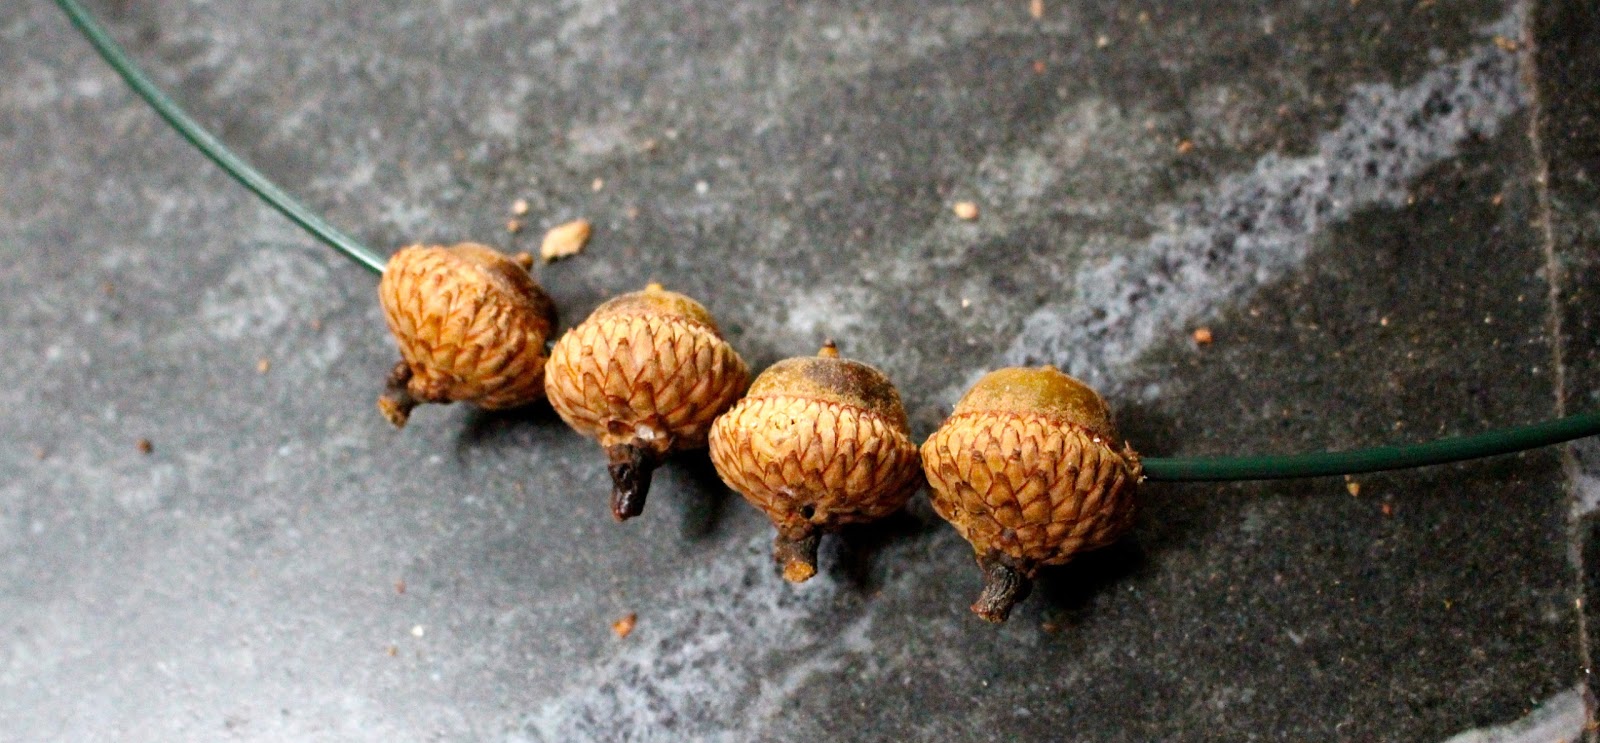
Fill up ring:

Leave about 1″ at both ends:

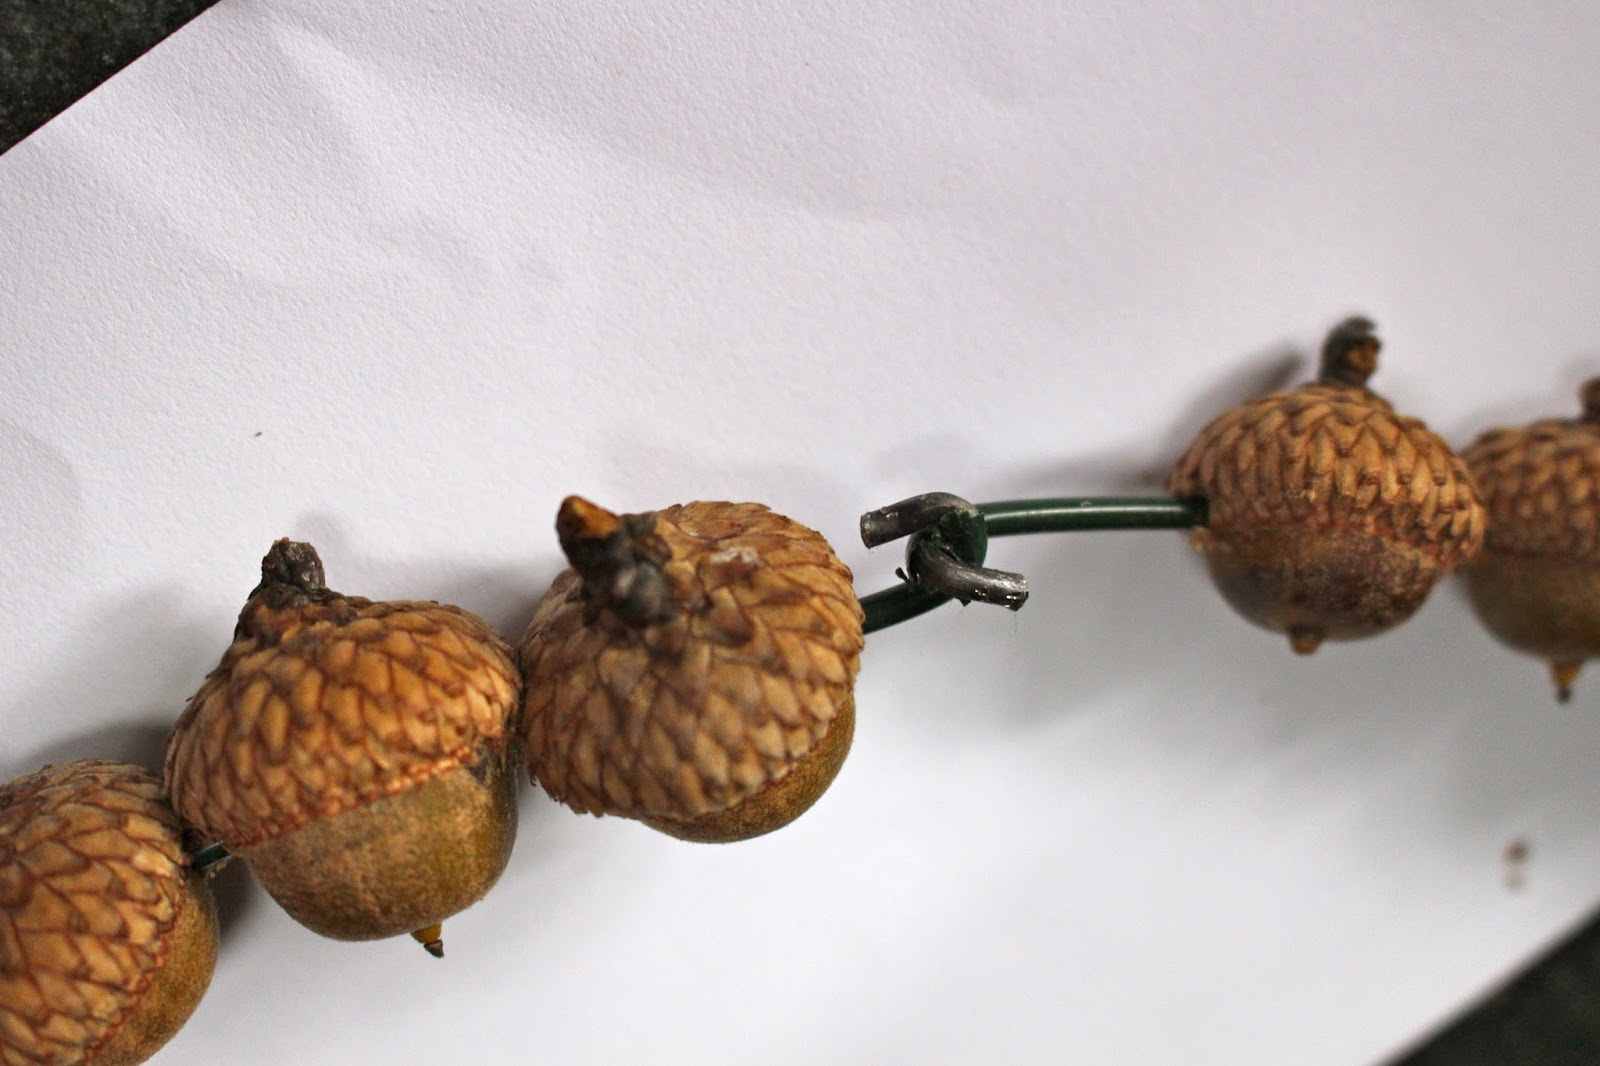
7. Using a pliers bend ends of wires to make hooks:

Then close ring by hooking the ends:

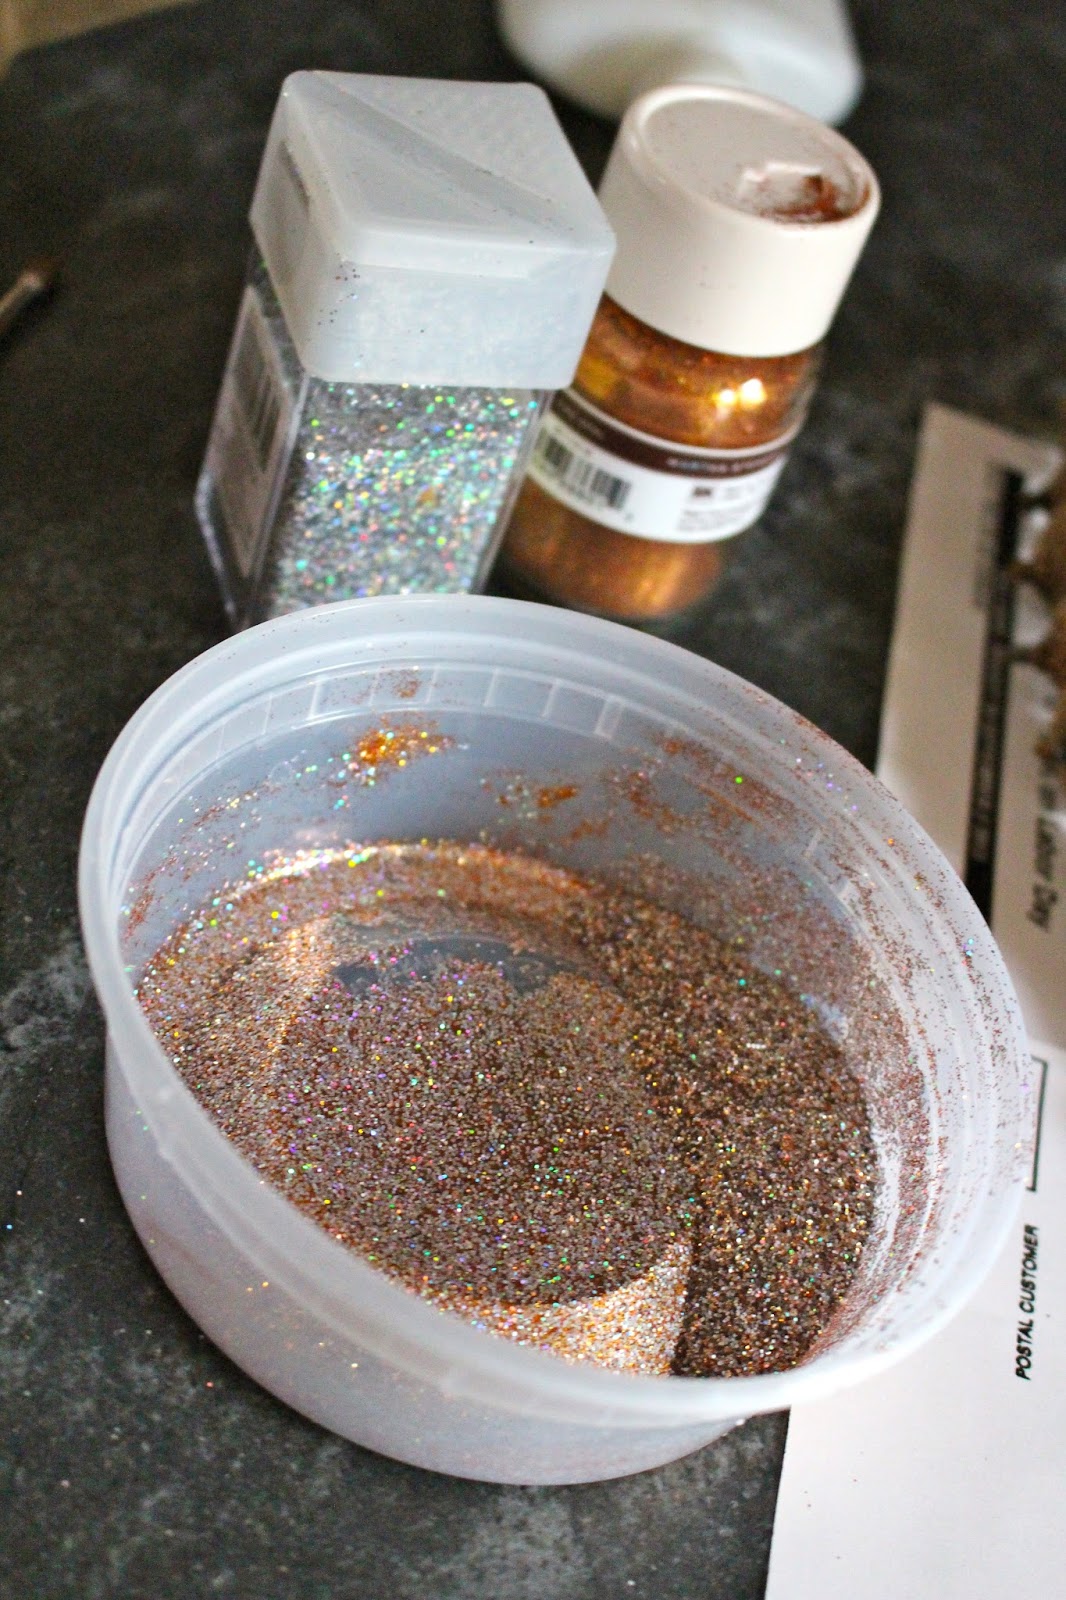
8. Glitter: I mixed orange and silver:

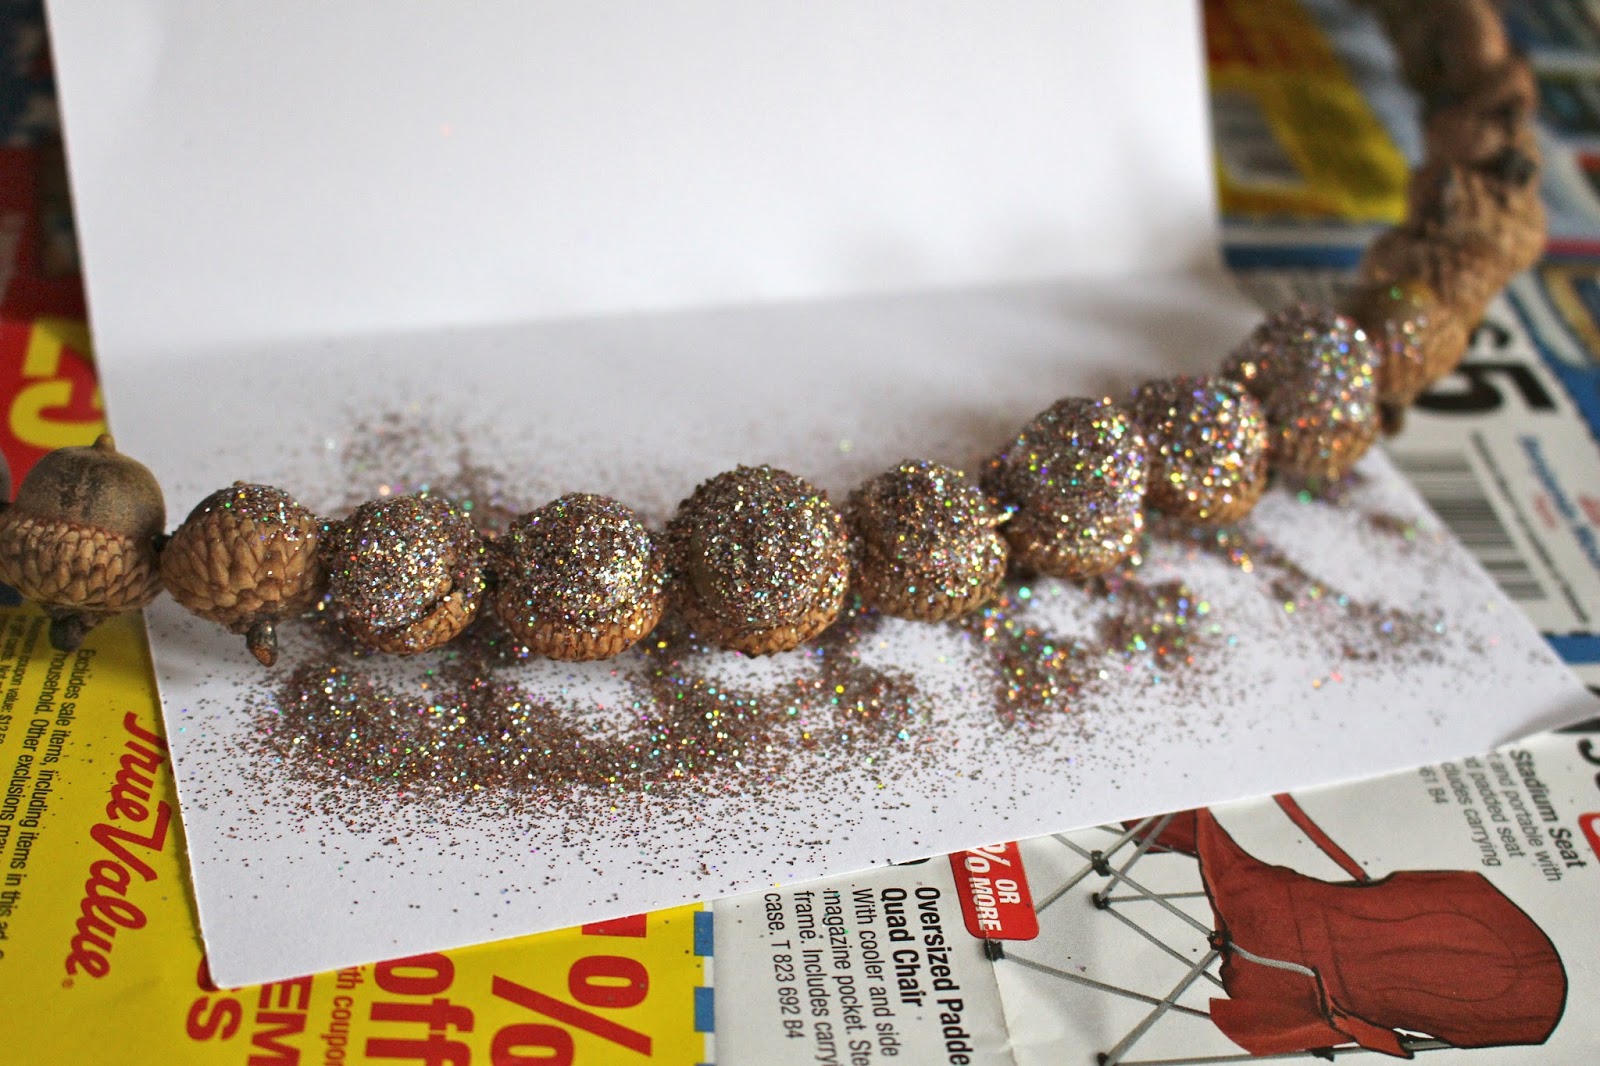
9. Apply a small dab of white school glue to the nut portion only of the acorn then spread with a paint brush:

10.  Shake glitter onto glue over a paper in order to save excess:
   
11. Add burlap ribbon and hang.
I’m linking up to:
Fall Nesting Party @ The Inspired Room
SAS @ Funky Junk
Nifty Thrifty Sunday @ Nifty Thrifty Things
That DIY Showoff @ The DIY Showoff
Tutorials & Tips Tuesday @ Home Stories A to Z
The Scoop @ Lolly Jane
Strut Your Stuff @ Somewhat Simple
Transformation Thursday @ The Shabby Creek Cottage
Share Awesomeness Thur @ The 36th Avenue
Pretty Things Thursday @ Scissors & Spatulas
Flaunt it Friday @ Chic on a Shoestring
Frugal Friday @ The Shabby Nest
Furniture Feature Friday @ Miss Mustard Seed
SAS @ Just a Girl
Remodelaholics Anonymous @ Remodelaholic
inspiration board @ Carolyns Homework
Sunday Showcase Party @ Under the Table & Dreaming
The Lettered Cottage

You may also like...

  • Painted Wood Leaves Fall WreathPainted Wood Leaves Fall Wreath
  • Touch of Spring 2017 Farmhouse TourTouch of Spring 2017 Farmhouse Tour
  • DIY Heather WreathDIY Heather Wreath
  • How to Make a Sugar Skull WreathHow to Make a Sugar Skull Wreath
Share this post:

Filed Under: CRAFTS, DIY, FALL, HOME DECOR, SEASONAL9 Comments

Reader Interactions

Comments

  1. Denise Marie says

    August 29, 2013 at 10:51 AM

    i luv it!

    Reply
  2. Inspire Me Heather says

    August 29, 2013 at 11:12 AM

    Your acorn wreath is so pretty, what a great idea!

    Reply
  3. DaiseyJayne.com says

    August 29, 2013 at 11:54 AM

    I love glitter and I love acorns, this is just a perfect Fall wreath!

    Reply
  4. Cassie @ Primitive & Proper says

    August 29, 2013 at 12:12 PM

    LOVE this! rustic and sparkly- two of my favorites!

    Reply
  5. For My Love Of says

    August 31, 2013 at 5:47 PM

    I did a similar treatment to my acorns last year with glitter nail polish 🙂 That could be another way of achieving this look too!

    I love the tips for putting them on a wire wreath form!

    Reply
  6. Pieced Pastimes says

    September 2, 2013 at 12:09 PM

    Love the simple look to your wreath, Perfect for Fall.
    Thanks for the inspiration,
    Suzanne
    Pieced Pastimes
    PS-Would love to have you link this up to Saturday Sparks. Links are open till Friday.

    Reply
  7. Jona @ Boho Willow says

    September 8, 2013 at 3:46 PM

    So cute! Pinned!

    Reply
  8. Abby says

    September 16, 2013 at 1:05 PM

    This is so creative! I love how simple and pretty it is! Great idea!

    Reply
  9. Bonita says

    December 3, 2014 at 3:17 AM

    So simple, so creative, so beautiful!

    Reply

Leave a Reply Cancel reply

Your email address will not be published. Required fields are marked *

Primary Sidebar

Hi! I’m Jaime

Jaime Costiglio

Hello!

Thank you for stopping by.
Join me for lots of DIY.

Read more

Get new posts via email

Handbuilt Holiday: Gift Project Plans

handbuilt holiday gift project plans

Collection of DIY gift project plans to build.

The Home Depot Tool Prospective

THD Prospective

Tools to consider for the DIYer.

Archives

The Home Depot Logo
Copyright © 2023 Jaime Costiglio · Custom site by Moonsteam Design

Privacy Policy