• Home
  • Blog
  • About
  • Contact
    • Disclosure
    • Privacy Policy
  • SHOP
  • Widget area for main menu

    • Email
    • Facebook
    • Instagram
    • Pinterest
    • Twitter
    • YouTube
  • Skip to primary navigation
  • Skip to main content
  • Skip to primary sidebar

Jaime Costiglio

build - paint - sew

  • BUILD
    • BEDS
    • BENCHES
    • DESKS
    • DRESSERS
    • GAMES & TOYS
    • SCRAP WOOD
    • SHELVES
    • STORAGE
    • TABLES
  • TOOLS
  • PAINT
    • CRAFTS
    • FURNITURE
    • HOME DECOR
  • SEW
    • GIFTS
    • HOME DECOR
    • POUCHES
  • HANDBUILT HOLIDAY
    • 2021
    • 2019
    • 2018
    • 2017
    • 2016
    • 2015
    • 2014
    • 2013
  • GIFTS
    • BABIES
    • KIDS
    • FOR HER
    • FOR HIM
    • TEACHERS
    • WEDDINGS
  • SEASONAL
    • 4TH OF JULY
    • FALL
    • HALLOWEEN
    • CHRISTMAS
    • SUMMER
    • SPRING
    • ST. PATRICK’S DAY
    • THANKSGIVING
    • VALENTINE’S DAY
    • WINTER
  • SALTBOX PROJECT
    • BATHROOMS
    • DINING ROOM
    • EXTERIOR
    • FAMILY ROOM
    • FOYER / MUDROOM
    • KIDS BEDROOMS
    • KITCHEN
    • LIVING ROOM
    • MASTER BEDROOM
    • PLAYROOM
  • SCROLL SAW

“W” is for Wood Bunting

October 26, 2012

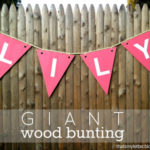
Build and paint: wood name bunting

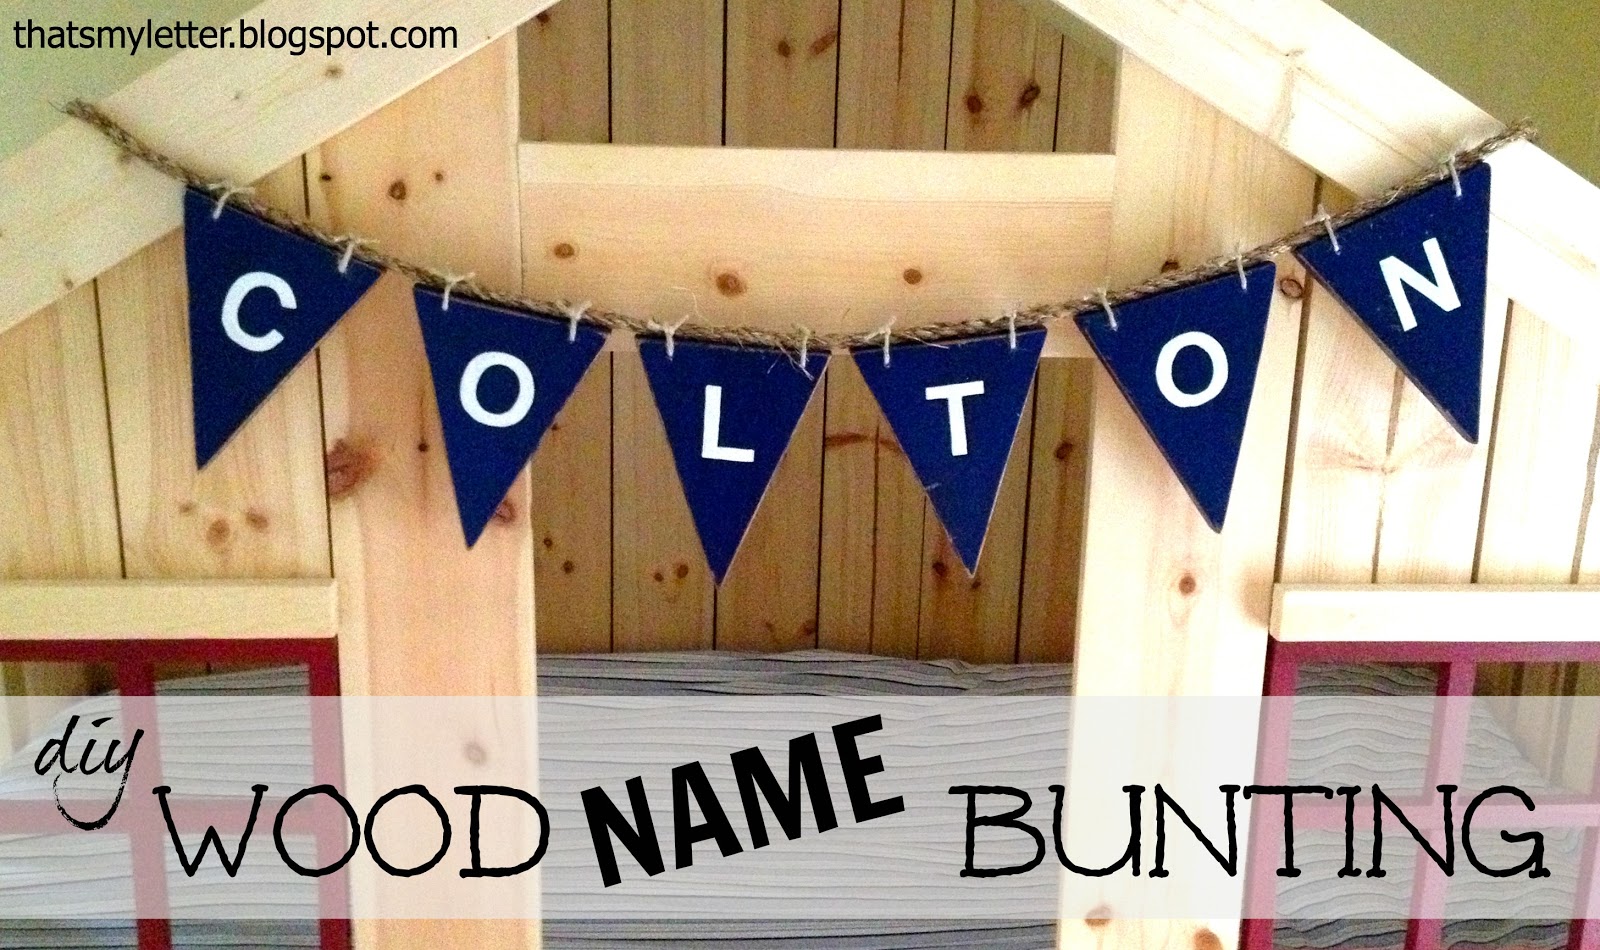
A gift for new baby boy Colton.
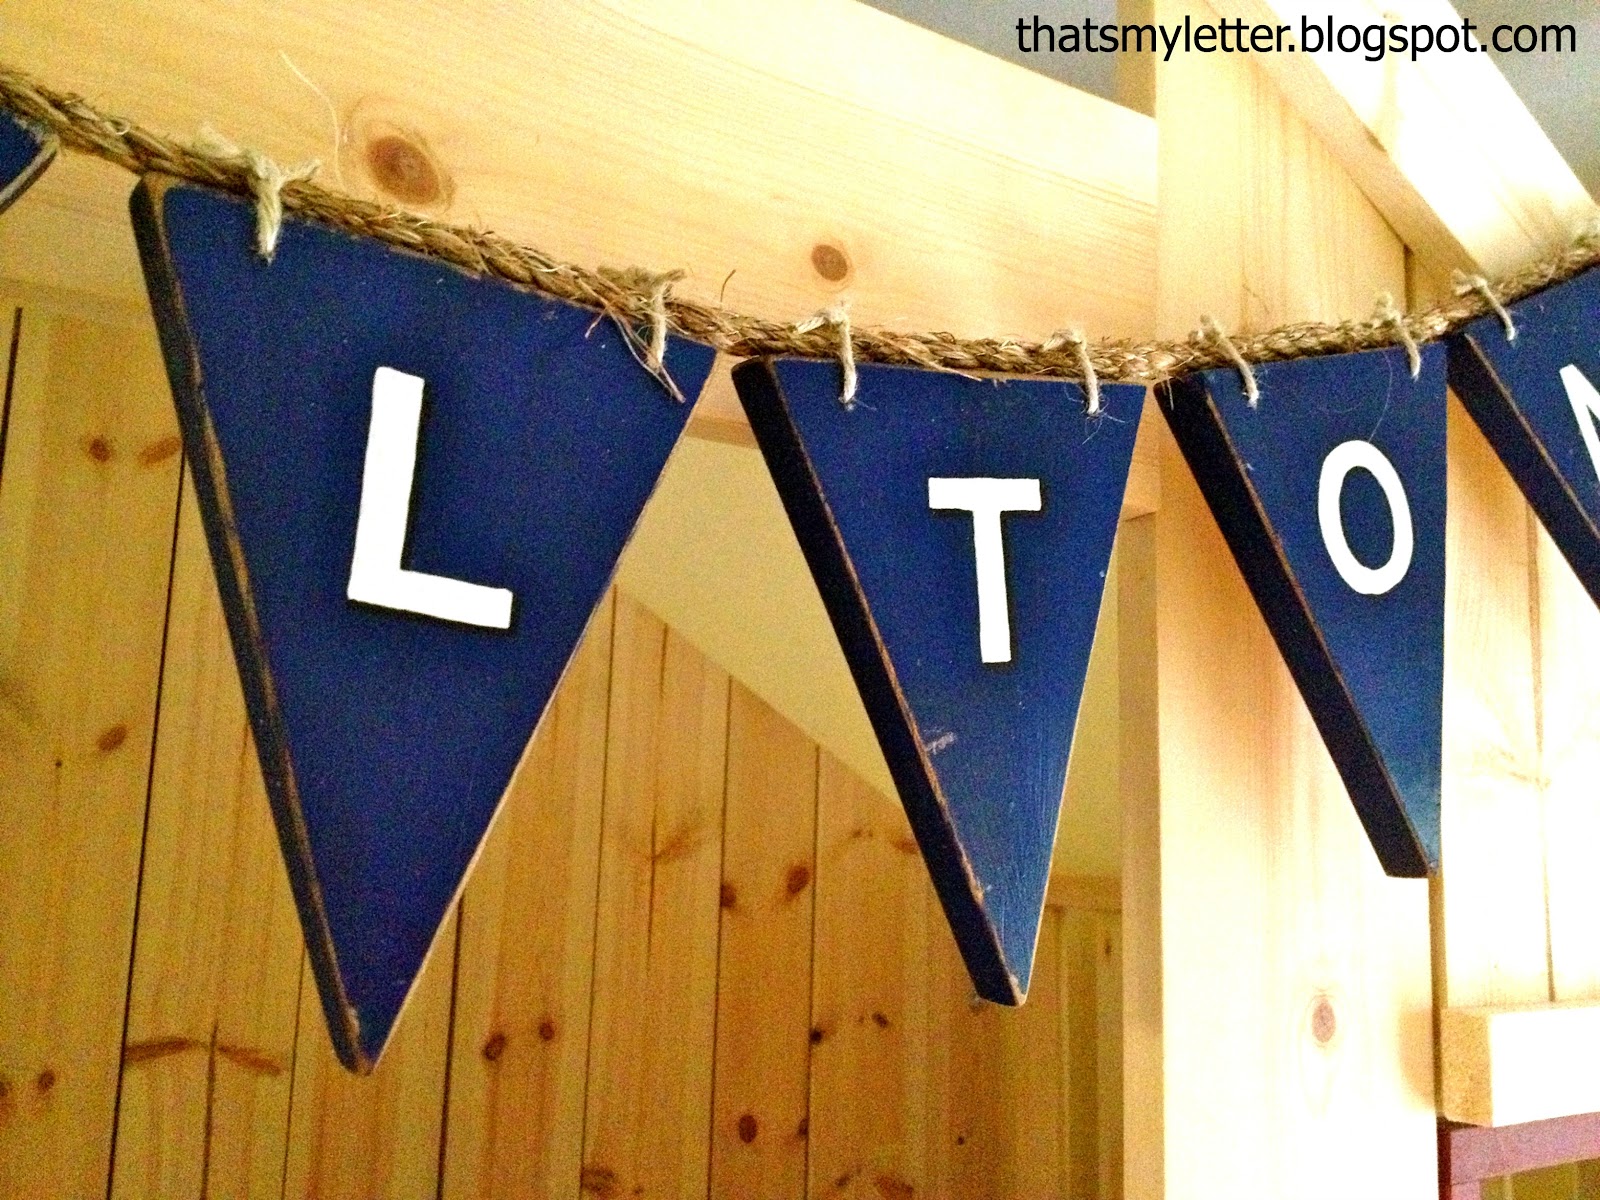
It’s made from a pine board cut into bunting triangles, painted and secured with jute onto manila rope.

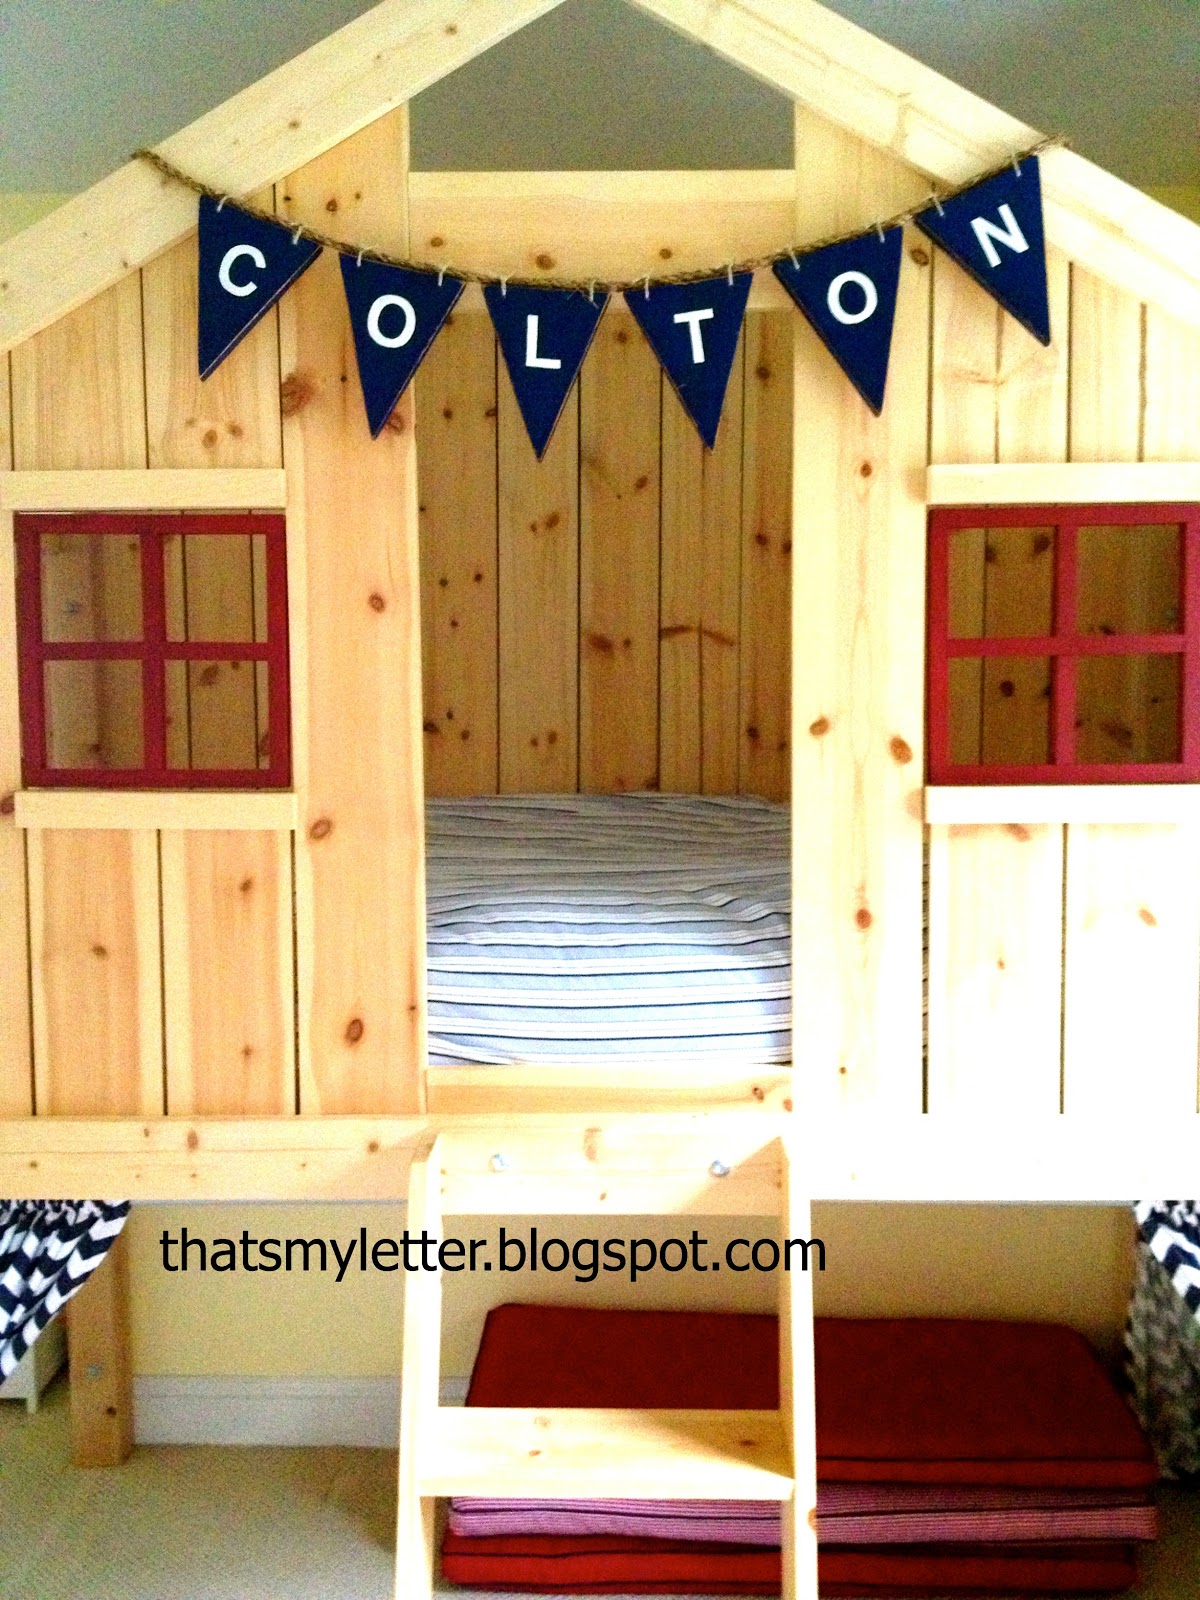
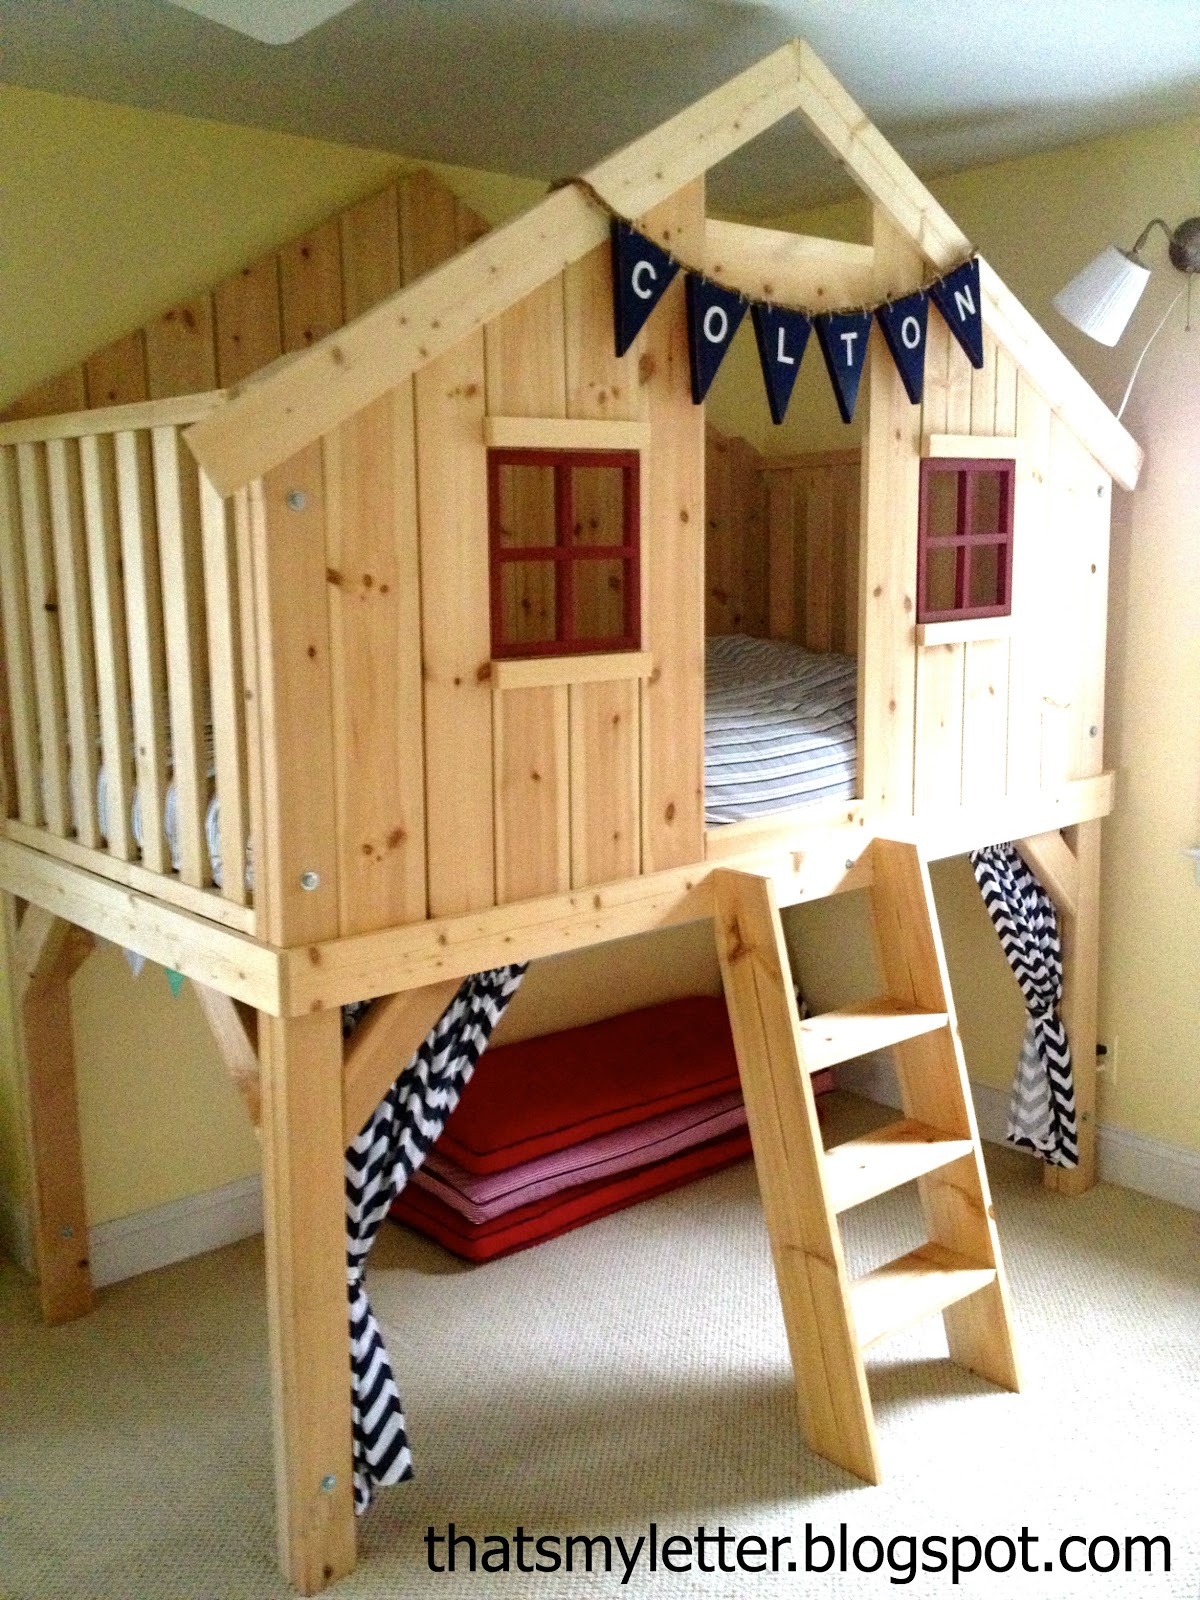
I hung this bunting on my son’s clubhouse bed purely for picture purposes but it will make the perfect addition to Colton’s nursery.
The 3/4″ thick wood gives this bunting weight and dimension.
Room decor that will stand the test of time as he grows into a young man.
A very easy and fast gift to make.

Here’s how I made the wood bunting:

1. I used a scrap piece of 1×6 pine board cut at 7″ lengths, then set my miter saw at 22.5 degrees to make two miter cuts.  Each triangle measures about 7″h x 5.5″w.
Then drill holes at the top for the jute string:
2. Paint two coats blue:

3. Sand to distress edges well.
Print out letters to fit. (I used Ariel font.)

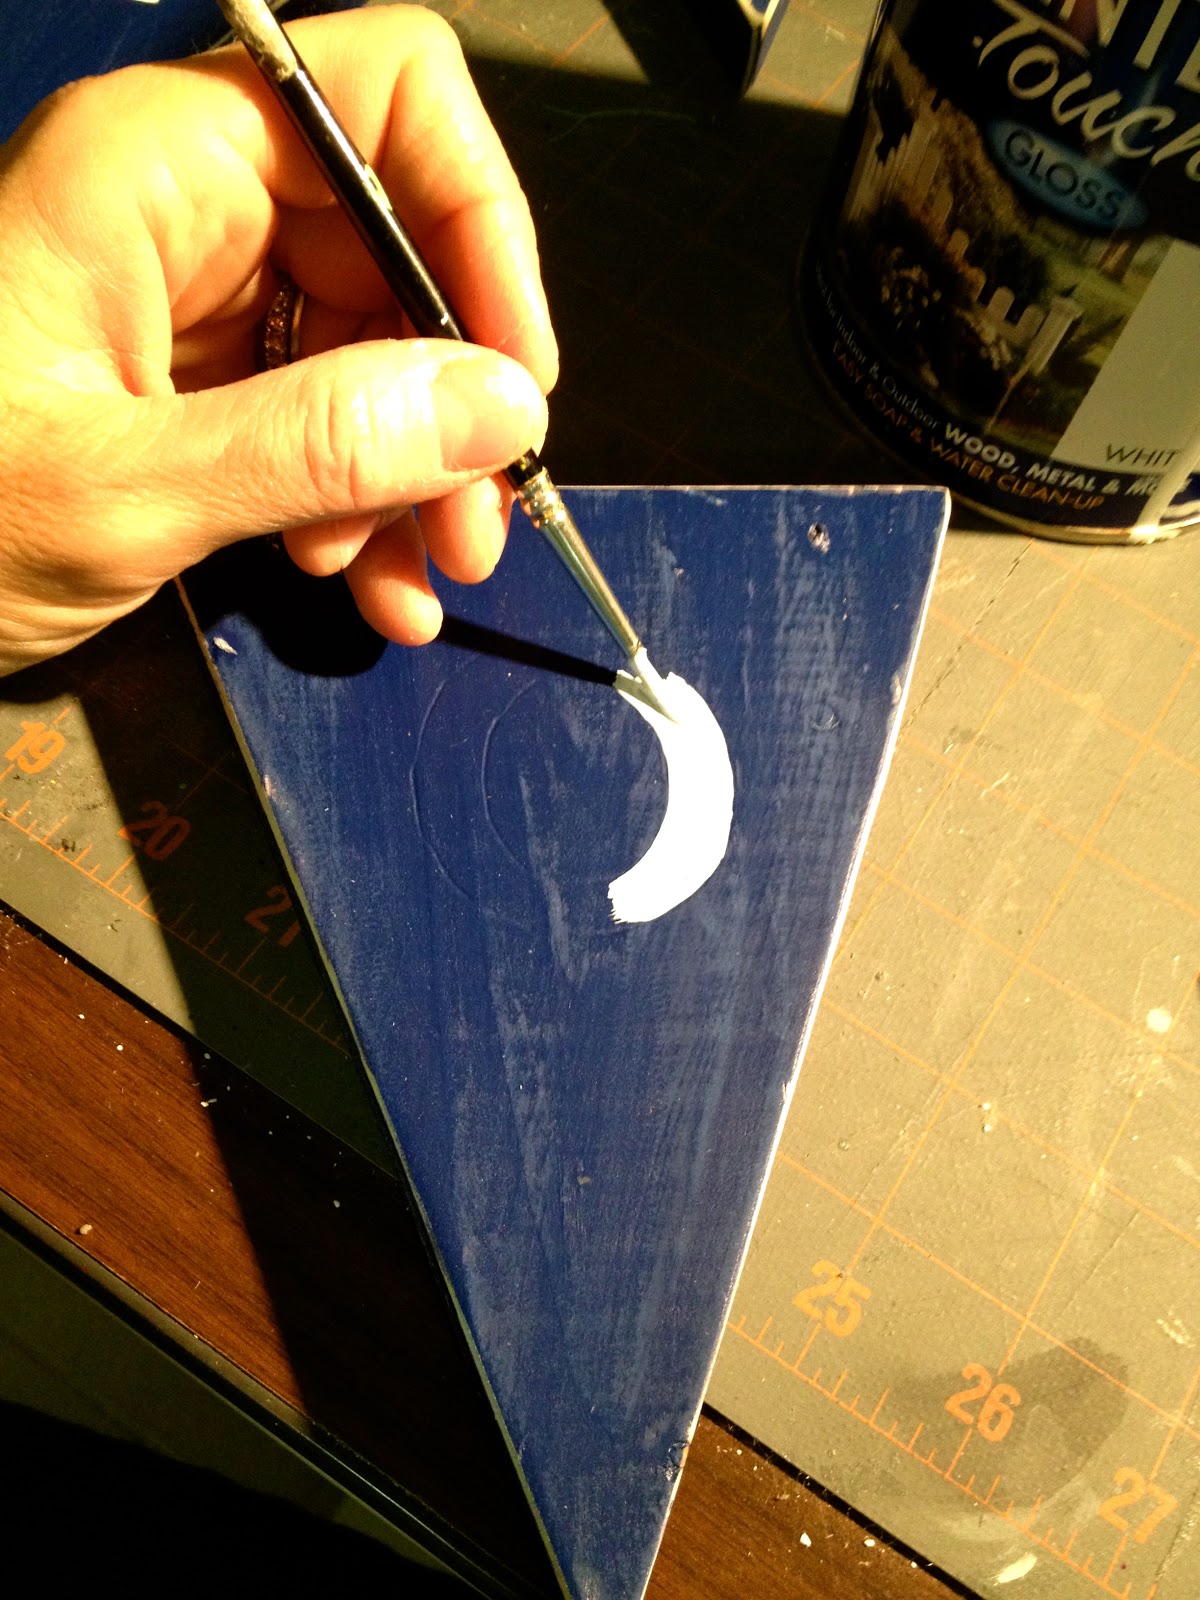
4. Line up letter and trace with ballpoint pen:

5. Paint on and inside the indent left behind by the ballpoint pen:

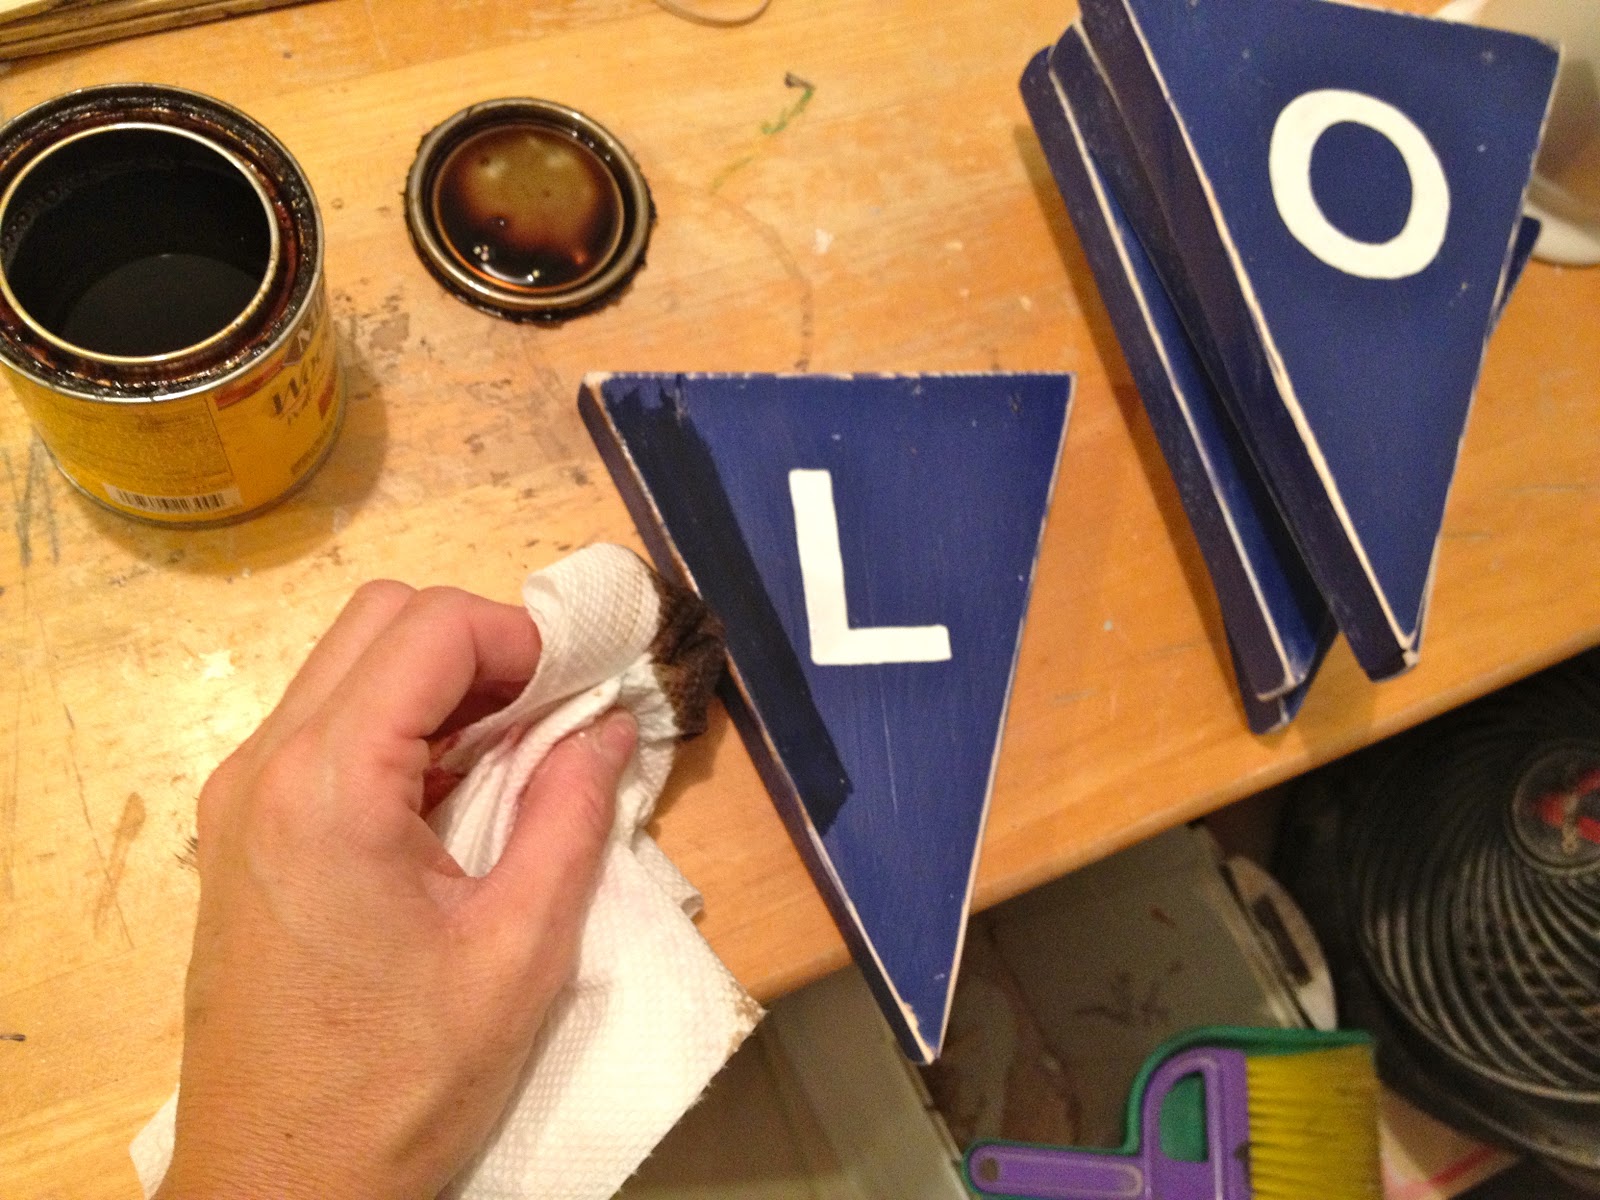
6. Stain to age with Minwax early american:

7. Seal with Minwax spray poly semi-gloss.
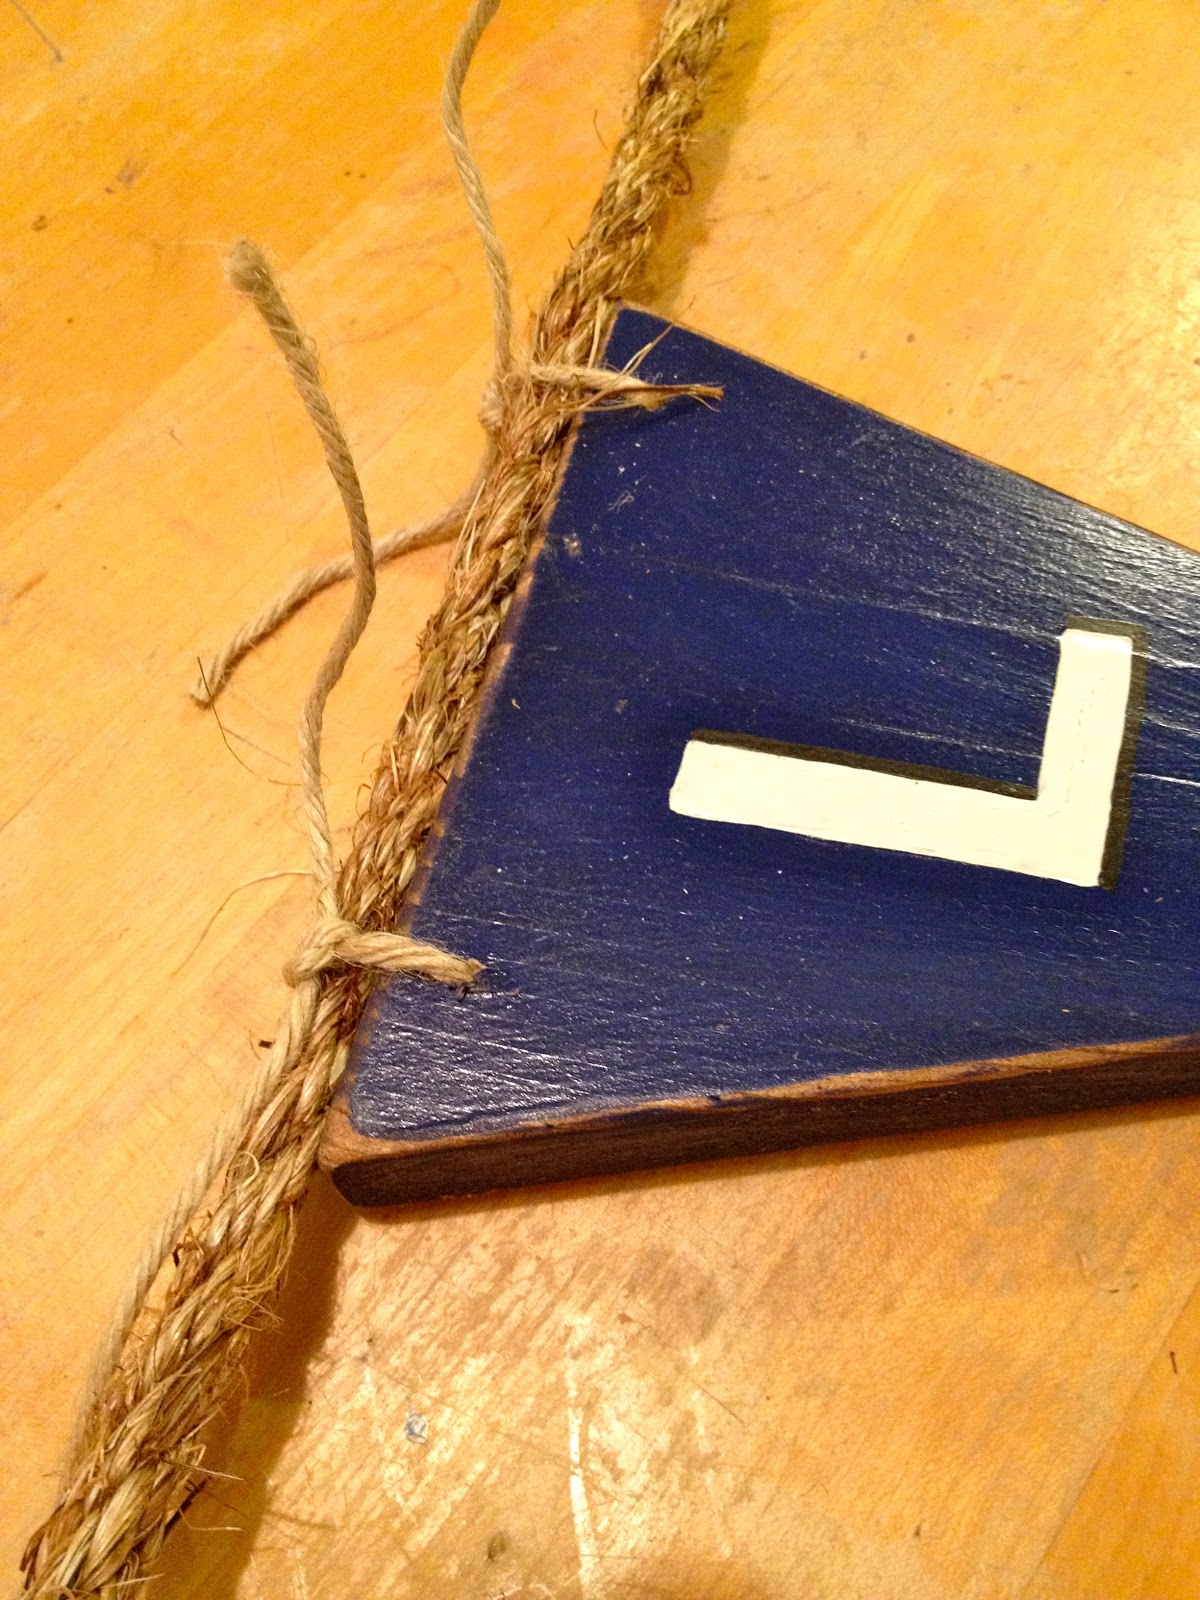
Thread jute string through holes:

8. Tie jute string pieces onto 3/8″ manila rope:

Hang and enjoy!
I’m linking up to:
SAS @ Funky Junk
Nifty Thrifty Sunday @ Nifty Thrifty Things
DIY Project Parade @ The DIY Showoff
Tutorials & Tips Tuesday @ Home Stories A to Z
Strut Your Stuff @ Somewhat Simple
Share Awesomeness Thur @ The 36th Avenue
Pretty Things Thursday @ Scissors & Spatulas
Flaunt it Friday @ Chic on a Shoestring
Frugal Friday @ The Shabby Nest
SAS @ Just a Girl
Remodelaholics Anonymous @ Remodelaholic
inspiration board @ Carolyns Homework
Sunday Showcase Party @ Under the Table & Dreaming
Weekend Bloggy Reading @ Serenity Now

You may also like...

  • Cross Stitch Monogram Ornament PlacecardCross Stitch Monogram Ornament Placecard
  • DIY Wedding Cake Ornament FavorsDIY Wedding Cake Ornament Favors
  • DIY Wood Cut Out Name PlaqueDIY Wood Cut Out Name Plaque
  • DIY Giant Wood BuntingDIY Giant Wood Bunting
Share this post:

Filed Under: BUILD, DIY, HOME DECOR, HOME DECOR, PAINT, SCRAP WOOD6 Comments

Reader Interactions

Comments

  1. Serena says

    October 27, 2012 at 8:37 AM

    Hi, Jamie, what a clever idea! Thanks for the inspiration! If you're interested, stop on over to my blog, too, Thrift Diving!

    Serena
    http://www.ThriftDiving.com

    Reply
  2. Korrie@RedHenHome says

    October 27, 2012 at 12:11 PM

    This is SO cute! You need to make one just for your son now; it's perfect for the clubhouse!

    Reply
  3. Jen says

    October 28, 2012 at 1:05 AM

    I absolutely LOVE this!
    Its definitely getting added to my very long to do list!

    Reply
  4. Larissa Richardson says

    October 28, 2012 at 5:18 PM

    Such a great idea, Jamie! I love it. Thanks for sharing.

    Reply
  5. Randi~Dukes and Duchesses says

    October 31, 2012 at 11:22 AM

    Love that!

    Reply
  6. Ashley G says

    December 24, 2014 at 5:06 AM

    I love the wood banner! Looks great on the bed. 🙂

    Reply

Leave a Reply Cancel reply

Your email address will not be published. Required fields are marked *

Primary Sidebar

Hi! I’m Jaime

Jaime Costiglio

Hello!

Thank you for stopping by.
Join me for lots of DIY.

Read more

Get new posts via email

Handbuilt Holiday: Gift Project Plans

handbuilt holiday gift project plans

Collection of DIY gift project plans to build.

The Home Depot Tool Prospective

THD Prospective

Tools to consider for the DIYer.

Archives

The Home Depot Logo
Copyright © 2026 Jaime Costiglio · Custom site by Moonsteam Design

Privacy Policy