• Home
  • Blog
  • About
  • Contact
    • Disclosure
    • Privacy Policy
  • SHOP
  • Widget area for main menu

    • Email
    • Facebook
    • Instagram
    • Pinterest
    • Twitter
    • YouTube
  • Skip to primary navigation
  • Skip to main content
  • Skip to primary sidebar

Jaime Costiglio

build - paint - sew

  • BUILD
    • BEDS
    • BENCHES
    • DESKS
    • DRESSERS
    • GAMES & TOYS
    • SCRAP WOOD
    • SHELVES
    • STORAGE
    • TABLES
  • TOOLS
  • PAINT
    • CRAFTS
    • FURNITURE
    • HOME DECOR
  • SEW
    • GIFTS
    • HOME DECOR
    • POUCHES
  • HANDBUILT HOLIDAY
    • 2021
    • 2019
    • 2018
    • 2017
    • 2016
    • 2015
    • 2014
    • 2013
  • GIFTS
    • BABIES
    • KIDS
    • FOR HER
    • FOR HIM
    • TEACHERS
    • WEDDINGS
  • SEASONAL
    • 4TH OF JULY
    • FALL
    • HALLOWEEN
    • CHRISTMAS
    • SUMMER
    • SPRING
    • ST. PATRICK’S DAY
    • THANKSGIVING
    • VALENTINE’S DAY
    • WINTER
  • SALTBOX PROJECT
    • BATHROOMS
    • DINING ROOM
    • EXTERIOR
    • FAMILY ROOM
    • FOYER / MUDROOM
    • KIDS BEDROOMS
    • KITCHEN
    • LIVING ROOM
    • MASTER BEDROOM
    • PLAYROOM
  • SCROLL SAW

DIY Wedding Invitation Serving Tray

June 23, 2012

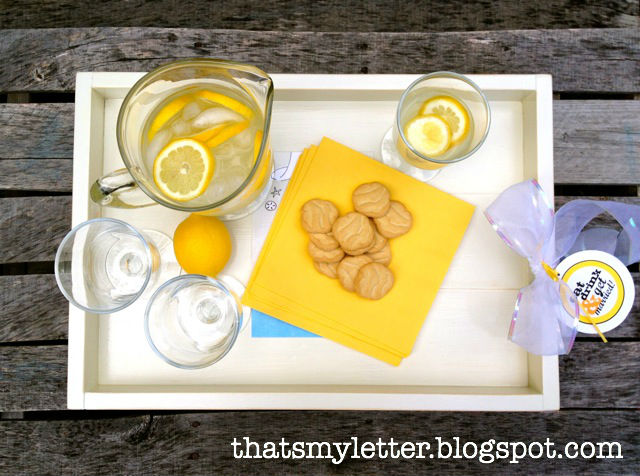
Build: wedding invitation serving tray
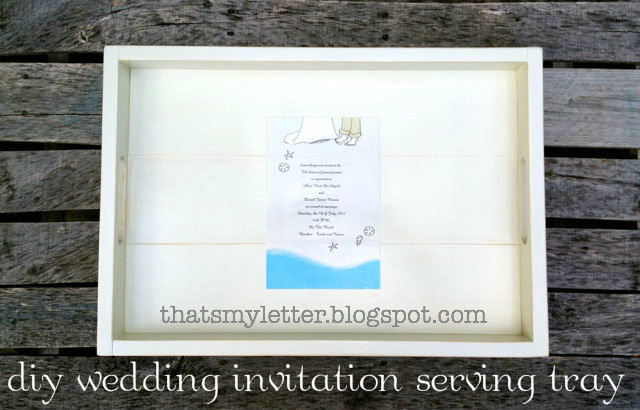
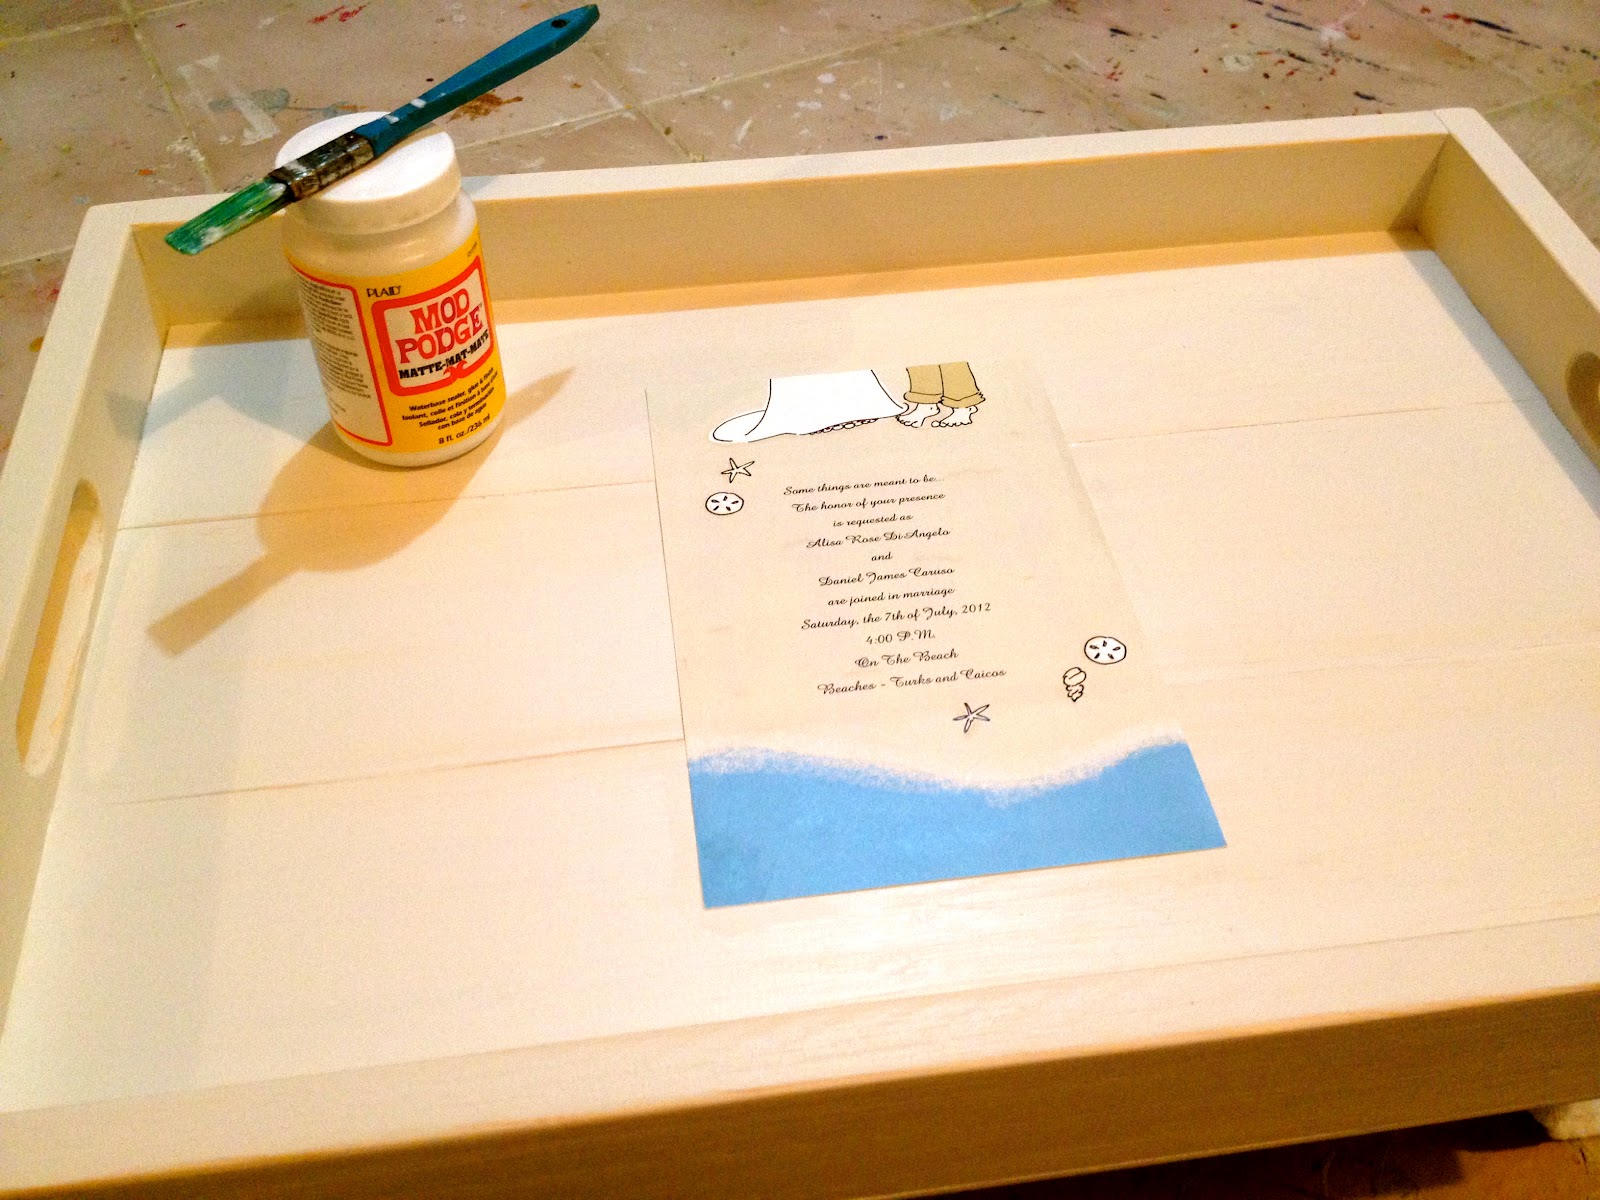
I made this wooden serving tray and sealed the wedding invitation on the surface:

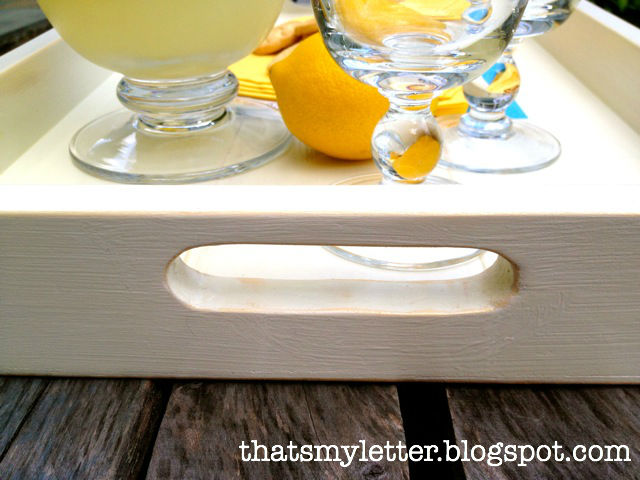
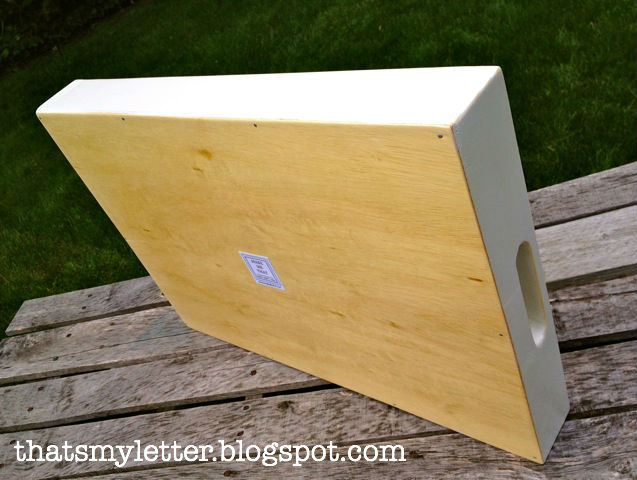
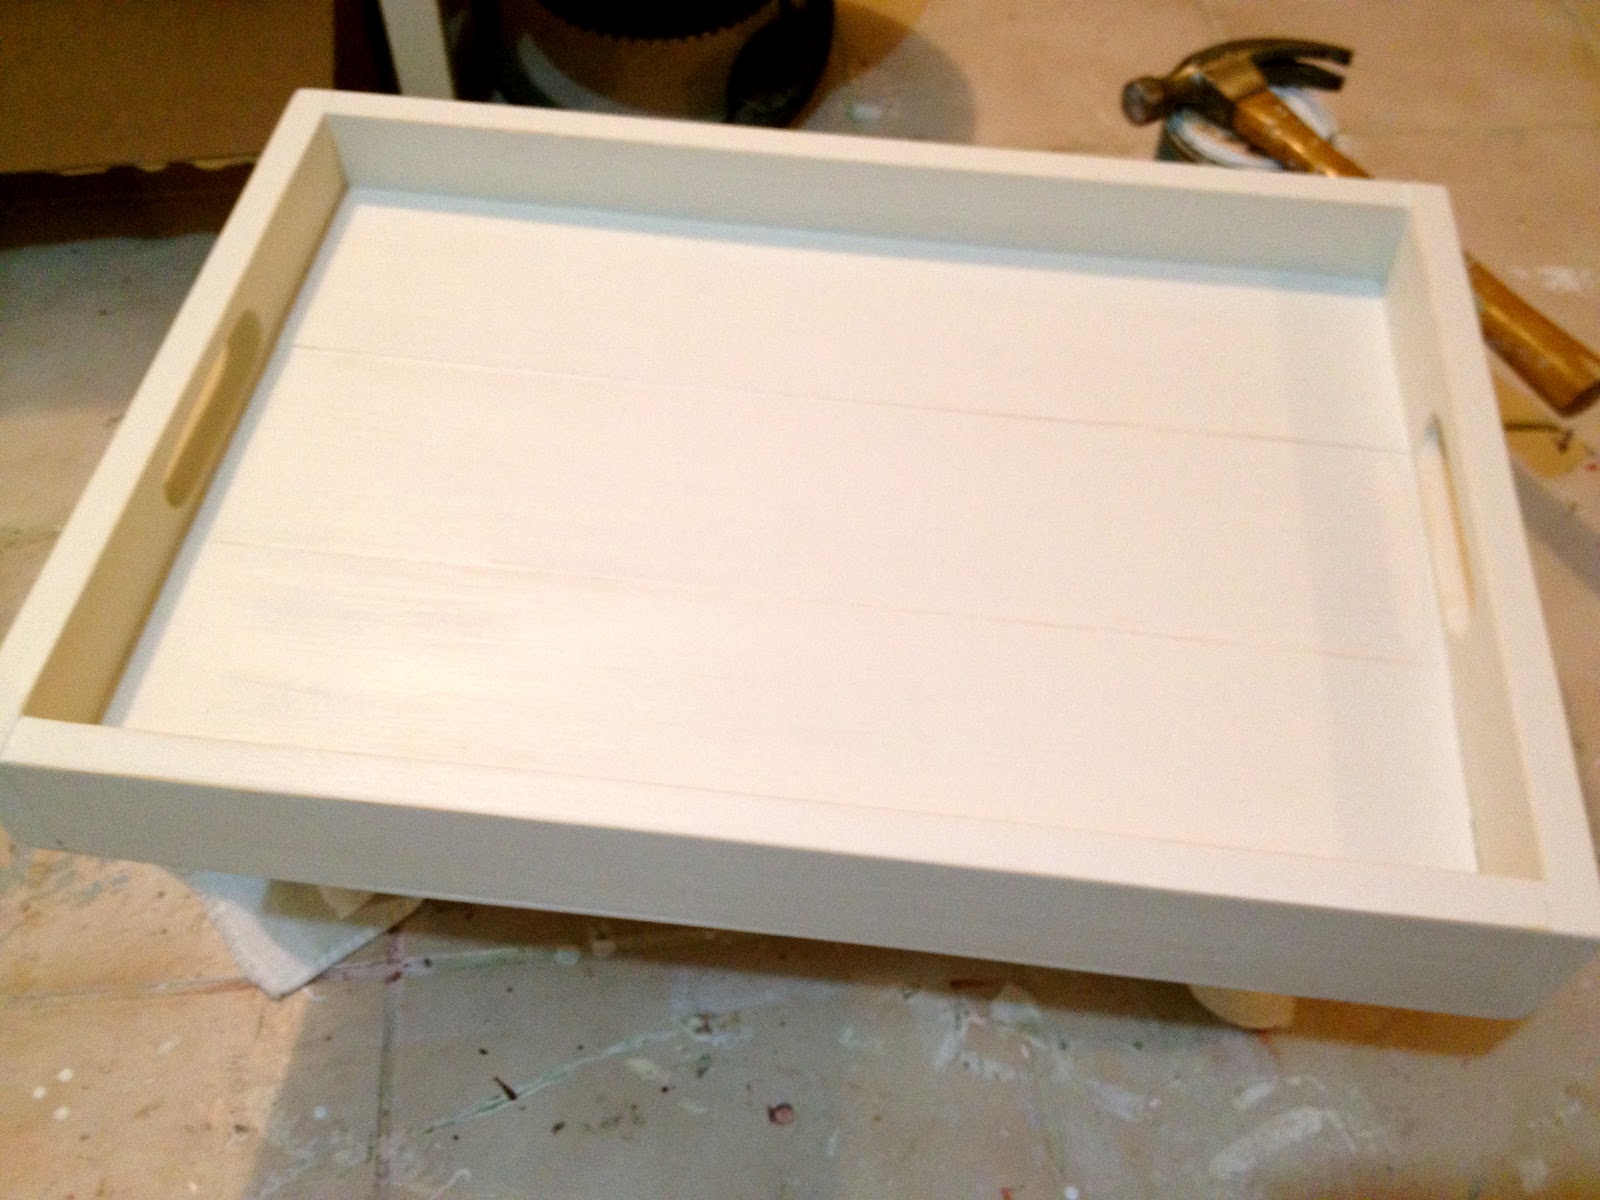
It’s a generous size with cut out handles for easy carrying:

A keepsake for their invitation, preserved under layers of gloss varnish and acrylic:

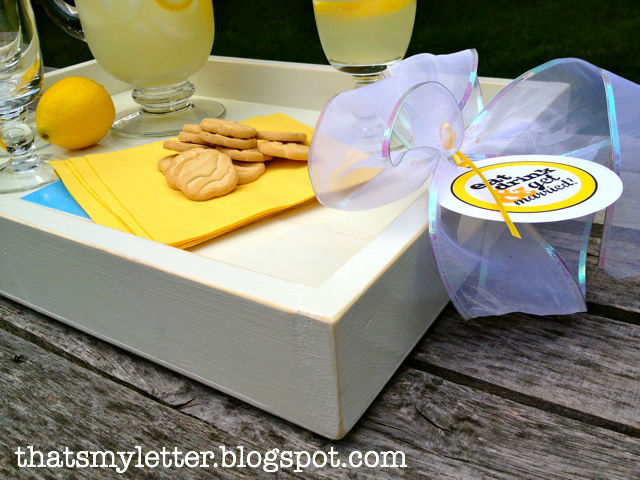
And makes for a great bridal shower gift.

The edges are distressed slightly in keeping with the beachy nature of the invitation:

Here’s how I made the serving tray:

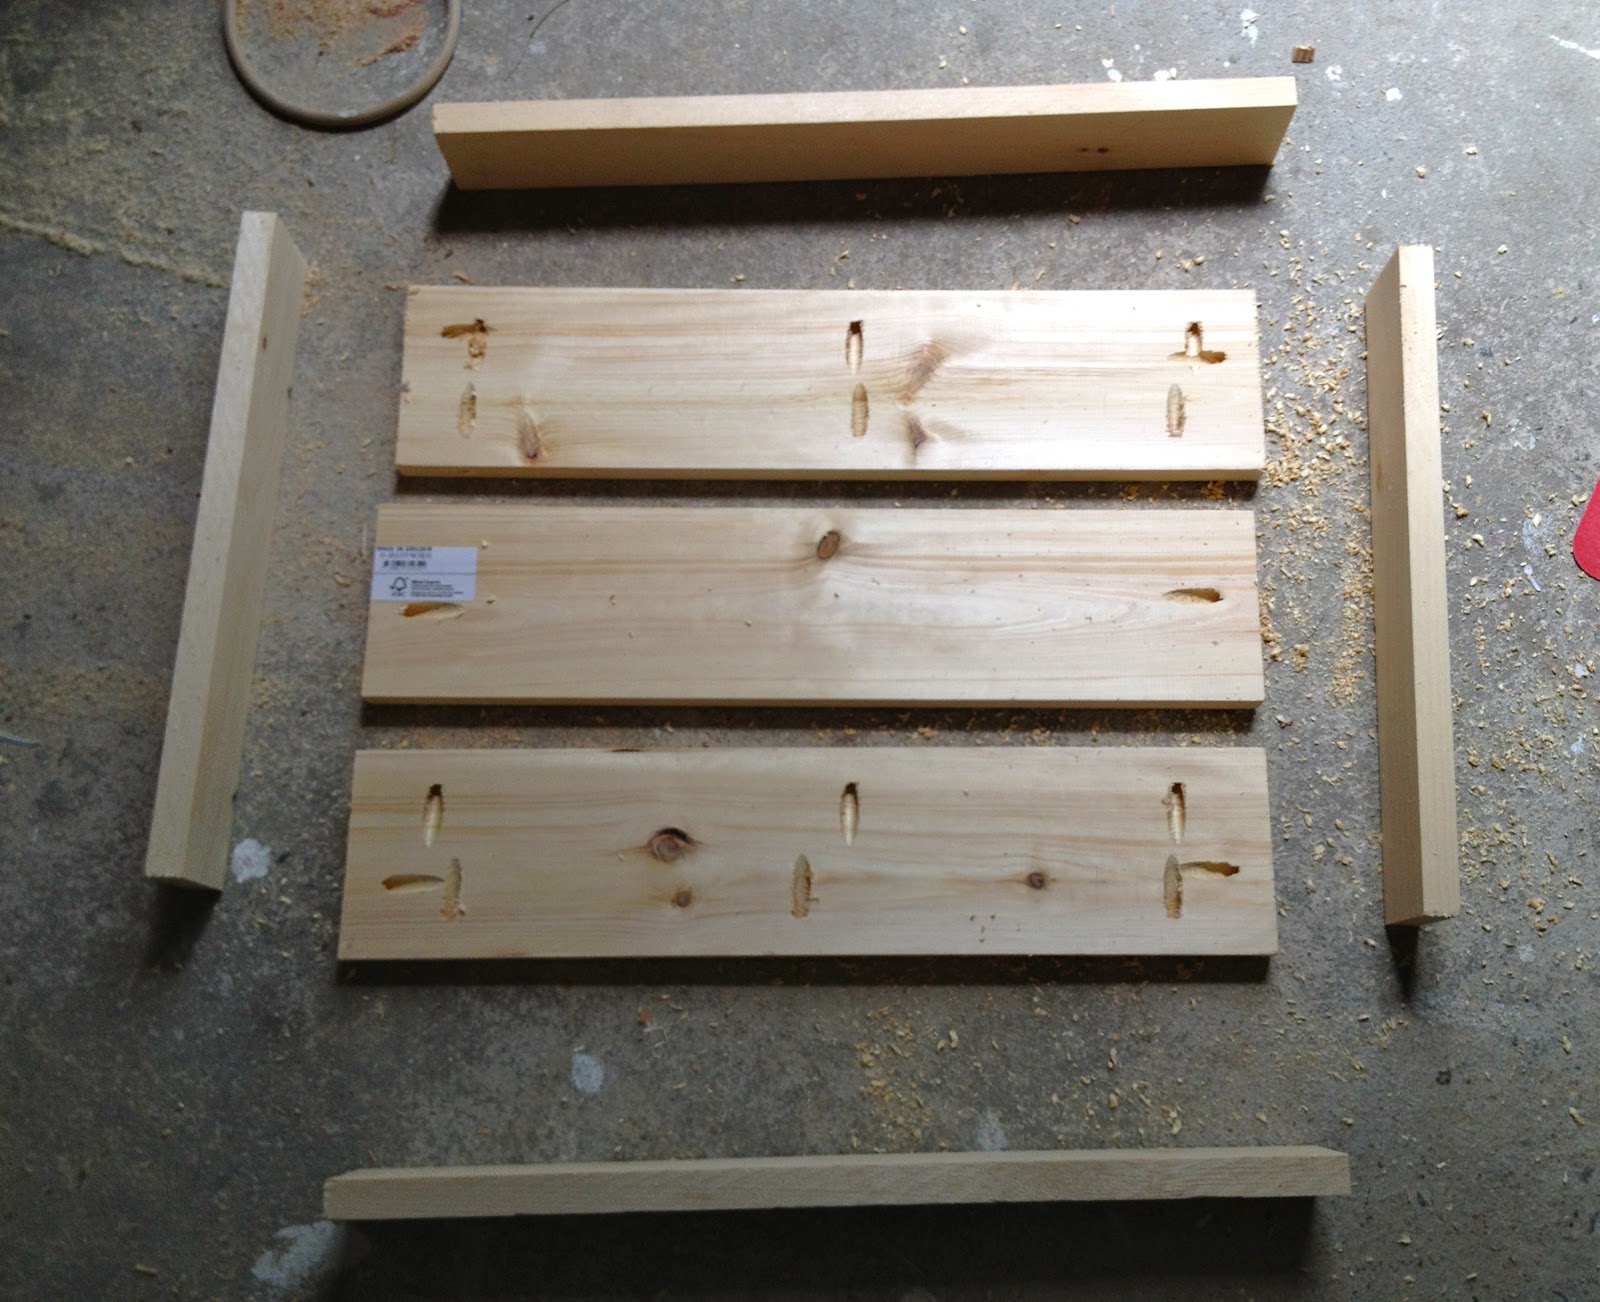
1. Cut wood to size:
3 – 1×5 @ 18″
2 – 1×3 @ 18″
2 – 1×3 @15″
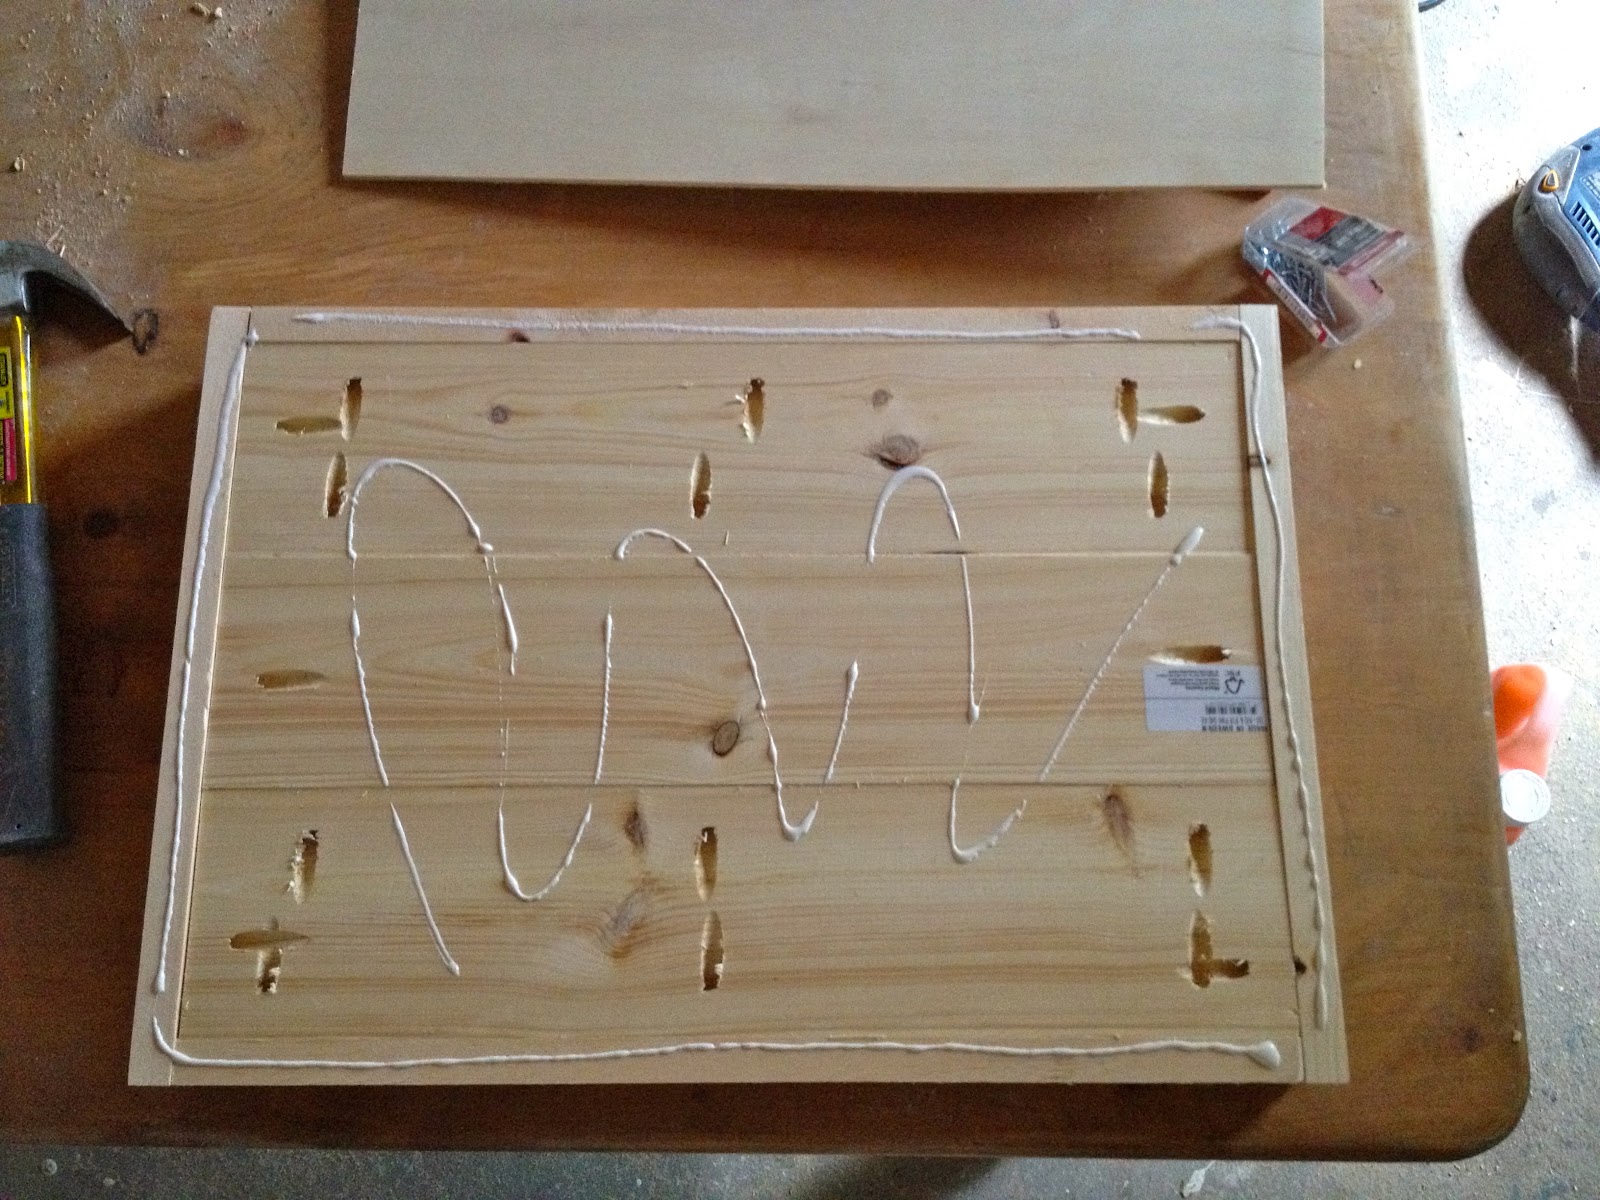
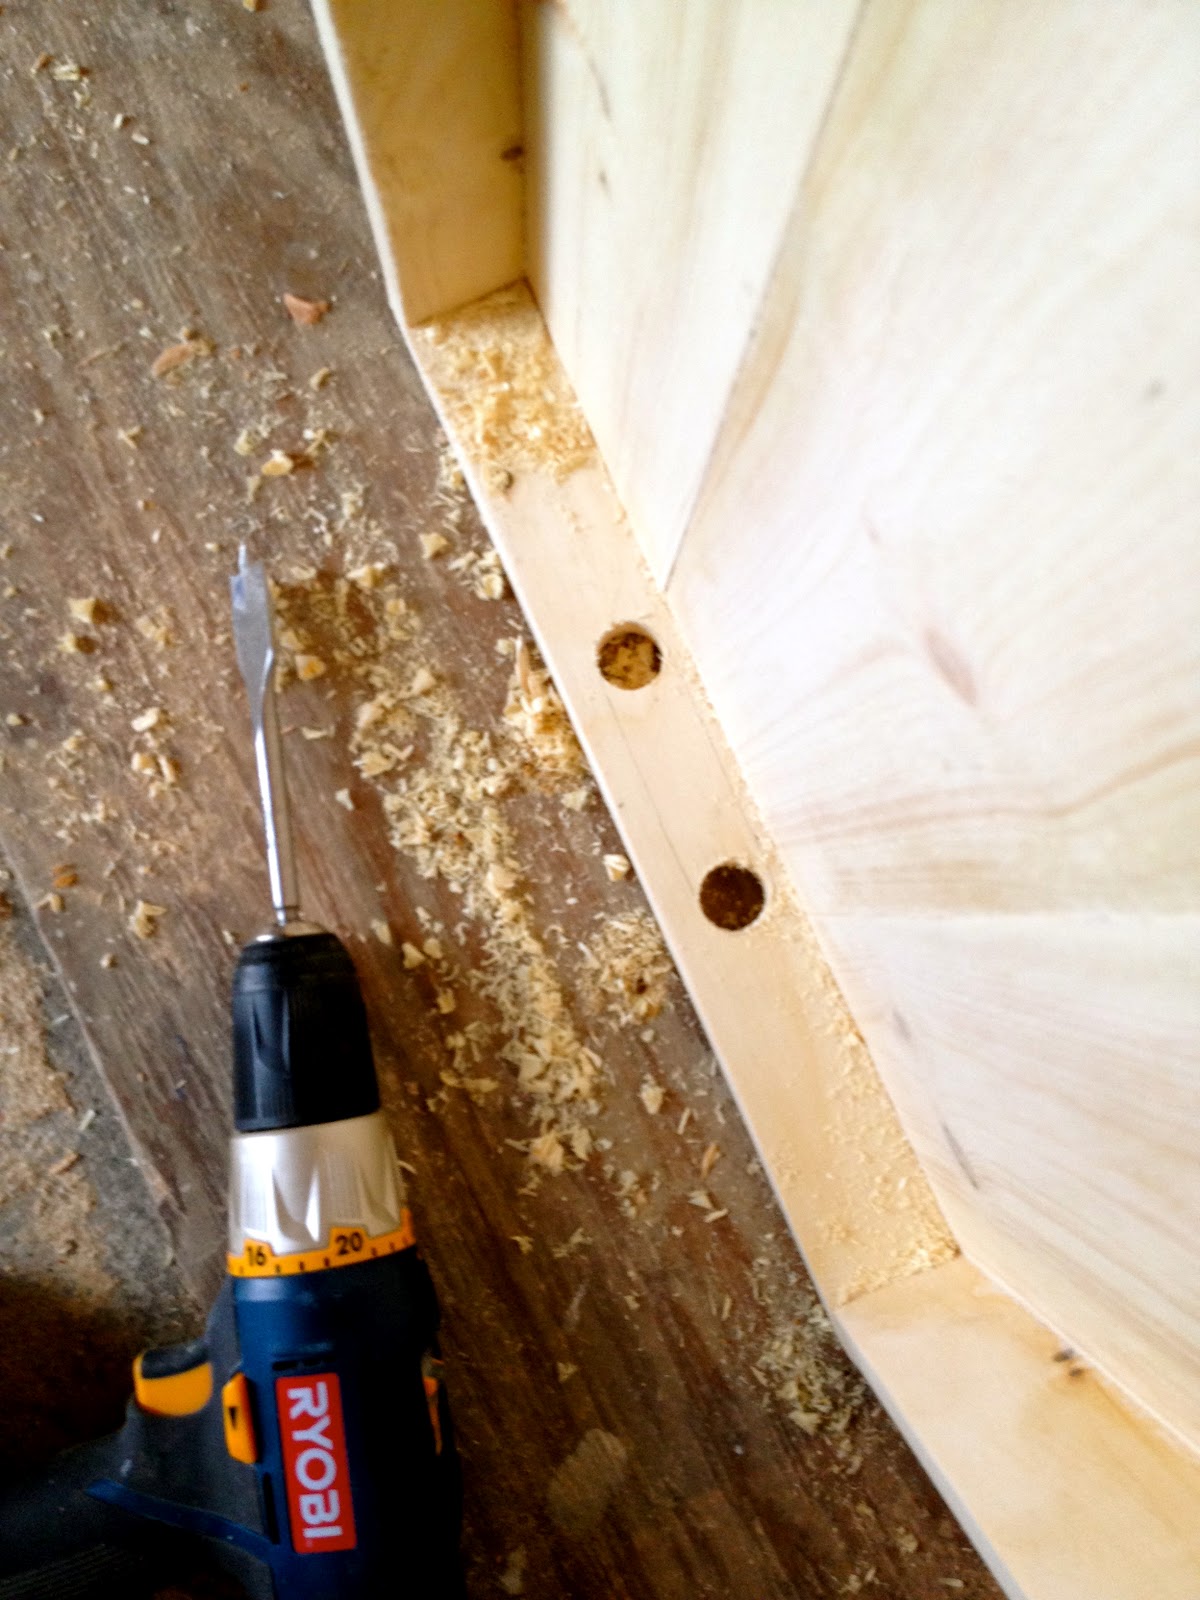
Make pocket holes in 1×5 pieces to attach to each other and for attaching the sides:
2. Secure all pieces.
Add 1/4″ plywood to underside with finish nails and glue:

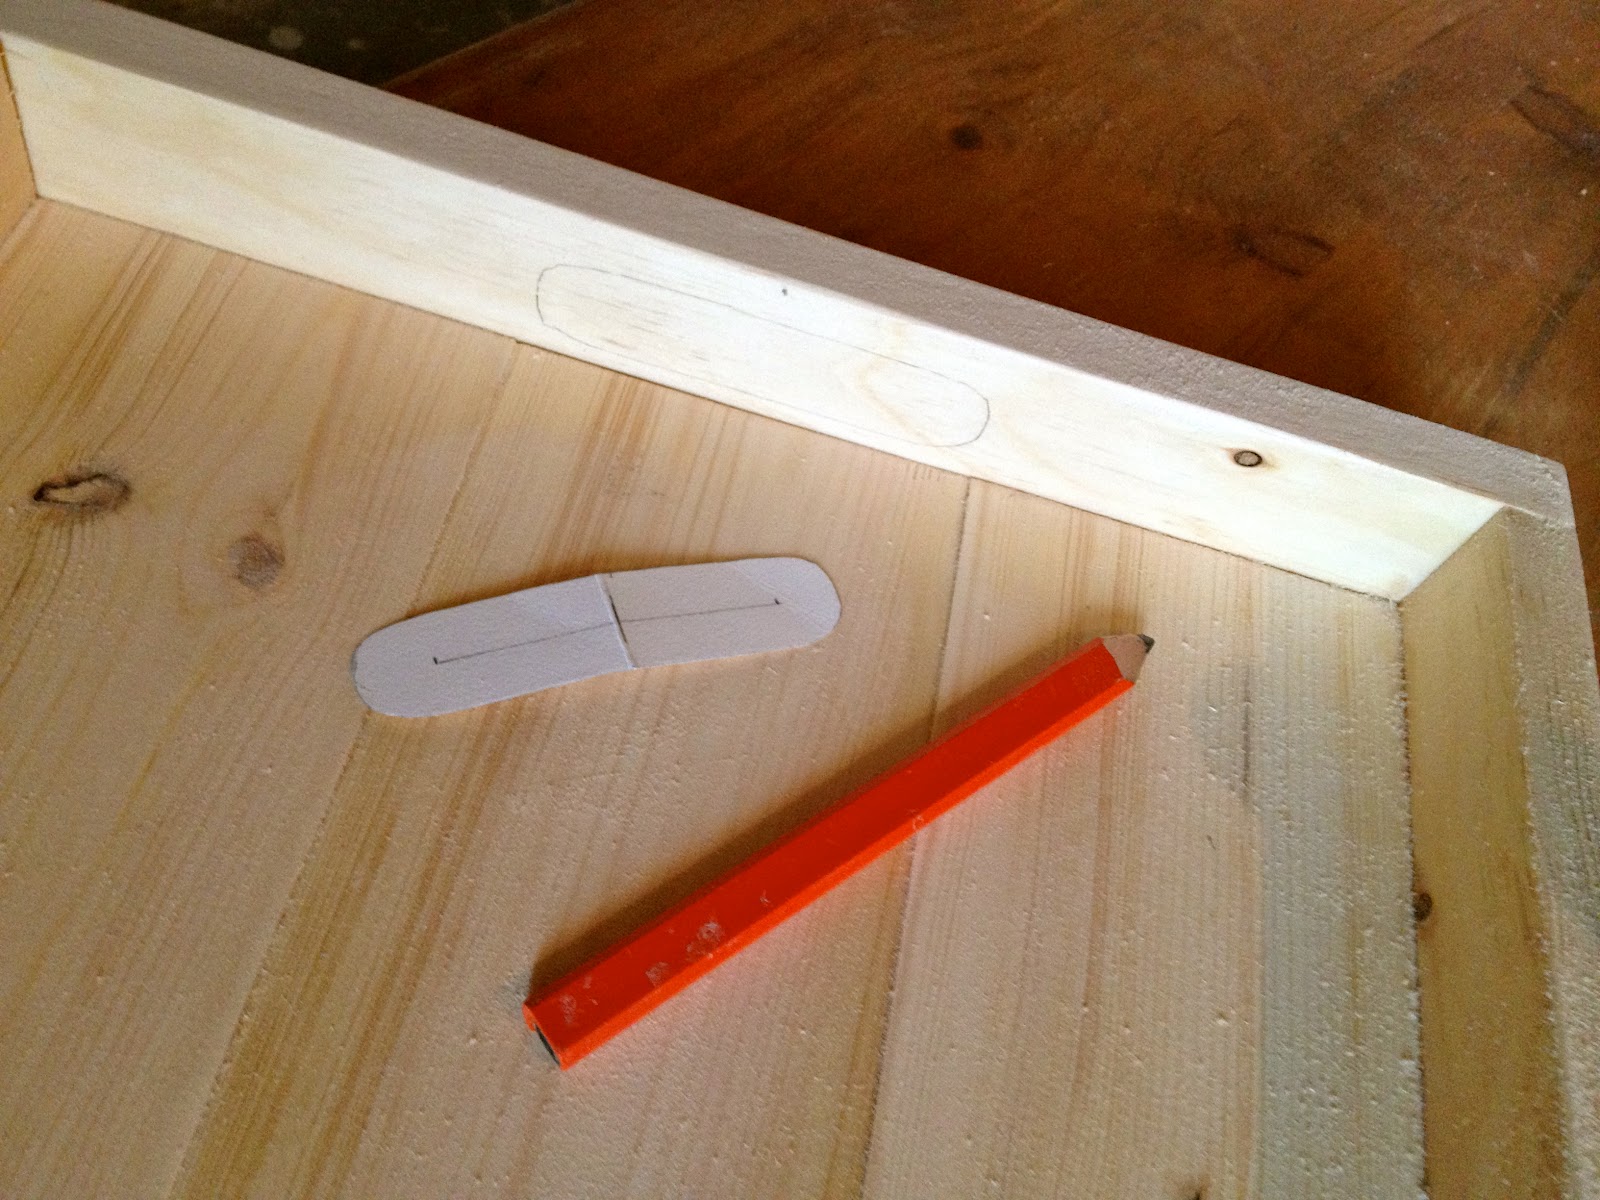
3. Mark short sides for cut out handles:

4. Begin cut out handles with circular bit:

5.  Then cut remaining part with jig saw:

6. Prime.
Paint two coats off white.

7. Attach invitation using mod podge on both back and front:

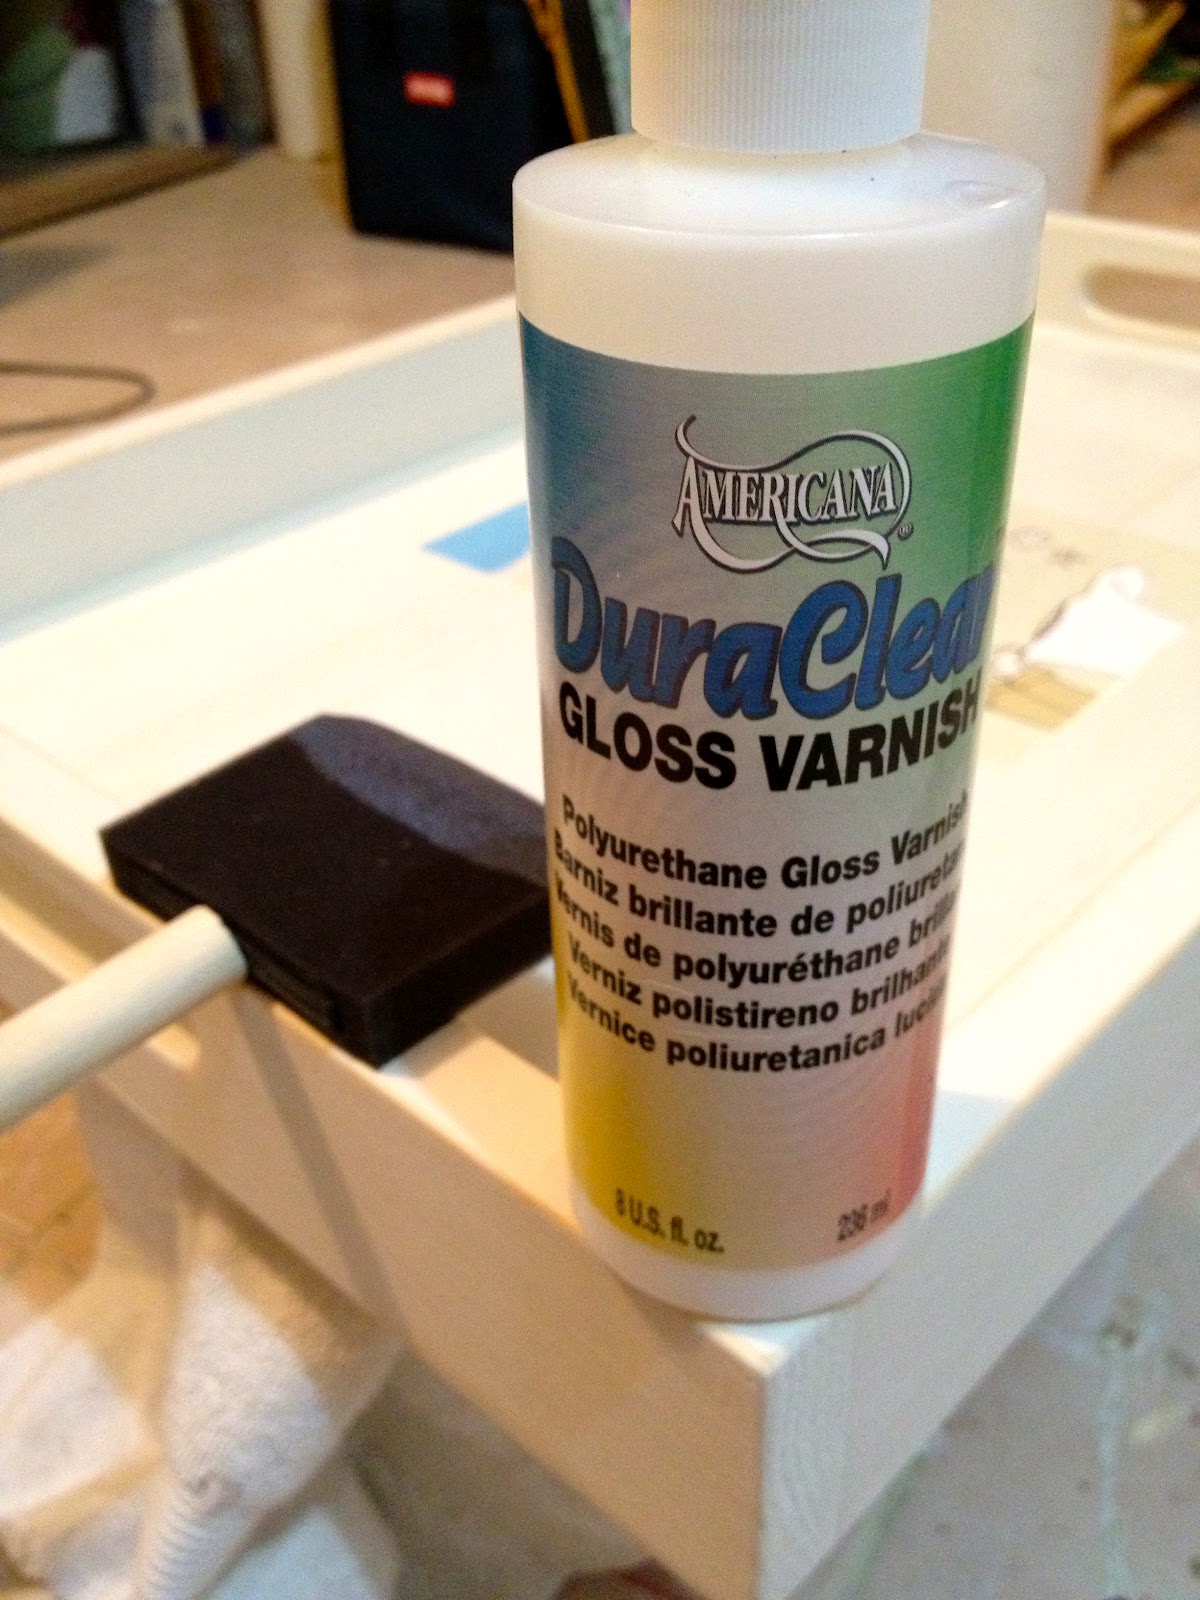
8. Apply Americana DuraClear gloss varnish to tray surface with foam brush.
Thin coats are best.
I applied at least 5 coats.

9. Spray entire tray with clear gloss acrylic, again multiple coats to achieve a hard glossy seal.
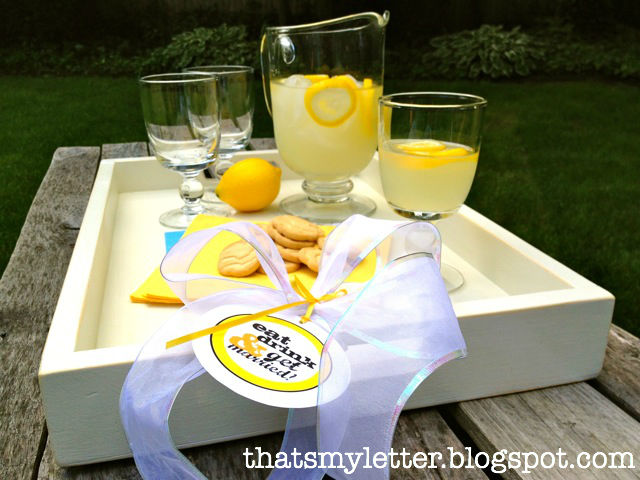
Attach tag for gift giving: eat, drink and get married!

Ready for serving:

You may also like...

  • DIY Cupcake StandDIY Cupcake Stand
  • DIY Industrial Cupcake StandDIY Industrial Cupcake Stand
  • DIY Divided Lazy SusanDIY Divided Lazy Susan
  • DIY Mini Croquet Mallet Food LabelsDIY Mini Croquet Mallet Food Labels
Share this post:

Filed Under: BUILD, DIY, GIFTS, HOME DECOR, PAINT, SCRAP WOOD, WEDDINGS9 Comments

Reader Interactions

Comments

  1. Julie says

    June 24, 2012 at 1:23 PM

    I am inviting you to come and be part of my blog hop:
    http://juliejewels1.blogspot.com/2012/06/show-your-stuff-29-mini-cherry.html

    Reply
  2. HarlowsExclusive says

    June 26, 2012 at 11:30 AM

    This serving tray DIY is great! I've been in the market to make a few as gifts 🙂

    Reply
  3. Karen Mary Butterfly says

    June 26, 2012 at 7:54 PM

    So smart. Very clever to do that with the invitation. Love it!

    Reply
  4. Style Sisters says

    June 28, 2012 at 3:22 PM

    What a great idea! So cute and fun…I wish I would have seen this last week…I just got back from a wedding and this would have been perfect! Come link up to Centerpiece Wednesday and share this idea with us.

    Karin

    Reply
  5. Kari says

    June 29, 2012 at 5:28 AM

    what a great idea and such a personal wedding gift! I love it!
    karicorsi.blogspot.com

    Reply
  6. theoriginalthread says

    June 29, 2012 at 7:30 PM

    What a lovely idea, thanks for sharing 🙂

    Reply
  7. Lolly Jane says

    July 7, 2012 at 2:00 PM

    Sooo cute Jaime- what a great idea!! 🙂
    We'll be featuring you this weekend!
    xoxo

    Reply
  8. Lolly Jane says

    July 7, 2012 at 2:01 PM

    Sooo cute Jaime- what a great idea!! 🙂
    We'll be featuring you this weekend!
    xoxo

    Reply

Leave a Reply Cancel reply

Your email address will not be published. Required fields are marked *

Primary Sidebar

Hi! I’m Jaime

Jaime Costiglio

Hello!

Thank you for stopping by.
Join me for lots of DIY.

Read more

Get new posts via email

Handbuilt Holiday: Gift Project Plans

handbuilt holiday gift project plans

Collection of DIY gift project plans to build.

The Home Depot Tool Prospective

THD Prospective

Tools to consider for the DIYer.

Archives

The Home Depot Logo
Copyright © 2023 Jaime Costiglio · Custom site by Moonsteam Design

Privacy Policy