• Home
  • Blog
  • About
  • Contact
    • Disclosure
    • Privacy Policy
  • SHOP
  • Widget area for main menu

    • Email
    • Facebook
    • Instagram
    • Pinterest
    • Twitter
    • YouTube
  • Skip to primary navigation
  • Skip to main content
  • Skip to primary sidebar

Jaime Costiglio

build - paint - sew

  • BUILD
    • BEDS
    • BENCHES
    • DESKS
    • DRESSERS
    • GAMES & TOYS
    • SCRAP WOOD
    • SHELVES
    • STORAGE
    • TABLES
  • TOOLS
  • PAINT
    • CRAFTS
    • FURNITURE
    • HOME DECOR
  • SEW
    • GIFTS
    • HOME DECOR
    • POUCHES
  • HANDBUILT HOLIDAY
    • 2021
    • 2019
    • 2018
    • 2017
    • 2016
    • 2015
    • 2014
    • 2013
  • GIFTS
    • BABIES
    • KIDS
    • FOR HER
    • FOR HIM
    • TEACHERS
    • WEDDINGS
  • SEASONAL
    • 4TH OF JULY
    • FALL
    • HALLOWEEN
    • CHRISTMAS
    • SUMMER
    • SPRING
    • ST. PATRICK’S DAY
    • THANKSGIVING
    • VALENTINE’S DAY
    • WINTER
  • SALTBOX PROJECT
    • BATHROOMS
    • DINING ROOM
    • EXTERIOR
    • FAMILY ROOM
    • FOYER / MUDROOM
    • KIDS BEDROOMS
    • KITCHEN
    • LIVING ROOM
    • MASTER BEDROOM
    • PLAYROOM
  • SCROLL SAW

DIY Cupcake Stand

November 15, 2013

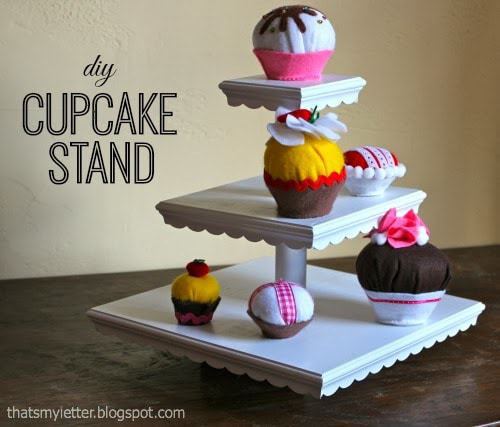
Party prep or just every day living either way you need an easy and pretty way to display those yummy cupcakes.  As part of the Handbuilt Holiday gift project series Ana White and I are sharing this DIY cupcake stand you can make for your holiday cupcakes.
diy cupcake stand

A DIY tutorial to build a three tier cupcake stand. Make this simple cupcake or dessert stand for your next event or perfect for kids play kitchen too!

It’s Friday and time to share another handmade holiday DIY gift build with plans from Ana White.
handmade holiday
Today we have a simple three tier cupcake stand that is perfect for your holiday gatherings.
wood cupcake stand
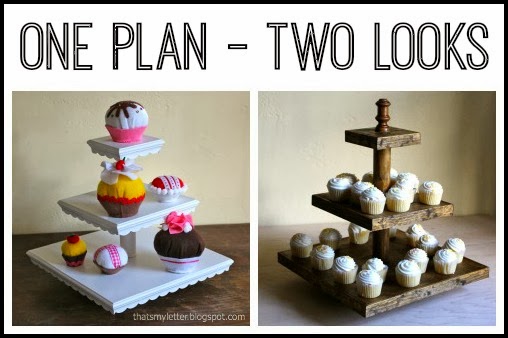
In fact it’s so simple I whipped up two stands very quickly.  And with just with a change of trim moulding and finish you can tailor this cupcake stand exactly as you like.
two looks from same build plan

Cupcake Stand Options:

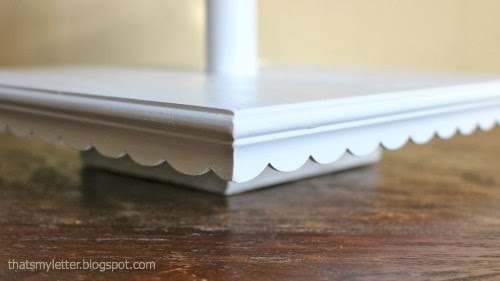
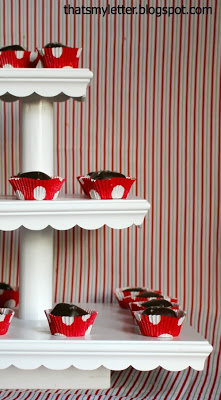
For the white stand I used scalloped moulding purchased from Michaels.  It adds such a pretty, delicate finishing touch that’s a bit more fancy.
tiered cupcake stand in white
 
scalloped edge detail on stand
And for the finishing touch I made felt cupcakes for a complete kids play gift.
diy felt cupcakes
The scalloped moulding gives the cupcake stand just the right amount of flare.
pretty scalloped cupcake stand

Rustic Stained Stand:

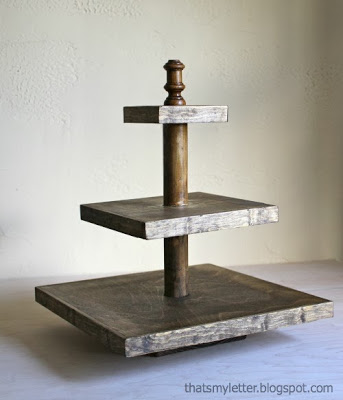
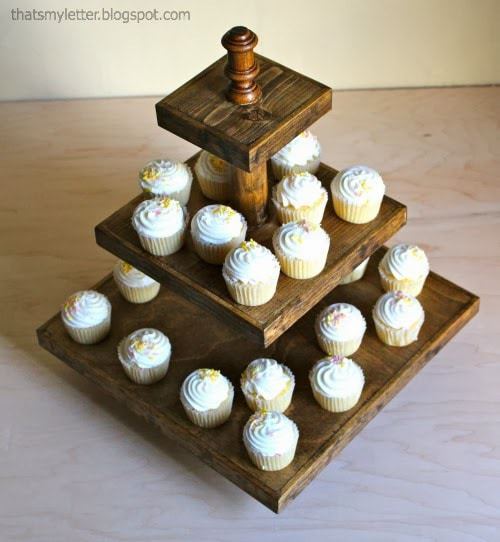
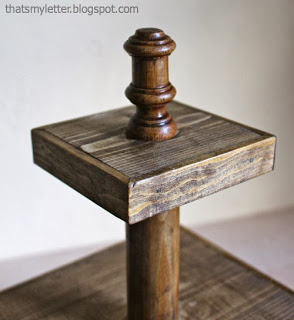
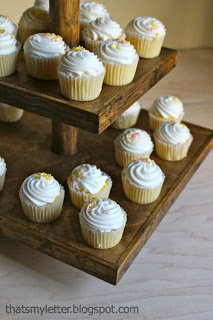
For the second stand I opted for a bit more rustic with stain and a turned dowel decorative topper.
stained wood cupcake stand farmhouse wedding
top dowel decorative detailstained cupcake stand

Build Process:

Below are the instructions on how to build a wood cupcake stand.  Be sure to read through entirely before beginning.
cupcake stand pieces cut

Step 1: Follow Ana’s plans and cut your lumber.

assembling cupcake stand

Step 2: Assemble the pieces as per Ana’s plans.

two mitered cuts not parallel

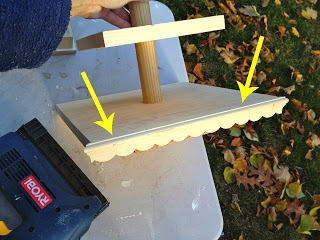
Step 3: Cut the moulding pieces with 45 degree bevel on both ends, not parallel.

Cut the moulding pieces to fit as you follow along the edge.

attaching trim on stand

Step 4: Attach the moulding with glue and finish nails.

mitered corner on trim
You want the shelf corners to come to a 90 degree angle.  Above is after you attach the first piece of moulding, the corner should look like this.
Now line up your next piece of moulding and cut to fit.
scalloped trim on cupcake stand

Step 5: Prime and paint with high gloss white, spray paint is best for this project.

Thanks for joining me for this cupcake stand project.  Please leave any questions in the comments below and be sure to follow me on social media for sneak peeks, tools and project inspiration:

Instagram / Pinterest / Facebook / Youtube / Twitter

diy cupcake stand free plans

You may also like...

  • DIY Crayon HolderDIY Crayon Holder
  • DIY Desktop TrayDIY Desktop Tray
  • DIY Mason Jar Tote free plansDIY Mason Jar Tote free plans
  • DIY Ottoman TrayDIY Ottoman Tray
Share this post:

Filed Under: 2013, BUILD, DIY, FOR HER, GIFTS, HANDBUILT HOLIDAY, SCRAP WOOD, SHELVES3 Comments

Reader Interactions

Comments

  1. Our Pinteresting Family says

    November 15, 2013 at 7:31 PM

    They both look beautiful!

    Reply
  2. Donald Cone says

    January 3, 2020 at 10:44 PM

    how you get the middle shelf to stay up?

    Reply
    • Jaime says

      January 4, 2020 at 8:15 AM

      Hi Donald, the middle shelf is very snug on the post and I used wood glue.

      Reply

Leave a Reply Cancel reply

Your email address will not be published. Required fields are marked *

Primary Sidebar

Hi! I’m Jaime

Jaime Costiglio

Hello!

Thank you for stopping by.
Join me for lots of DIY.

Read more

Get new posts via email

Handbuilt Holiday: Gift Project Plans

handbuilt holiday gift project plans

Collection of DIY gift project plans to build.

The Home Depot Tool Prospective

THD Prospective

Tools to consider for the DIYer.

Archives

The Home Depot Logo
Copyright © 2023 Jaime Costiglio · Custom site by Moonsteam Design

Privacy Policy