
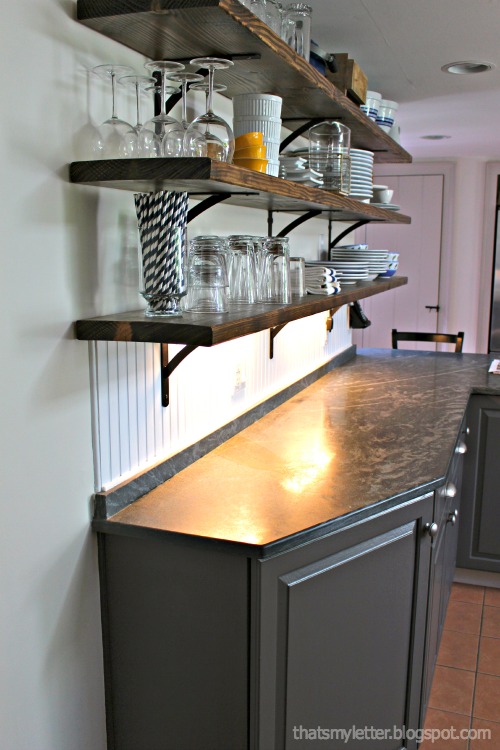
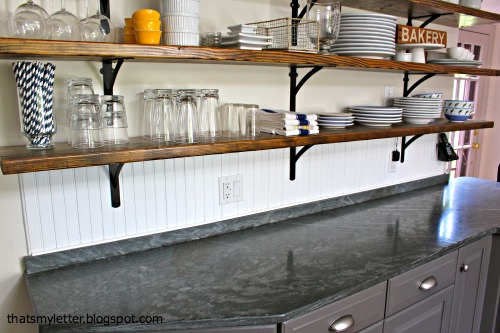
The kitchen makeover is complete now that I installed kitchen cabinet lighting from Westside Wholesale. Task lighting is a must any kitchen so when I ripped down the old wall cabinets the old hard wired under cabinet light did not fit the new open wood shelving mostly because of the suppport bracket. The stars aligned and Westside Wholesale contacted me about a product review, they sell all types of building supplies: lighting, bath fixtures, landscape items, tools, etc. – definitely worth a look. I found a great solution for hard wired under cabinet kitchen lighting with the Kichler Under Cabinet Lighting Kit.
The Kichler Under Cabinet Lighting Kit allows you to connect multiple fixtures with simple interconnect cables all leading to one hard wire controlled by a wall switch for professional looking task lighting. In addition these fixtures have a hi-low switch and Xenon bulbs for tons of clear, bright light.
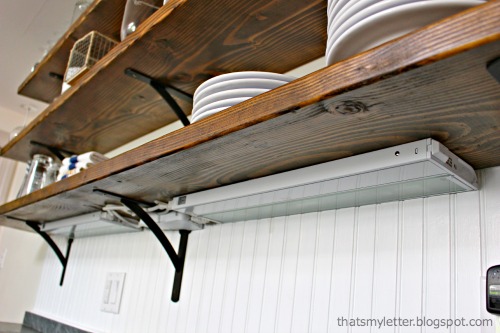
The slim 1″ profile means you won’t see any fixture or hardware poking out below your cabinets. The picture above is standing at adult eye level.

And with the fixtures on at the low setting.

Even if I squat down to below counter height the low 1″ profile is tidy and unobtrusive.
Here I have 2 – 22″ Kichler Under Cabinet Lights installed below a 2×12 wood shelf. Installation is a breeze, the wire module allows simple push-in installtion – no wire connectors or twisting caps which means it took me less than 30 minutes to finish this project.
How to install under cabinet lighting:
** I am NOT an electrician. Follow all proper safety guidelines in regards to electrical work and codes. If you have any doubts contact a qualified licensed electrician. **
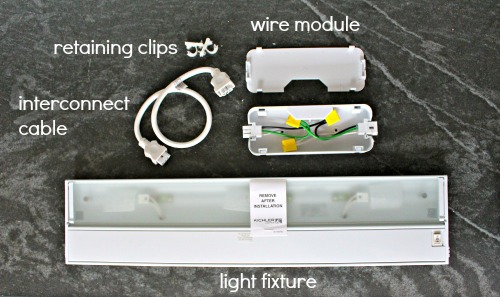
Each fixture comes with the following parts:
– wire module
– light fixture
– interconnect cable
– retaining clips
– hardware & connector covers (not pictured)
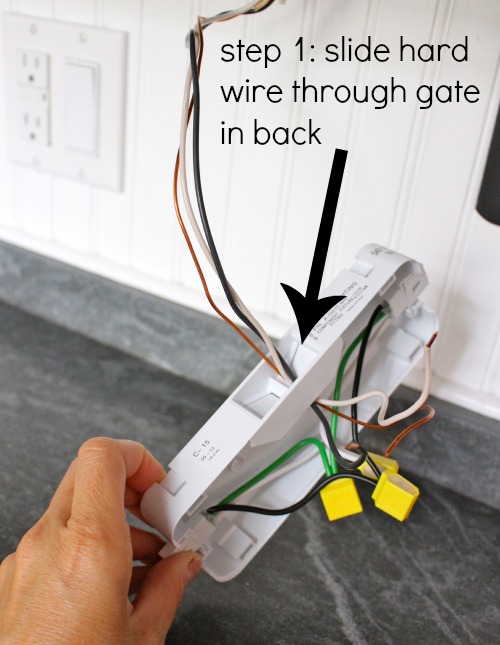
Step 1: Slide the hard wire (from the wall) through one of the gates in the back of the wire module. The gate acts as a strain relief preventing the wire from sliding.
(My wire had already been stripped from previous installation, only strip back approximately 5″ of jacket inside the module.)

Step 2: Insert stripped wires into the proper connector tab (yellow). Match up the colors here (ground is always green or copper). Simple, no twisting, just plug wire into tab!

Step 3: Using wood screws mounting the wire module to underside of cabinet. Determine the placement based on your light fixtures and then snap on cover.
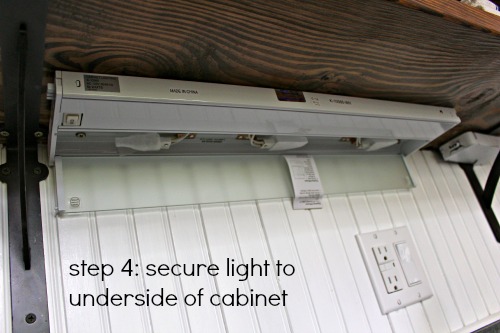
Step 4: Secure light fixture to underside of cabinet using 2 pre-installed screws, bulb compartment towards back.
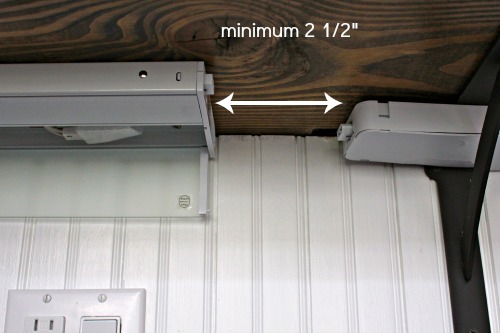
Be sure to leave a minimum of 2 1/2″ between the light fixture and wire module for interconnect cable.
Mount additional fixtures.

Step 5: Connect fixtures to wire module using interconnect cables. The cables have male/female ends.

Step 6: To keep the interconnect wires in place use the retaining clips and secure to underside of cabinet.

Step 7: On the opposite end of the light fixtures insert the connector cover for a finished look.

Your Kichler Under Cabinet Lighting Kit is installed and ready to flip the switch!
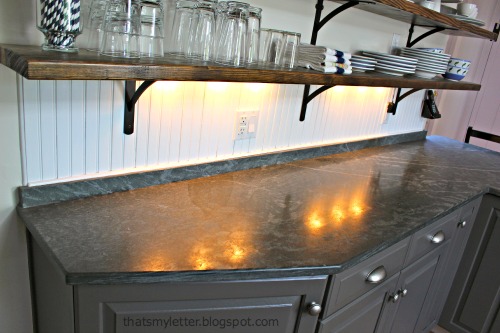
Now I can see what I’m doing.
Do you need task lighting, under cabinet lighting, kitchen cabinet lighting? I highly recommend checking out Westside Wholesale, the products are endless and you might find the solution you have been looking for.
Disclaimer: I was not compensated for writing this review. I was provided product and all thoughts and opinions are my own.


Wow! Those lights look amazing. I think they're perfect additions to any kitchen, especially if one plans on cooking up lots of meals in nighttime, where the ceiling lights may not be enough to cover everything. Your step-by-step guide made doing it sound so easy. Thank you so much for sharing! All the best!
Kelley Burton @ Aim Dynamics