• Home
  • Blog
  • About
  • Contact
    • Disclosure
    • Privacy Policy
  • SHOP
  • Widget area for main menu

    • Email
    • Facebook
    • Instagram
    • Pinterest
    • Twitter
    • YouTube
  • Skip to primary navigation
  • Skip to main content
  • Skip to primary sidebar

Jaime Costiglio

build - paint - sew

  • BUILD
    • BEDS
    • BENCHES
    • DESKS
    • DRESSERS
    • GAMES & TOYS
    • SCRAP WOOD
    • SHELVES
    • STORAGE
    • TABLES
  • TOOLS
  • PAINT
    • CRAFTS
    • FURNITURE
    • HOME DECOR
  • SEW
    • GIFTS
    • HOME DECOR
    • POUCHES
  • HANDBUILT HOLIDAY
    • 2021
    • 2019
    • 2018
    • 2017
    • 2016
    • 2015
    • 2014
    • 2013
  • GIFTS
    • BABIES
    • KIDS
    • FOR HER
    • FOR HIM
    • TEACHERS
    • WEDDINGS
  • SEASONAL
    • 4TH OF JULY
    • FALL
    • HALLOWEEN
    • CHRISTMAS
    • SUMMER
    • SPRING
    • ST. PATRICK’S DAY
    • THANKSGIVING
    • VALENTINE’S DAY
    • WINTER
  • SALTBOX PROJECT
    • BATHROOMS
    • DINING ROOM
    • EXTERIOR
    • FAMILY ROOM
    • FOYER / MUDROOM
    • KIDS BEDROOMS
    • KITCHEN
    • LIVING ROOM
    • MASTER BEDROOM
    • PLAYROOM
  • SCROLL SAW

DIY Pumpkin Shaped Treat Bag

September 27, 2011

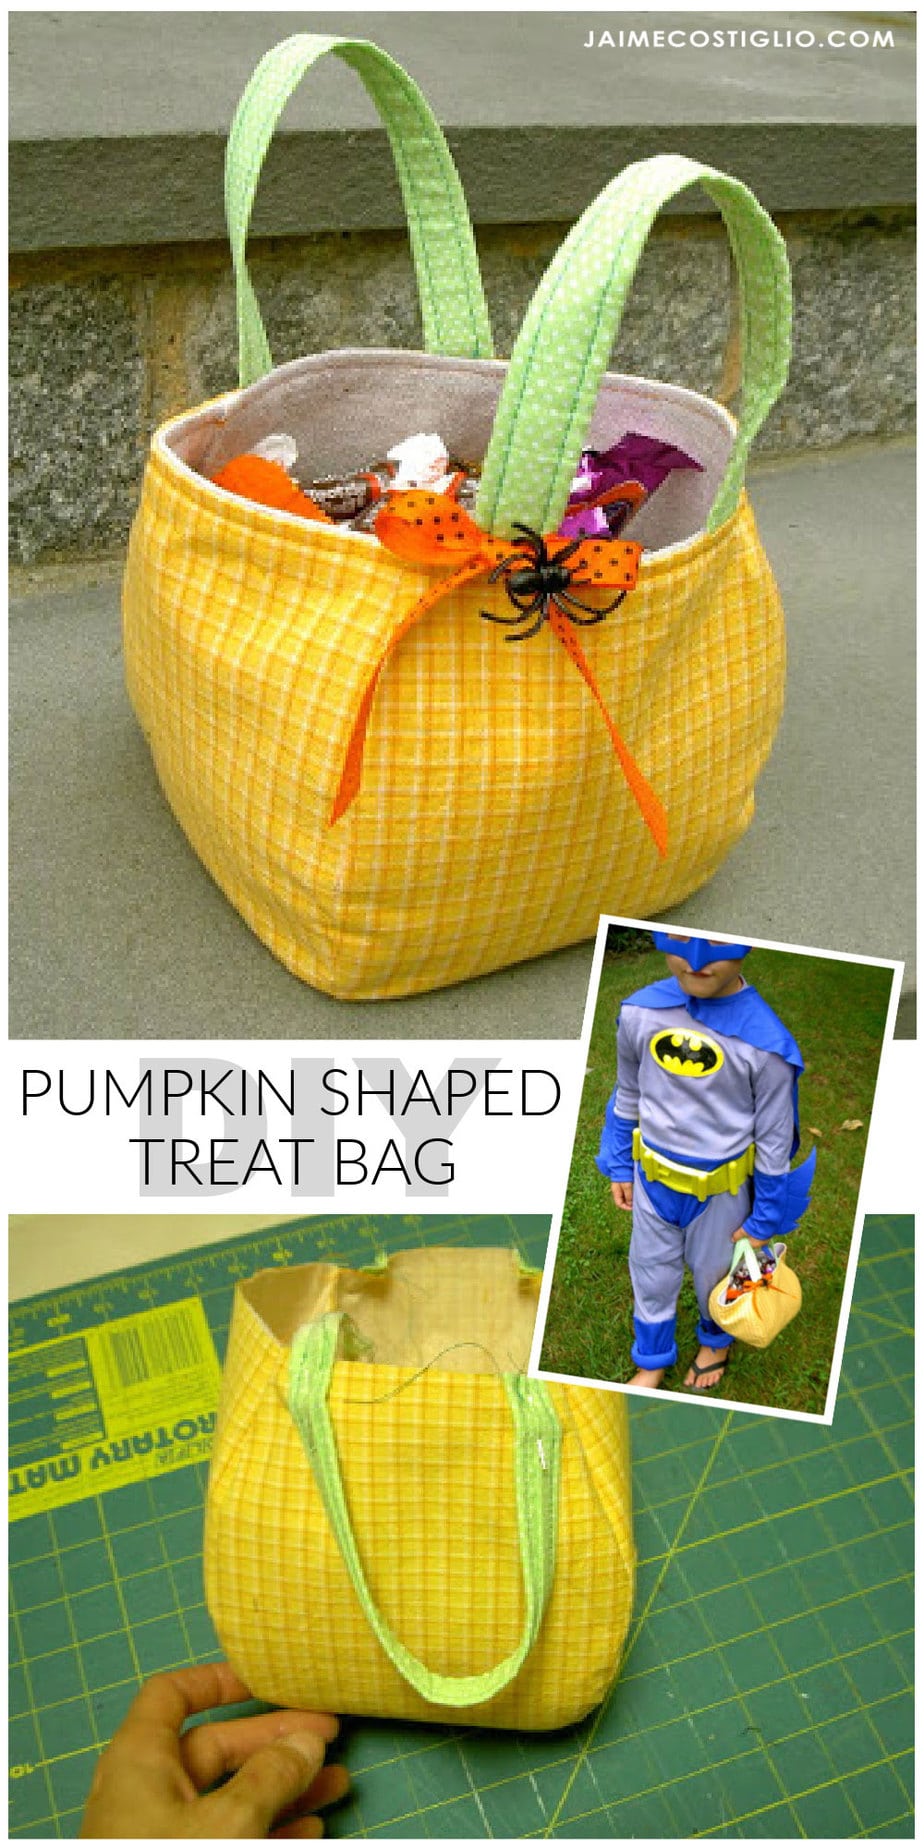
The cutest pumpkin shaped treat bag you can sew just in time to collect all the candy for Halloween.

pumpkin shaped trick or treat bag

A DIY tutorial to sew a pumpkin shaped treat bag. Sew this cute trick or treat bag made in the shape of a pumpkin.

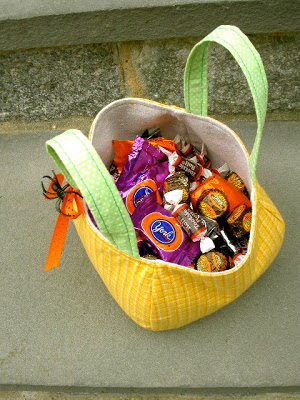
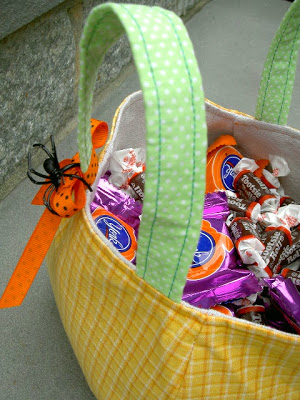
Today I’m sharing how I made this soft sided pumpkin shaped treat bag.  And this pumpkin holds a ton of candy!
fabric bag full of candy

Treat Bag

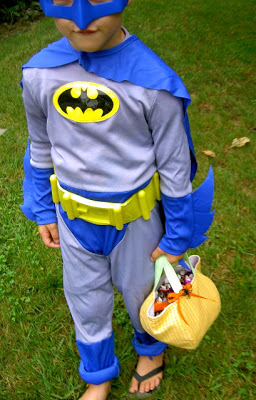
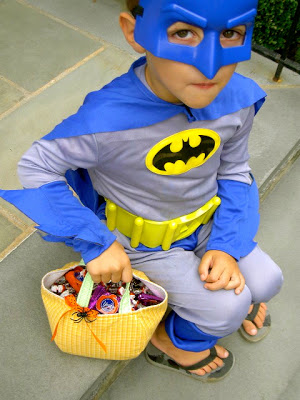
Batman needs a container to hold all his goodies from trick or treating.  He’s four years old here so you can see the bag is plenty big for his size.

batman holding fabric treat bag
halloween candy bag

Pumpkin Shaped Bag

To make this soft sided treat bag I modified a tulip bag pattern.  You can find the original pattern here.  I made the body smaller (stouter) and the handles a bit shorter and also made the sewing process easier as I found the pattern instructions unnecessarily complicated.
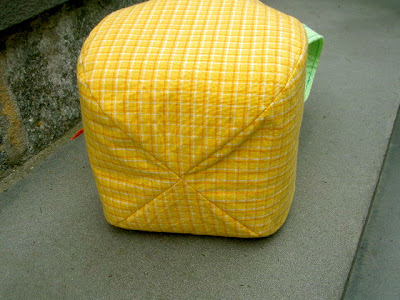
The best part about this pattern is the bag essentially has a flat bottom without making mitered corners.  It’s just the four seams coming together to create a nice base.
base of fabric treat bag

Bag Details

This style pattern makes a perfect bag that will stand alone. And that makes it even better to fill with candy!
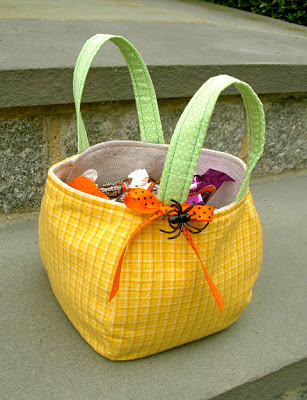
My pumpkin bag measures about 5″ square with a handle height about 4.5″ after the modifications.
pumpkin shaped treat bag

How To:

* Note – all seams are 1/4″, press as you go.

Cut Bag Pieces:

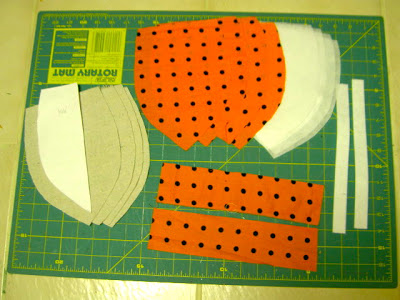
  • 4 – outer body and lining
  • 4 – lightweight fusible interfacing
  • 2 – handles (10″ x 2.5″)
  • 2 – heavy interfacing (10″ x 3/4″)
I used the ‘petite’ pattern from here and modified it even smaller for a mini version.
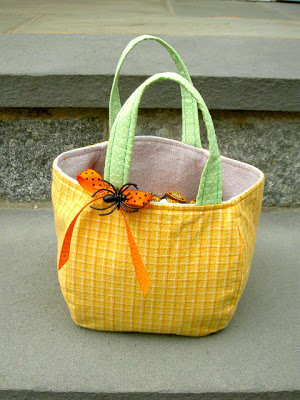
fabric pieces cut
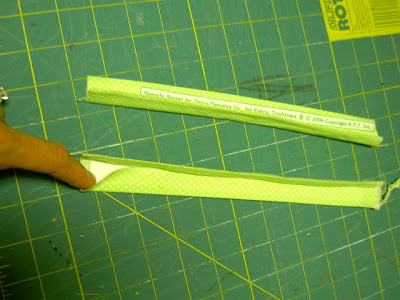
press raw edges in on handles

Step 1: Press handle fabric around interfacing folding in raw edges.

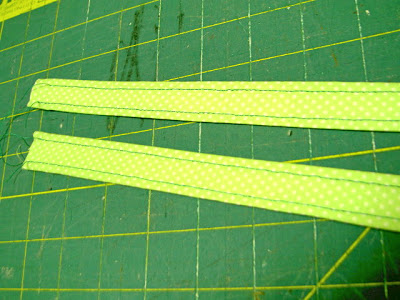
handles top stitched

Step 2: Straight stitch down both sides of handle piece, 1/8″ from outer edge.  Repeat for both handle pieces.

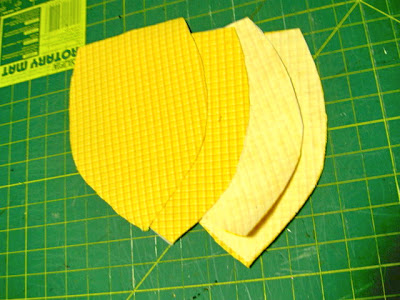
exterior side pieces with interfacing

Step 3: Iron fusible interfacing to wrong side of outer body fabric.  Repeat for all 4 pieces.

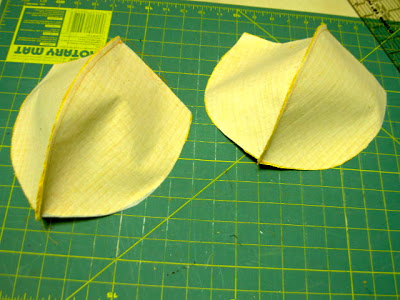
two side pieces

Step 4: Sew side seams of body pieces, 1 to 2 and 3 to 4.

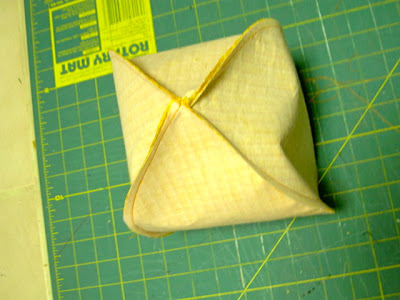
four seams meet at center

Step 5: Sew remaining center seam.
(Repeat Steps 4 and 5 for lining pieces.)

pumpkin bag shape
pin handle to side

Step 6: Turn main body right side out and pin the handles in place on both sides.

pin handles in place

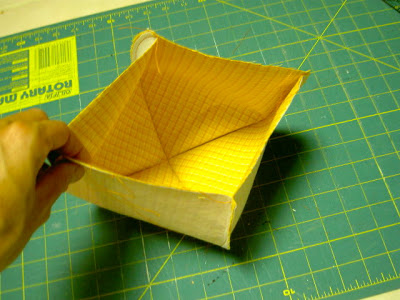
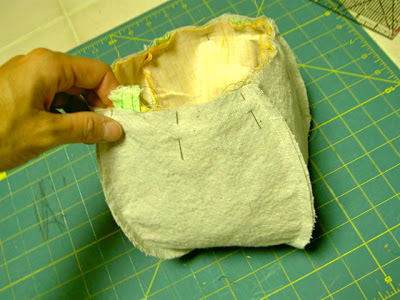
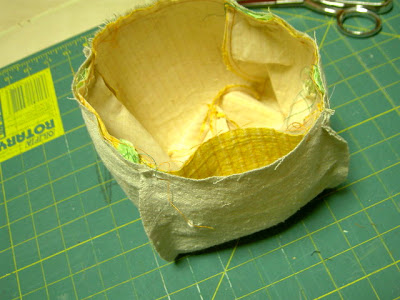
Step 7: Keep the lining wrong side out and stuff outer body inside the lining, matching up the seams.  Pin around the top edge.

sew right sides together

Step 8:  Sew all around the top edge except one section leaving open about 4″.  Be sure to double back at handle points for extra stability.

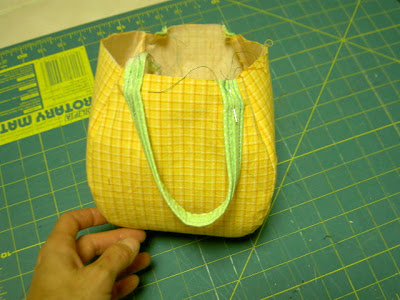
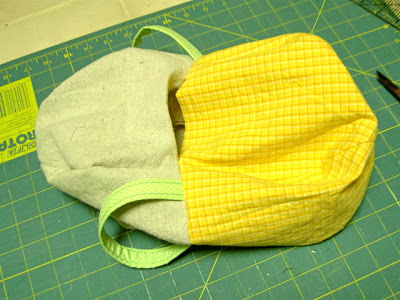
bag turned right side out

Step 9:  Turn bag right side out by pulling through the opening left in top seam.  Push the lining down into the bag, press the top edge then top stitch 1/8″ from the edge for a finished look.

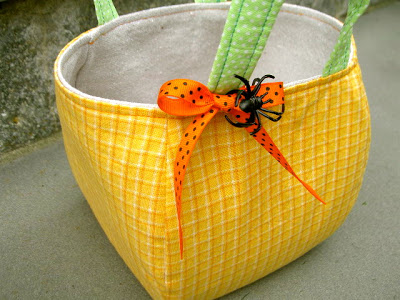
ribbon and spider decoration

Ready for trick or treating!
fabric handles
kids fabric treat bag
A quick, easy pattern with so many possibilities.
diy pumpkin shaped treat bag

You may also like...

  • Drop Cloth Goody BagsDrop Cloth Goody Bags
  • “C” is for Chalk Pouch“C” is for Chalk Pouch
  • “D” is for Dress #4“D” is for Dress #4
  • DIY Mini Zippered Goody BagsDIY Mini Zippered Goody Bags
Share this post:

Filed Under: DIY, GIFTS, HALLOWEEN, KIDS, POUCHES, SEASONAL, SEW, SEWING28 Comments

Reader Interactions

Comments

  1. Jenny says

    September 27, 2011 at 5:08 PM

    This is so cute!! Very well done!

    Reply
  2. Happy in red says

    September 27, 2011 at 5:37 PM

    Totally cute!! Esther

    Reply
  3. Katy says

    September 27, 2011 at 6:48 PM

    This is so cute and would make a great gift..

    Reply
  4. sabrymagic says

    September 27, 2011 at 7:51 PM

    Ma che carino!!:)
    Complimenti!!
    Sabry!!

    Reply
  5. A Vintage Vine says

    September 27, 2011 at 8:43 PM

    Very cute! I have been sewing too. Something less festive, though!!!

    Reply
  6. Sawdust and Paperscraps says

    September 28, 2011 at 12:35 AM

    So cute!

    Reply
  7. Suzanne@Meridian Road says

    September 28, 2011 at 2:45 AM

    What a great bag! My poor kids used plastic grocery bags.

    Reply
  8. Lisa @ Shine Your Light says

    September 28, 2011 at 2:56 AM

    That is adorable! It would be cute for Easter too.
    And a very cute model as well!

    Reply
  9. Sanghamitra Bhattacherjee(Mukherjee) says

    September 28, 2011 at 6:32 AM

    Fantastic idea! You did a great job.The little one is so cute.
    Hope to see you on my blog:)

    Reply
  10. Michele Alger says

    September 29, 2011 at 7:01 AM

    How darling! I love the colors/fabric!!

    Reply
  11. Hollie - TheSevenYearCottage says

    September 29, 2011 at 3:01 PM

    Great project… thanks for sharing!

    Reply
  12. Diane says

    September 30, 2011 at 4:24 AM

    I love this idea! Thanks for giving and showing us the details. New follower and hope you follow me back. Thanks!

    Reply
  13. chris says

    September 30, 2011 at 3:16 PM

    This sweet bag is darling…and it can hold a bunch of candy! What fun.

    Reply
  14. Shannon says

    September 30, 2011 at 5:27 PM

    That's a really cute little bag. Perfect for collecting Halloween candy! Thanks for showing us how it's done!
    shannonsews.blogspot.com

    Reply
  15. Amy says

    September 30, 2011 at 8:06 PM

    That's fantastic! Love it! Would you consider linking to my pumpkin craft challenge? This is just the kind of thing I'd love for my readers to see. 🙂

    http://oneartmama.blogspot.com/2011/09/fall-craft-challenge-4-pumpkins.html

    Reply
  16. pinktoesandpowertools says

    September 30, 2011 at 9:27 PM

    I thought the same thing as Lisa–this would be great for Easter too! I like how it kind of stands without any help. The spider accent is clever 🙂

    Reply
  17. Dianna F says

    October 2, 2011 at 10:32 AM

    Love your bag! What a cute idea. The fabric is one I've been looking for…do you know where you purchased it?

    Reply
  18. WhyCuzICan says

    October 2, 2011 at 9:15 PM

    VERY cute treat bag! 🙂

    Visiting from Midwestern Sewing Girl's Everything Halloween Linky Party today,
    ~Suzanne in NW Illinois

    Reply
  19. Elizabeth (Blue Clear Sky) says

    October 2, 2011 at 9:41 PM

    That is a really cute treat bag (and an adorable Batman in his flip flops.) Around here it is not uncommon to wear snow boots for trick or treating! Stopping by from the everything Halloween party at Midwestern {Sewing} Girl.

    Reply
  20. Maggie @ Midwestern {Sewing} Girl says

    October 2, 2011 at 10:47 PM

    Oh my gosh, my kids would flip if their bags held that much candy!!! I love the design! And I have to laugh at your little Batman's rolled up pant legs…I have a little Boba Fett with extra long legs…;) Just how tall do these costume makers think our kids are??? Thanks so much for linking up, Jaime!!!!!

    Reply
  21. Patricia Torres says

    October 7, 2011 at 3:56 AM

    Oh my this is sooooooooo super cute!!

    Reply
  22. Jaimee says

    October 13, 2011 at 12:53 PM

    This is awesome. Thanks so much for sharing a tutorial!! I pinned this to my Fall board : )
    Jaimee @ craft-interrupted.blogspot.com

    Reply
  23. Gramma G says

    October 15, 2011 at 11:20 AM

    These are the cutest bags! Thank you for sharing your ideas. I put a photo and a link to this post on my blog because I thought it was so cute. I loved going through your blog and seeing all the fun stuff. I enjoyed your writings, too. Gook luck with everything.

    Reply
  24. Niki says

    March 19, 2013 at 2:26 AM

    So cute! Have you made these as Easter Baskets yet?

    Reply
  25. Chatty Cathy-Clip Your String says

    August 21, 2014 at 5:27 PM

    These are wonderful, the link took me to a Chinese site that I couldn't read? Is there a way for me to get a copy of this pattern? Thanks!

    Reply
  26. Emtnana says

    October 12, 2016 at 2:18 AM

    Fabulous! Great tutorial.

    Reply
  27. Ingrid says

    October 11, 2021 at 11:57 AM

    Is the pattern still available? Pattern links route to Amazon home page.

    Reply
    • Jaime says

      October 12, 2021 at 10:48 AM

      Hi Ingrid, yes the pattern is available for purchase on Amazon here: https://www.amazon.com/Anything-But-Boring-Tulip-Pattern/dp/B002NHCZ9C

      Reply

Leave a Reply Cancel reply

Your email address will not be published. Required fields are marked *

Primary Sidebar

Hi! I’m Jaime

Jaime Costiglio

Hello!

Thank you for stopping by.
Join me for lots of DIY.

Read more

Get new posts via email

Handbuilt Holiday: Gift Project Plans

handbuilt holiday gift project plans

Collection of DIY gift project plans to build.

The Home Depot Tool Prospective

THD Prospective

Tools to consider for the DIYer.

Archives

The Home Depot Logo
Copyright © 2023 Jaime Costiglio · Custom site by Moonsteam Design

Privacy Policy