This post about a stocking hanger box is sponsored by The Home Depot. We’re making a stocking hanger box today because the stockings need somewhere to hang and nobody wants to ruin their beautiful mantel with nails. Come join me and nine other DIY bloggers sharing their stocking hanger boxes.

A DIY tutorial to make a stocking hanger box using cedar wood and rope cleats. Make this simple stocking hanger with space for greenery this holiday season.
Here we are a few weeks out from the big holiday season which is the perfect time to think about holiday decor for your home. We’re making a stocking hanger box and I’m sharing my version below along with my fellow bloggers in a virtual party.
If you’re looking for a simple and effective idea to hang your stockings this holiday then please consider joining us for the DIH Workshop at The Home Depot on Thursday, November 16th at 6:30pm. Gather your friends and click here to find the nearest store offering this workshop and register for a productive girls night out.

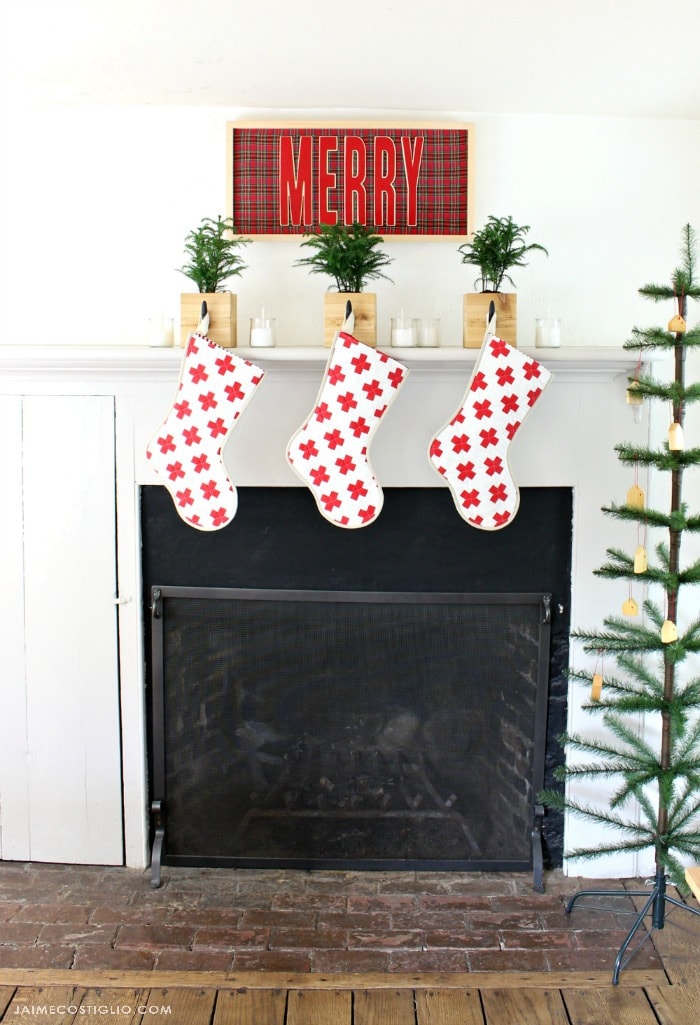
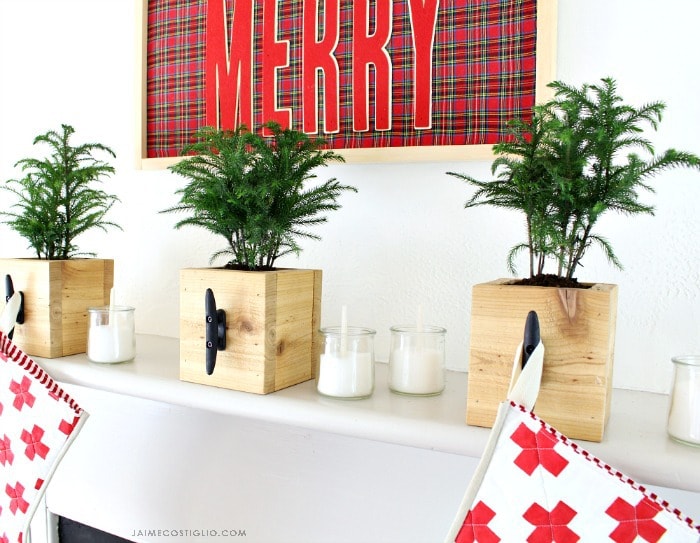
So instead of just one big stocking hanger box with multiple hooks I made individual stocking hanger boxes. Each stocking has their own special spot to hang. Then I tucked in a real potted tree and you’ve got a simple stocking hanger box perfect for your mantel or any shelf ledge.

In order to hang the stocking I opted for a rope cleat hanger. It’s a tiny bit nautical but I like the vertical shape and dark color that ties in with the fireplace surround. We’ll be using the swiss cross stockings I made a few years back. I love the red and white contrast against the more natural cedar box and greenery.

Supplies:
- 1 x 6 x 8 cedar board
- miter saw
- measuring tape
- pencil
- nail gun
- 1 1/4″ finish nails
- wood glue
- sander
- clear wipe on poly
- 3 – 4″ nylon rope cleats
- drill & drill bits
- 3 – 4″ potted trees

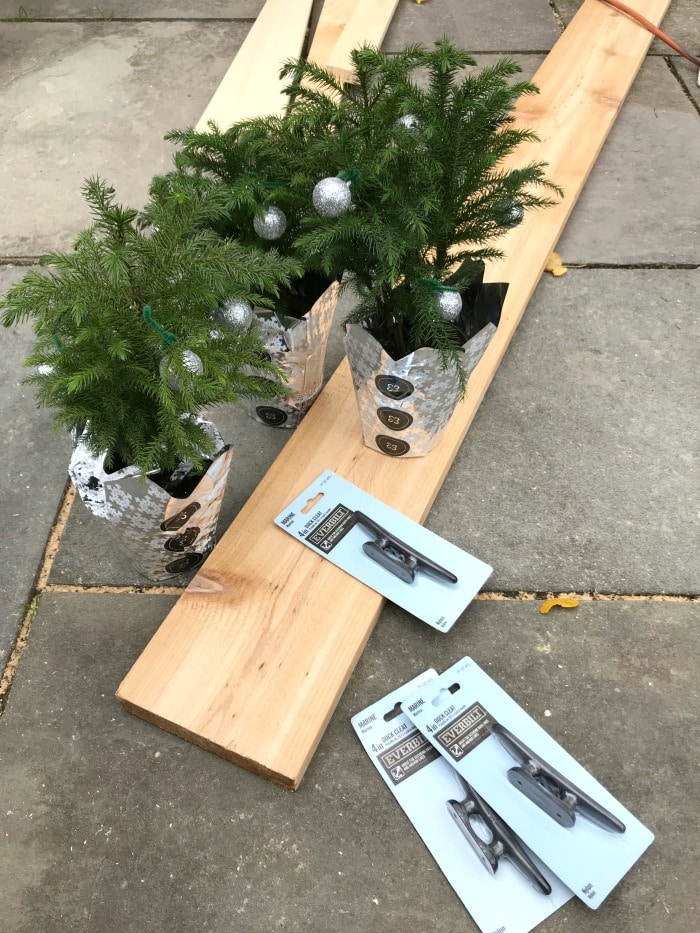
Gather your supplies from The Home Depot. I found the rope cleats in the rope and pulley section. Of course you could use any hook you like, there’s a ton of options in the hardware aisle.

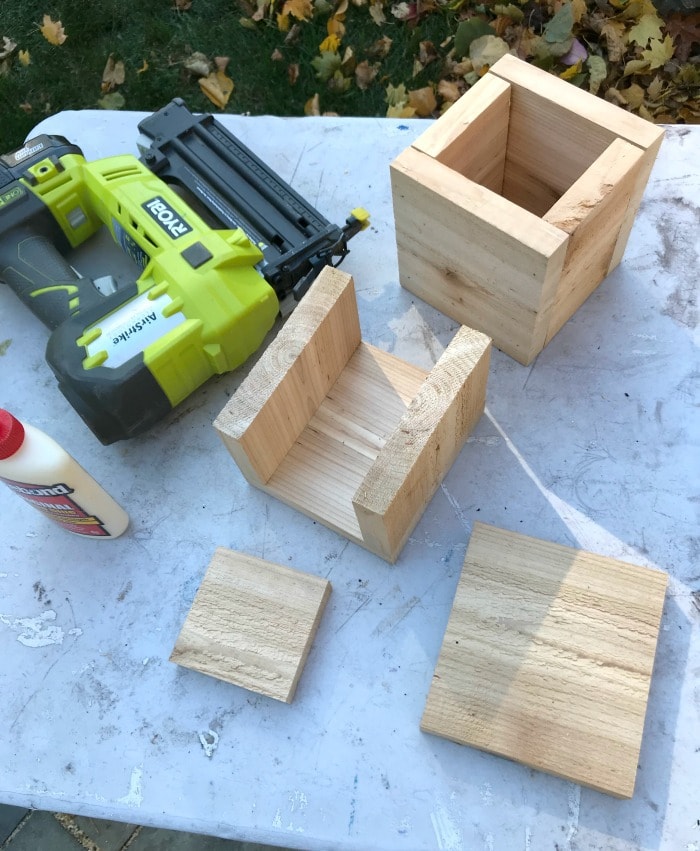
Construct the box using wood glue and 1 1/4″ finish nails. Then attach the rope cleat and insert the plant.
You can learn how to make the stocking hanger box at the DIH Workshop at The Home Depot:
If you have previously attended any workshop at The Home Depot and would like to provide feedback, please feel free to use this form. Your experience and response helps The Home Depot make the improvements you want to see.
Thanks for joining me for this stocking hanger box project. Please leave any questions in the comments below and be sure to follow me on social media for sneak peeks, tools and project inspiration:
Instagram / Pinterest / Facebook / Youtube / Twitter
SHOP THIS PROJECT:

As part of the virtual party be sure to stop by my fellow DIY bloggers and see their versions of the stocking hanger box. So much beautiful inspiration and ideas for your holiday home decor.
Jen @ House of Wood
Jaime @ Jaime Costiglio (you’re here)
Brooke @ All Things Thrifty
Kristi & Kelly @ Lolly Jane
Donna @ Refresh Restyle
Shara @ Woodshop Diaries
Beth @ Reality Daydream
Ashley @ Simply Designing
Jamie @ The Crafting Chicks
Carmona @ Home Made by Carmona


I love these so much!!!