• Home
  • Blog
  • About
  • Contact
    • Disclosure
    • Privacy Policy
  • SHOP
  • Widget area for main menu

    • Email
    • Facebook
    • Instagram
    • Pinterest
    • Twitter
    • YouTube
  • Skip to primary navigation
  • Skip to main content
  • Skip to primary sidebar

Jaime Costiglio

build - paint - sew

  • BUILD
    • BEDS
    • BENCHES
    • DESKS
    • DRESSERS
    • GAMES & TOYS
    • SCRAP WOOD
    • SHELVES
    • STORAGE
    • TABLES
  • TOOLS
  • PAINT
    • CRAFTS
    • FURNITURE
    • HOME DECOR
  • SEW
    • GIFTS
    • HOME DECOR
    • POUCHES
  • HANDBUILT HOLIDAY
    • 2021
    • 2019
    • 2018
    • 2017
    • 2016
    • 2015
    • 2014
    • 2013
  • GIFTS
    • BABIES
    • KIDS
    • FOR HER
    • FOR HIM
    • TEACHERS
    • WEDDINGS
  • SEASONAL
    • 4TH OF JULY
    • FALL
    • HALLOWEEN
    • CHRISTMAS
    • SUMMER
    • SPRING
    • ST. PATRICK’S DAY
    • THANKSGIVING
    • VALENTINE’S DAY
    • WINTER
  • SALTBOX PROJECT
    • BATHROOMS
    • DINING ROOM
    • EXTERIOR
    • FAMILY ROOM
    • FOYER / MUDROOM
    • KIDS BEDROOMS
    • KITCHEN
    • LIVING ROOM
    • MASTER BEDROOM
    • PLAYROOM
  • SCROLL SAW

DIY Starry Side Table Makeover

February 1, 2017

diy round game table with handpaint star pattern
A quick side table makeover for a round game table in our family room.

A friend had given me this little round side table in an all over dark brown finish.  I needed to refinish the top and decided I would tackle the entire piece.
I painted the base with Annie Sloan Old Ochre chalk paint, stripped the top surface, painted navy stars all around and sealed with 3 coats of satin poly:
diy round game table with handpaint star pattern

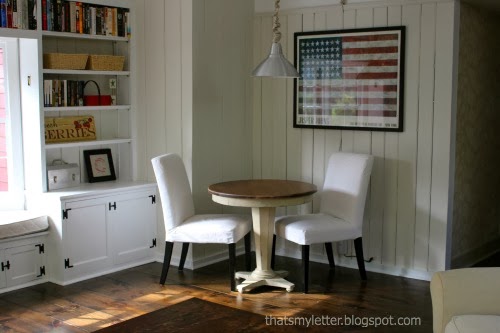
This round side table is the perfect addition to our family room.
I can honestly say it gets used every single day by my kids and myself.

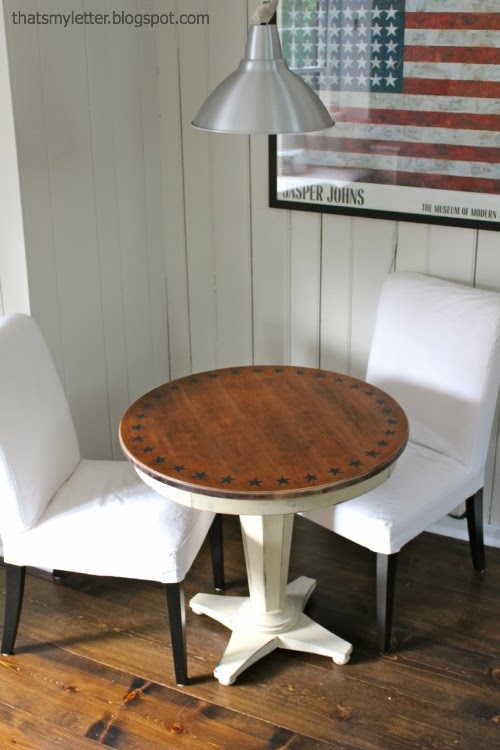
How to makeover a side table with star detail:

1. Use kwik strip liquid stripper to remove existing stain and poly.
Let the chemical do the work and then scrap off with a putty knife:
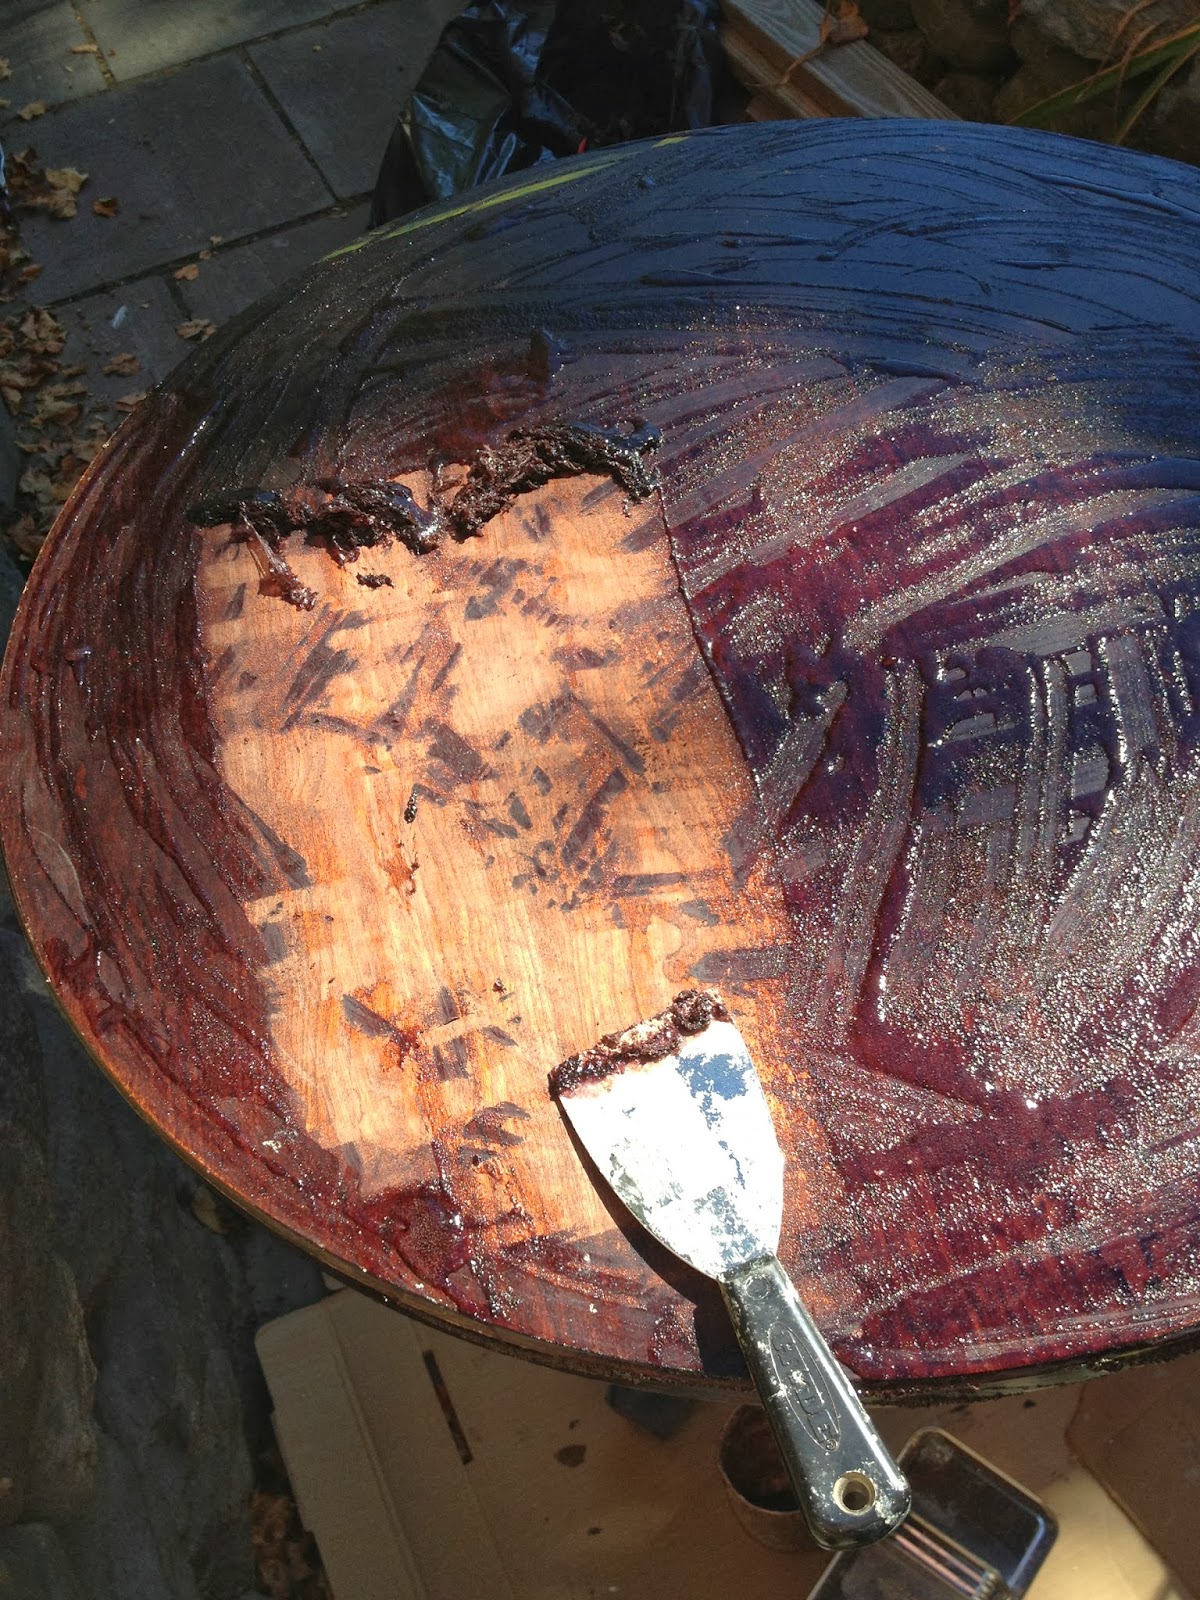
2. Sand to a smooth finish:

how to refinish a round game table

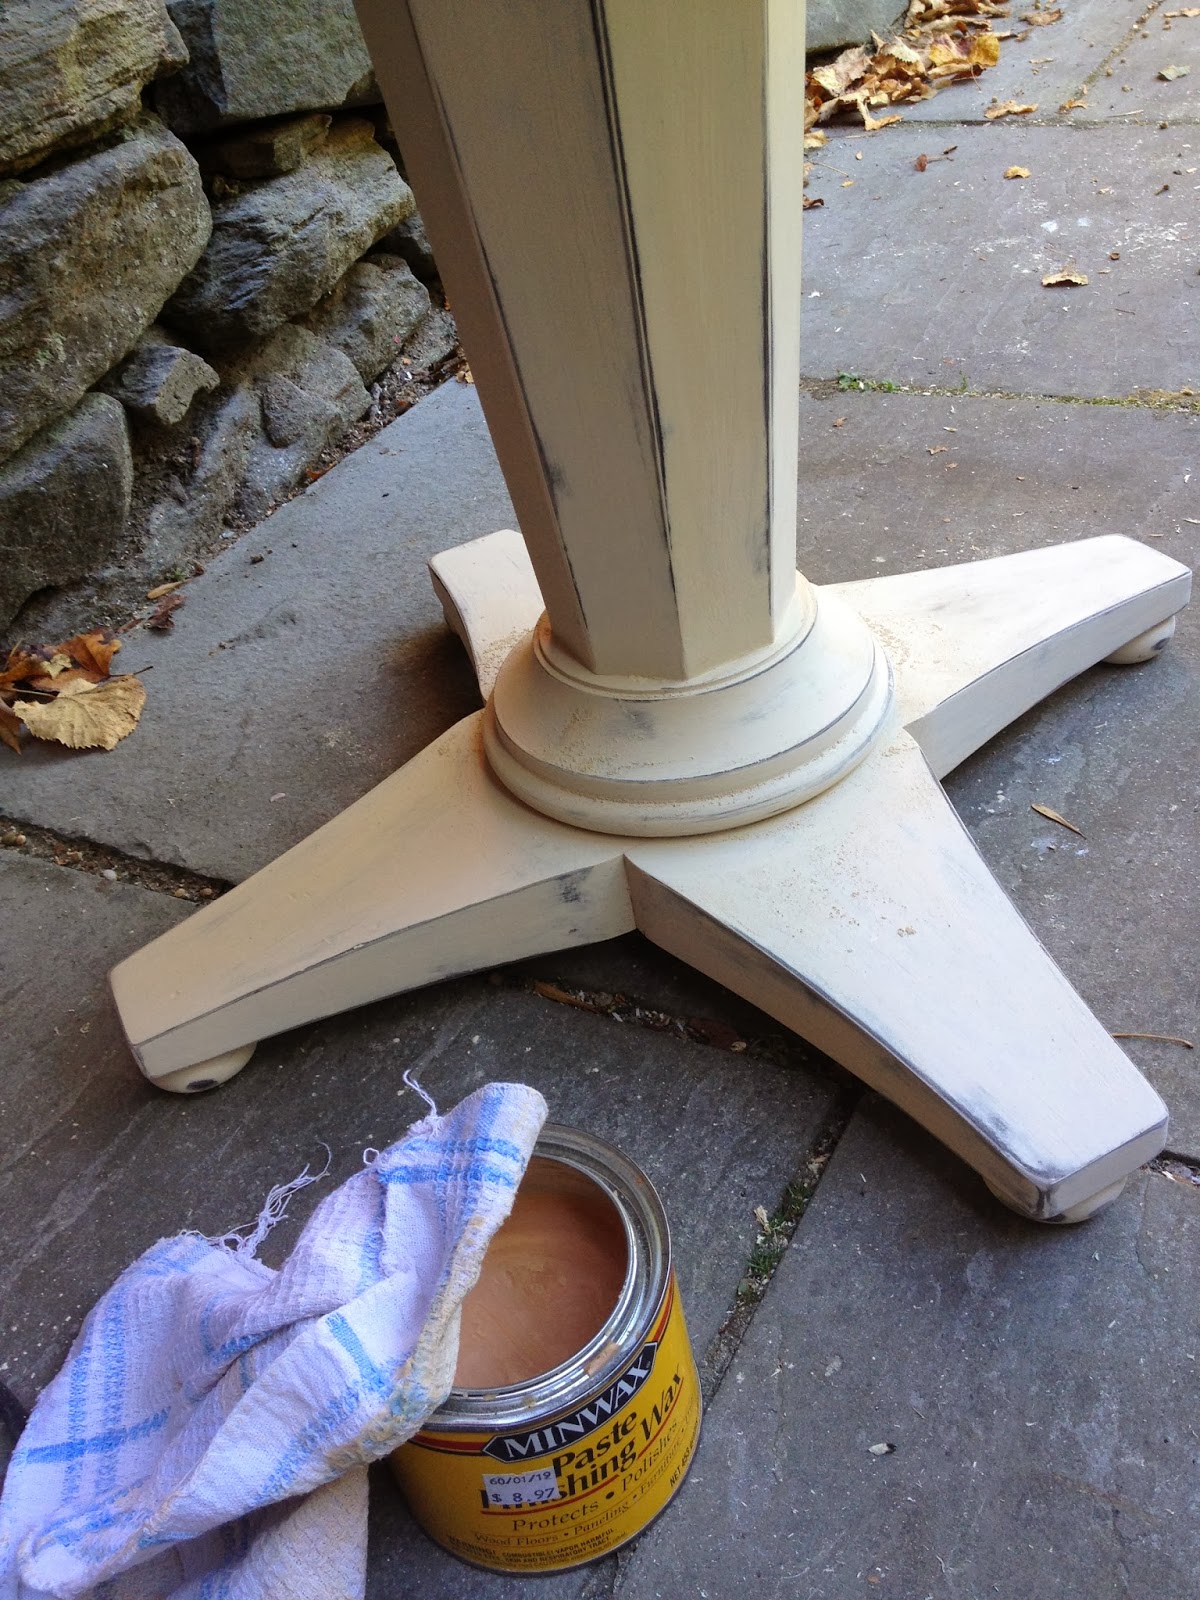
 3. For the base paint on 2 coats Annie Sloan Old Ochre chalk paint:

painted game table base with chalk paint
4. Sand to distress then seal with clear wax:

5. For the stair detail print out a 2″ star, determine placement along edge of table and trace using ballpoint pen:

apply star pattern to table top using tracing method
The pressure of the pen creates an indent in the wood:

imprint from tracing star shape on table top
6. To get equidistance placement of the stars start by doing four corners:

7. Then equal spacing in between:

handpainted navy stars on round game table
8. Paint on and inside the indent from the tracing:
handpainted navy stars on round game table
9. Seal the top with 3 coats of Minwax clear satin polycrylic sanding in between coats:
sealed game table with polycrylic

You may also like...

  • Spring Lawn Project: Patch those Problem AreasSpring Lawn Project: Patch those Problem Areas
  • How to Install a Stair RunnerHow to Install a Stair Runner
  • Refinishing Pine FloorsRefinishing Pine Floors
  • How to Install a Slat CeilingHow to Install a Slat Ceiling
Share this post:

Filed Under: DIY, FAMILY ROOM, FURNITURE, FURNITURE, HOME DECOR, PAINT4 Comments

Reader Interactions

Comments

  1. Inspire Me Heather says

    January 3, 2014 at 12:05 PM

    Wow that table really turned out beautiful – love the stars and the chalk painted base!

    Reply
  2. Cassie @ Primitive & Proper says

    January 3, 2014 at 2:22 PM

    how perfect is that!!! i LOVE it! love the finish of the top!

    Reply
  3. C. Meghann LeCates says

    January 3, 2014 at 7:51 PM

    Such a neat idea & beautifully executed! My mum collects primitive red, white, & blue decor so I know how much people love this sort of look! 🙂

    Reply
  4. Kristie says

    April 19, 2014 at 2:31 PM

    My table is so boring but I didn't know the solution until seeing this post. Thank you for this idea.

    Reply

Leave a Reply Cancel reply

Your email address will not be published. Required fields are marked *

Primary Sidebar

Hi! I’m Jaime

Jaime Costiglio

Hello!

Thank you for stopping by.
Join me for lots of DIY.

Read more

Get new posts via email

Handbuilt Holiday: Gift Project Plans

handbuilt holiday gift project plans

Collection of DIY gift project plans to build.

The Home Depot Tool Prospective

THD Prospective

Tools to consider for the DIYer.

Archives

The Home Depot Logo
Copyright © 2023 Jaime Costiglio · Custom site by Moonsteam Design

Privacy Policy