I built the skinniest console ever.
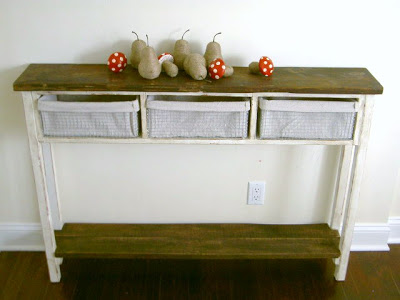

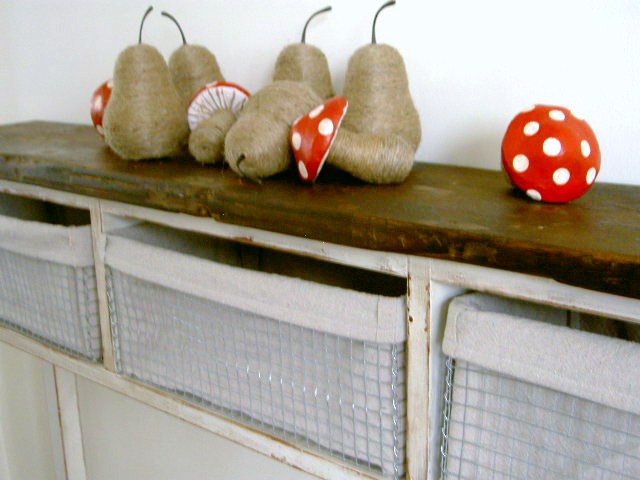
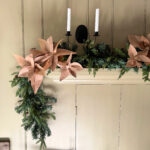
This is one model size console, tall (counter height at 34″) and skinny (9″ wide), ready for the runway.

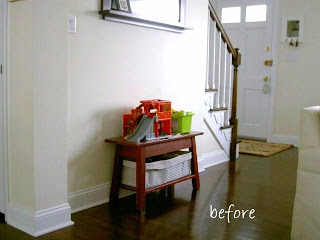
The was the problem – Hubby comes home and unloads all his stuff – cell phone, wallet, keys, coins, blackberry, loose notes, etc.
(This is why women carry handbags.)
I was tired of looking at the Hubby stuff, he needed a place to put all his goodies.

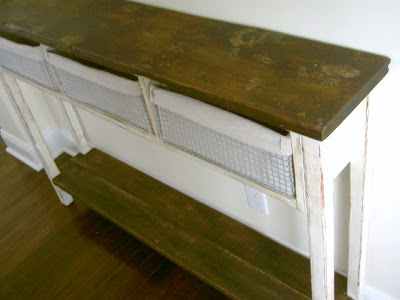
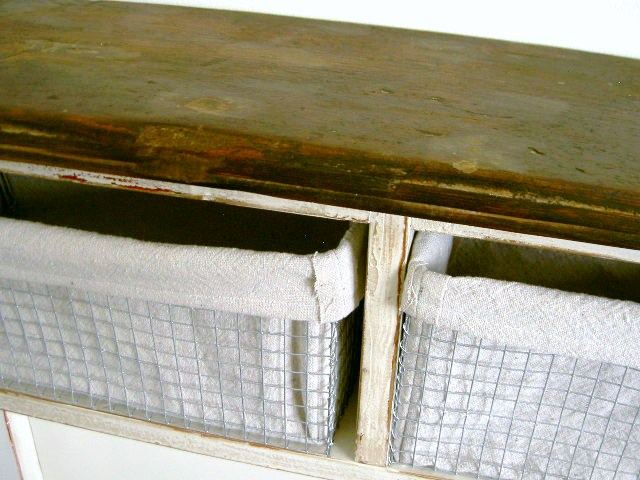
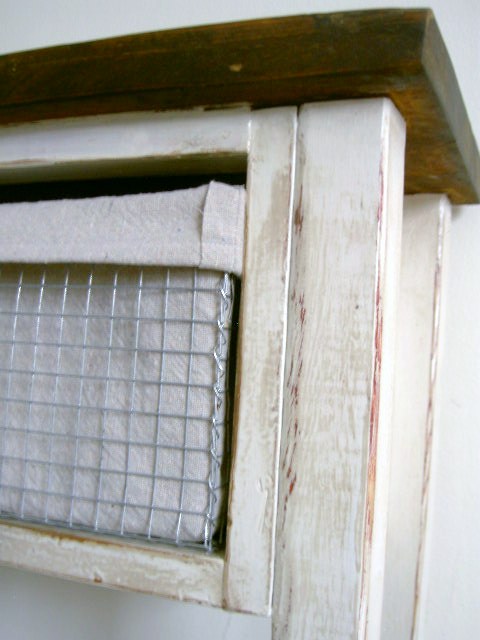
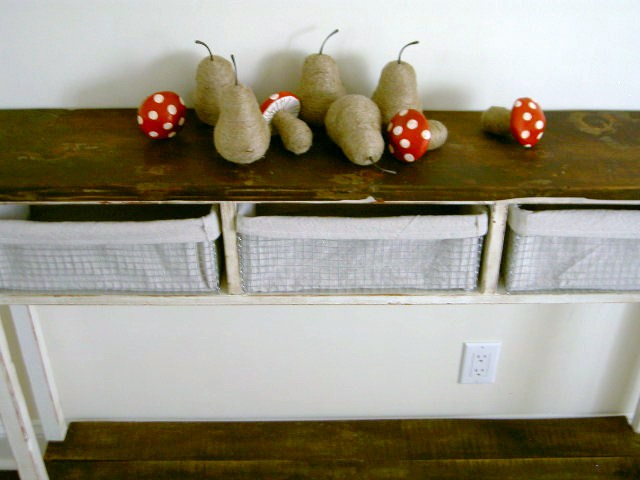
Now Hubby has three baskets to call his own.
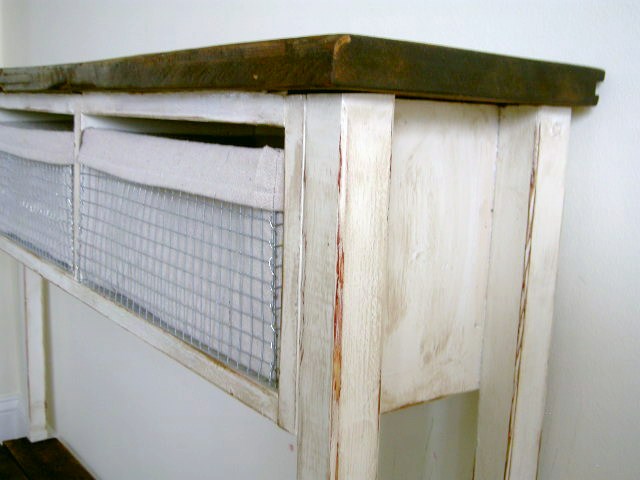
(Click here for my post on how to make the wire baskets.)
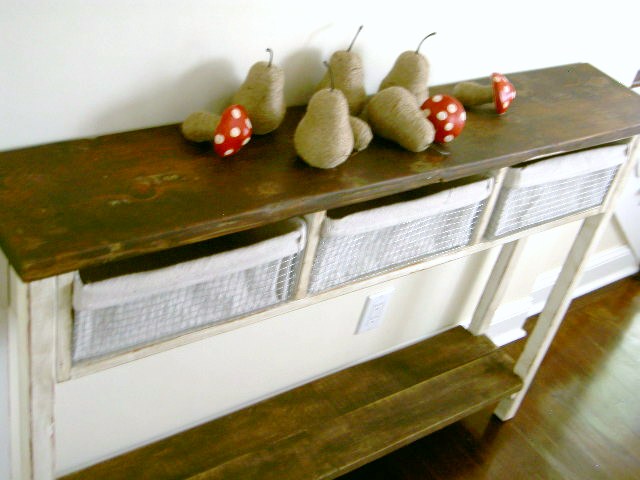
(Curious about those jute pears click here, jute mushrooms click here.)
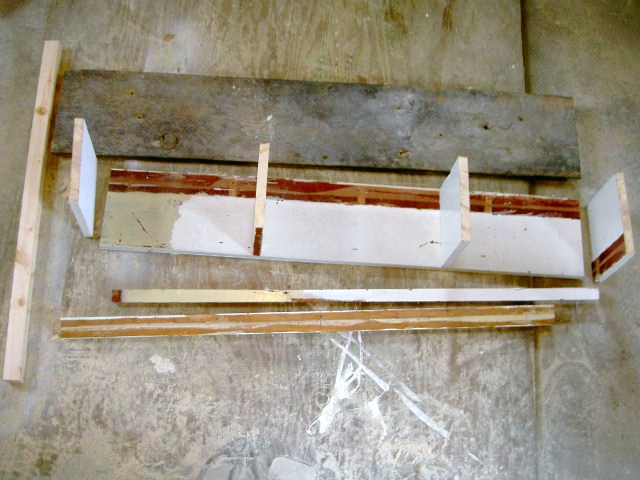
Here’s a few progress shots of the build:
All pieces cut (I used mostly scrap wood, from a Freecycler friend and spent $3 on one 2x2x8)
Top and drawer openings assembled. (The top is screwed on from the underside to avoid having screws visible on the beautiful distressed surface.)
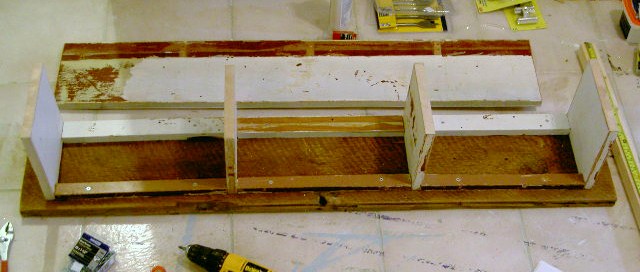
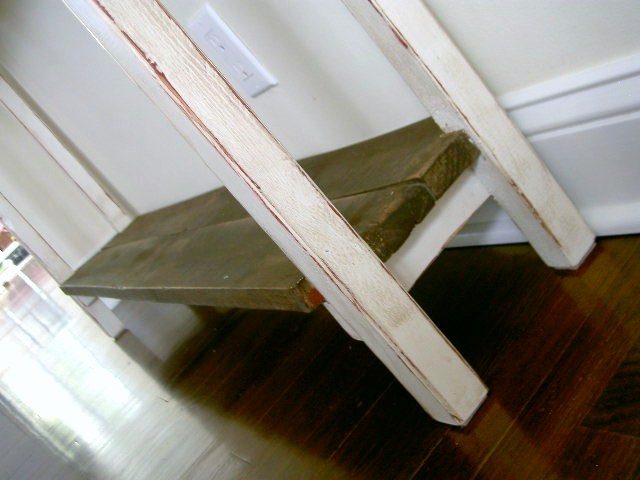
Legs on and bottom shelf added, ready to sand.

Stained top and shelf one coat Minwax dark walnut:
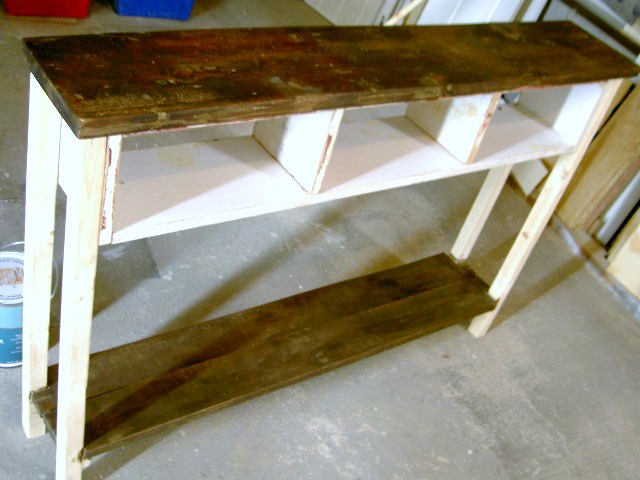
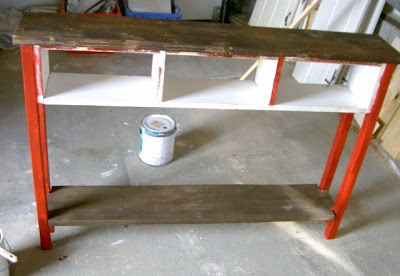
Painted legs red to even the playing field. (The undercoat on the scrap wood was red so I wanting the legs to blend in with the other pieces.)

Painted everything (except top and shelf) two coats Behr off white.
Sanded to distress.
Stained everywhere Minwax dark walnut.
One coat clear satin poly on painted parts.
Clear waxing paste on top and shelf.
The bottom shelf adds character and weight to the console.
Here’s the space before:
A much better fit and clearly more functional for our needs.

Jaime, Is there ANYthing you can't do??? 🙂 That's a great table. P.S. We are moving into a new house that has the most perfect set of stairs to paint. I've saved your brilliant tutorial and plan to use it on them! I'll send you a photo.
I love that. It's perfect for narrow places, and is much better than the piece you had there before. Great job.
x
That is a supermodel kind of console! Very cute, though, and even nicer that she's functional. 🙂
How clever are you then? That's fantastic. And it looks so much better in that area now. Thanks for the tutorial too 🙂
OK you are simply amazing!! I love this table, perfect for those of w/ small spaces. LOve those baskets too!
Jaime, that is so perfect for your space! There is no way you could of ever of found something so perfect. I love it!
YOU MADE THE WIRE BASKETS. criminy. And what are those mushroom thingies? Whatever, you are the bomb. i love it, where do you find the time?
It's lovely. I have yet to try building furniture, but I intend to, one of these days.
Definitely a better fit for the space. That is so cool that you put it all together with mostly scrap wood and that you made your own wire baskets!! You sure are one talented and smart woman (got hubby beat with the mess). lol. Thanks for sharing.
Love it. I am working on a narrow console to go in my tiny dining area. Love the baskets, I will have to check out your post on those.
you are my hero!!!
I have the same problem and I need something skinny to stick by the kitchen door (where we usually enter the house).
Pure genius.
Perfect! I love the size of this table and I can't wait to try making some wire baskets! And, I am loving the jute mushrooms…yeah I saw them up there 😉 too cute!!
I have a very narrow hallway and have been looking for a skinny wall table forever. Seeing yours you have just convinced me I just need to make it myself. Thanks for the tutorial. Just Tumblrd it for future reference.
That's a gorgeous hall table! It really suits the space too, just perfect!
Perfect hubby place!! I agree, my hubs does the same thing!!! Drives me crazy!
GORGEOUS, PERFECT, INCREDIBLE! You absolutely amaze me!
:0) WOW!
~robin
It's so cute! Love the skinny table, thanks for linking!
Great solution! I'm impressed with your woodworking skills. Love the combo of the dark stain and the light paint. Looks really really good!
XO,
~M
I LOVE THIS! SO many people actually need a "skinny" version of a traditional console table? Congrats! It's great :o)
this couldn't be any more PERFECT!!! Excellent job!! I am in LOVE with itttttttt!!!!!!!!!!!!!!
i love that table! and so impressed that you built it. i need you to come here and teach me some skills! i also love those mushrooms on top- did you make those? i just love your style, jaime! about to go become your newest follower so i don't mis anything!
What a great idea and so perfect for your entry! Thanks for sharing! I adore your blog!
That is just awesome. I love, love, love what you did with scrap wood! It's beautiful. And the mushrooms are pretty cute, too! 😉
Very nice–great job!
Gosh, you are a clever girl! Looks like the perfect spot to dump. Then it can be hid away. Wonderful.
Jaime, it's awesome! Love, love, love it…you amaze me!
Um, you are amazing!! I can't believe you made that!!!
Looooove it. 🙂
it's perfectly skinny! love it. i have a party going on right now, would love if you shared this. http://typeadecorating.blogspot.com/2011/04/anything-goes-party-13.html
I love it!
I think I commented on a different post (I can't remember, too many ana-white.com posts and what not the past week) about how I found your blog through ana-white.com.
Where did you get the mirror hanging above the console table? Did you make that too?! (Please tell me you did and then share the tutorial!)
You are TOO good! Do you know that? I want one too!!! I need to just take the plunge and try to build something already! Great work!
Kim
http://www.kim-toomuchtimeonmyhands.blogspot.com
I can totally relate to the husband "stuff!" This skinny table is perfect. I'm going to follow your lead and make one for myself.
Very Inspiring! Love it. You did a great job. I love the homemade wire baskets too! Thanks for sharing! Your newest follower. Hope you can visit me sometime soon.
I just found your blog over on Ana White's website!
You are amazing! You are one talented lady.
Found you on Delightful Order. Great job! The console compliments that space perfectly!
ready for the runway, HAHA! 2 funny. Great little table, it fills the space so much better then what was there, and you made the whole thing yourself! Fantastic!
It's perfect- love your sweet little skinny table!! Sharing on FB- thanks for sharing at FNF! 🙂
Jaime, I have the same issue with my husband, but he uses the kitchen counter as his dumping ground. I'm still on the hunt for a table for our hallway! You've inspired me to look into making our own! Thank you for sharing.
Visiting from Just a Girl and a new follower 🙂
wow! You are amazing! I love it, but will not even attempt it myself…will stick to the paint brushes.. lol
Awesomely lovely solution to your little problem! Well done!
This is fantastic!! I need one!!!
Incredible!
You did a fabulous job on this!! I love that it's all made from scrap wood. It gives it a charm that new wood wouldn't have. And I also really like the dimensions. I can think of a couple of places in the past where I've needed a really skinny table, but couldn't find one.
I hope you'll come link up your project at the Sunday link party at Addicted 2 Decorating.
I love it! It fits your wall space so much better!
Loving this post! And the super skinny table! Found you via DO link up!
that is amazing! it is great color wise and fit wise for that space. unbelievable!
It looks fantastic, Jaime! Love those neat wire baskets. 🙂
Visiting from Thrifty Decor Chick. Hope you'll stop by my blog to say hi. 🙂
I LOVE your teeny, skinny console! It is just beautiful! I hopped over from the skip to my lou linkup and this one post alone has me convinced–I'm a new follower! Can't wait to look through your other posts!
Rachel @ Maybe Matilda
I'm stunned! What a fabulous job you did on this! Awesome 🙂
What a handy-dany gal you are Jamie. The console turned out awesome! Cannot wait to look around your blog some more…Those wire baskets are calling my name. Have a wonderful day and very nice to meet you. I'm thrilled to have found your blog.
Your newest follower,
♥Ana
I'm back again 🙂 This table is SO great, I couldn't help but feature it on my blog today. Check it out! http://www.maybematilda.com/2011/05/five-favorites-and-my-mothers-day-gift.html
Thanks for sharing your amazing project!
Rachel @ Maybe Matilda
I need this so bad!! Do you have the plans with all the measurements? Would love to have them. Thanks!!
Hi Lorie, My apologies but I don’t have plans for this exact table. I built it well before I was doing plans and just made it up as I went along. I do have something similar that may be a good starting place: https://jaimecostiglio.com/diy-dining-room-sideboard/ Good luck!
I’ve been looking for a skinny table myself but haven’t found any. Do you have the instructions or sell skinny tables?
Hi Connie, I don’t have plans for this table (I built it well before I started creating plans) but I have a similar version here that does have plans: https://jaimecostiglio.com/diy-dining-room-sideboard/
Good luck with your search!
Jaime