• Home
  • Blog
  • About
  • Contact
    • Disclosure
    • Privacy Policy
  • SHOP
  • Widget area for main menu

    • Email
    • Facebook
    • Instagram
    • Pinterest
    • Twitter
    • YouTube
  • Skip to primary navigation
  • Skip to main content
  • Skip to primary sidebar

Jaime Costiglio

build - paint - sew

  • BUILD
    • BEDS
    • BENCHES
    • DESKS
    • DRESSERS
    • GAMES & TOYS
    • SCRAP WOOD
    • SHELVES
    • STORAGE
    • TABLES
  • TOOLS
  • PAINT
    • CRAFTS
    • FURNITURE
    • HOME DECOR
  • SEW
    • GIFTS
    • HOME DECOR
    • POUCHES
  • HANDBUILT HOLIDAY
    • 2021
    • 2019
    • 2018
    • 2017
    • 2016
    • 2015
    • 2014
    • 2013
  • GIFTS
    • BABIES
    • KIDS
    • FOR HER
    • FOR HIM
    • TEACHERS
    • WEDDINGS
  • SEASONAL
    • 4TH OF JULY
    • FALL
    • HALLOWEEN
    • CHRISTMAS
    • SUMMER
    • SPRING
    • ST. PATRICK’S DAY
    • THANKSGIVING
    • VALENTINE’S DAY
    • WINTER
  • SALTBOX PROJECT
    • BATHROOMS
    • DINING ROOM
    • EXTERIOR
    • FAMILY ROOM
    • FOYER / MUDROOM
    • KIDS BEDROOMS
    • KITCHEN
    • LIVING ROOM
    • MASTER BEDROOM
    • PLAYROOM
  • SCROLL SAW

“S” is for Shoe Clips

April 14, 2012

Sew: silver shoe clips
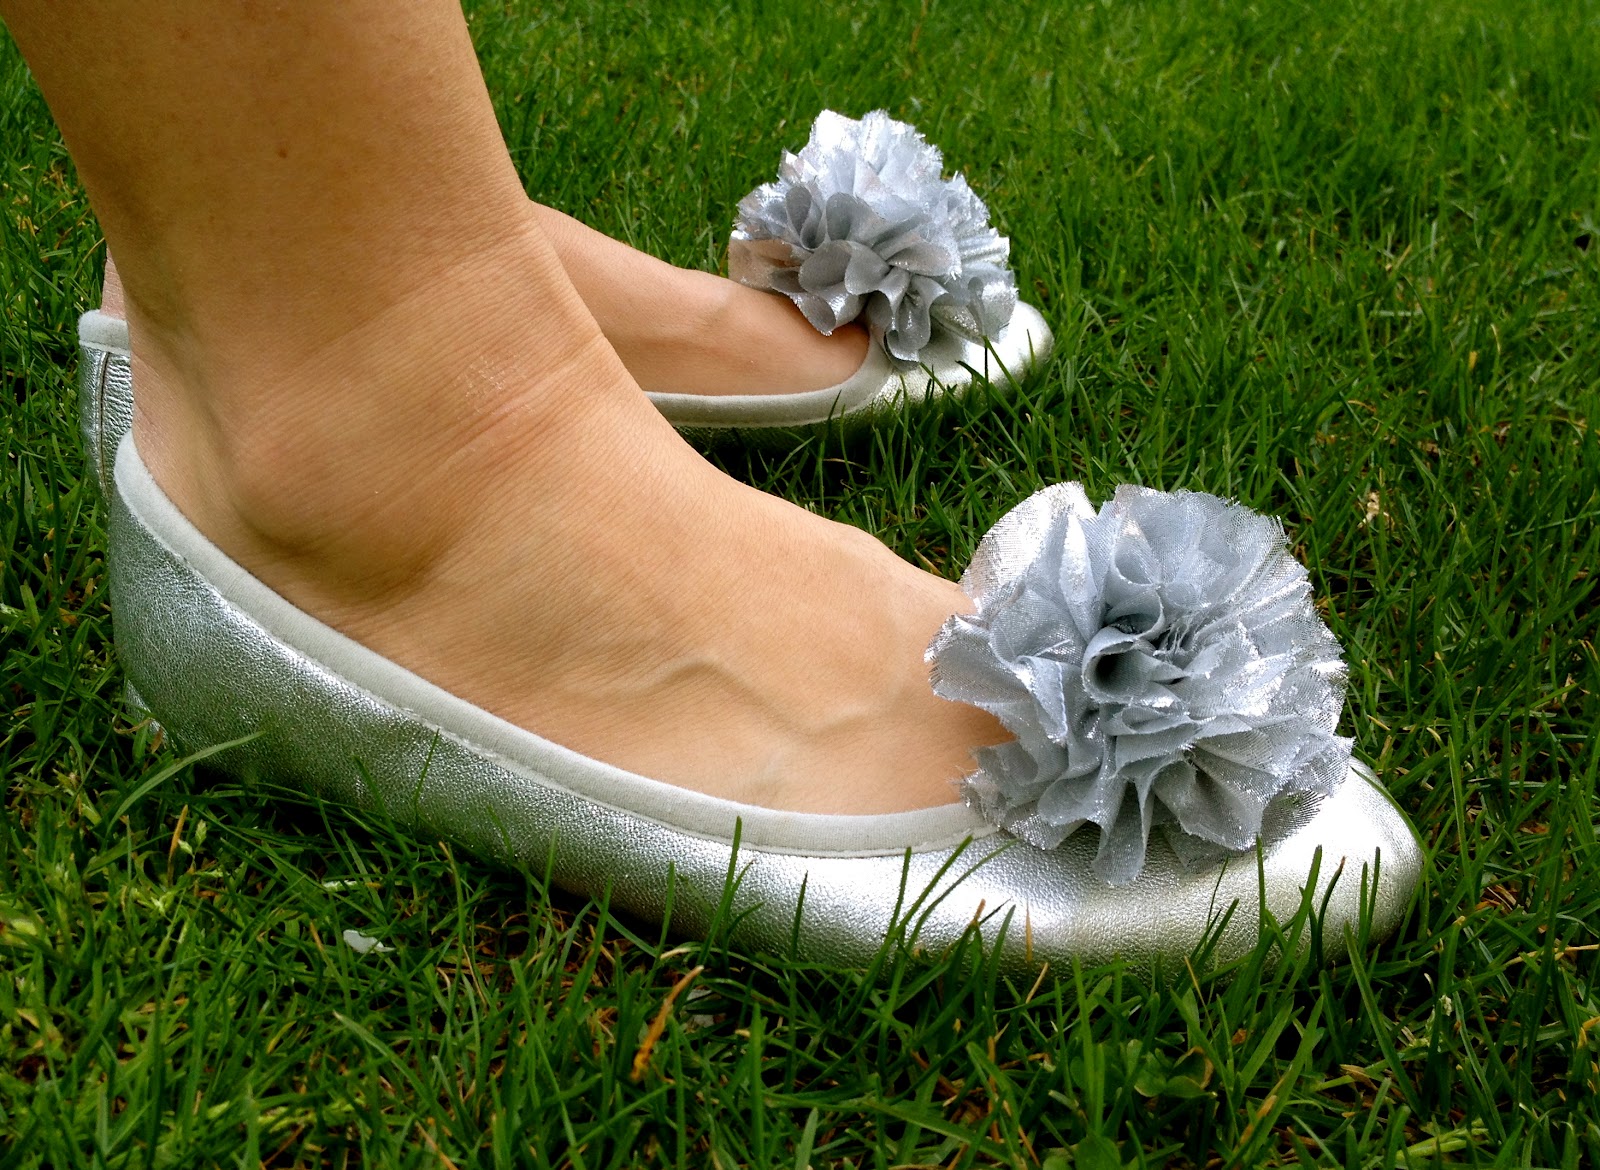
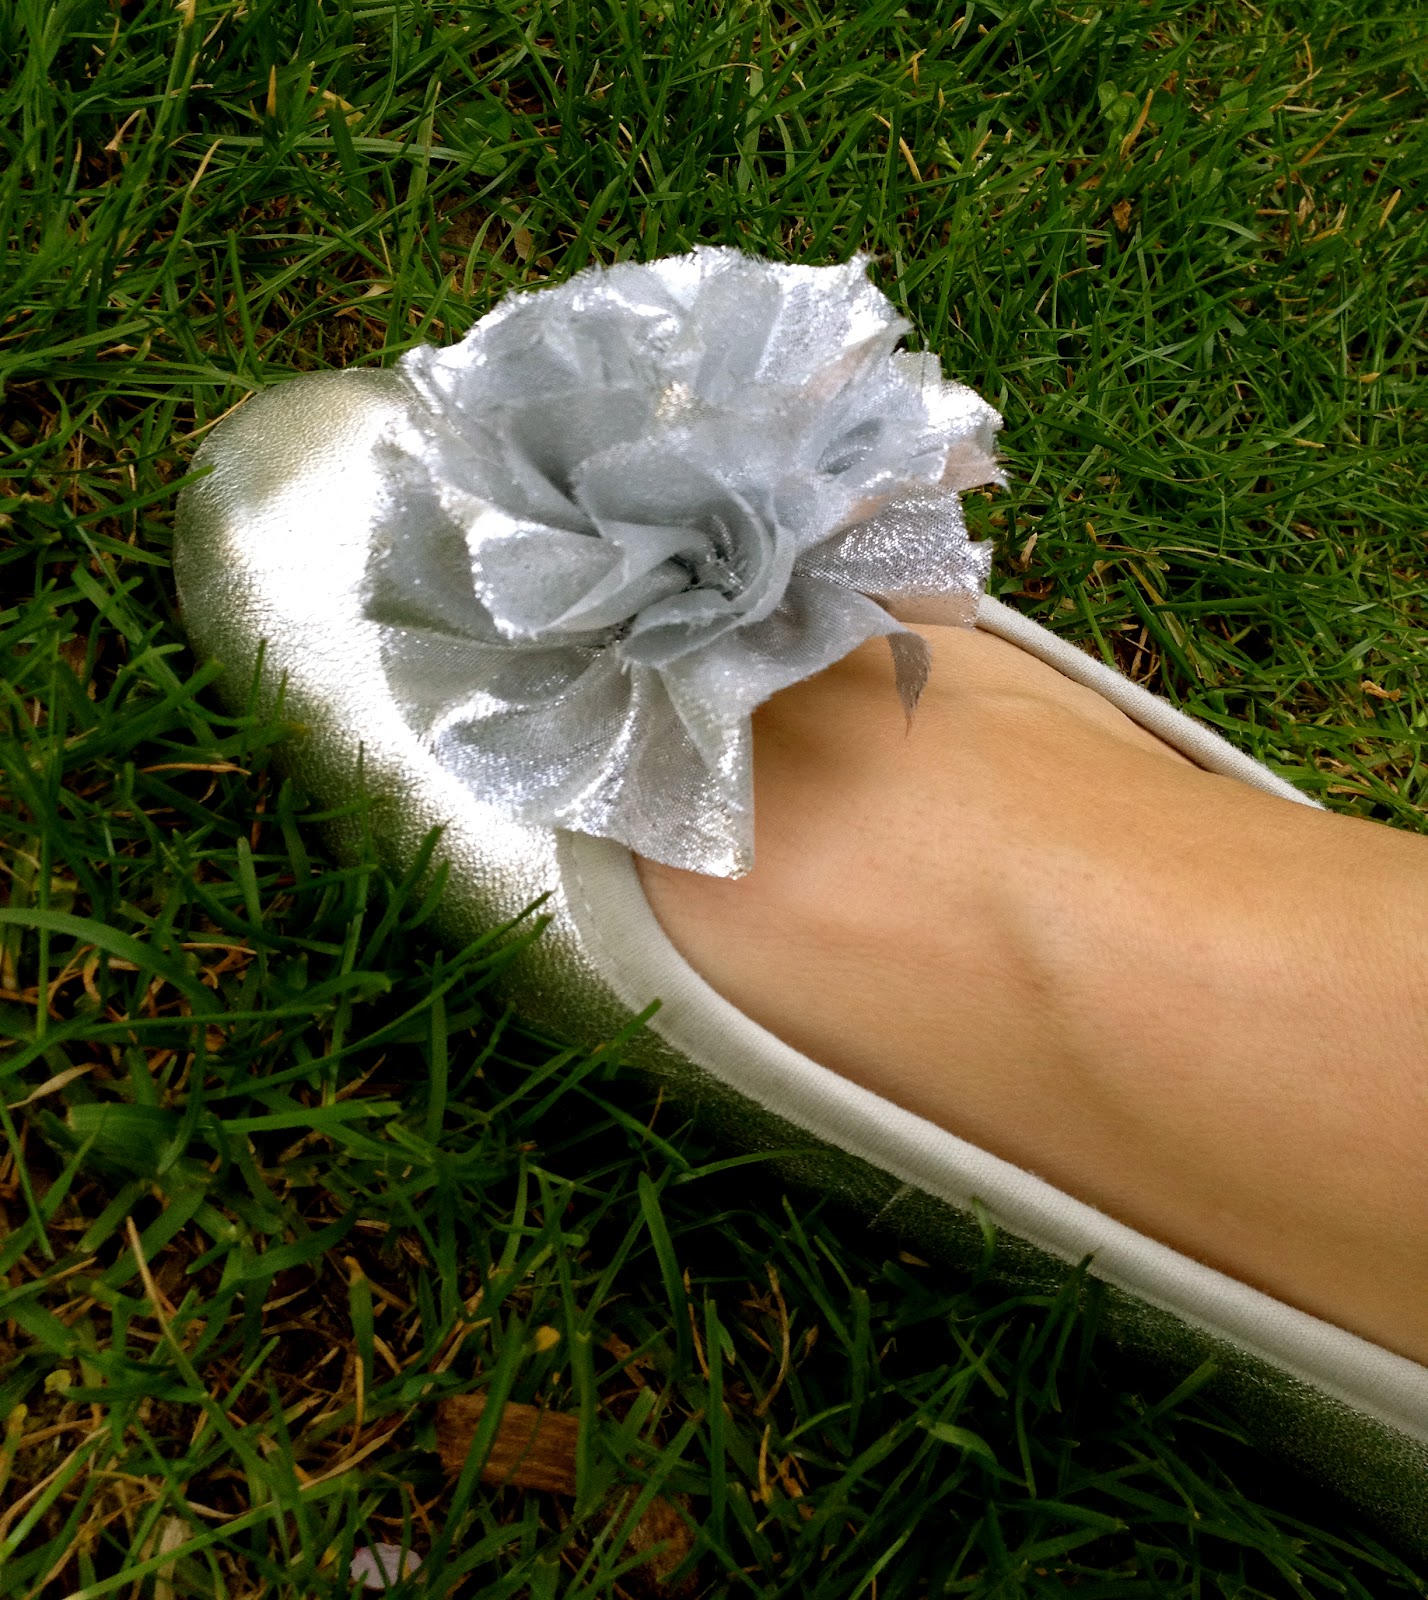
Embellish your boring shoes with ruffley, floral silver shoe clips.

I am not a shoe person at all but I was looking to update some comfy flats.

I used some scrap silver fabric cut on the bias, ruffled and glued to a binder clip and now my shoes are a tiny bit fancy, fun and ready for never never land.
Here’s how I made the shoe clips:

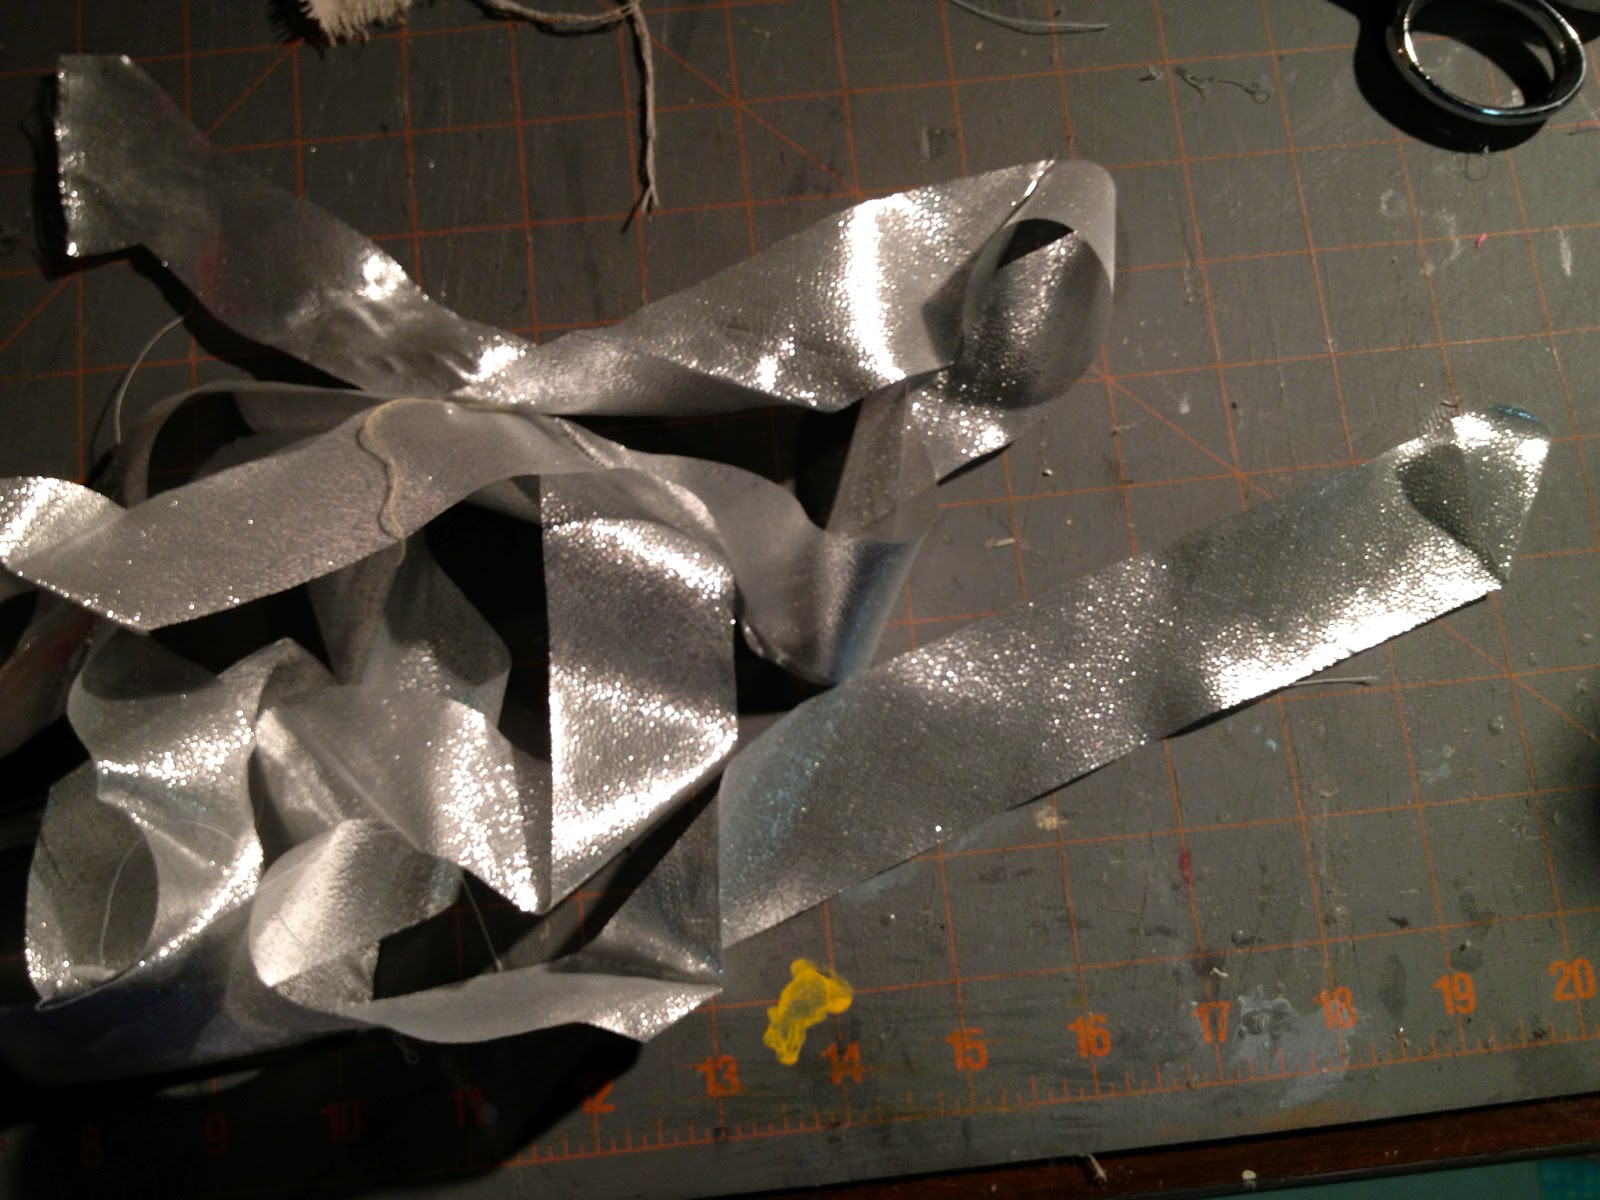
1. Cut bias strips of silver fabric at 1 1/2″wide x 40″ (longer = bigger flower):
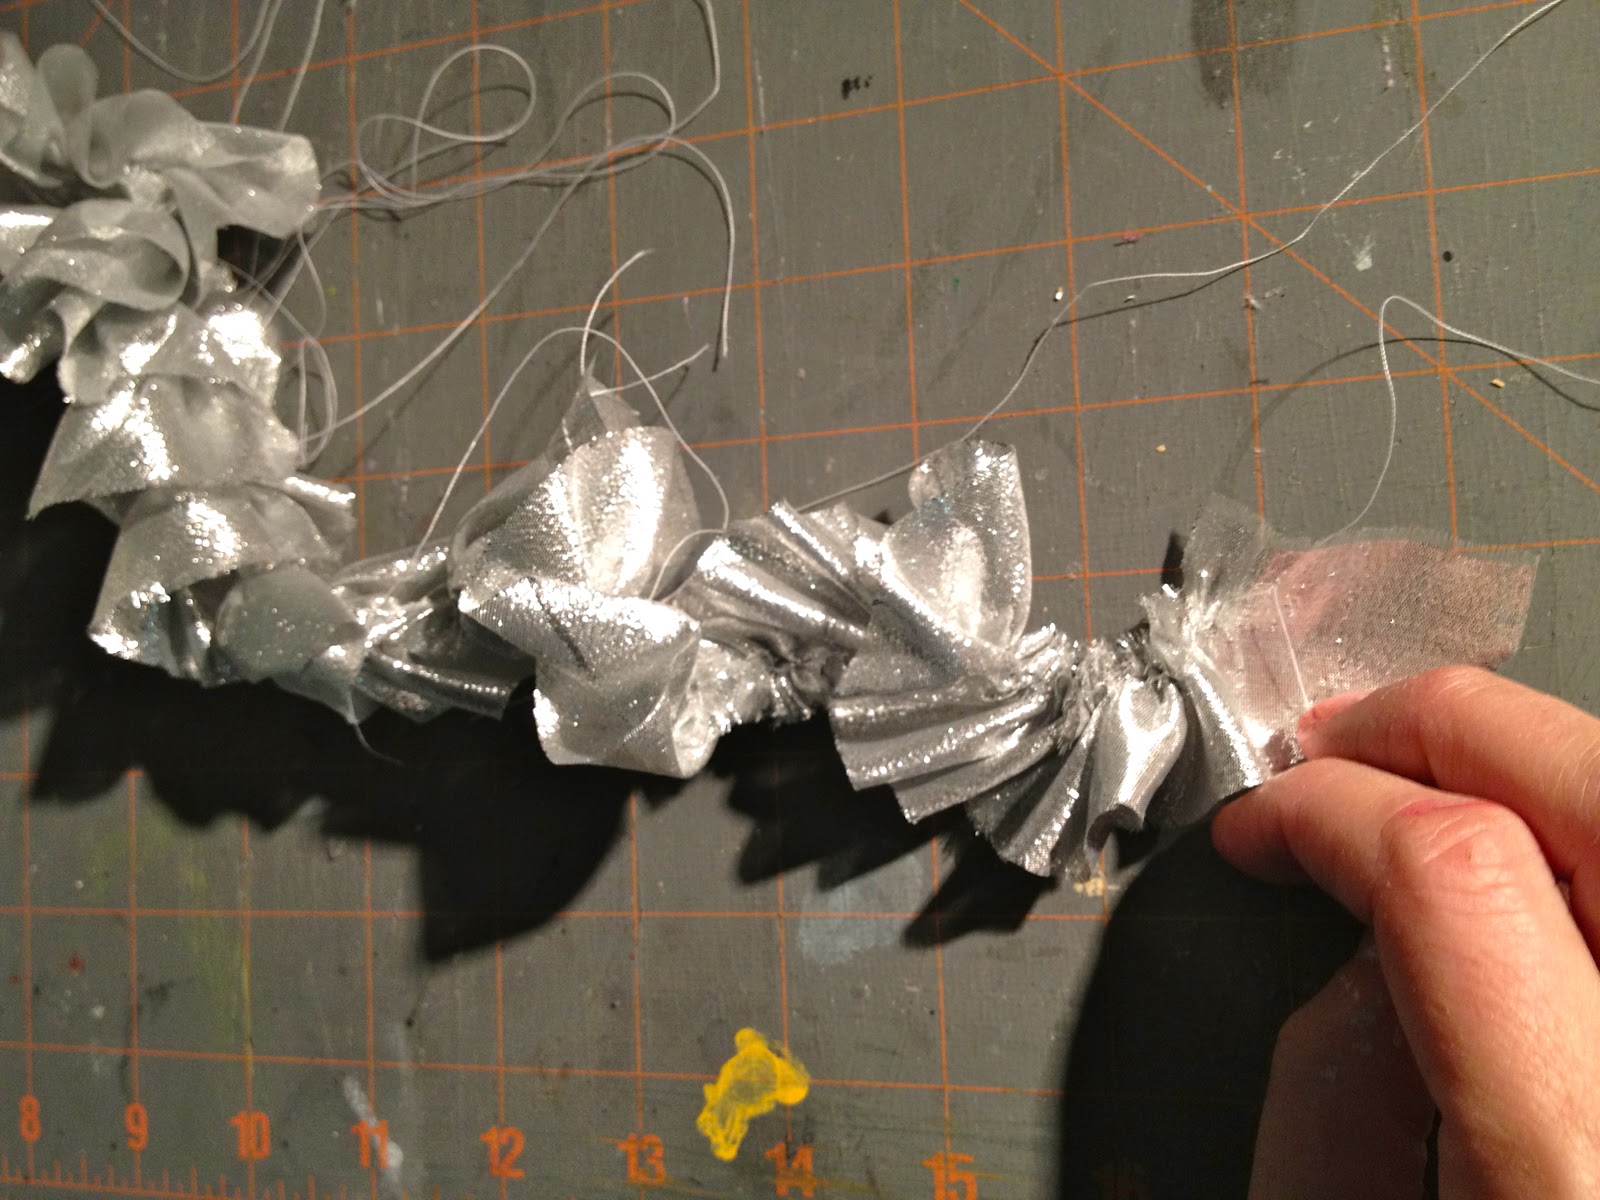
2. Sew a long zig zag stitch near one edge of fabric strip then pull one thread to make the gather:
(See Kate’s post here for ruffle techniques, basically #6.)

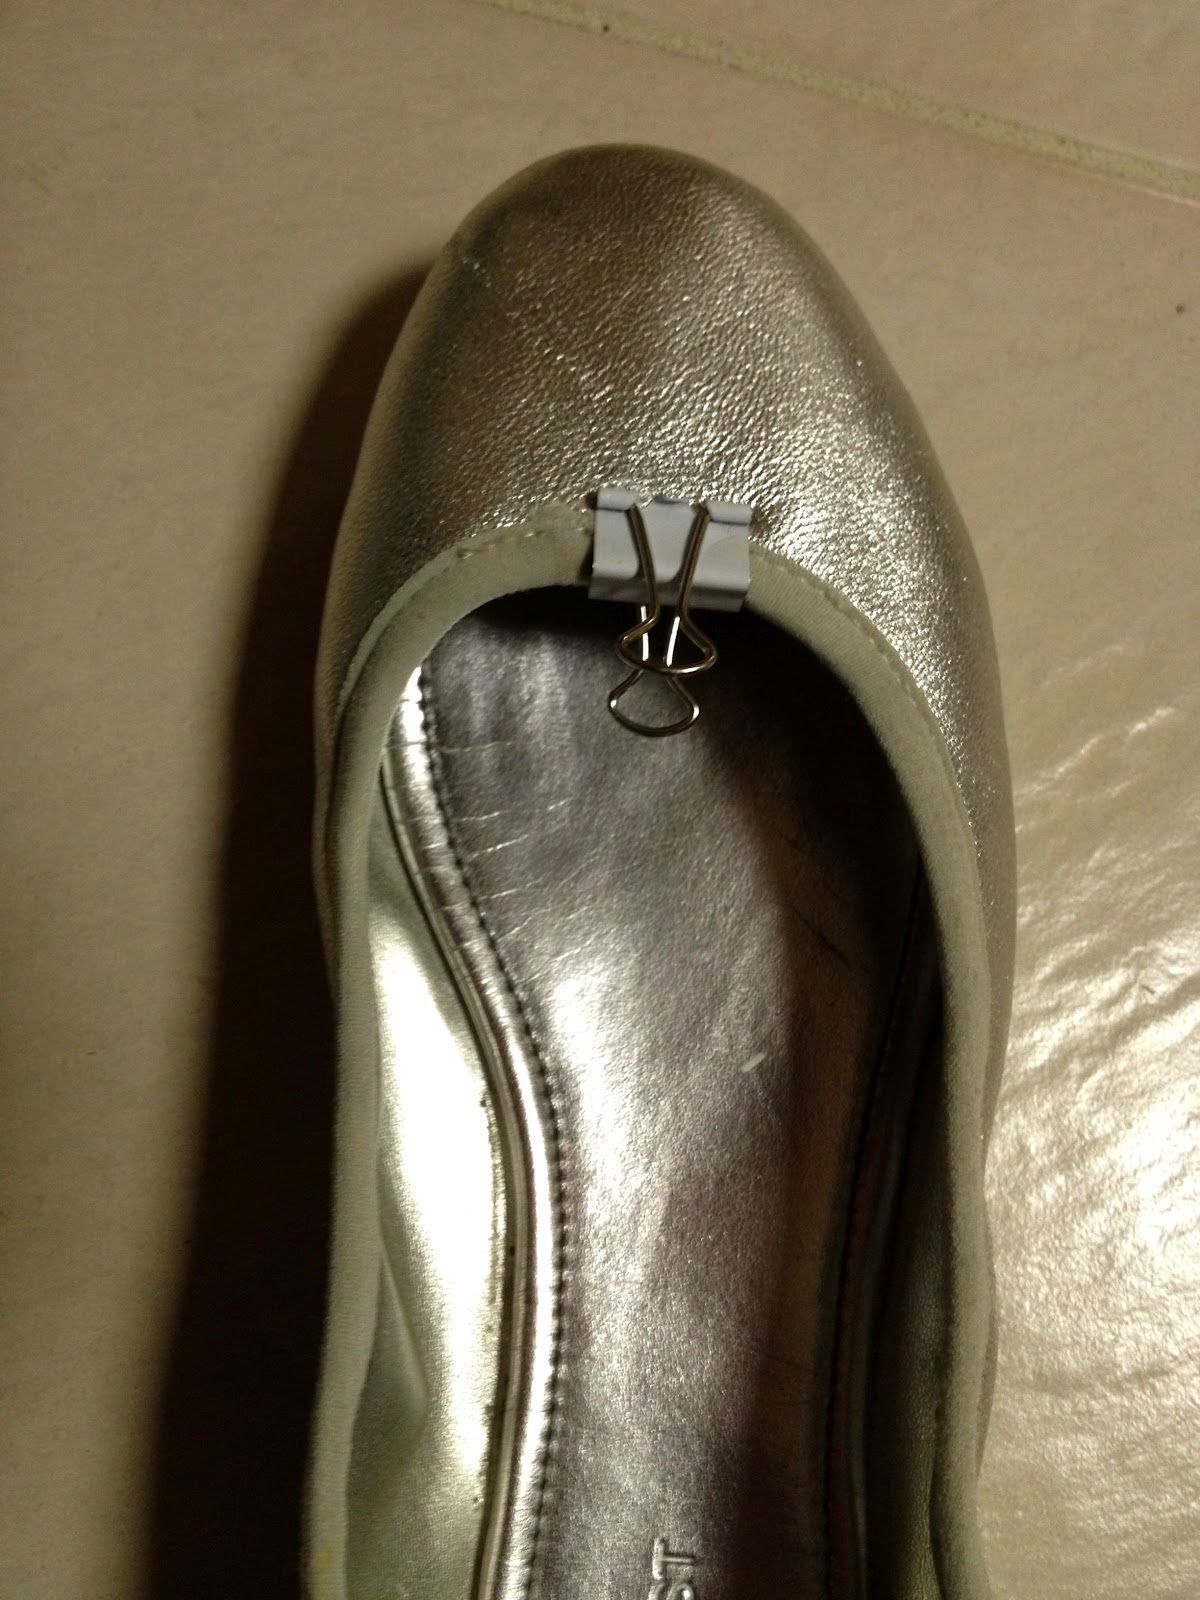
3. Check binder clip for size and fit:

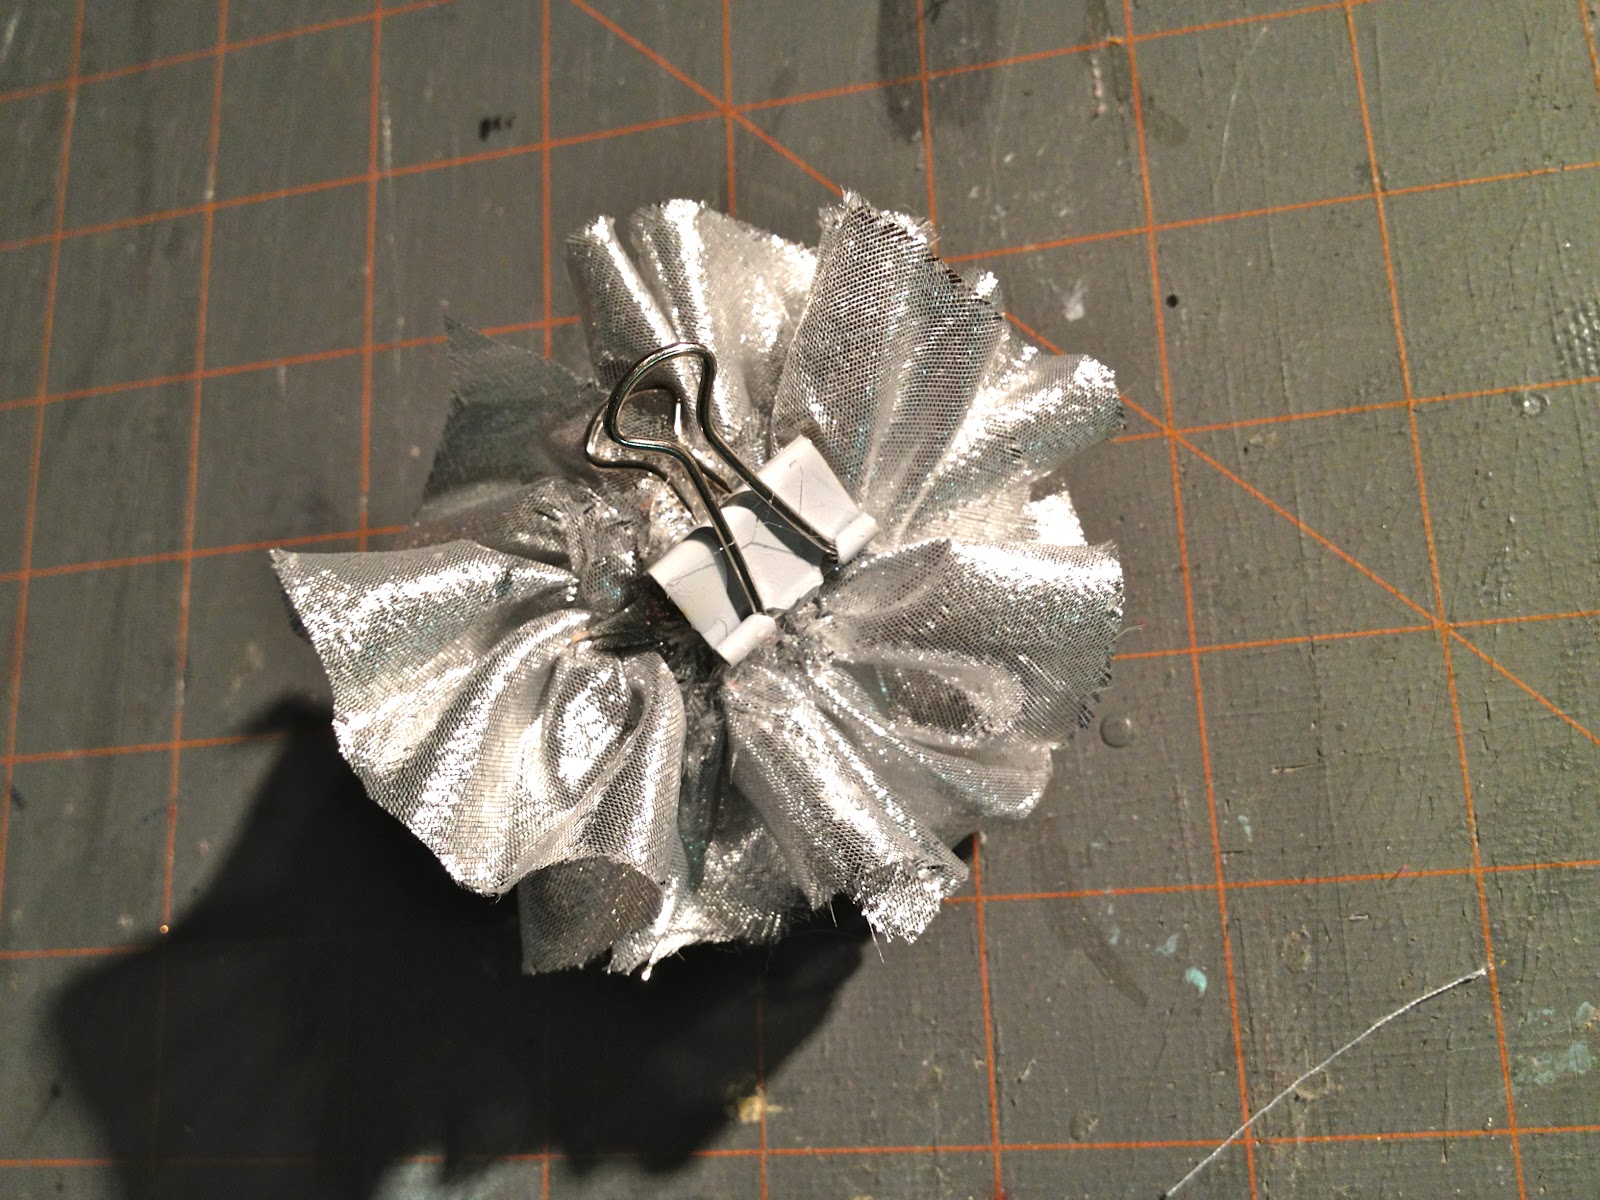
4. Using hot glue roll fabric into circular shape keeping all gathered edges down towards center of flower shape.  Then glue one flat edge of binder clip to flower:

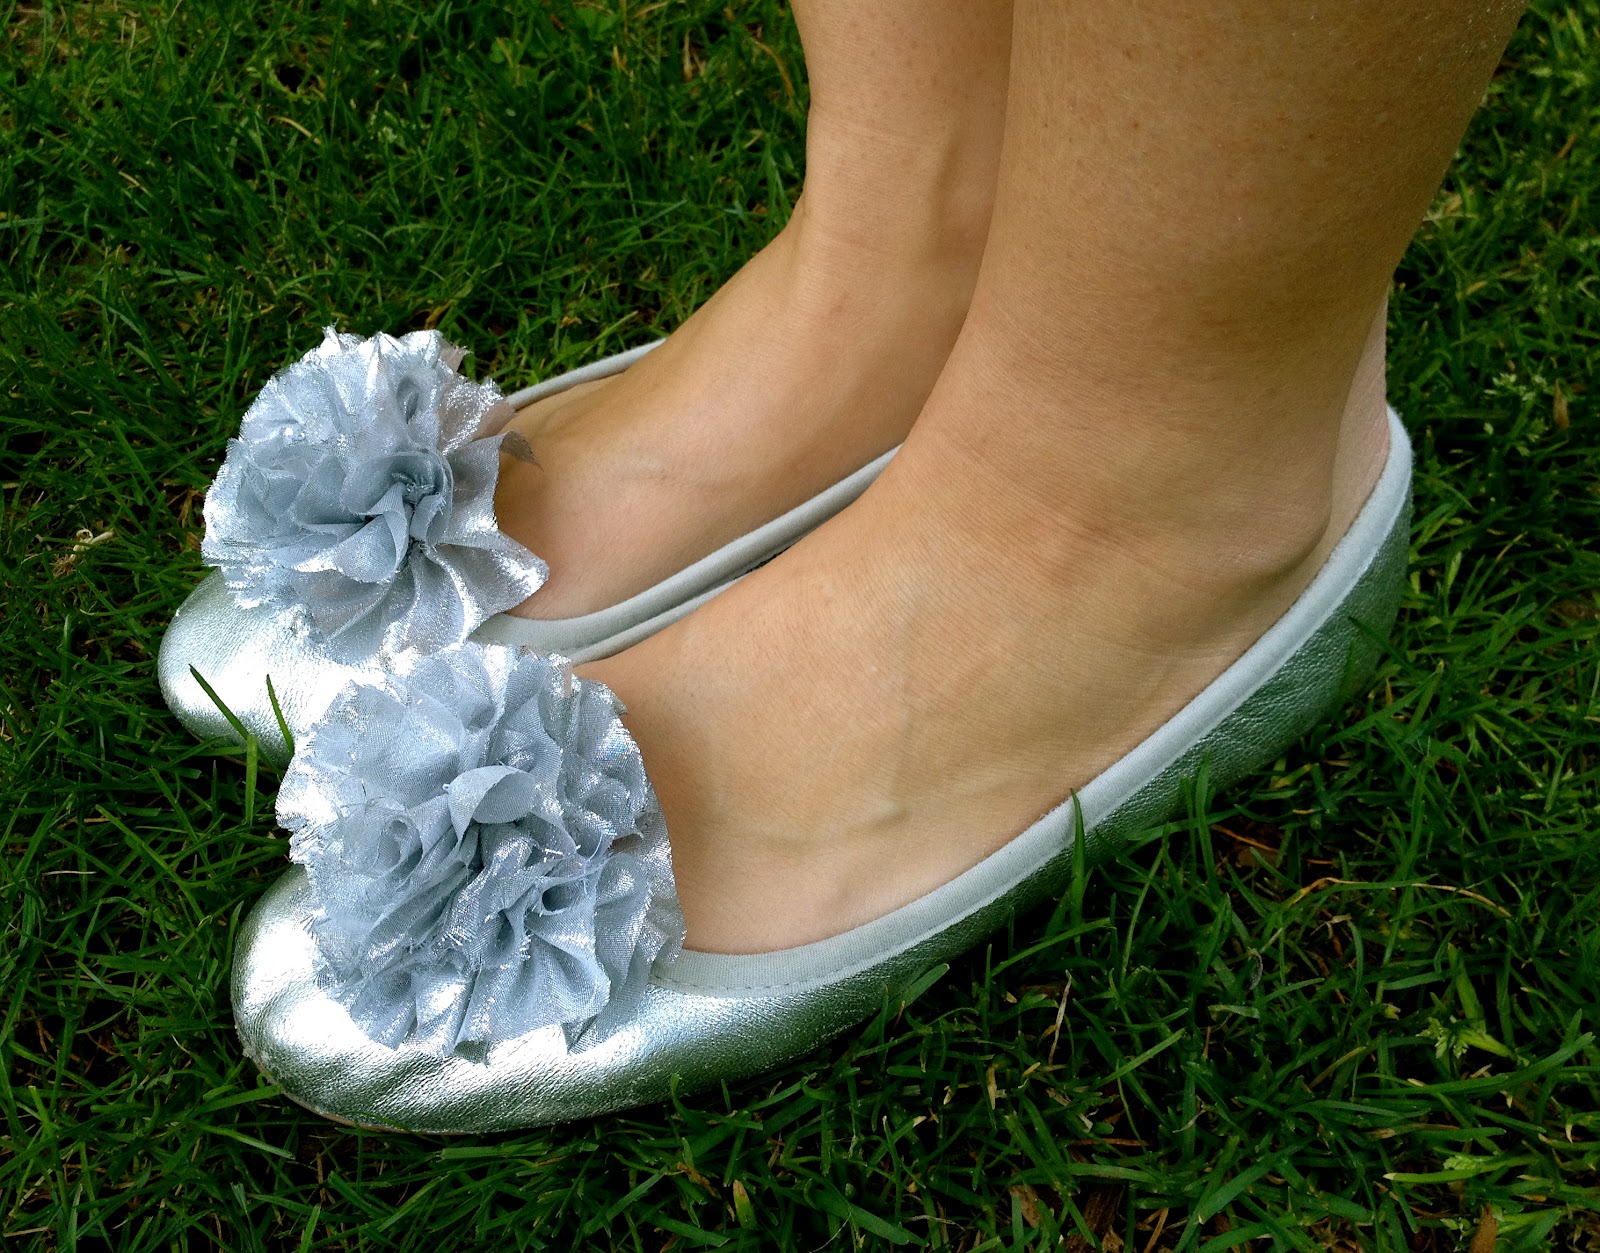
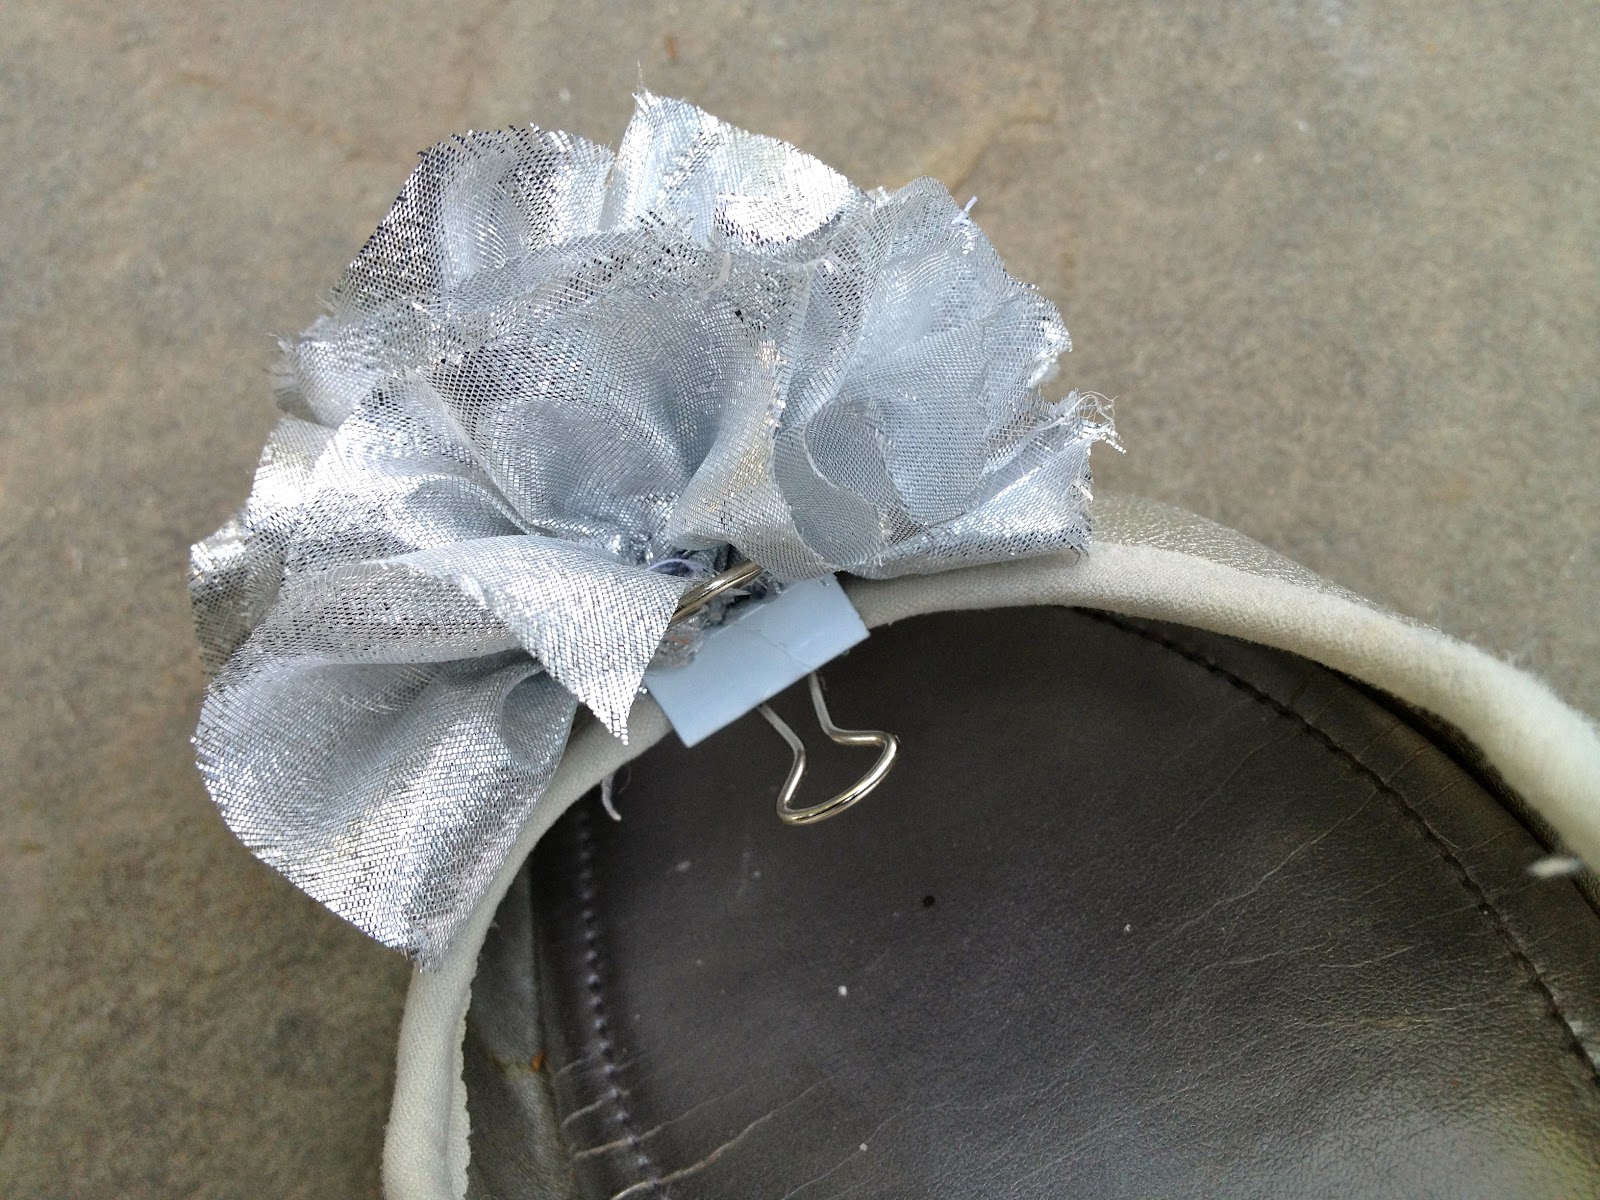
5. Clip flower onto shoe:

6. Remove one side of metal lever by pinching together long sides of metal piece and popping out of grooves:

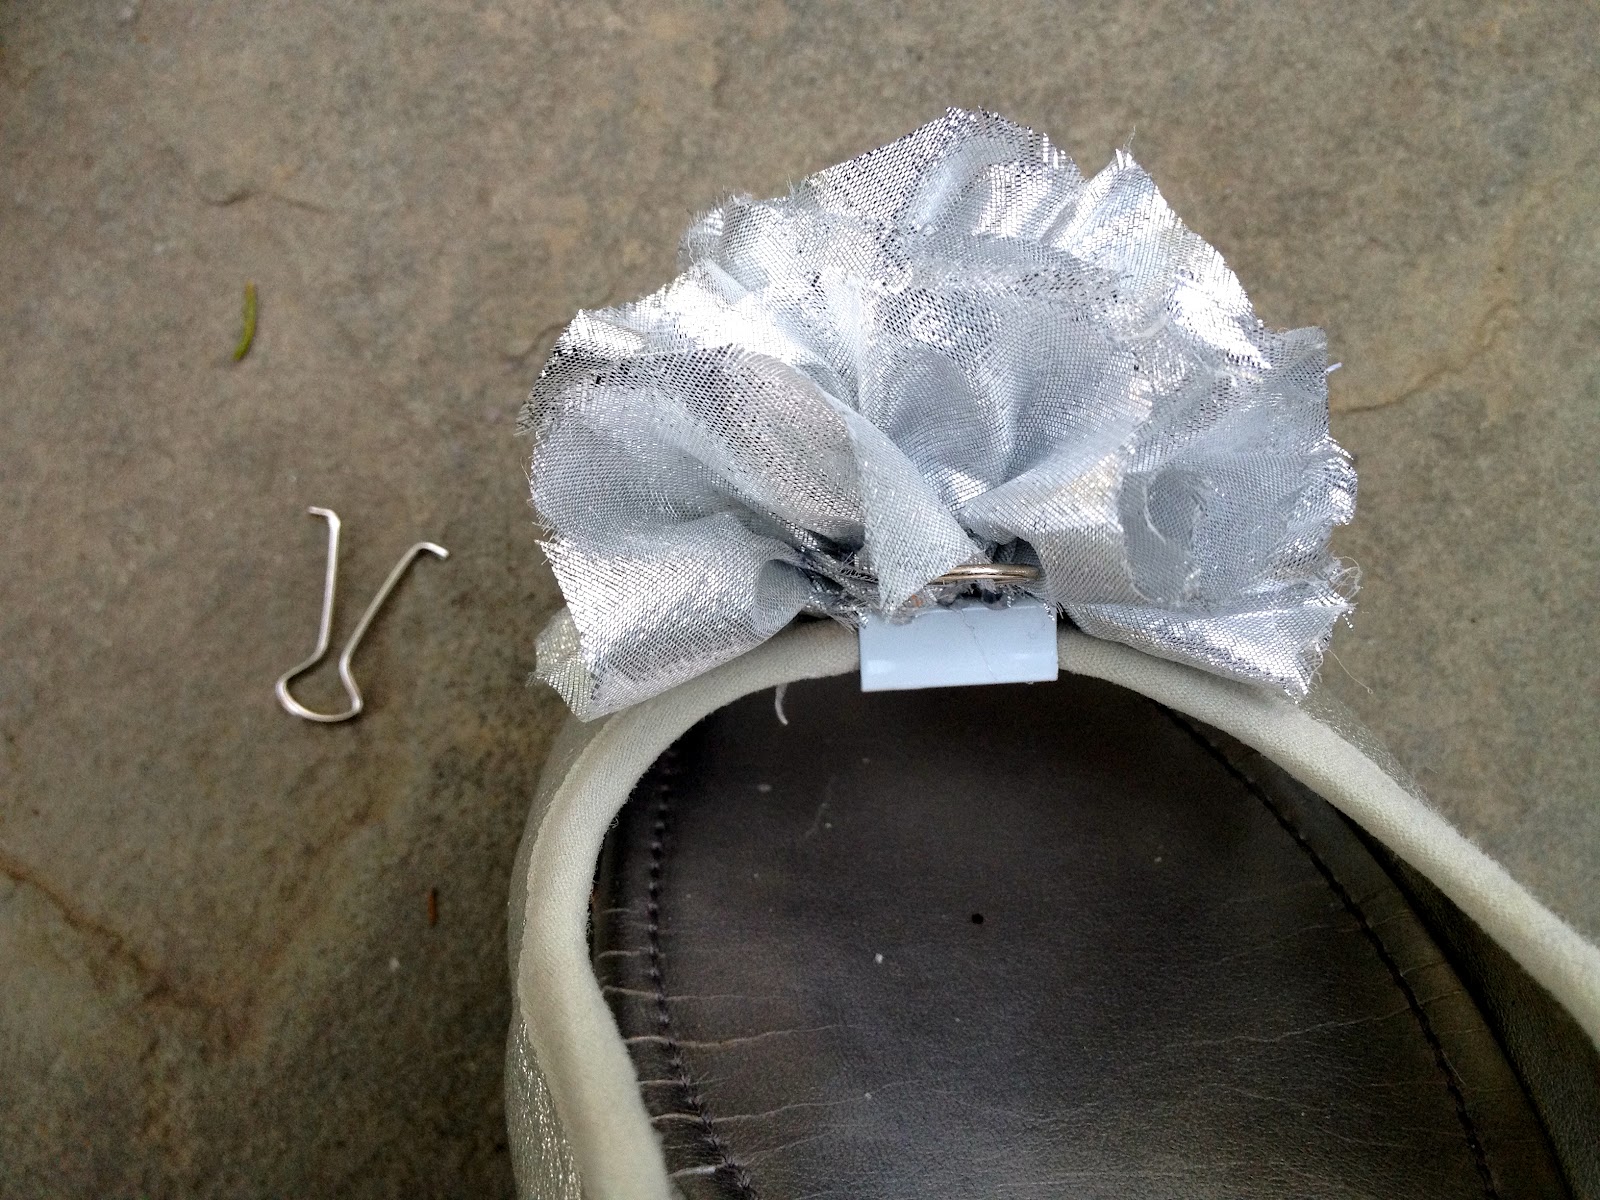
Now your shoes are updated, cute and ready to wear:
I’m linking up to:
DIY Talent Parade @ Pretty Handy Girl
Whatcha Got Weekend @ Lolly Jane
SAS @ Funky Junk
Weekend Wrap Up @ Tatertots & Jello
Sundae Scoop @ I Heart Naptime
Sister Sunday @ Sisters of the Wild West
Sunday Showcase Party @ Under the Table & Dreaming
Just Something I Whipped Up @ The Girl Creative
DIY Project Parade @ The DIY Showoff
Made by You Mondays @ Skip to My Lou
Making the World Cuter @ Making the World Cuter
Nifty Thrifty @ Coastal Charm
Tuesday Treasures @ My Uncommon Slice of Suburbia
Tutorials & Tips Tuesday @ Home Stories A to Z
Good Life @ A Beach Cottage
Delightfully Inspiring @ Delightful Order
Transformation Thursday @ The Shabby Creek Cottage
Strut Your Stuff @ Somewhat Simple
Share Awesomeness Thur @ The 36th Avenue
Flaunt it Friday @ Chic on a Shoestring
Tickled Pink @ 504 Main
Frugal Friday @ The Shabby Nest
SAS @ Just a Girl
Feathered Nest @ French Country Cottage
Remodelaholics Anonymous @ Remodelaholic
inspiration board @ Carolyns Homework
Textiles @ Freckled Laundry

You may also like...

  • Cross Stitch Monogram Ornament PlacecardCross Stitch Monogram Ornament Placecard
  • Painted Zipper Pouch with Stylin PaintPainted Zipper Pouch with Stylin Paint
  • Wood & Leather Bed Free PlansWood & Leather Bed Free Plans
  • DIY Village Cut Out Wreath & DecoArt / Cricut GiveawayDIY Village Cut Out Wreath & DecoArt / Cricut Giveaway
Share this post:

Filed Under: DIY, SEW, SEWING7 Comments

Reader Interactions

Comments

  1. Haven says

    April 14, 2012 at 11:53 PM

    Wow, amazing!!! I'm 63 and can remember wearing shoe clips in my teens and twenties. How creative you are! Thanks for the memory!

    Reply
  2. Special 'K' says

    April 15, 2012 at 12:37 AM

    So adorable! Thanks for sharing. Cheers SpecialK XoXo

    Reply
  3. Suzanne@Meridian Road says

    April 16, 2012 at 8:03 PM

    What a great idea! I didn't know that one side of the clip could come off. CUTE shoes!

    Reply
  4. Mimi says

    April 22, 2012 at 10:39 AM

    These shoes look great. Very professional. Can't believe you can use that binder clip to hold it on. You just made this project very accessible.

    Reply
  5. S says

    April 30, 2012 at 11:26 AM

    Genius!

    Reply
  6. Anu@My Dream Canvas says

    May 3, 2012 at 11:18 PM

    This is amazing. I am visiting you via the linky party at Somewhat Simple. I look forward to seeing you at My Dream Canvas.

    Reply
  7. - Brittany aka Pretty Handy Girl says

    May 6, 2012 at 9:58 PM

    Get out! A binder clip and some silver fabric! Girl, what can't you invent?! Thanks for sharing in the DIY Talent Parade.

    Reply

Leave a Reply Cancel reply

Your email address will not be published. Required fields are marked *

Primary Sidebar

Hi! I’m Jaime

Jaime Costiglio

Hello!

Thank you for stopping by.
Join me for lots of DIY.

Read more

Get new posts via email

Handbuilt Holiday: Gift Project Plans

handbuilt holiday gift project plans

Collection of DIY gift project plans to build.

The Home Depot Tool Prospective

THD Prospective

Tools to consider for the DIYer.

Archives

The Home Depot Logo
Copyright © 2026 Jaime Costiglio · Custom site by Moonsteam Design

Privacy Policy