Handpainted holiday sign in script:

And the backside:

This is one big sign – about 36″w x 30″h.
Heavy and thick too.

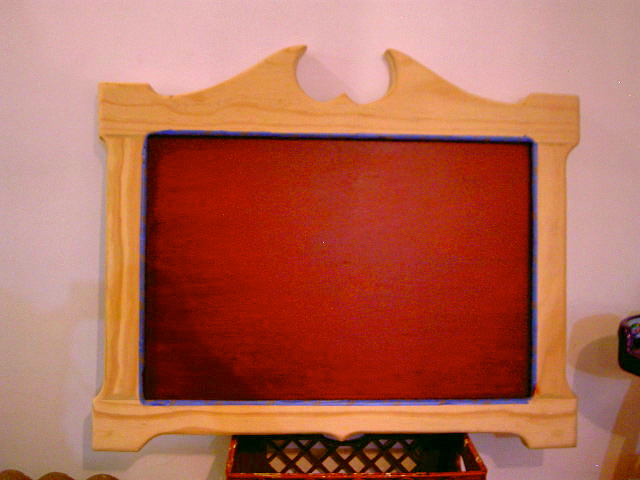
A customer, AnnMarie, brought me this piece:

Her brother had constructed and carved the frame to mimic a sign they had in their family as youngsters.
AnnMarie needed me to paint the sign.
I came up with these drawings:
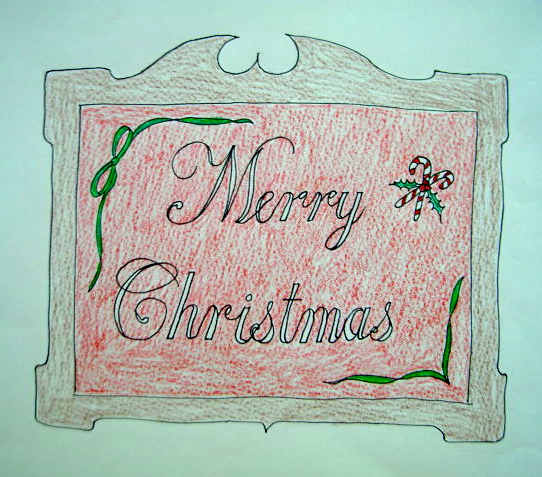

She approved and I started painting.

I did pull some inspiration from historical postcards found via Google:


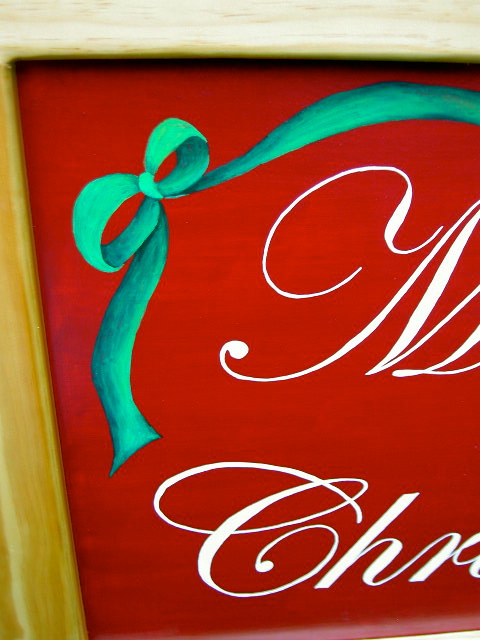
And everything came together in the end:

Here’s how I made the sign:
1. Basecoat the inner rectangle two coats red.
*Tape off outer frame edges.
2. Print out lettering to size, layout, trace around edges with ballpoint pen to create indent in wood:

3. Paint inside indent:

4. Sketch holly, ribbon and candy cane details with pencil.
Paint, layer up the colors starting with the darkest green first:

5. Make leaves more realistic with lighter green on edges:

6. For candy cane paint white background first:

7. Add red details and holly:

8. Stain edges with Minwax Ipswich Pine.
Seal with 3 coats Helmsman exterior grade satin poly.

Definitely a different project, fun and nostalgic.

The details are perfectly simple:
And just to see the difference a little paint can make:
BEFORE:
AFTER:
Thanks AnnMarie for a great Christmas project.
I’m linking up to:
Whatcha Got Weekend @ Lolly Jane
SAS @ Funky Junk
Weekend Wrap Up @ Tatertots & Jello
Sundae Scoop @ I Heart Naptime
Sister Sunday @ Sisters of the Wild West
Sunday Showcase Party @ Under the Table & Dreaming
Just Something I Whipped Up @ The Girl Creative
DIY Fall Festival @ The DIY Showoff
Made by You Mondays @ Skip to My Lou
Making the World Cuter @ Making the World Cuter
Nifty Thrifty @ Coastal Charm
Tuesday Treasures @ My Uncommon Slice of Suburbia
Tutorials & Tips Tuesday @ Home Stories A to Z
Good Life @ A Beach Cottage
Delightfully Inspiring @ Delightful Order
Transformation Thursday @ The Shabby Creek Cottage
Strut Your Stuff @ Somewhat Simple
Share Awesomeness Thur @ The 36th Avenue
Flaunt it Friday @ Chic on a Shoestring
Tickled Pink @ 504 Main
Frugal Friday @ The Shabby Nest
SAS @ Just a Girl
Feathered Nest @ French Country Cottage
Remodelaholics Anonymous @ Remodelaholic


Great job, Jaime ~ on both sides! It does have a definite nostalgic feel to it. Love the font you went with, and the holly and candy canes are just perfect touches.
You did a fabulous job painting the sign and a new family tradition/treasure is created. I love the traditional style of it.
Absolutely beautiful!
Beautiful sign and painting!
Fabulous sign, I love signs and this one would look perfect on my front porch. Thanks for the inspiration!