• Home
  • Blog
  • About
  • Contact
    • Disclosure
    • Privacy Policy
  • SHOP
  • Widget area for main menu

    • Email
    • Facebook
    • Instagram
    • Pinterest
    • Twitter
    • YouTube
  • Skip to primary navigation
  • Skip to main content
  • Skip to primary sidebar

Jaime Costiglio

build - paint - sew

  • BUILD
    • BEDS
    • BENCHES
    • DESKS
    • DRESSERS
    • GAMES & TOYS
    • SCRAP WOOD
    • SHELVES
    • STORAGE
    • TABLES
  • TOOLS
  • PAINT
    • CRAFTS
    • FURNITURE
    • HOME DECOR
  • SEW
    • GIFTS
    • HOME DECOR
    • POUCHES
  • HANDBUILT HOLIDAY
    • 2021
    • 2019
    • 2018
    • 2017
    • 2016
    • 2015
    • 2014
    • 2013
  • GIFTS
    • BABIES
    • KIDS
    • FOR HER
    • FOR HIM
    • TEACHERS
    • WEDDINGS
  • SEASONAL
    • 4TH OF JULY
    • FALL
    • HALLOWEEN
    • CHRISTMAS
    • SUMMER
    • SPRING
    • ST. PATRICK’S DAY
    • THANKSGIVING
    • VALENTINE’S DAY
    • WINTER
  • SALTBOX PROJECT
    • BATHROOMS
    • DINING ROOM
    • EXTERIOR
    • FAMILY ROOM
    • FOYER / MUDROOM
    • KIDS BEDROOMS
    • KITCHEN
    • LIVING ROOM
    • MASTER BEDROOM
    • PLAYROOM
  • SCROLL SAW

“R” is for Replica

March 28, 2012

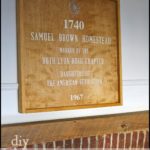
Paint: replica of antique metal pub sign
 
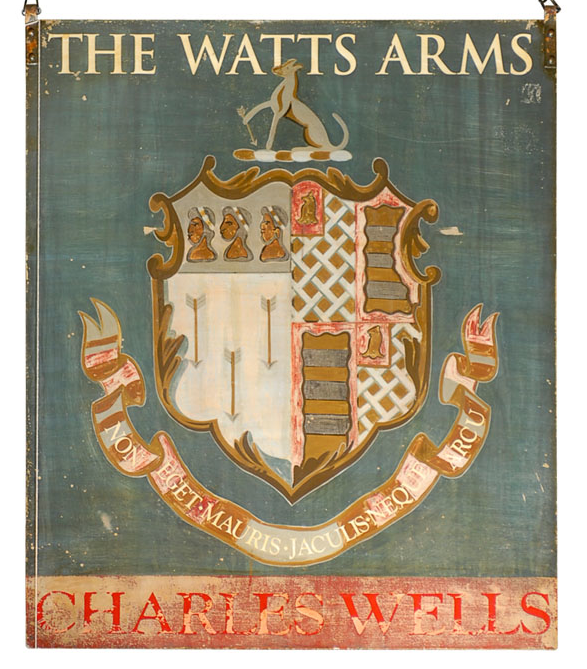
Can you tell which one is the antique?

A special request from a friend who wanted this sign for her living room, the style and colors (with a slight change to burnt orange) were a perfect fit for her decor, but the price for the antique was ridiculous.
She sent me the challenge and I accepted.

It was definitely a little tricky getting all the details and colors in place but I love a good challenge.

Here’s how I made the sign:

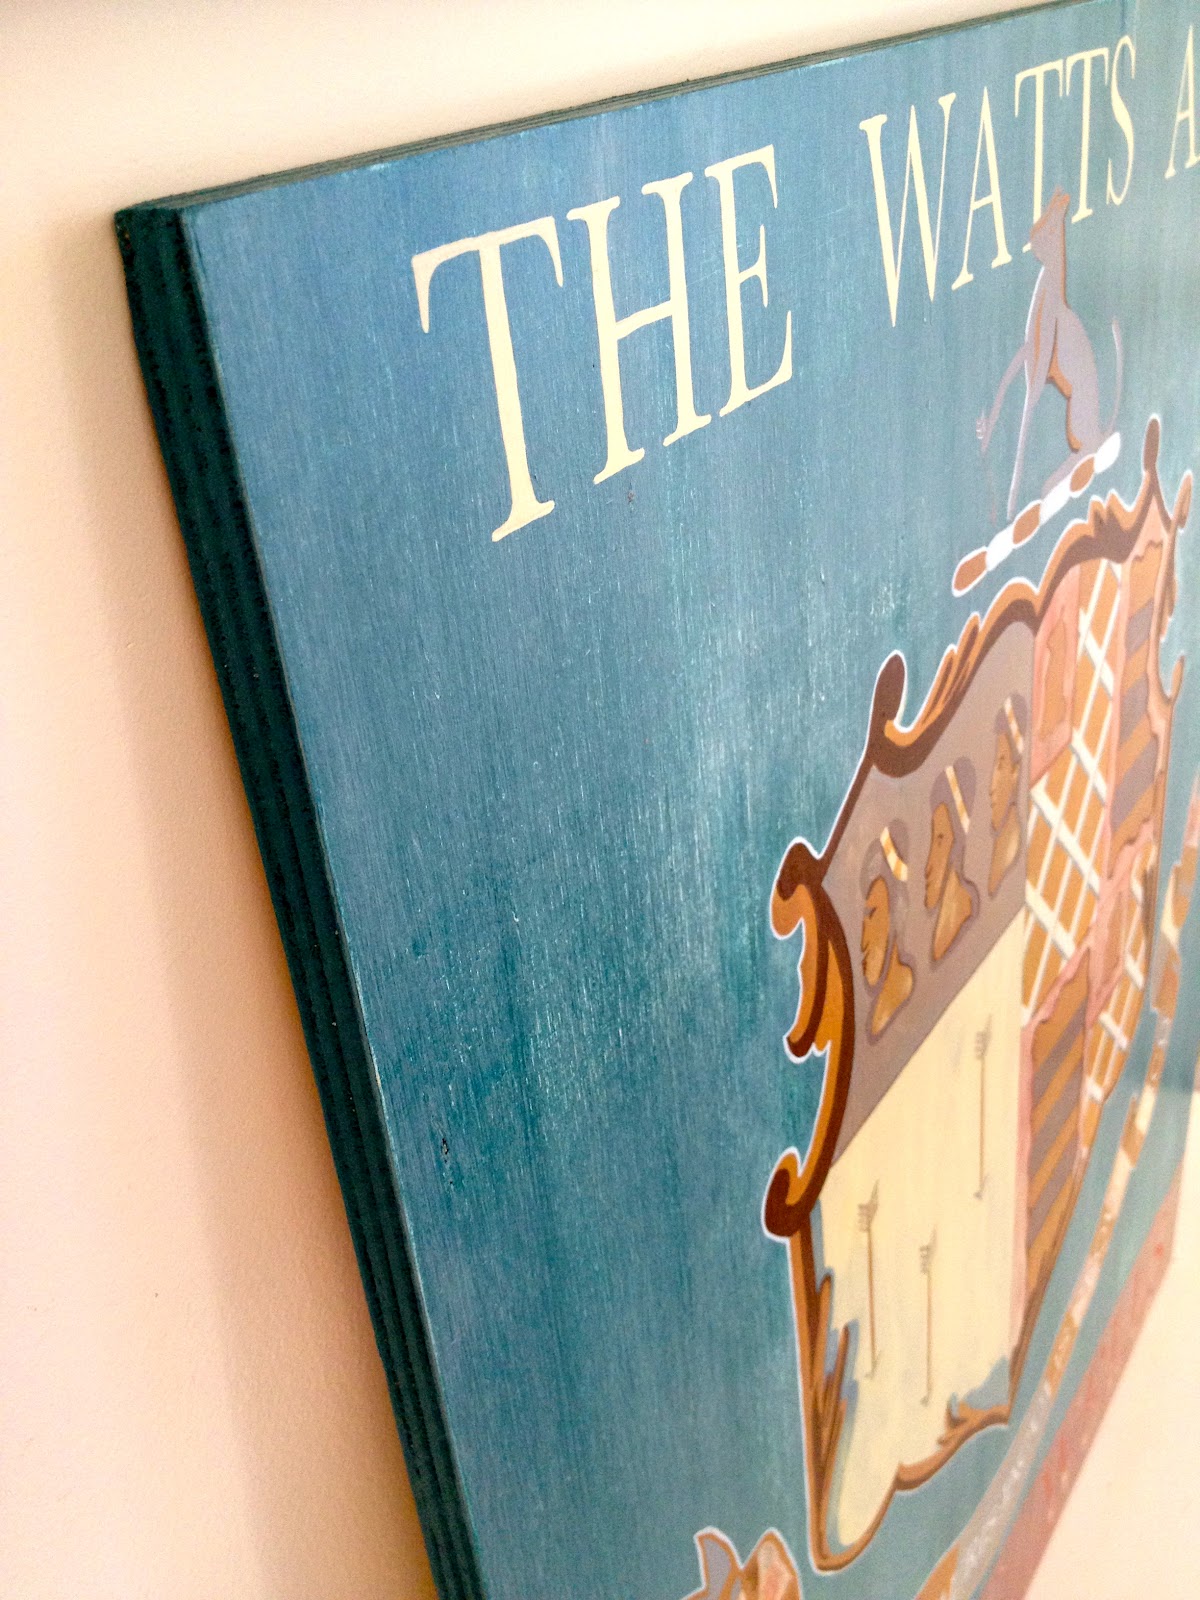
1. Cut 3/4″ plywood to requested size 33″ x 28″.
Prime and paint base color.
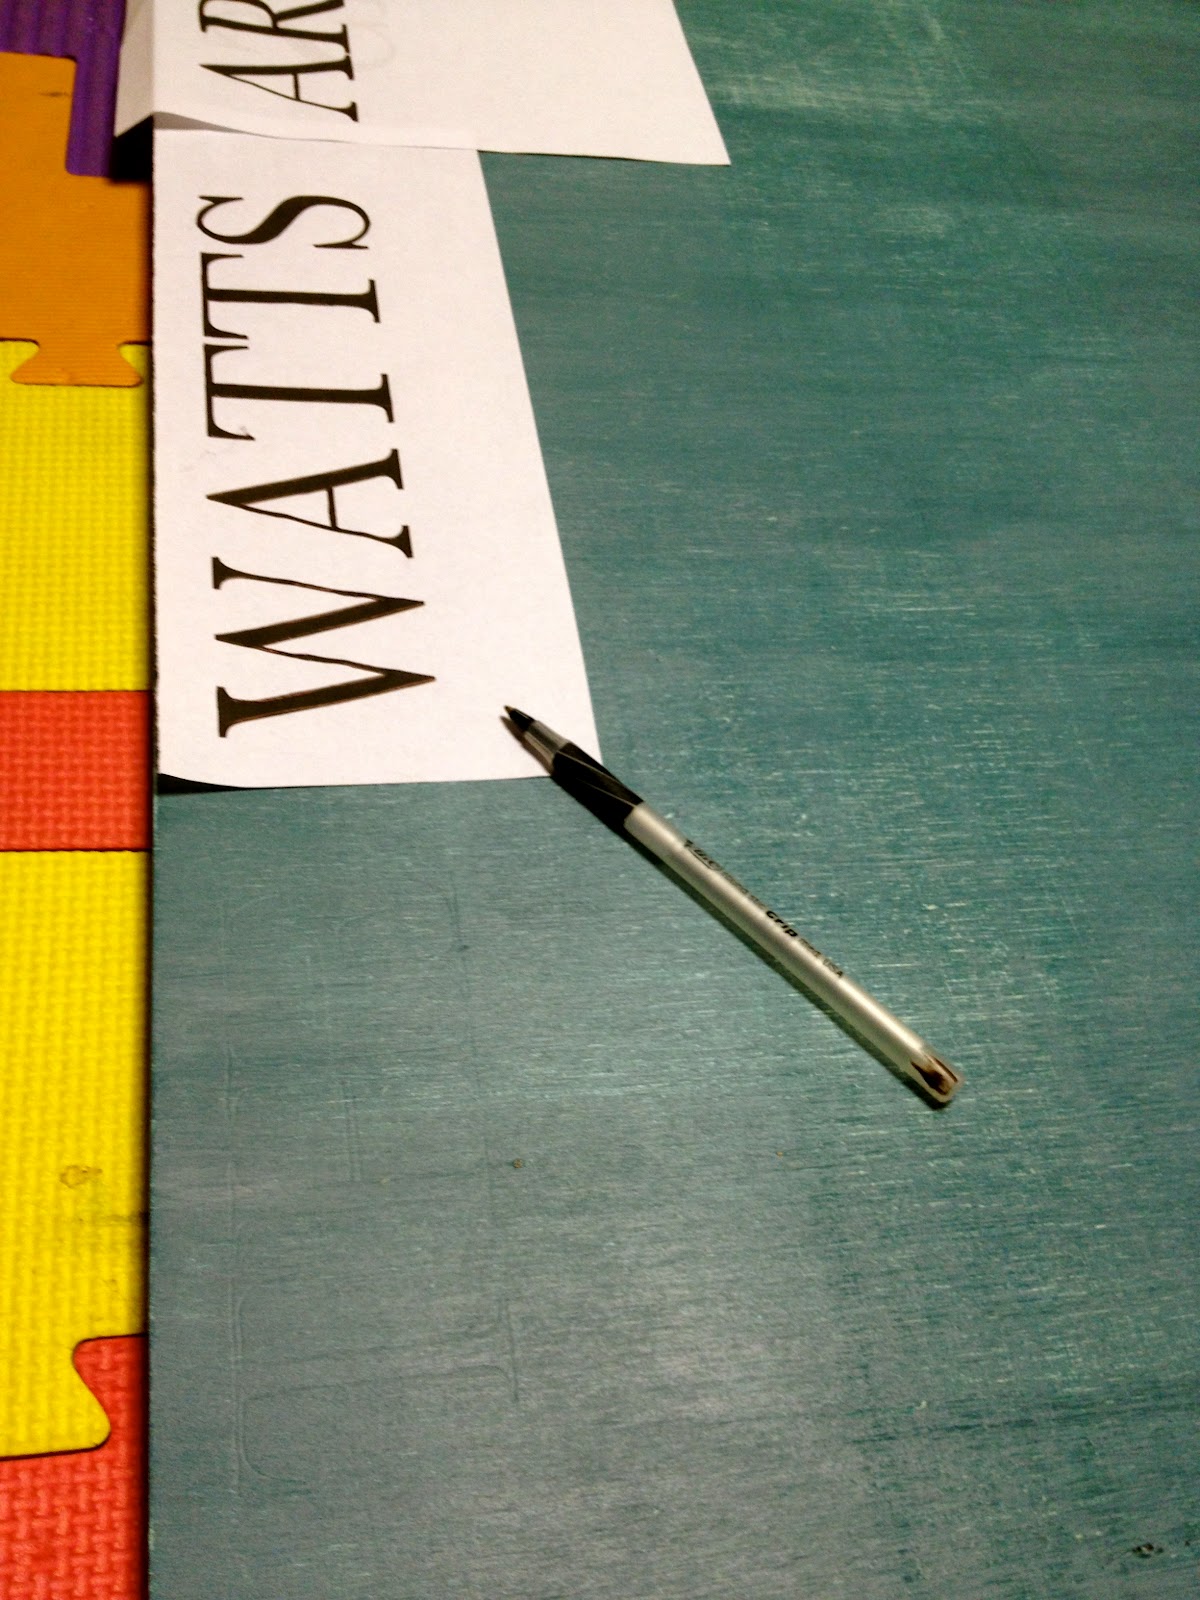
Print out lettering to match and fit space.
Trace letters with ballpoint pen which leaves indent in wood to paint:
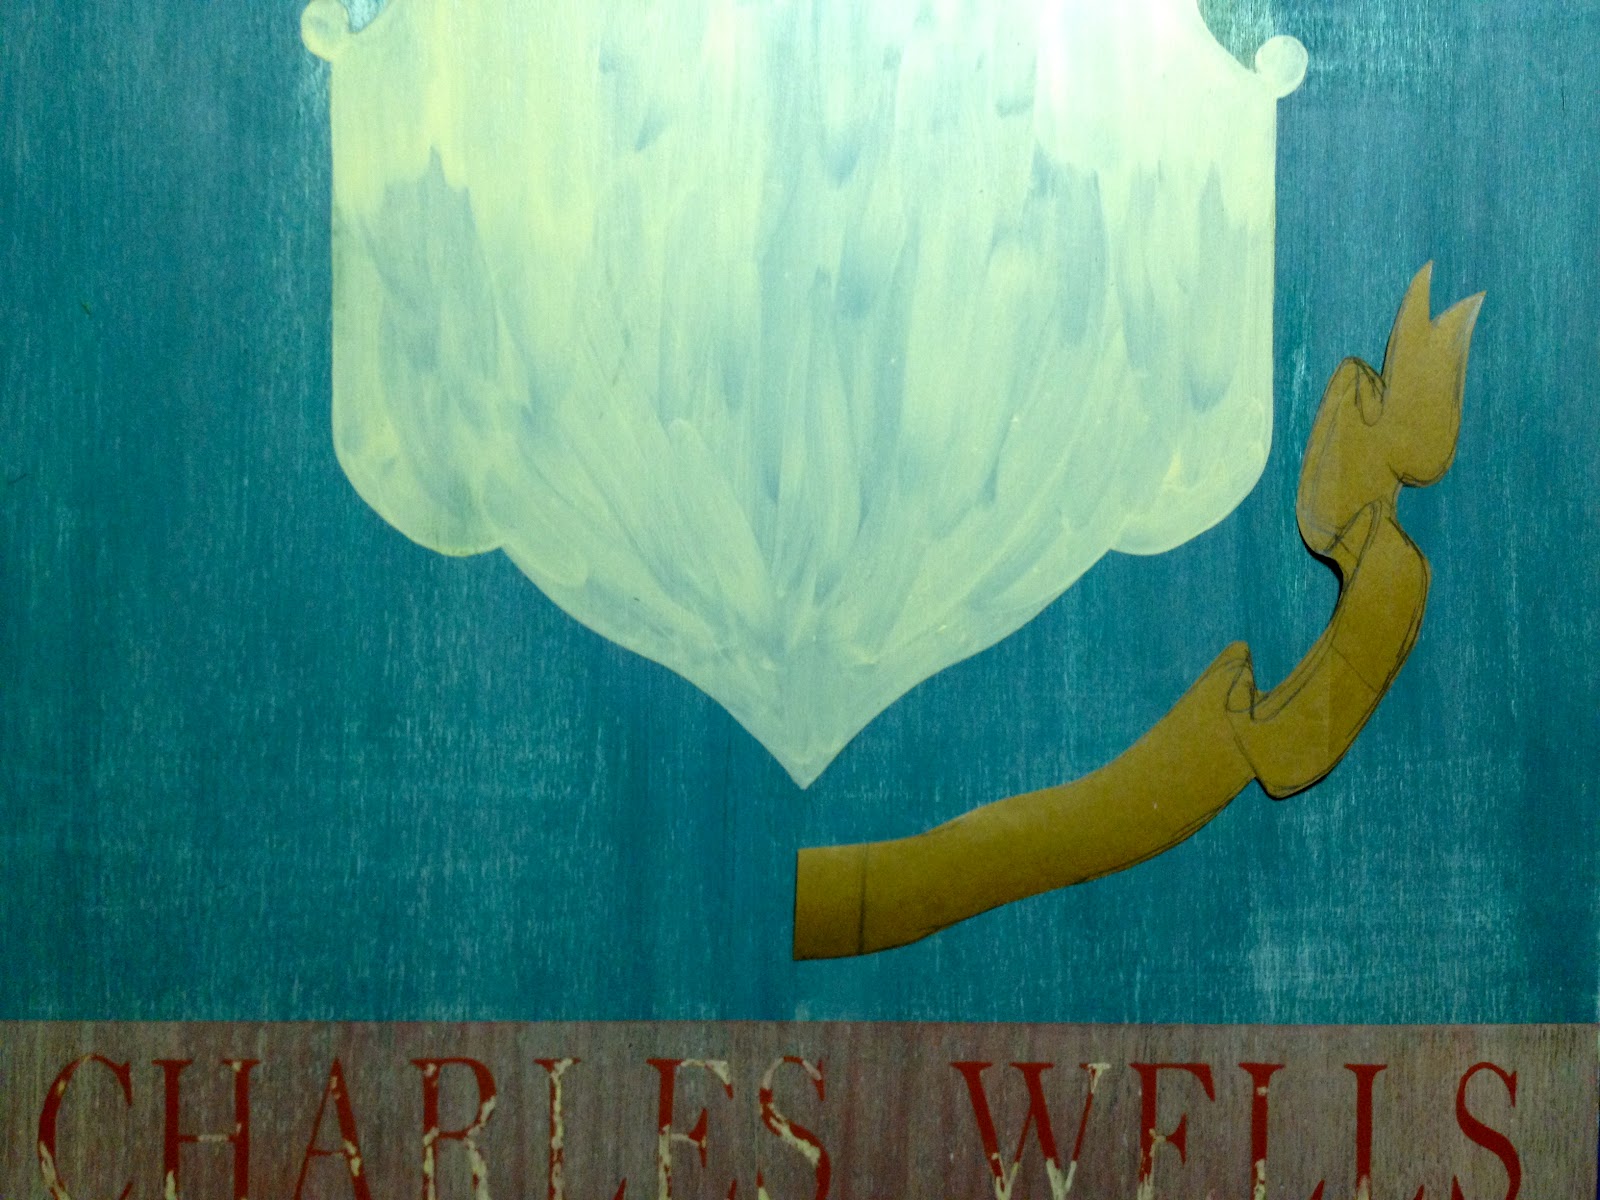
2. Cut shield shape from craft paper folded in half, trace around edge:

3. Paint shield base color:

4. Cut out ribbon banner from craft paper and trace for each side:
5. Start painting in details:

6. Add lettering to the banner:

7. Seal with clear satin poly and add hanging hardware to back:
I’m linking up to:
Whatcha Got Weekend @ Lolly Jane
SAS @ Funky Junk
Weekend Wrap Up @ Tatertots & Jello
Sundae Scoop @ I Heart Naptime
Sister Sunday @ Sisters of the Wild West
Sunday Showcase Party @ Under the Table & Dreaming
Just Something I Whipped Up @ The Girl Creative
DIY Fall Festival @ The DIY Showoff
Made by You Mondays @ Skip to My Lou
Making the World Cuter @ Making the World Cuter
Nifty Thrifty @ Coastal Charm
Tuesday Treasures @ My Uncommon Slice of Suburbia
Tutorials & Tips Tuesday @ Home Stories A to Z
Good Life @ A Beach Cottage
Delightfully Inspiring @ Delightful Order
Transformation Thursday @ The Shabby Creek Cottage
Strut Your Stuff @ Somewhat Simple
Share Awesomeness Thur @ The 36th Avenue
Flaunt it Friday @ Chic on a Shoestring
Tickled Pink @ 504 Main
Frugal Friday @ The Shabby Nest
SAS @ Just a Girl
Feathered Nest @ French Country Cottage
Remodelaholics Anonymous @ Remodelaholic
inspiration board @ Carolyns Homework

You may also like...

  • “C” is for Chore Chart“C” is for Chore Chart
  • “H” is for Historical Plaque“H” is for Historical Plaque
  • “O” is for Optimistic“O” is for Optimistic
  • “S” is for Silent Night“S” is for Silent Night
Share this post:

Filed Under: DIY, HOME DECOR, HOME DECOR, PAINT9 Comments

Reader Interactions

Comments

  1. Megan Kissman says

    March 28, 2012 at 12:02 PM

    Great job replicating! Honestly, I like yours better 😀

    Reply
  2. Tiaras & Bow Ties - Think Smink says

    March 28, 2012 at 12:31 PM

    Looks great! I couldn't tell the antique from your reproduction!

    Reply
  3. Korrie@RedHenHome says

    March 28, 2012 at 1:51 PM

    Amazing! You did a terrific job!

    Reply
  4. LeighAnn says

    March 28, 2012 at 2:02 PM

    Impressive!

    Reply
  5. Cassie @ Primitive & Proper says

    March 28, 2012 at 6:13 PM

    WOW~ that is so impressive!

    Reply
  6. It's All Connected says

    March 28, 2012 at 6:57 PM

    I couldn't tell which was the repro. Amazing job and lucky friend! ~ Maureen

    Reply
  7. Ann @ makethebestofthings says

    April 1, 2012 at 4:54 PM

    Beautifully done! I've painted a few pub signs for Christmas presents and they are a big hit. Your version is just gorgeous!

    Reply
  8. Fiona, LilyfieldLife says

    April 2, 2012 at 11:59 AM

    this is really good. what a great undertaking -and you've done an amazing job.

    Reply
  9. Mel says

    April 3, 2012 at 5:39 PM

    wow! I am totally impressed!

    That's my family name on my mum's side 🙂

    Reply

Leave a Reply Cancel reply

Your email address will not be published. Required fields are marked *

Primary Sidebar

Hi! I’m Jaime

Jaime Costiglio

Hello!

Thank you for stopping by.
Join me for lots of DIY.

Read more

Get new posts via email

Handbuilt Holiday: Gift Project Plans

handbuilt holiday gift project plans

Collection of DIY gift project plans to build.

The Home Depot Tool Prospective

THD Prospective

Tools to consider for the DIYer.

Archives

The Home Depot Logo
Copyright © 2026 Jaime Costiglio · Custom site by Moonsteam Design

Privacy Policy