• Home
  • Blog
  • About
  • Contact
    • Disclosure
    • Privacy Policy
  • SHOP
  • Widget area for main menu

    • Email
    • Facebook
    • Instagram
    • Pinterest
    • Twitter
    • YouTube
  • Skip to primary navigation
  • Skip to main content
  • Skip to primary sidebar

Jaime Costiglio

build - paint - sew

  • BUILD
    • BEDS
    • BENCHES
    • DESKS
    • DRESSERS
    • GAMES & TOYS
    • SCRAP WOOD
    • SHELVES
    • STORAGE
    • TABLES
  • TOOLS
  • PAINT
    • CRAFTS
    • FURNITURE
    • HOME DECOR
  • SEW
    • GIFTS
    • HOME DECOR
    • POUCHES
  • HANDBUILT HOLIDAY
    • 2021
    • 2019
    • 2018
    • 2017
    • 2016
    • 2015
    • 2014
    • 2013
  • GIFTS
    • BABIES
    • KIDS
    • FOR HER
    • FOR HIM
    • TEACHERS
    • WEDDINGS
  • SEASONAL
    • 4TH OF JULY
    • FALL
    • HALLOWEEN
    • CHRISTMAS
    • SUMMER
    • SPRING
    • ST. PATRICK’S DAY
    • THANKSGIVING
    • VALENTINE’S DAY
    • WINTER
  • SALTBOX PROJECT
    • BATHROOMS
    • DINING ROOM
    • EXTERIOR
    • FAMILY ROOM
    • FOYER / MUDROOM
    • KIDS BEDROOMS
    • KITCHEN
    • LIVING ROOM
    • MASTER BEDROOM
    • PLAYROOM
  • SCROLL SAW

Railing Makeover from Paint to Stain

October 14, 2013

railing makeover
A railing makeover from painted to stained and the final installment of the family room makeover.
 The railing is complete and I can officially say I conquered all the red paint in the family room:
railing before and after

stained railing with white balusters
painted railing before and stained railing after

There was red paint everywhere: walls, trim, railings, handrail, vents and stair risers.

stairwell before and after
I just love the look of white semi-gloss paint against the dark stain, it’s classy, updated and fresh:
railing makeover with stain and painted walls
The stairs go down to the pool room (which was partially red too 🙂):
stairwell looking up before and after

How to refinish a painted railing:


1. Start by prepping your workspace, use painters tape and drop cloths.
Apply a thick layer of Citristrip stripper gel safe for indoors:

stripping railing balusters
Wait. Let the stripper do the work.
2. Using a metal or plastic scraper remove the loose paint:

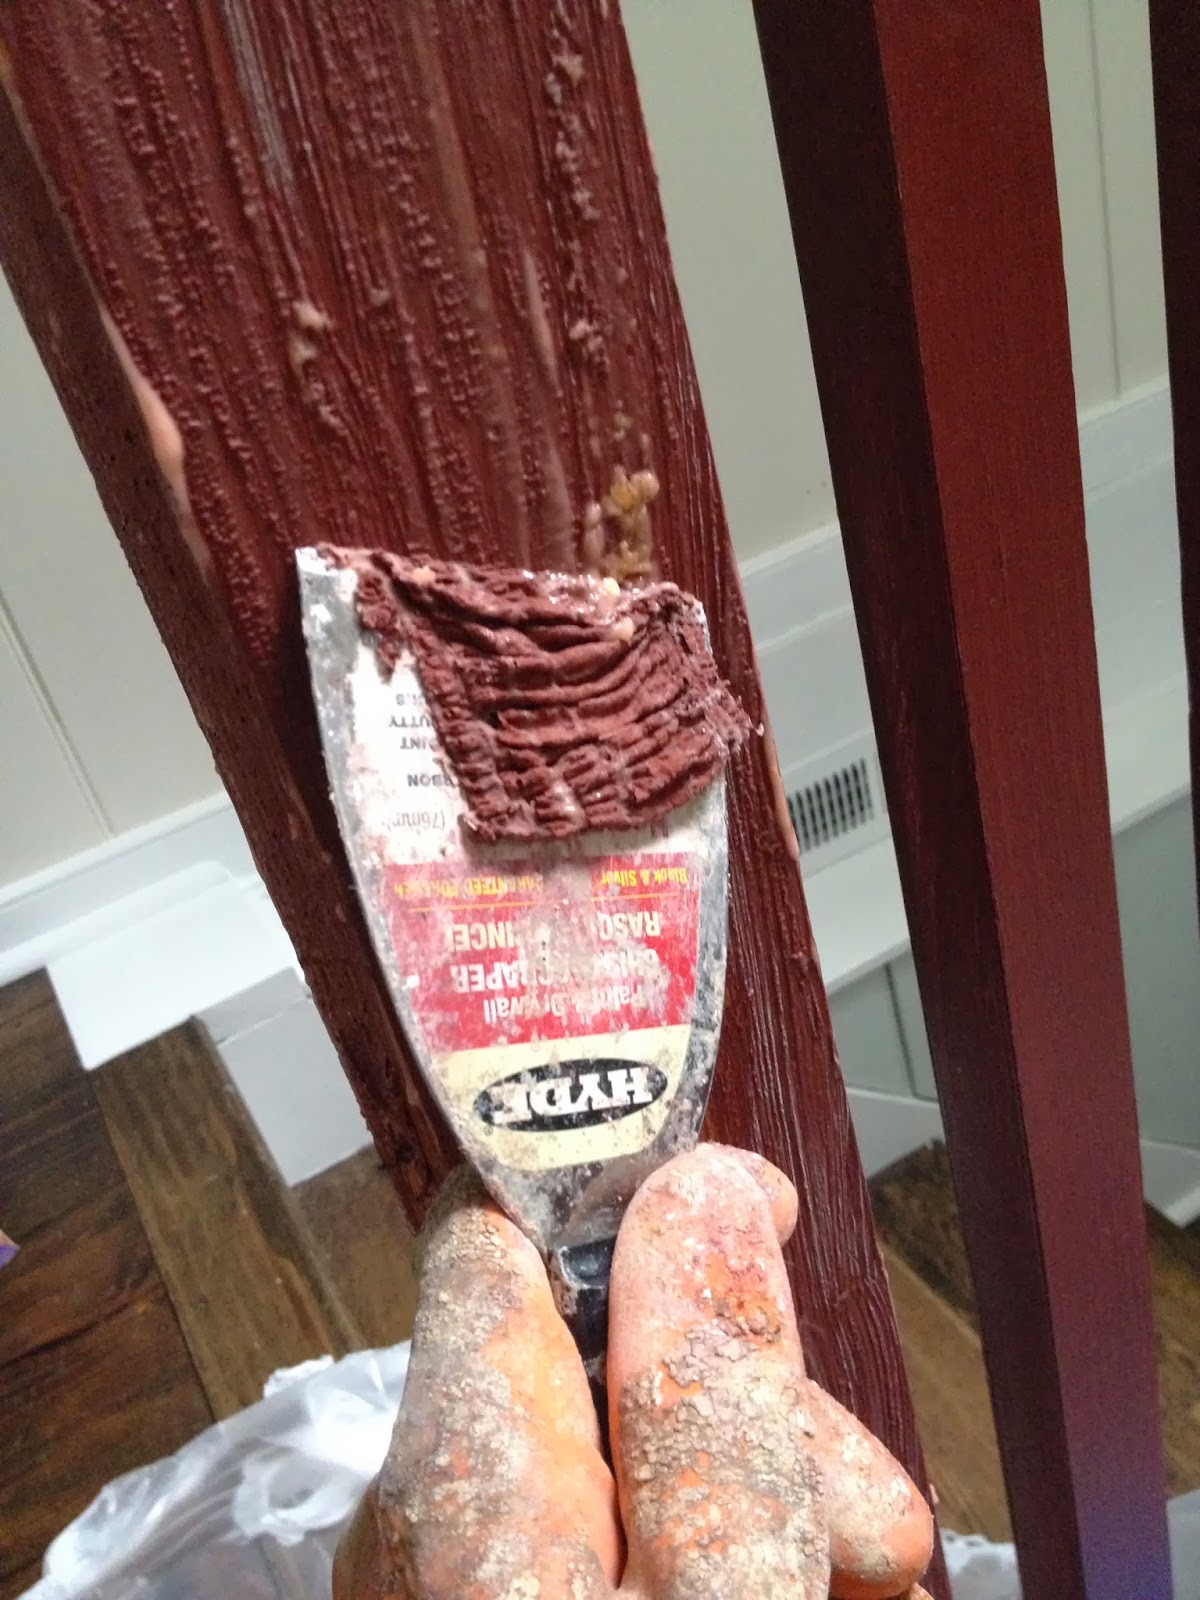
This is my pile of paint from one corner post:

stripped paint from railing
3. Once you’ve scraped off as much paint as possible begin sanding the last fine layer with an orbital sander.
In my case I was looking to remove ALL of the red paint on the newels and railings because I didn’t want red seeping through the new stain.

4.  Prime and paint balusters semi-gloss white:

railing stripped to raw wood
5. Stain newels and railings Minwax Jacobean:

railing stained minwax jacobean
6. Seal with 2 coats Minwax semi-gloss poly, sanding in between coats.
railing stained and sealed after

You may also like...

  • How to Install a Stair RunnerHow to Install a Stair Runner
  • Family Room RefreshFamily Room Refresh
  • Family Room MakeoverFamily Room Makeover
  • Refinishing Pine FloorsRefinishing Pine Floors
Share this post:

Filed Under: DIY, FAMILY ROOM, HOME DECOR, PAINT, PLAYROOM, SALTBOX PROJECT14 Comments

Reader Interactions

Comments

  1. [email protected] says

    October 14, 2013 at 2:14 PM

    I can not IMAGINE how much work it was to strip and sand those posts inside! You're amazing. The new looks is amazing!

    Reply
  2. Frankie says

    October 14, 2013 at 4:03 PM

    What a ton of work! So worth it in the end though — your railing is beautiful now.

    Reply
  3. Jenny says

    October 14, 2013 at 7:49 PM

    Wow! What a great result after all of the elbow grease that I'm sure went into it! I love the contrast of the stain and the crisp white paint – such a classic and timeless look. Oh how far that space has come – well done!!

    Reply
  4. Mindy says

    October 15, 2013 at 2:24 AM

    Wow, you have done so much work. How gratifying it must be, though. Now that it's done!!! 🙂
    It's absolutely beautiful.

    Reply
  5. Mindi Carwin says

    October 15, 2013 at 5:30 PM

    Simply Amazing!! I love it, and props to you for all that work!

    Reply
  6. DaiseyJayne.com says

    October 15, 2013 at 6:54 PM

    Lots of work but so well worth it!

    Reply
  7. Our Pinteresting Family says

    October 16, 2013 at 5:14 PM

    It turned out so amazing! What a transformation after all that painstaking work.

    Reply
  8. Tara Corley says

    October 17, 2013 at 4:56 AM

    Wow! Looks great! I imagine that was a lot of work!

    Reply
  9. Danielle Bartran says

    October 17, 2013 at 1:45 PM

    BEAUTIFUL! What a difference!!

    Reply
  10. Abby says

    October 17, 2013 at 2:43 PM

    This looks so great! Ugh! I can't imagine stripping all that paint off, all your work sure paid off! Very very pretty!

    Reply
  11. TheKimSix Fix says

    October 21, 2013 at 3:59 AM

    Wow! That is amazing. I don't know what anyone was thinking painting that place red.. but your work is definitely paying off.

    It is gorgeous now!

    Reply
  12. Katy says

    October 25, 2013 at 2:39 AM

    oh yeah that looks like it was a huge job, it looks so great now. I was trying to catch up on your new house adventures but I am falling behind! :/

    Reply
  13. Desiree @ The 36th AVENUE says

    October 25, 2013 at 4:27 PM

    This is gorgeous! I am featuring you tomorrow!

    Reply
  14. Leeanne Dyson says

    January 21, 2014 at 8:12 PM

    I love your new railing! I love your color choices! I also love the renovation projects that you've been posting. Are you done with all your projects? I'm sure you have a fabulous home. Any updates? 🙂

    Leeanne Dyson @ MasterMyList

    Reply

Leave a Reply Cancel reply

Your email address will not be published. Required fields are marked *

Primary Sidebar

Hi! I’m Jaime

Jaime Costiglio

Hello!

Thank you for stopping by.
Join me for lots of DIY.

Read more

Get new posts via email

Handbuilt Holiday: Gift Project Plans

handbuilt holiday gift project plans

Collection of DIY gift project plans to build.

The Home Depot Tool Prospective

THD Prospective

Tools to consider for the DIYer.

Archives

The Home Depot Logo
Copyright © 2023 Jaime Costiglio · Custom site by Moonsteam Design

Privacy Policy