• Home
  • Blog
  • About
  • Contact
    • Disclosure
    • Privacy Policy
  • SHOP
  • Widget area for main menu

    • Email
    • Facebook
    • Instagram
    • Pinterest
    • Twitter
    • YouTube
  • Skip to primary navigation
  • Skip to main content
  • Skip to primary sidebar

Jaime Costiglio

build - paint - sew

  • BUILD
    • BEDS
    • BENCHES
    • DESKS
    • DRESSERS
    • GAMES & TOYS
    • SCRAP WOOD
    • SHELVES
    • STORAGE
    • TABLES
  • TOOLS
  • PAINT
    • CRAFTS
    • FURNITURE
    • HOME DECOR
  • SEW
    • GIFTS
    • HOME DECOR
    • POUCHES
  • HANDBUILT HOLIDAY
    • 2021
    • 2019
    • 2018
    • 2017
    • 2016
    • 2015
    • 2014
    • 2013
  • GIFTS
    • BABIES
    • KIDS
    • FOR HER
    • FOR HIM
    • TEACHERS
    • WEDDINGS
  • SEASONAL
    • 4TH OF JULY
    • FALL
    • HALLOWEEN
    • CHRISTMAS
    • SUMMER
    • SPRING
    • ST. PATRICK’S DAY
    • THANKSGIVING
    • VALENTINE’S DAY
    • WINTER
  • SALTBOX PROJECT
    • BATHROOMS
    • DINING ROOM
    • EXTERIOR
    • FAMILY ROOM
    • FOYER / MUDROOM
    • KIDS BEDROOMS
    • KITCHEN
    • LIVING ROOM
    • MASTER BEDROOM
    • PLAYROOM
  • SCROLL SAW

“P” is for Punch

February 2, 2012

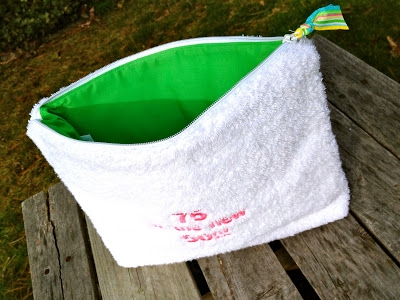
Terrycloth pouches with bright, tropical punch colored linings:

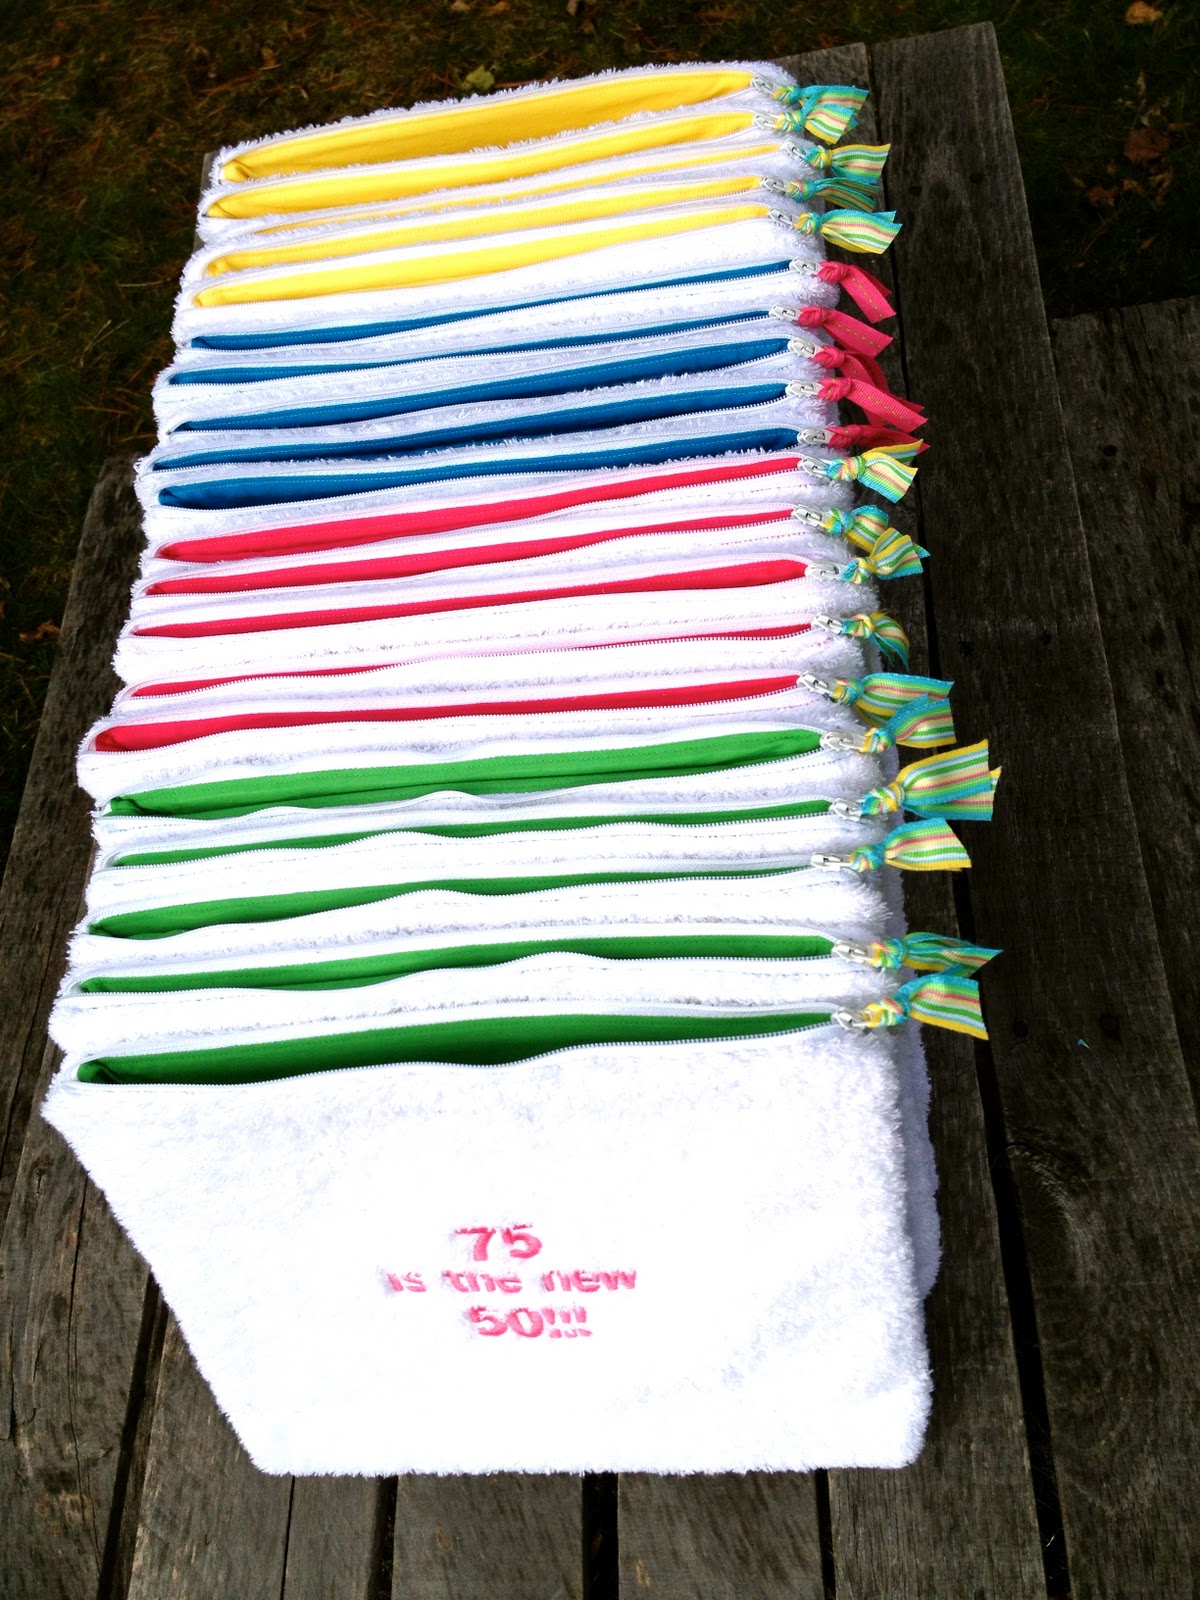
A custom order for a 75th birthday party.

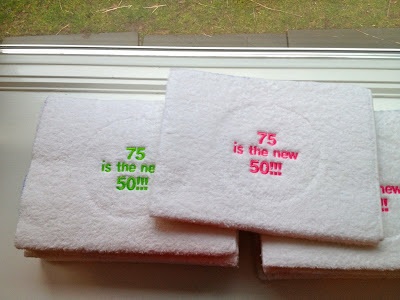
Although apparently 75 is the new 50!!!
(Half had pink embroidery, the other half had green.)

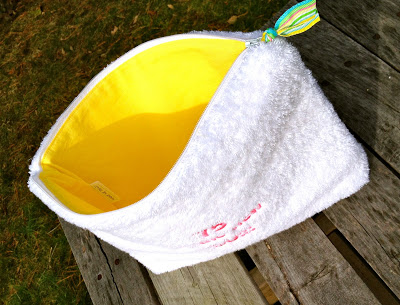
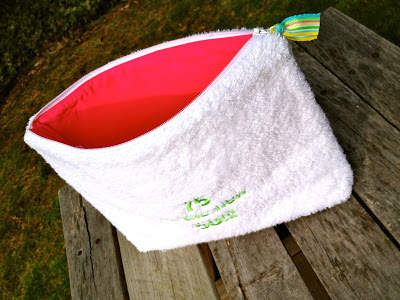
A nice favor (it was filled goodies for the party) that’s useful to the guests.

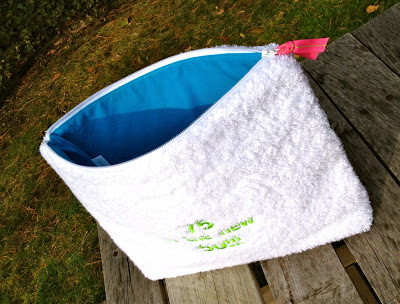
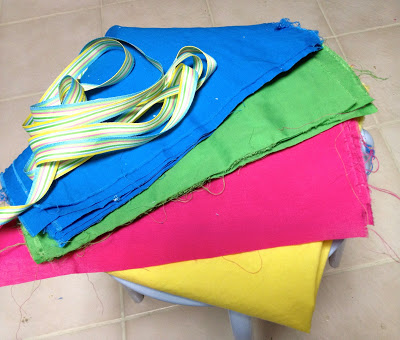
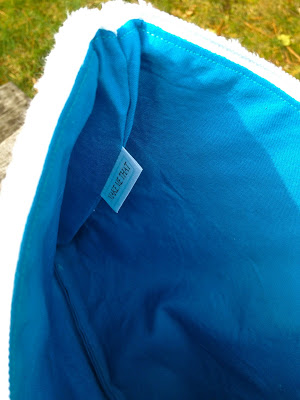
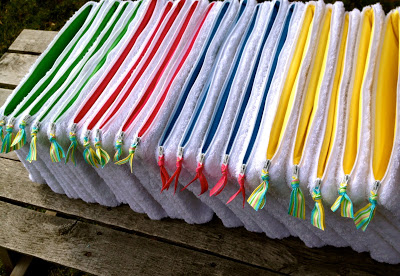
I did five with turquoise lining:

Five yellow:

Five fuchsia:

And five green:

But I think they look best all lined up together:
Here’s how I made the pouches:

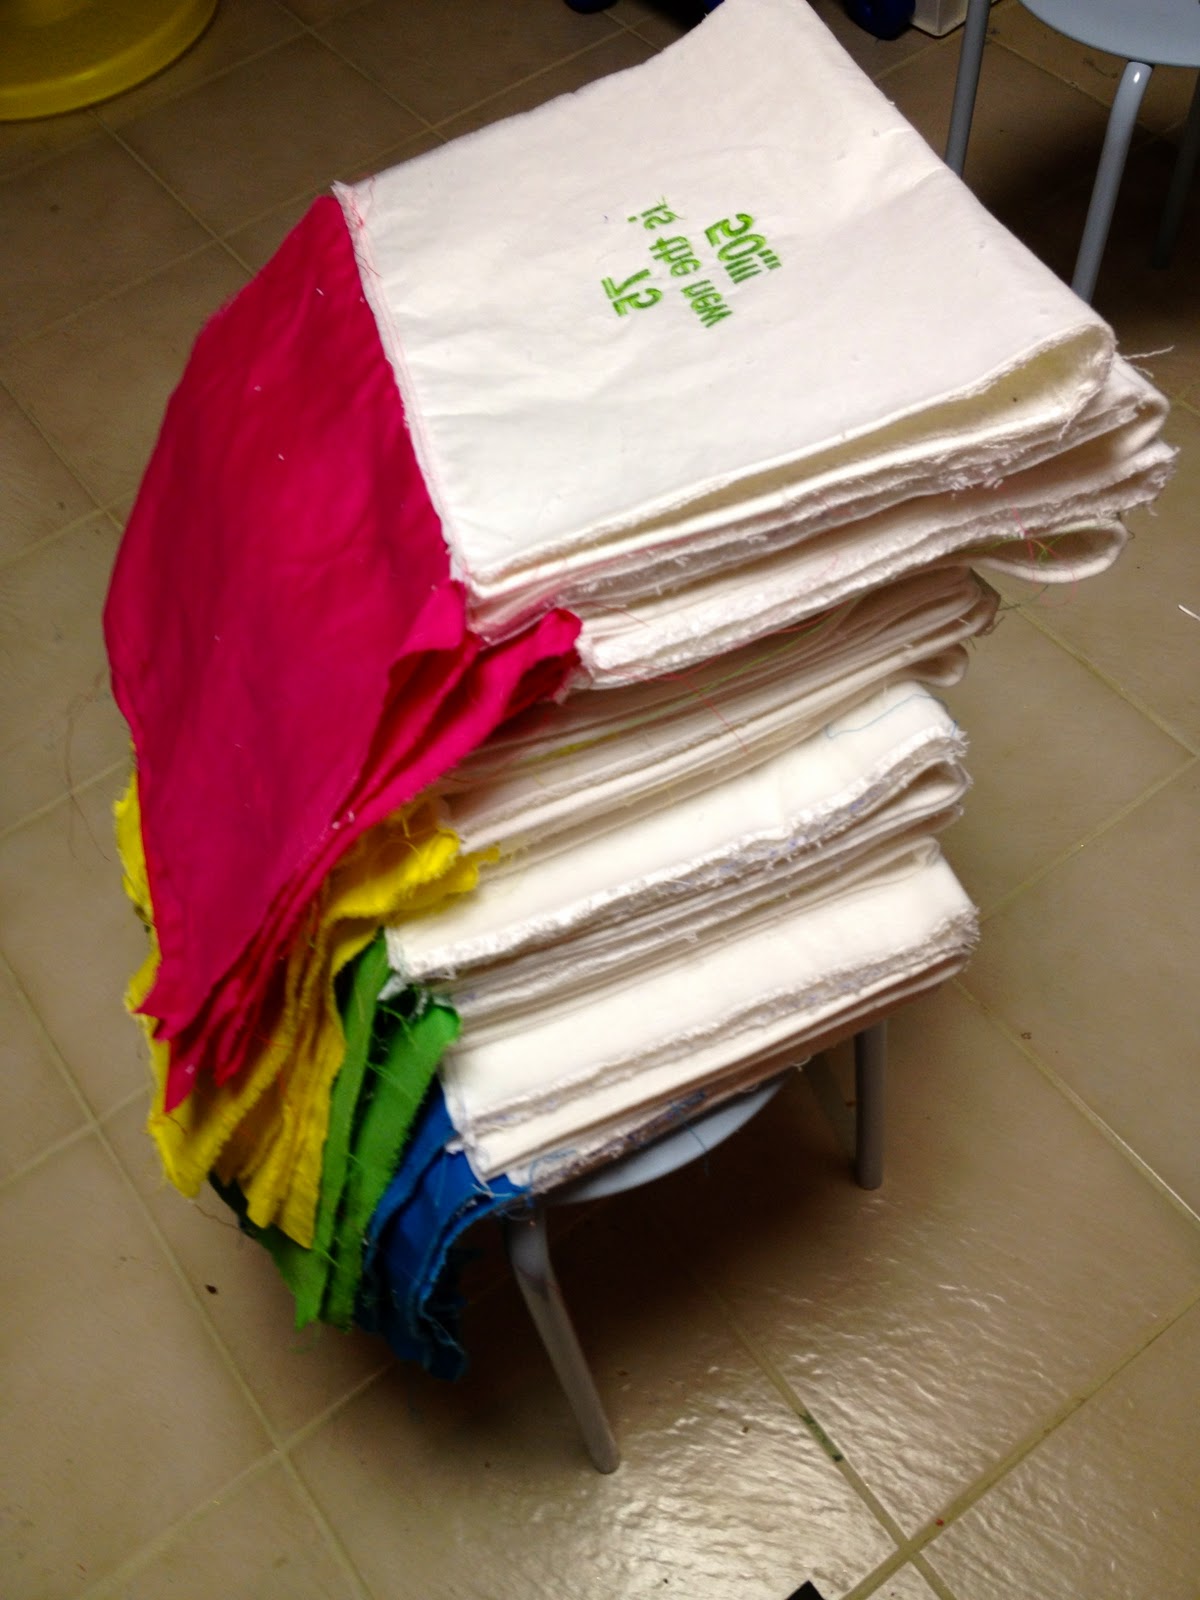
For a 12″w x 9″h x 1″gusset pouch:
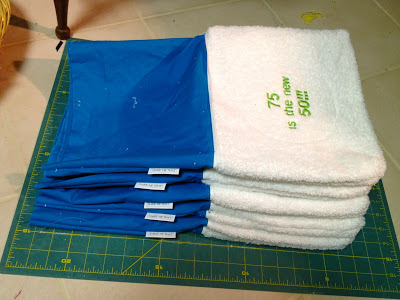
 (1) terry cloth @ 13″ x 20″
(2) lining @ 13″ x 10″
(1) fusible interfacing @ 13″ x 20″
(1) 12″ white zipper
ribbon for zipper pull
1. Cut terry and fuse interfacing.  Send off to embroiderer.
Pick up completed pieces:
2. Cut lining pieces ready to go:
3. Begin by sewing in the zipper.
For a full how to pouch tutorial go to my post here.
4. Then side seams and miter corners, turn right side out:
5. Press seams open and stitch bottom lining closed.
Push lining down into pouch and press top edge smooth:
6. Add ribbon detail to zipper pull and ready for use.
Happy 75th Birthday!
I’m linking up to:
Whatcha Got Weekend @ Lolly Jane
SAS @ Funky Junk
Weekend Wrap Up @ Tatertots & Jello
Sundae Scoop @ I Heart Naptime
Sister Sunday @ Sisters of the Wild West
Sunday Showcase Party @ Under the Table & Dreaming
Just Something I Whipped Up @ The Girl Creative
DIY Fall Festival @ The DIY Showoff
Made by You Mondays @ Skip to My Lou
Making the World Cuter @ Making the World Cuter
Nifty Thrifty @ Coastal Charm
Tuesday Treasures @ My Uncommon Slice of Suburbia
Tutorials & Tips Tuesday @ Home Stories A to Z
Good Life @ A Beach Cottage
Delightfully Inspiring @ Delightful Order
Transformation Thursday @ The Shabby Creek Cottage
Strut Your Stuff @ Somewhat Simple
Share Awesomeness Thur @ The 36th Avenue
Flaunt it Friday @ Chic on a Shoestring
Tickled Pink @ 504 Main
Frugal Friday @ The Shabby Nest
SAS @ Just a Girl
Feathered Nest @ French Country Cottage
Remodelaholics Anonymous @ Remodelaholic
inspiration board @ Carolyns Homework
Textiles @ Freckled Laundry

You may also like...

  • Cross Stitch Monogram Ornament PlacecardCross Stitch Monogram Ornament Placecard
  • Painted Zipper Pouch with Stylin PaintPainted Zipper Pouch with Stylin Paint
  • Wood & Leather Bed Free PlansWood & Leather Bed Free Plans
  • DIY Village Cut Out Wreath & DecoArt / Cricut GiveawayDIY Village Cut Out Wreath & DecoArt / Cricut Giveaway
Share this post:

Filed Under: DIY, FOR HER, GIFTS, GIFTS, KIDS, POUCHES, SEW, SEWING5 Comments

Reader Interactions

Comments

  1. Kathleen says

    February 5, 2012 at 1:42 AM

    I just spent 45 min reading your blog. You are totally amazing!!!!
    Your neighbor for the East end of LI,
    Kathleen

    Reply
  2. Marcia (123 blog) says

    February 6, 2012 at 6:46 PM

    LOVE your cute pouches 🙂

    Reply
  3. Katie says

    February 8, 2012 at 1:48 PM

    These are "sew" cute!

    Reply
  4. Cherilyn says

    February 8, 2012 at 9:25 PM

    Super cute pouches! I'm pinning these!

    Reply
  5. Kimberly @ The Brown Eyes Have It says

    February 9, 2012 at 3:30 AM

    Those are really fun. I really like the bright fun linings.

    Reply

Leave a Reply Cancel reply

Your email address will not be published. Required fields are marked *

Primary Sidebar

Hi! I’m Jaime

Jaime Costiglio

Hello!

Thank you for stopping by.
Join me for lots of DIY.

Read more

Get new posts via email

Handbuilt Holiday: Gift Project Plans

handbuilt holiday gift project plans

Collection of DIY gift project plans to build.

The Home Depot Tool Prospective

THD Prospective

Tools to consider for the DIYer.

Archives

The Home Depot Logo
Copyright © 2026 Jaime Costiglio · Custom site by Moonsteam Design

Privacy Policy