• Home
  • Blog
  • About
  • Contact
    • Disclosure
    • Privacy Policy
  • SHOP
  • Widget area for main menu

    • Email
    • Facebook
    • Instagram
    • Pinterest
    • Twitter
    • YouTube
  • Skip to primary navigation
  • Skip to main content
  • Skip to primary sidebar

Jaime Costiglio

build - paint - sew

  • BUILD
    • BEDS
    • BENCHES
    • DESKS
    • DRESSERS
    • GAMES & TOYS
    • SCRAP WOOD
    • SHELVES
    • STORAGE
    • TABLES
  • TOOLS
  • PAINT
    • CRAFTS
    • FURNITURE
    • HOME DECOR
  • SEW
    • GIFTS
    • HOME DECOR
    • POUCHES
  • HANDBUILT HOLIDAY
    • 2021
    • 2019
    • 2018
    • 2017
    • 2016
    • 2015
    • 2014
    • 2013
  • GIFTS
    • BABIES
    • KIDS
    • FOR HER
    • FOR HIM
    • TEACHERS
    • WEDDINGS
  • SEASONAL
    • 4TH OF JULY
    • FALL
    • HALLOWEEN
    • CHRISTMAS
    • SUMMER
    • SPRING
    • ST. PATRICK’S DAY
    • THANKSGIVING
    • VALENTINE’S DAY
    • WINTER
  • SALTBOX PROJECT
    • BATHROOMS
    • DINING ROOM
    • EXTERIOR
    • FAMILY ROOM
    • FOYER / MUDROOM
    • KIDS BEDROOMS
    • KITCHEN
    • LIVING ROOM
    • MASTER BEDROOM
    • PLAYROOM
  • SCROLL SAW

“P” is for Pencil Tube Pouches

August 12, 2013

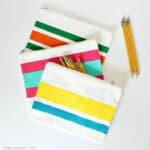
Sew: pencil tube zippered pouches
Slim pencil tube pouches perfect to slide inside a backpack just in time for back to school.

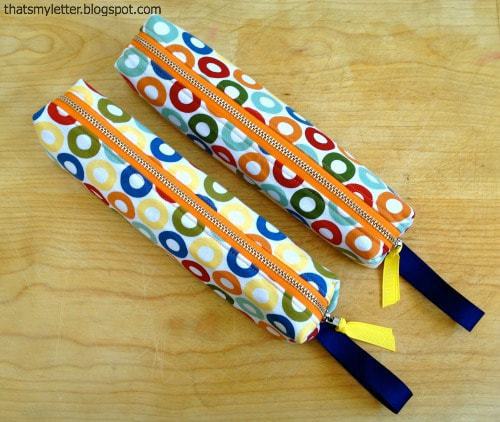
The little boys version has a fun orange metal zipper:
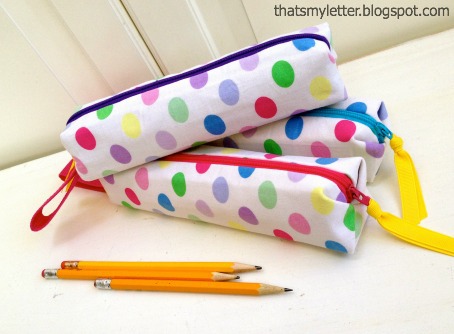
Let’s not forget the girls.  I choose some polka dot fabric with bright colored zippers:


Here’s how to sew pencil tube zippered pouches:
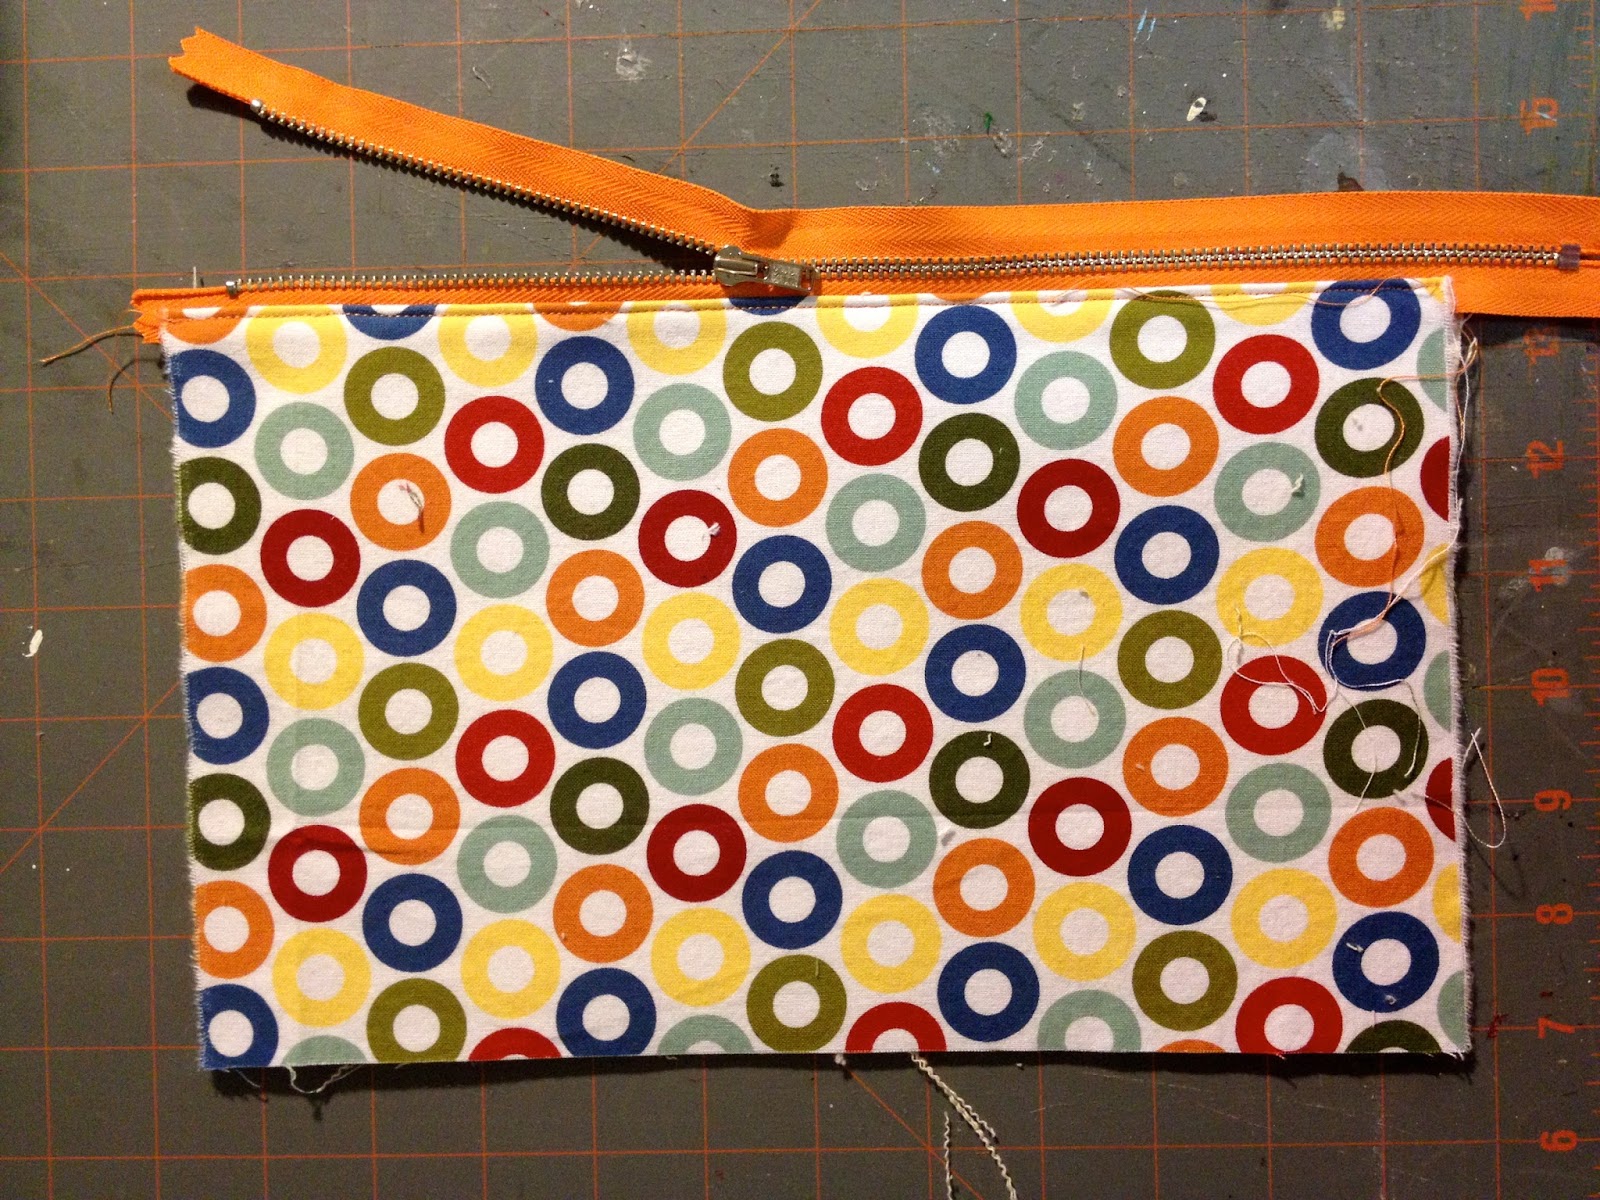
2. Sew zipper in place, clearly my zipper is too long but it will be trimmed.


3. Top stitch:


4. Repeat for other side of zipper:


5. Tube should look like this:


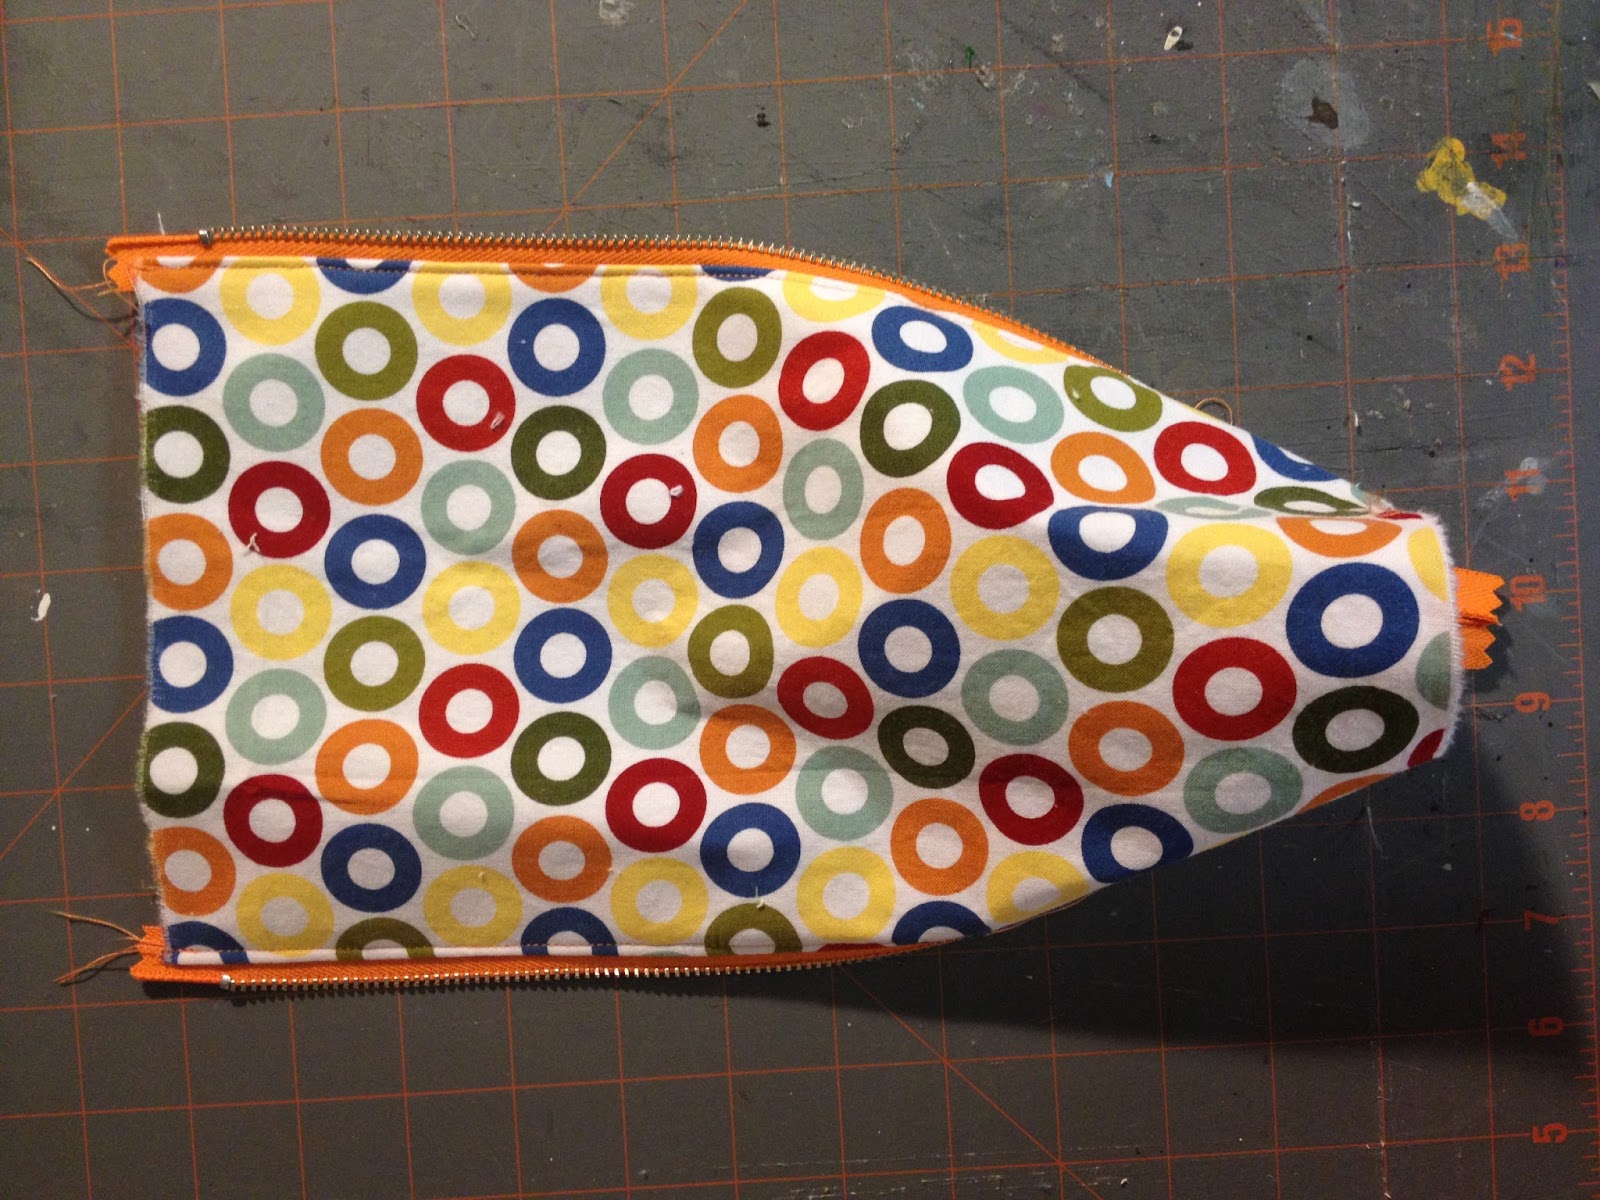
6. Pin raw edges together for a smooth look:
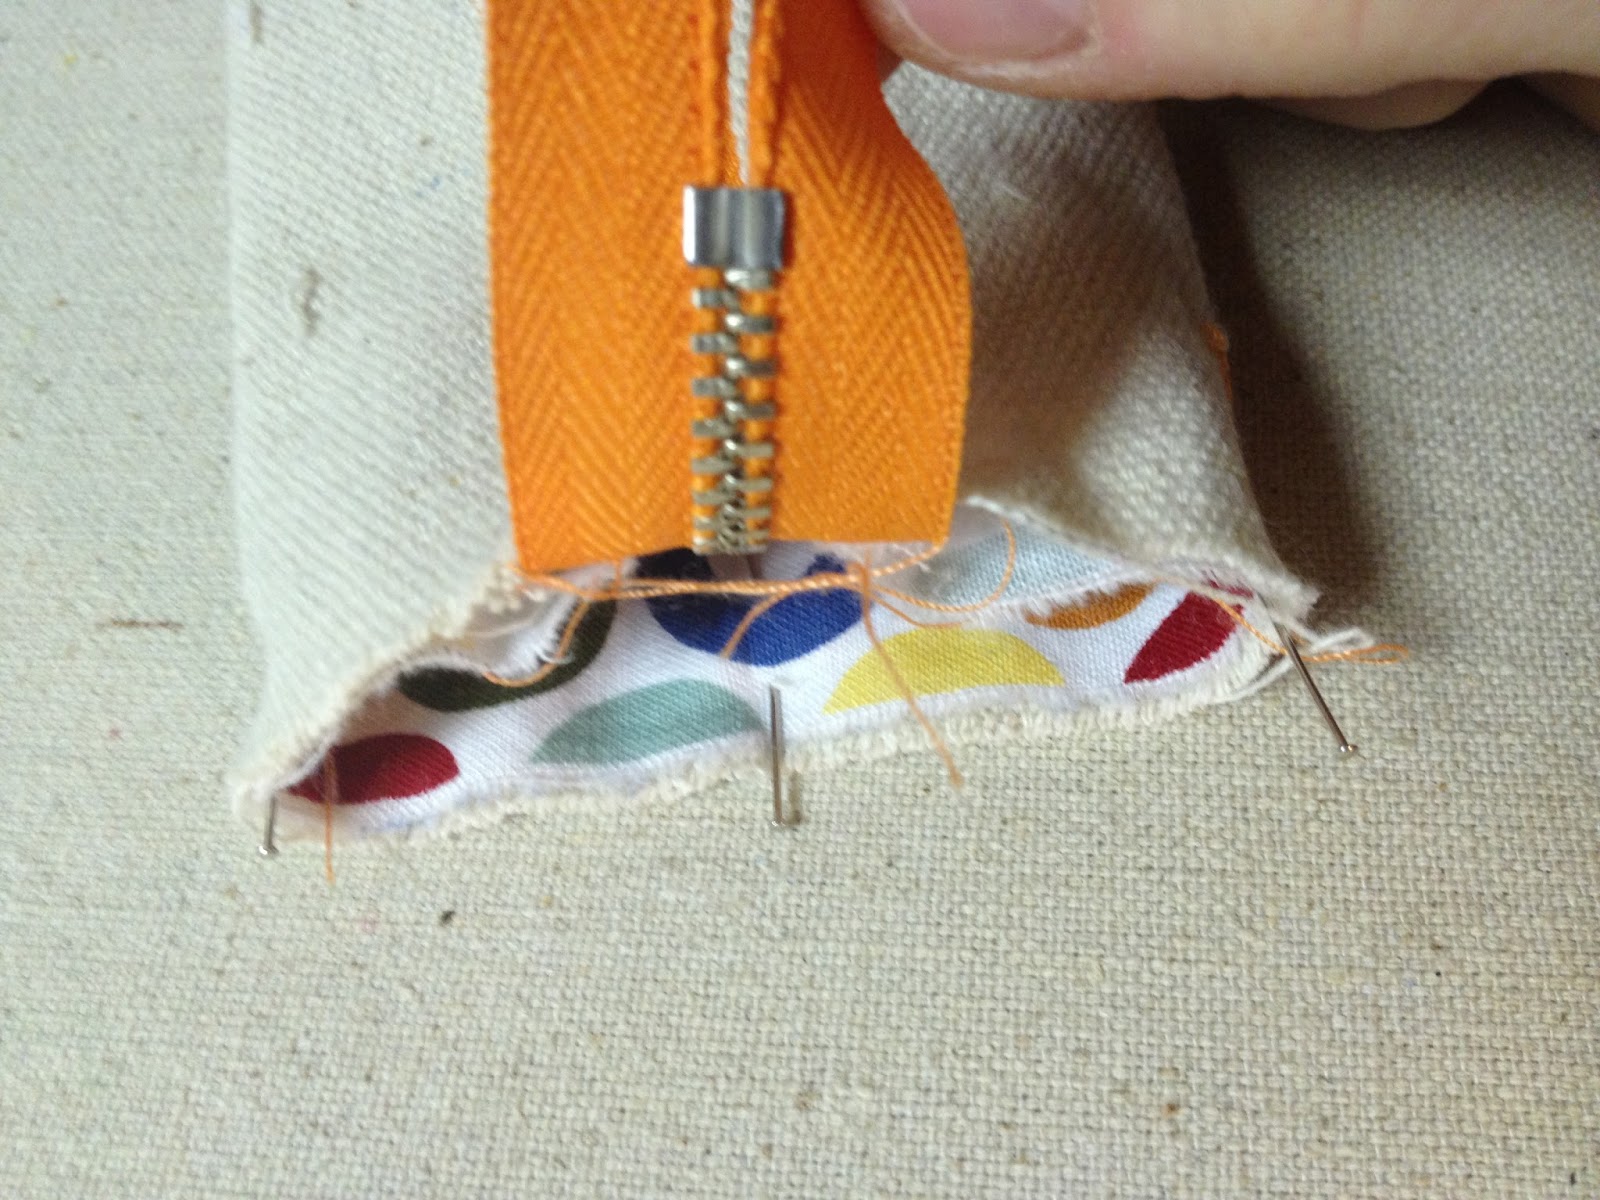
7. Then make a box fold lining up zipper + bottom center + 2 sides and stitch across:
(I also zig zagged the raw edge.)
8. For the other end pin canvas strap in place:
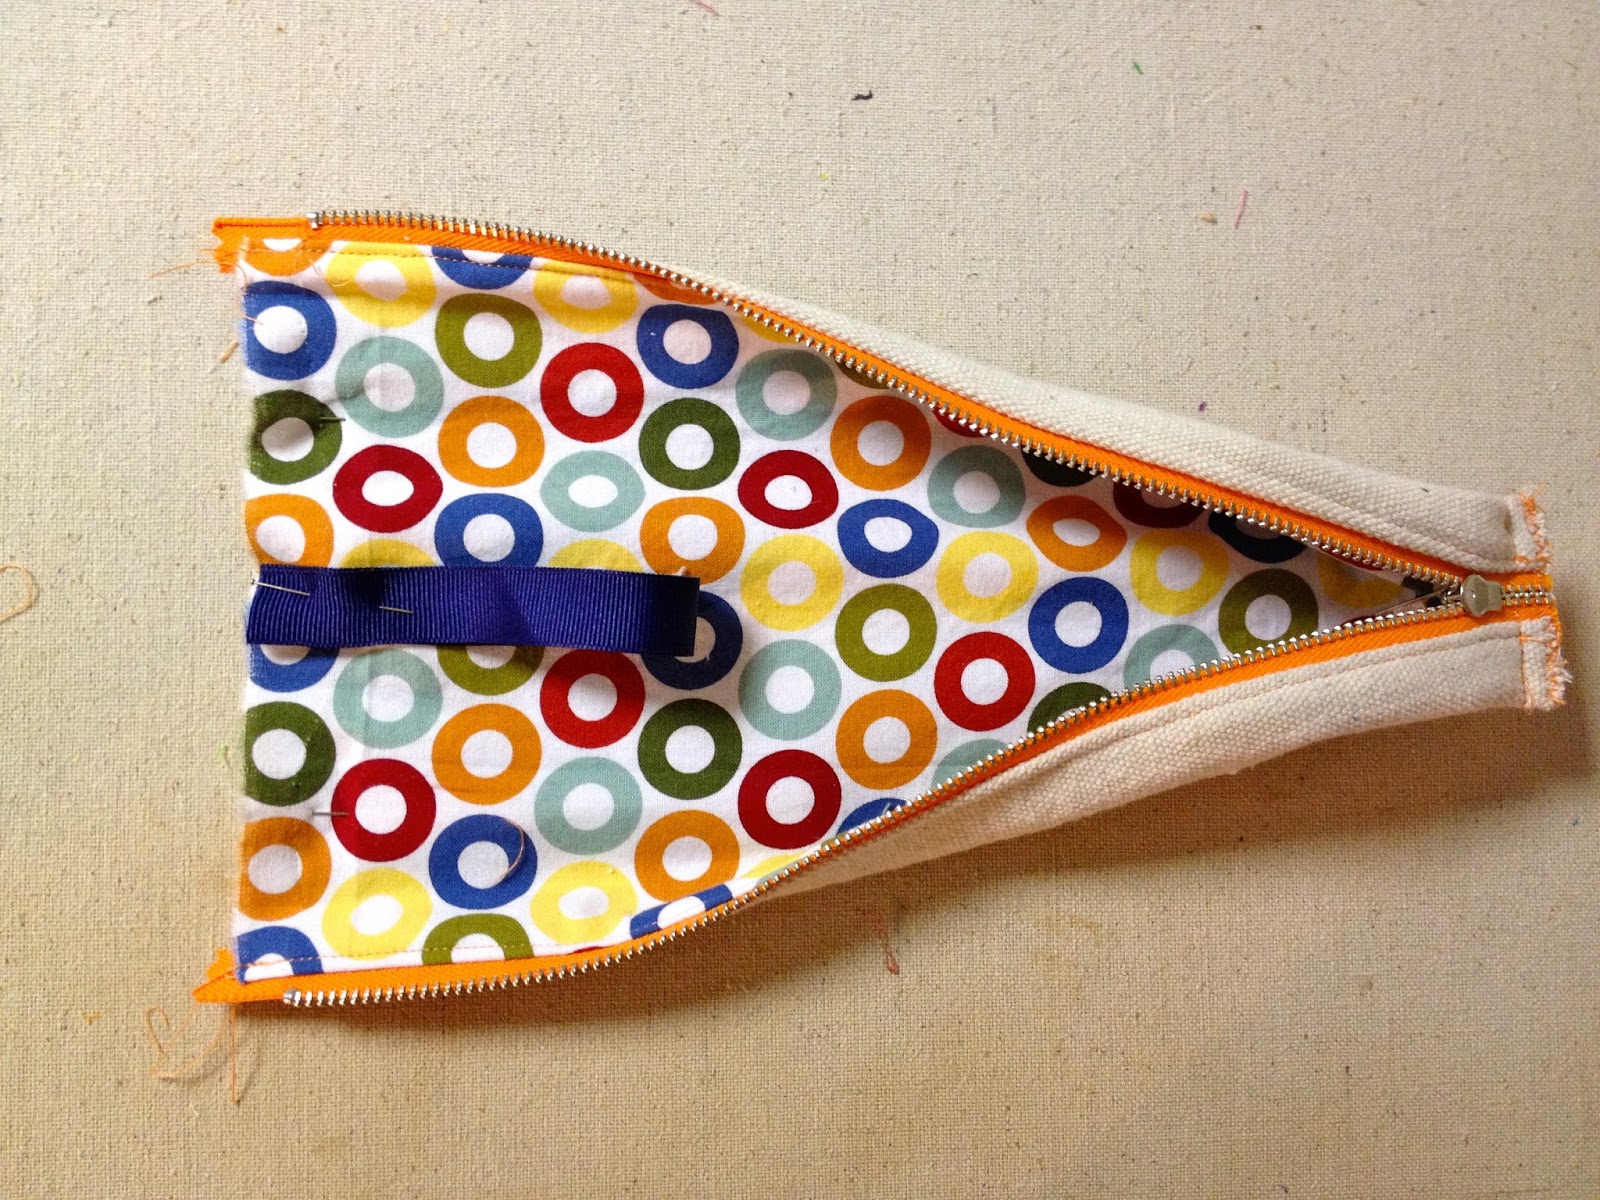
9. Repeat box fold process but be sure to leave zipper open.
Sew across end seam.
10. Turn right side out and add grosgrain ribbon to zipper pull.

You may also like...

  • Cross Stitch Monogram Ornament PlacecardCross Stitch Monogram Ornament Placecard
  • Painted Zipper Pouch with Stylin PaintPainted Zipper Pouch with Stylin Paint
  • Wood & Leather Bed Free PlansWood & Leather Bed Free Plans
  • DIY Village Cut Out Wreath & DecoArt / Cricut GiveawayDIY Village Cut Out Wreath & DecoArt / Cricut Giveaway
Share this post:

Filed Under: DIY, FOR HER, FOR HIM, GIFTS, GIFTS, KIDS, POUCHES, SEW, SEWING, TEACHERS4 Comments

Reader Interactions

Comments

  1. pasqueflower says

    August 12, 2013 at 4:00 PM

    Love this! Thank you so much!

    Reply
  2. Olivia says

    August 13, 2013 at 6:46 PM

    So adorable! You should sell these at the Christmas fair.

    Reply
  3. Colleen says

    August 15, 2013 at 9:00 PM

    Cute as ever! Love your fabric choice too! 🙂

    Reply
  4. Brooke says

    August 23, 2013 at 5:55 PM

    These are adorable! And look so professional- I'd totally think these were bought from the store. Great job!

    Reply

Leave a Reply Cancel reply

Your email address will not be published. Required fields are marked *

Primary Sidebar

Hi! I’m Jaime

Jaime Costiglio

Hello!

Thank you for stopping by.
Join me for lots of DIY.

Read more

Get new posts via email

Handbuilt Holiday: Gift Project Plans

handbuilt holiday gift project plans

Collection of DIY gift project plans to build.

The Home Depot Tool Prospective

THD Prospective

Tools to consider for the DIYer.

Archives

The Home Depot Logo
Copyright © 2023 Jaime Costiglio · Custom site by Moonsteam Design

Privacy Policy