• Home
  • Blog
  • About
  • Contact
    • Disclosure
    • Privacy Policy
  • SHOP
  • Widget area for main menu

    • Email
    • Facebook
    • Instagram
    • Pinterest
    • Twitter
    • YouTube
  • Skip to primary navigation
  • Skip to main content
  • Skip to primary sidebar

Jaime Costiglio

build - paint - sew

  • BUILD
    • BEDS
    • BENCHES
    • DESKS
    • DRESSERS
    • GAMES & TOYS
    • SCRAP WOOD
    • SHELVES
    • STORAGE
    • TABLES
  • TOOLS
  • PAINT
    • CRAFTS
    • FURNITURE
    • HOME DECOR
  • SEW
    • GIFTS
    • HOME DECOR
    • POUCHES
  • HANDBUILT HOLIDAY
    • 2021
    • 2019
    • 2018
    • 2017
    • 2016
    • 2015
    • 2014
    • 2013
  • GIFTS
    • BABIES
    • KIDS
    • FOR HER
    • FOR HIM
    • TEACHERS
    • WEDDINGS
  • SEASONAL
    • 4TH OF JULY
    • FALL
    • HALLOWEEN
    • CHRISTMAS
    • SUMMER
    • SPRING
    • ST. PATRICK’S DAY
    • THANKSGIVING
    • VALENTINE’S DAY
    • WINTER
  • SALTBOX PROJECT
    • BATHROOMS
    • DINING ROOM
    • EXTERIOR
    • FAMILY ROOM
    • FOYER / MUDROOM
    • KIDS BEDROOMS
    • KITCHEN
    • LIVING ROOM
    • MASTER BEDROOM
    • PLAYROOM
  • SCROLL SAW

“O” is for Ornaments #3

November 26, 2012

Paint: Handpainted chalkboard ornaments

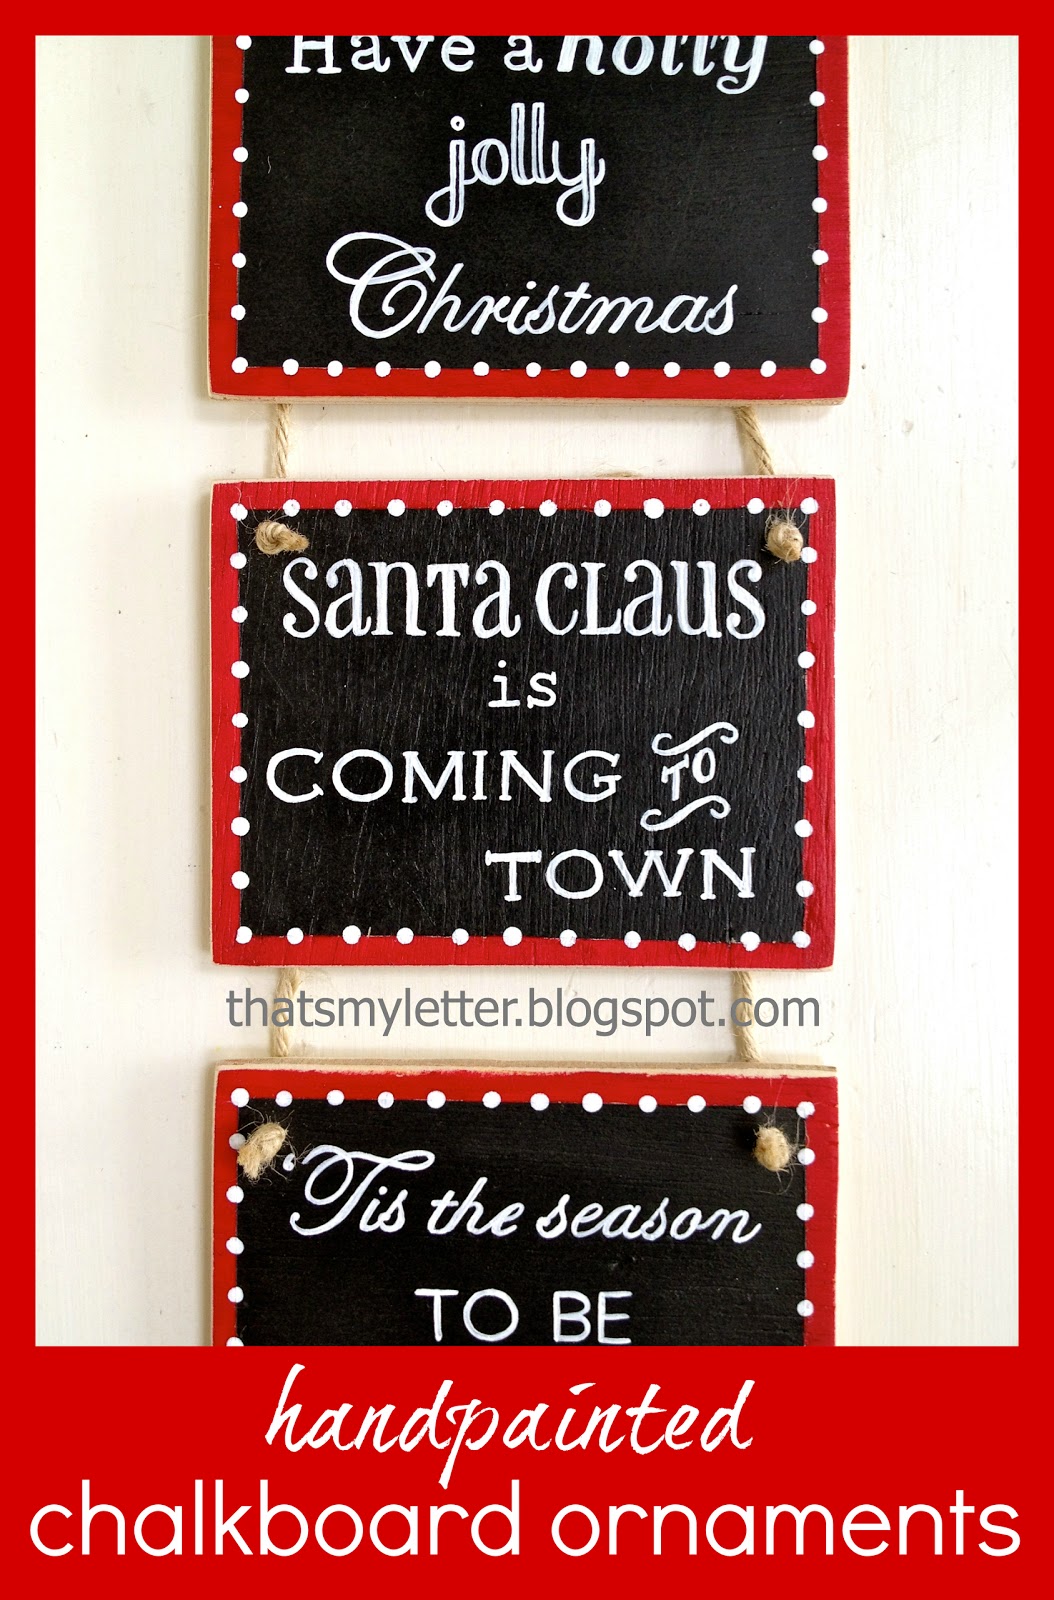
The chalkboard craze is still going strong so for Christmas I made chalkboard ornaments with handpainted seasonal phrases:
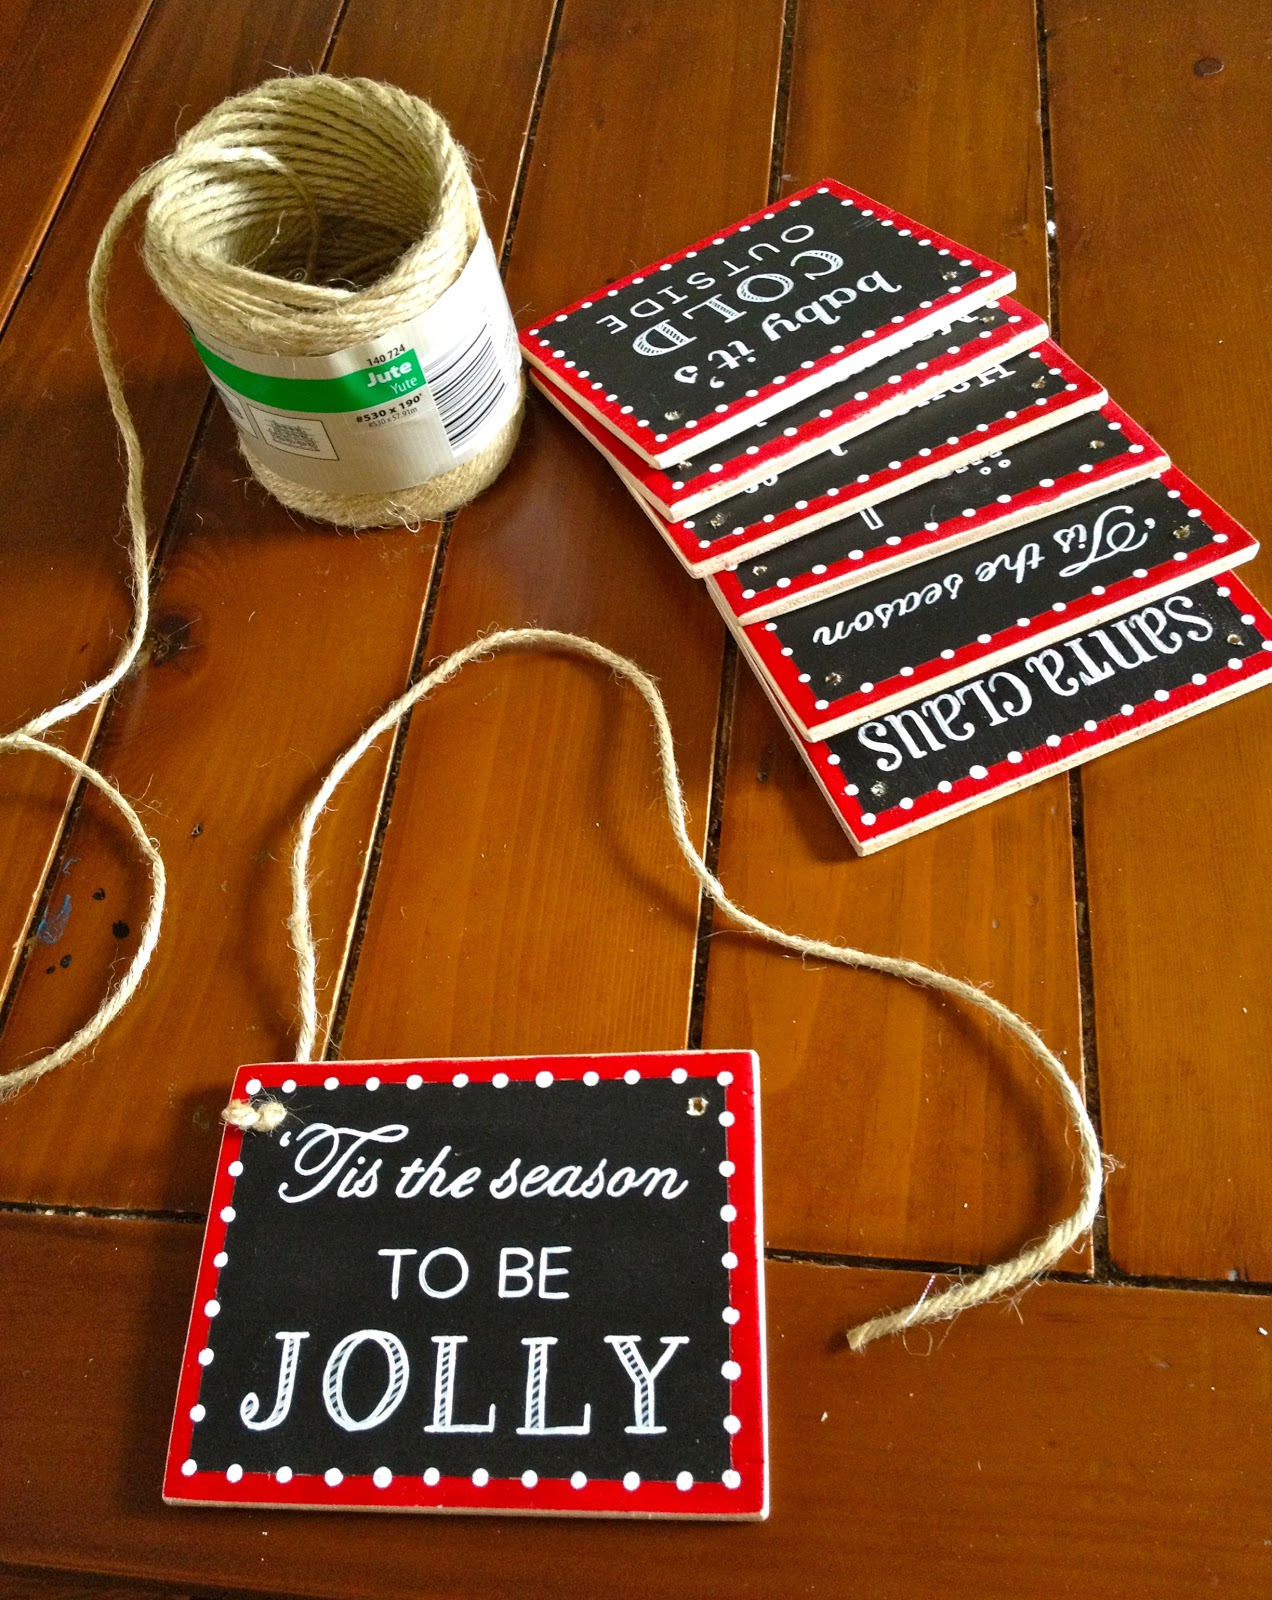
Hung with a bit of jute rope:
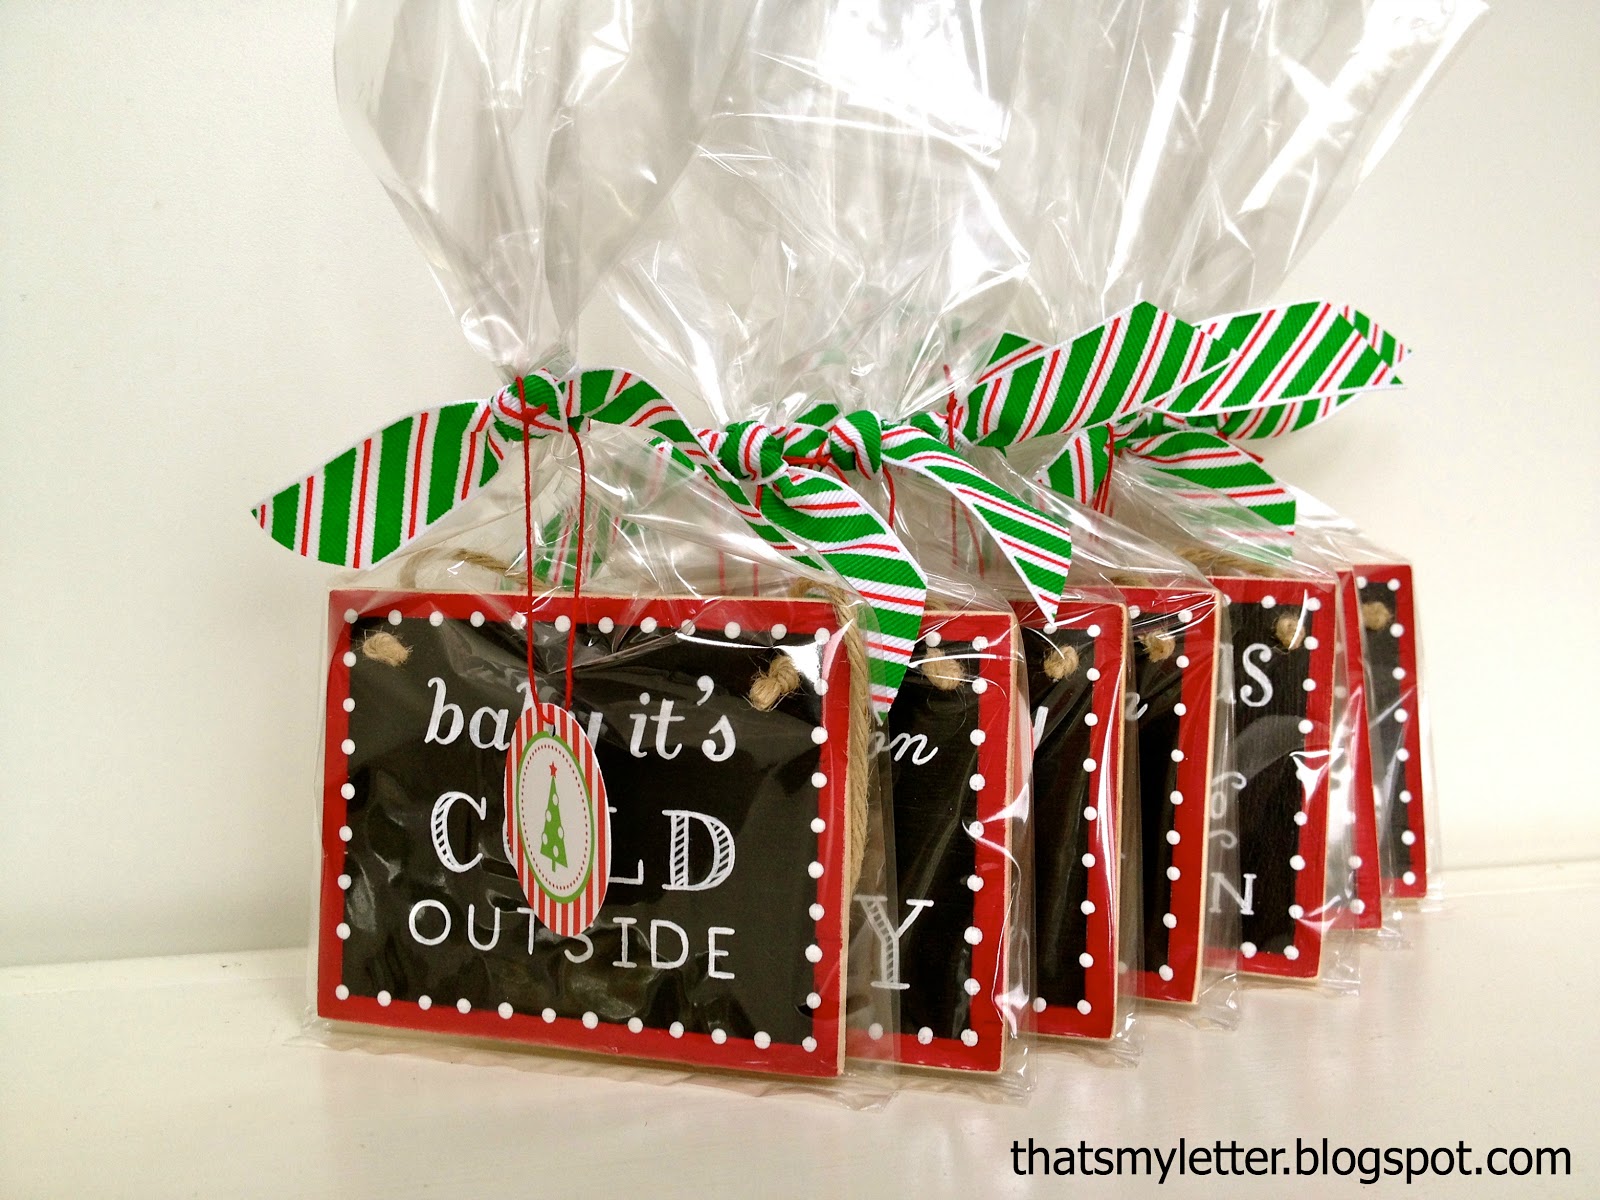
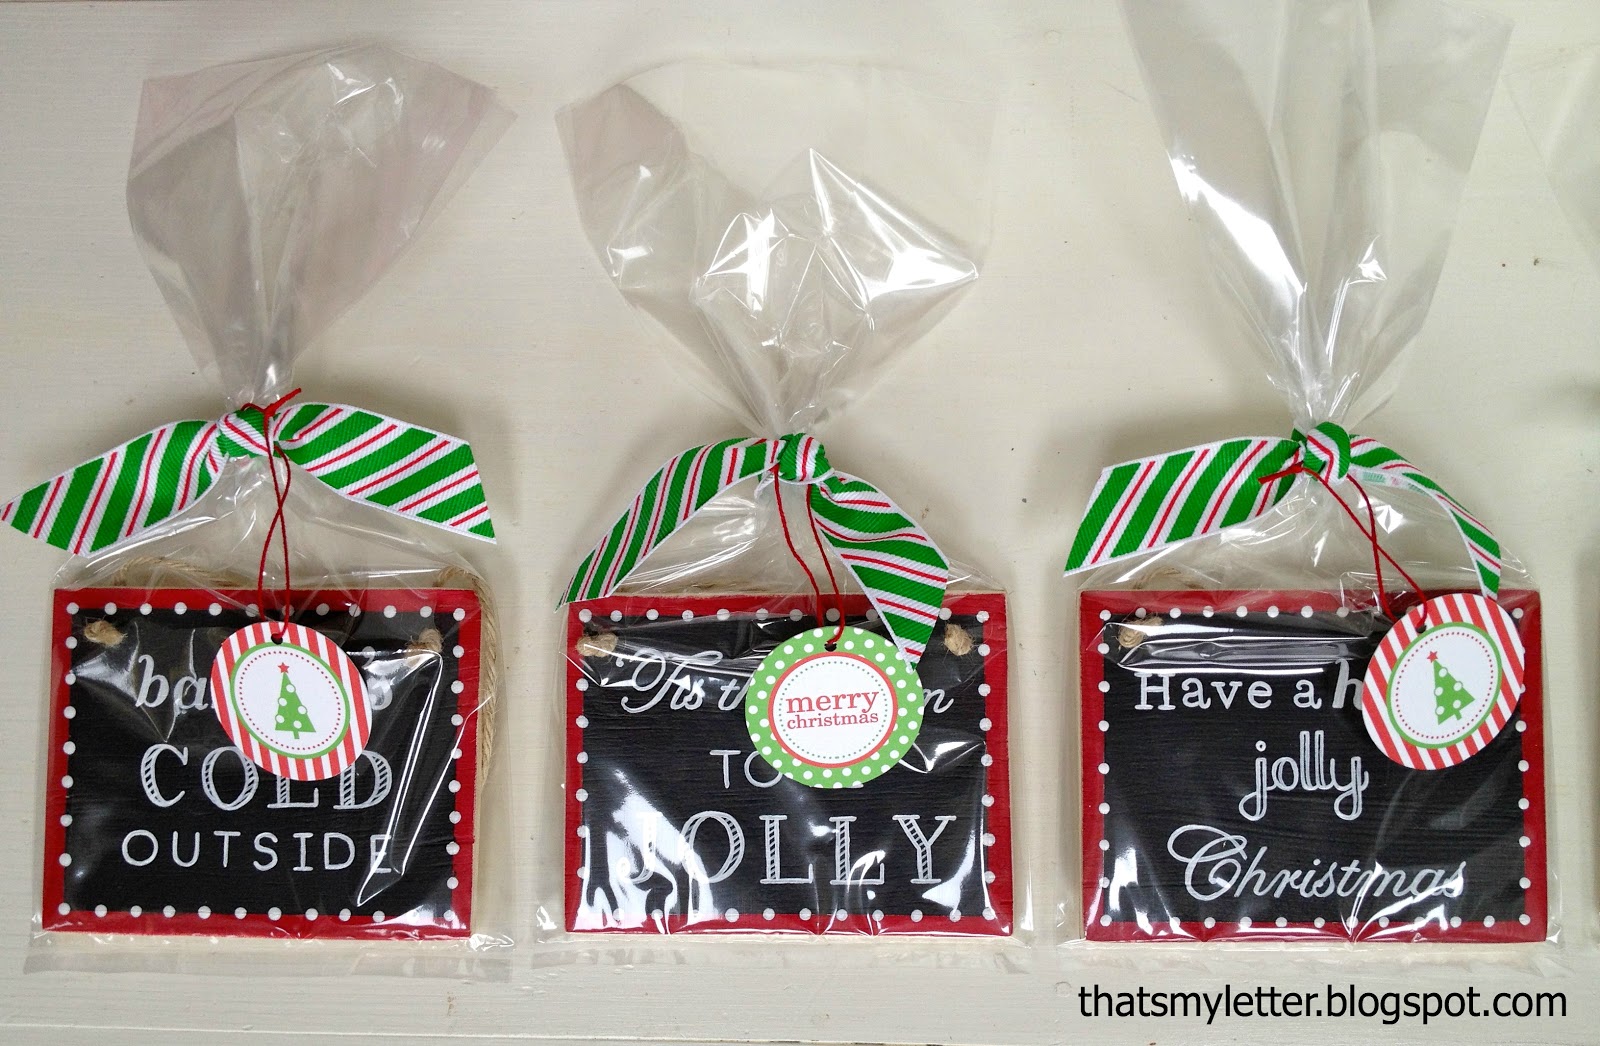
All wrapped up and ready to give:
In lieu of chalk I opted for a more permanent solution using white acrylic paint.  
A little patience, a steady hand and some really fun fonts and you can make these:
(For lots of free fonts use dafont.com)
 
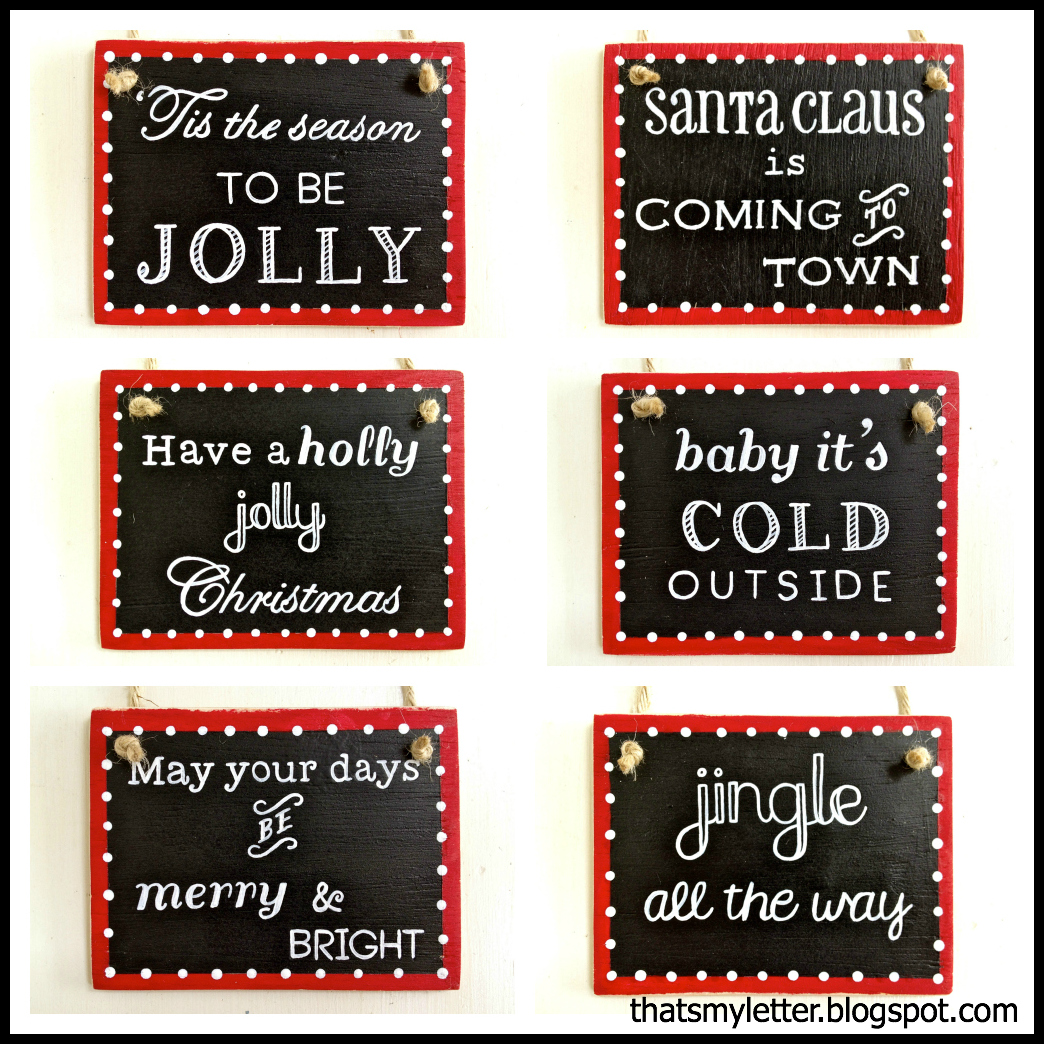
They look so good as a collection too!
Here’s how I made the chalkboard ornaments:
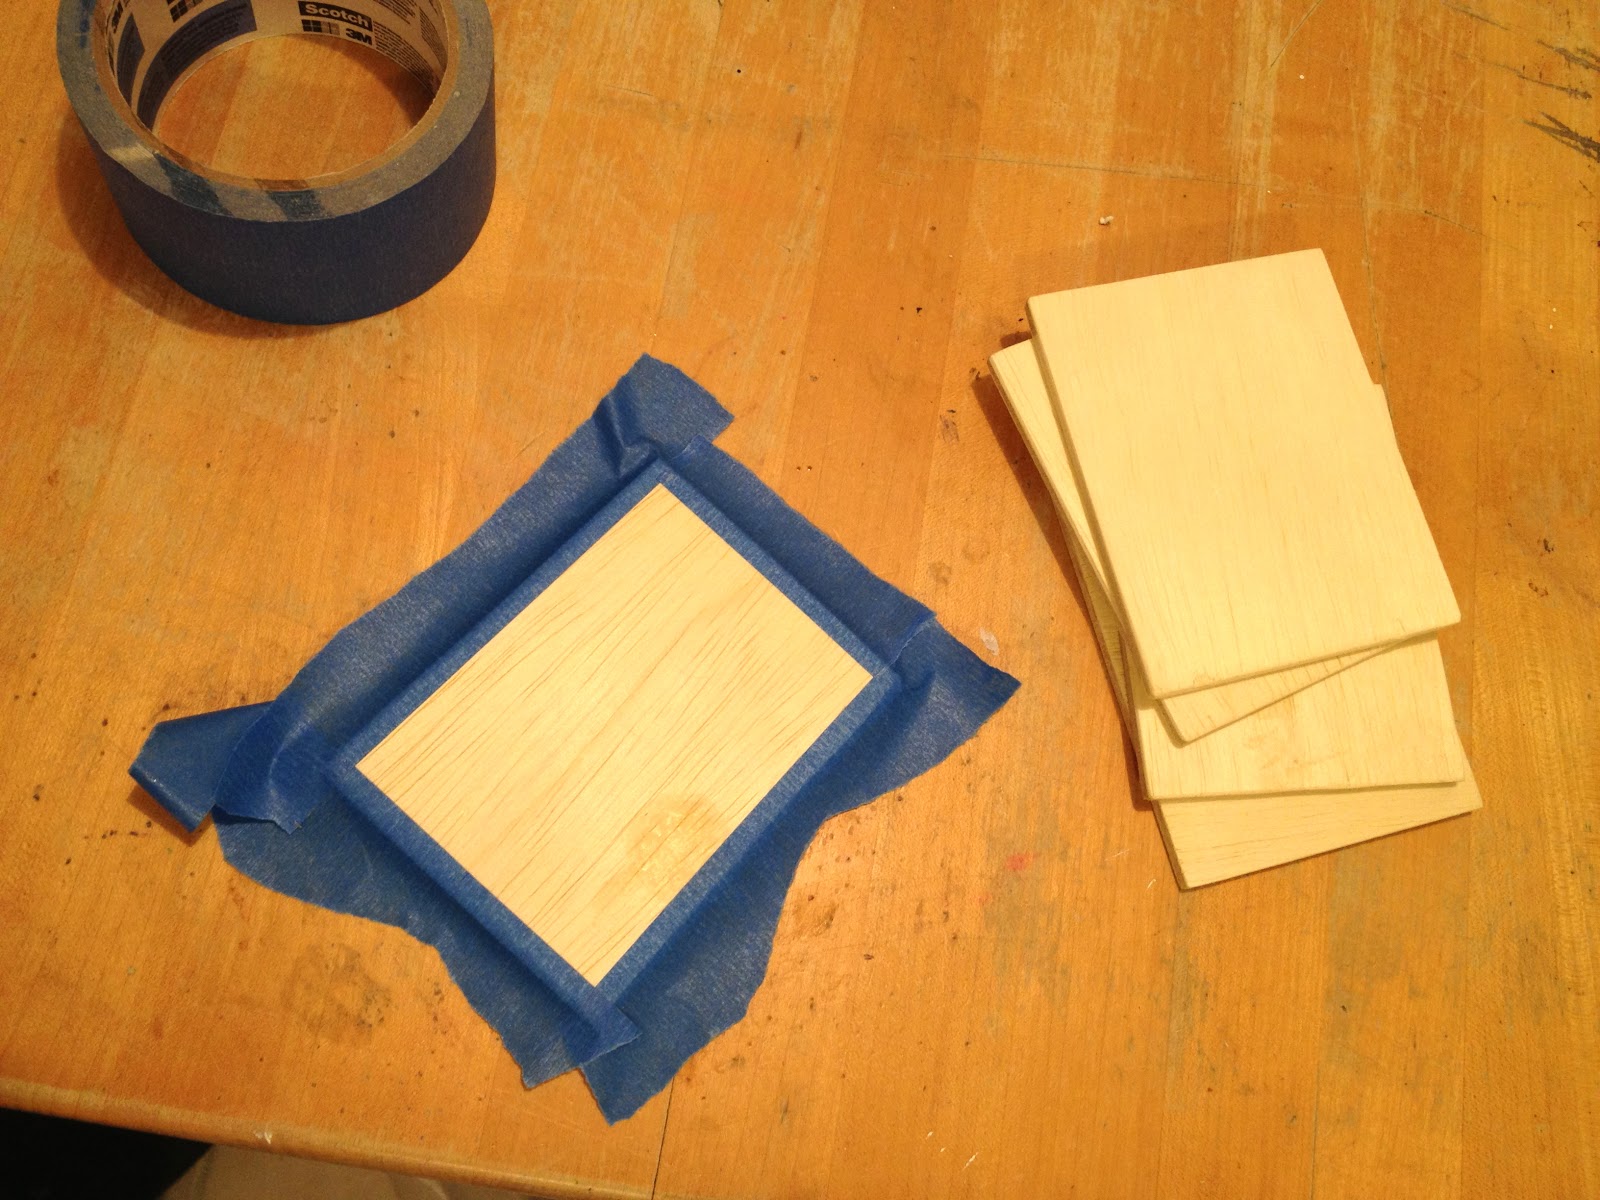
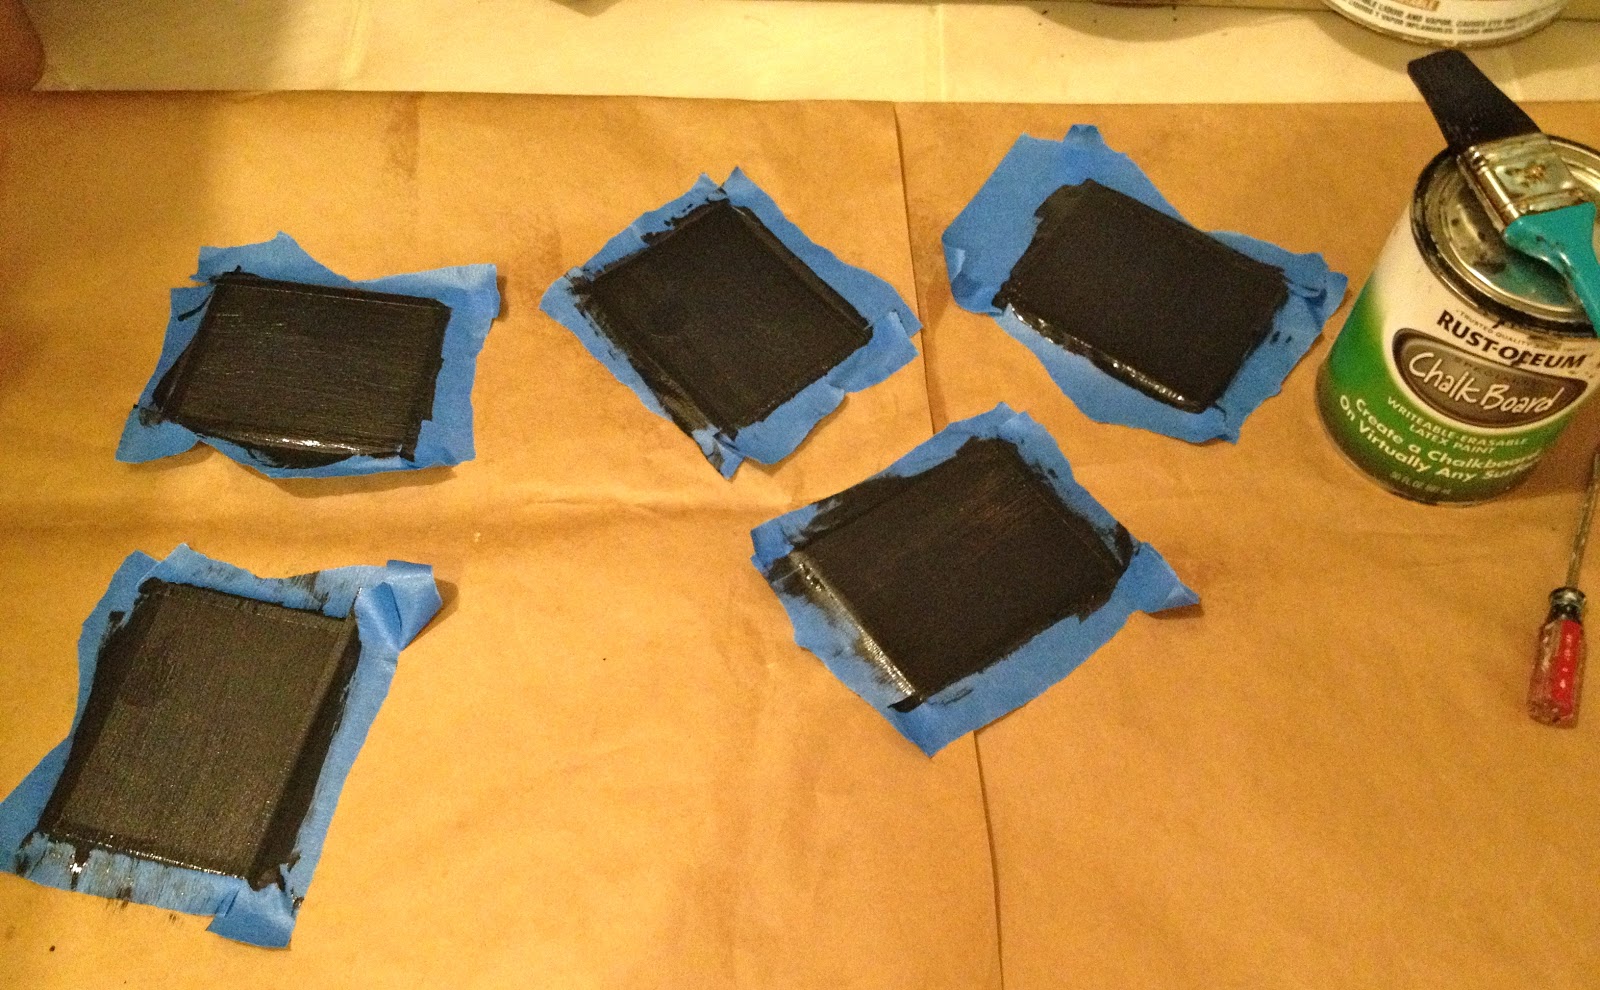
1. Cut 1/4″ plywood into 3 1/2″ x 4 1/2″ pieces.
Apply blue painters tape around edges covering up 1/4″:

2. Paint two coats black chalkboard paint:
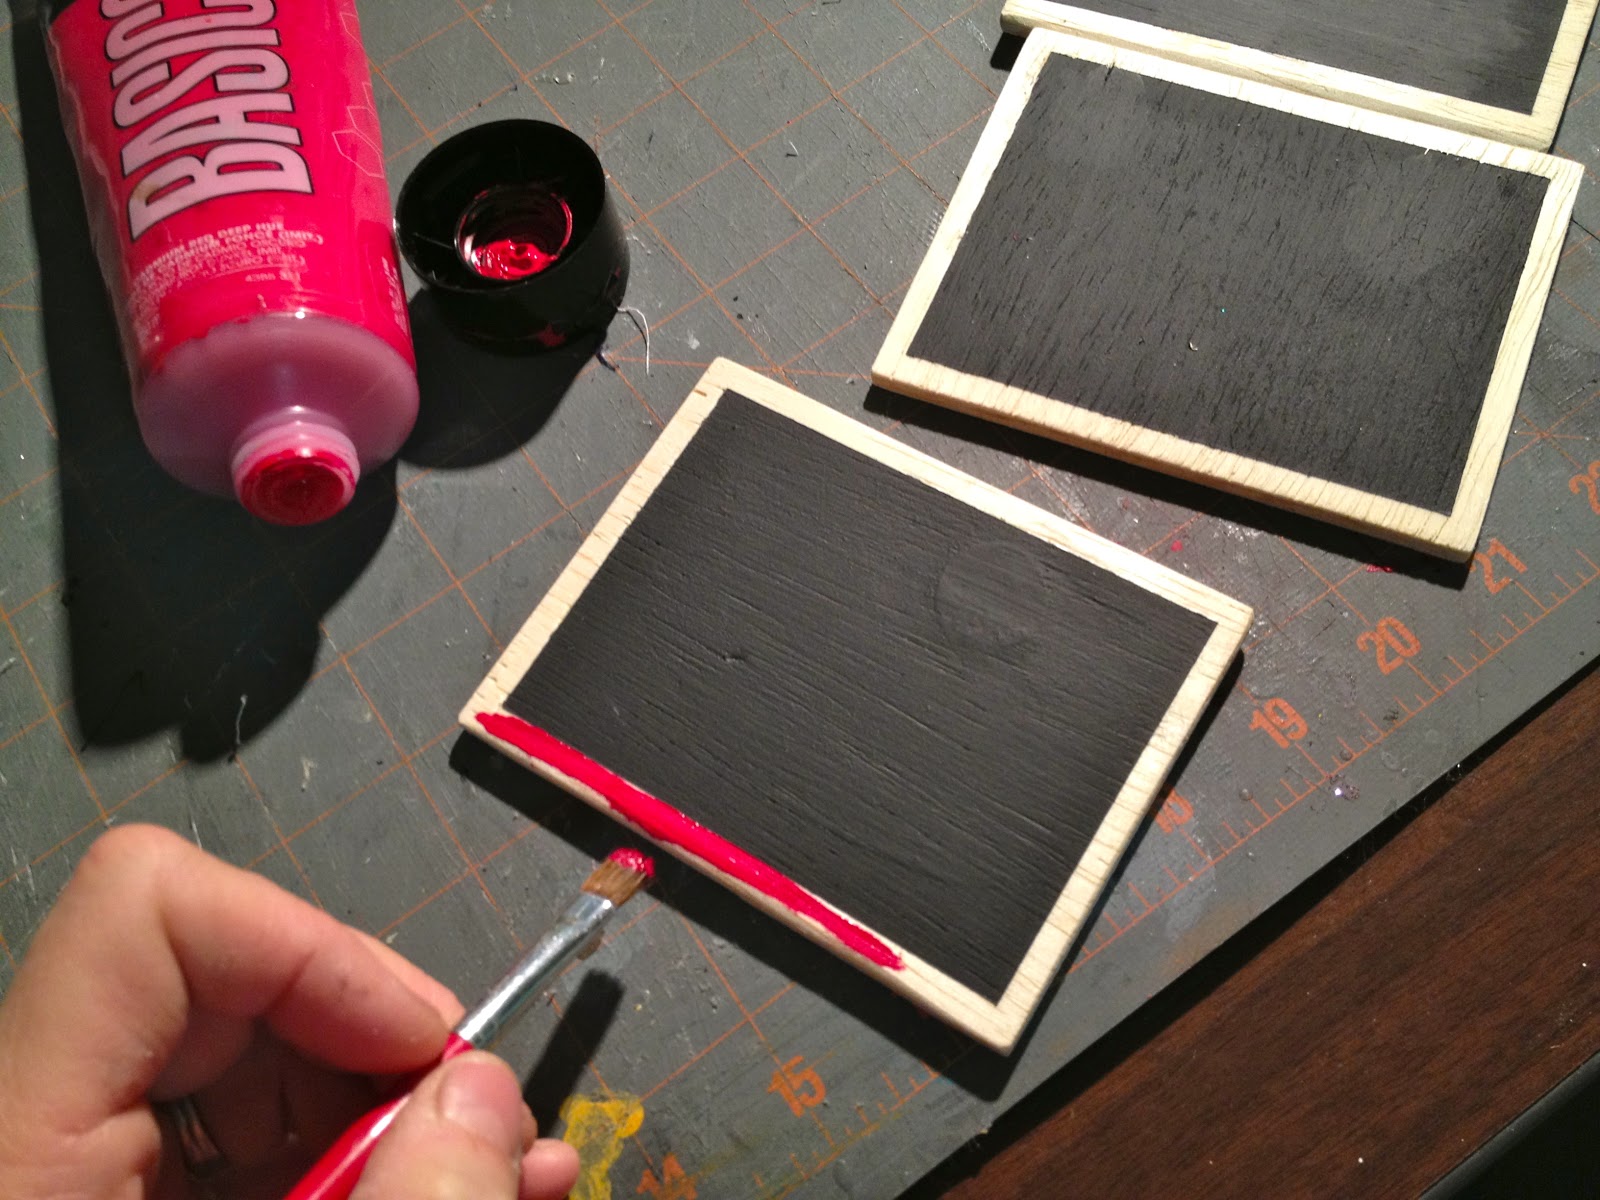
3. Remove blue tape and apply red acrylic around border:

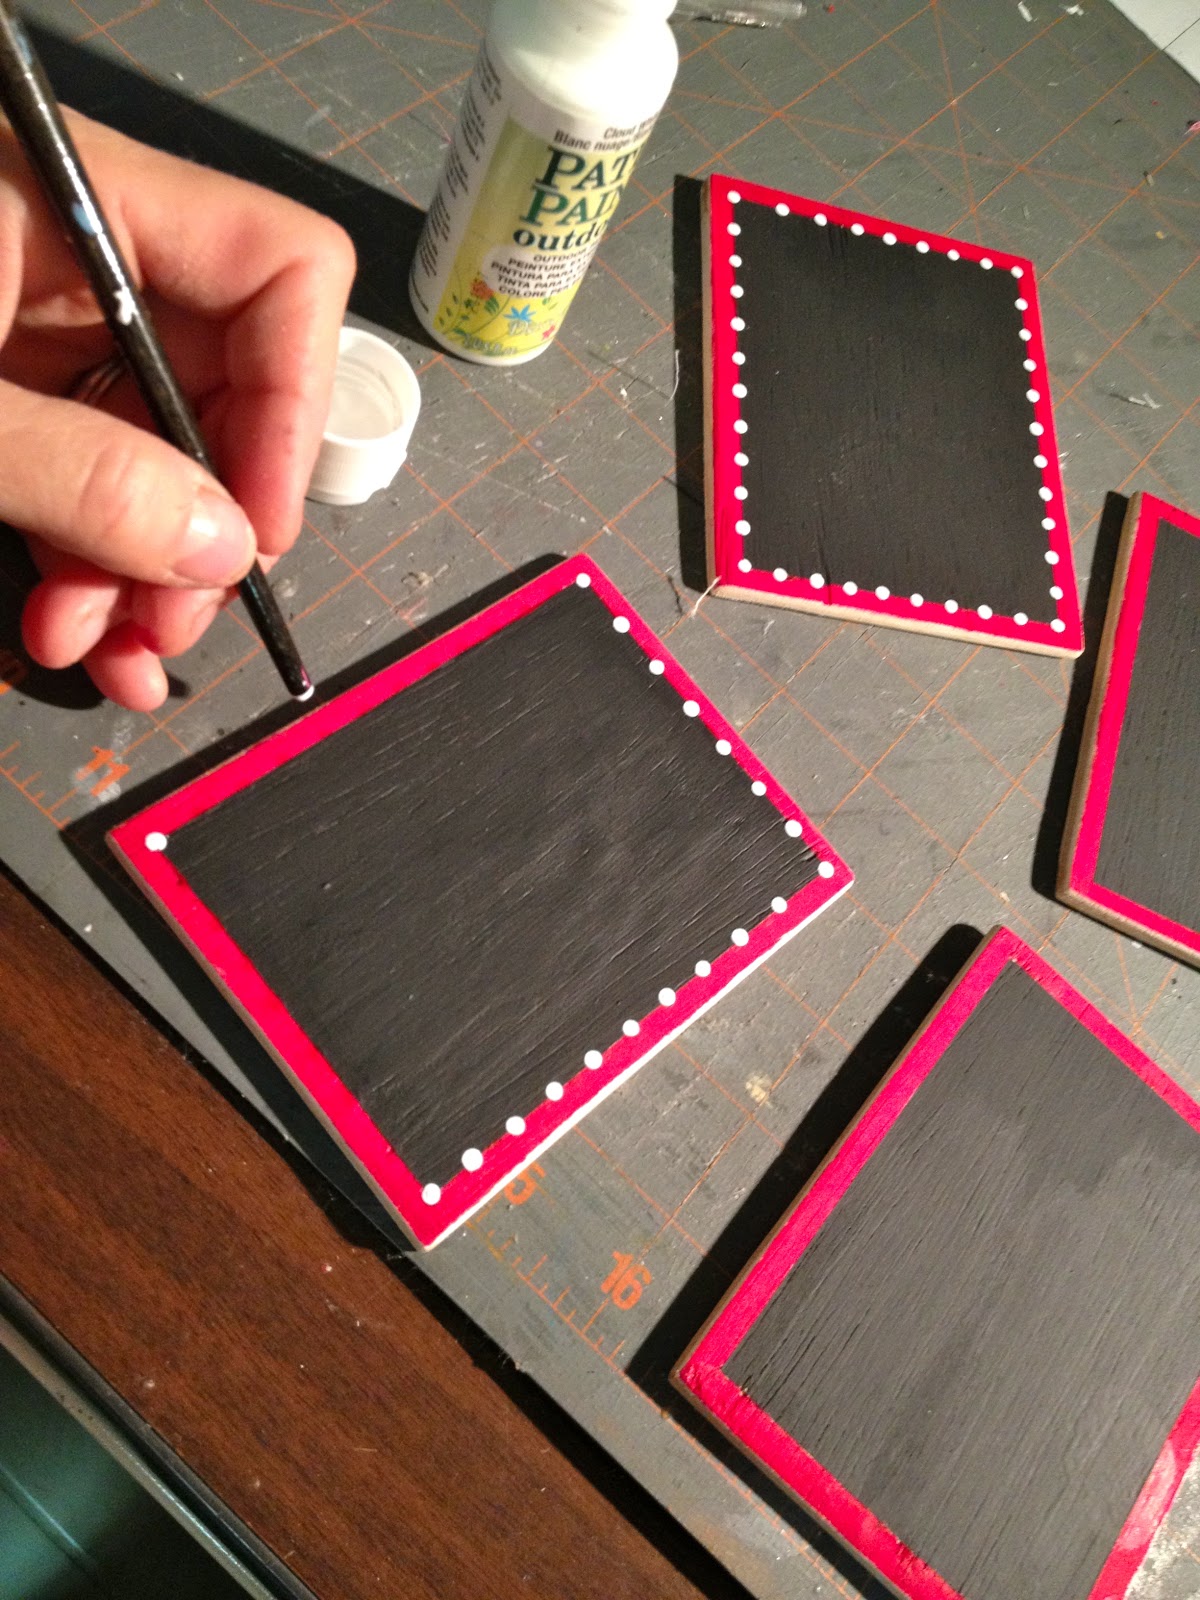
4. Make the dot border detail with white acrylic and the end of a paint brush:
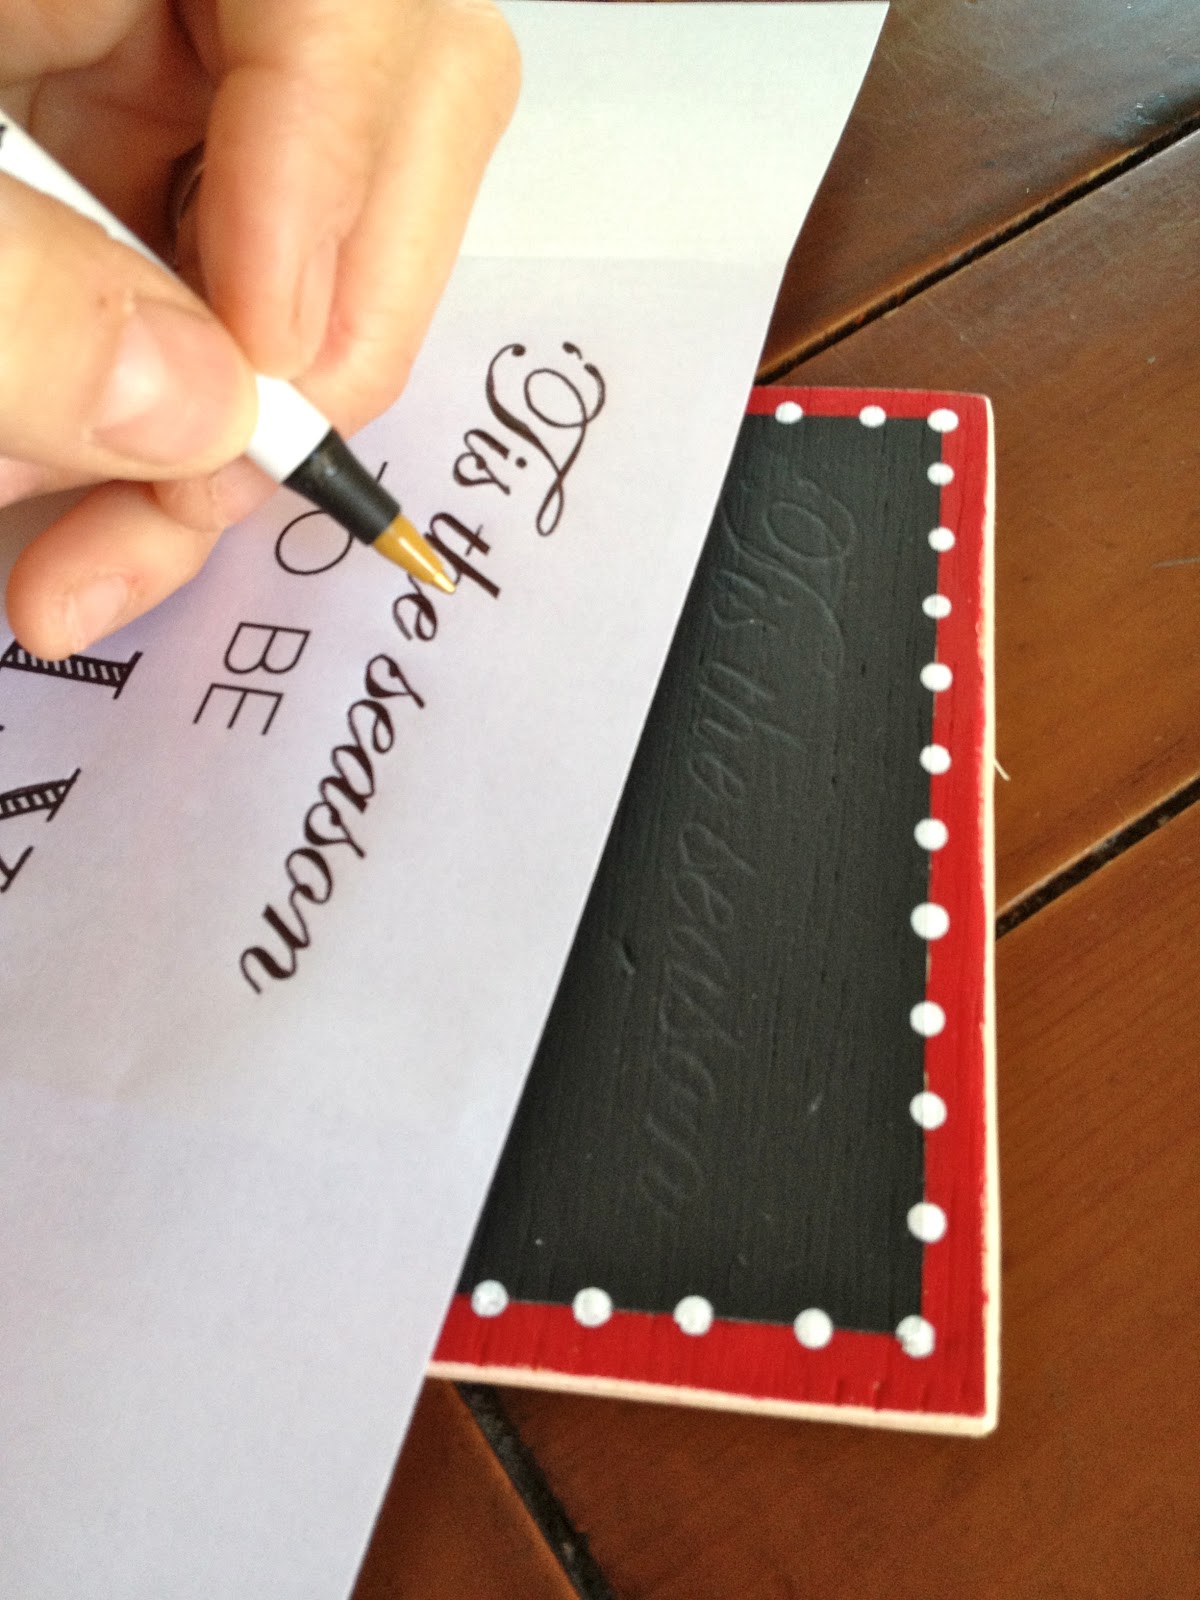
5. Print out the phrases using all different fonts in sizes to fit the boards:
6. Line up the print out on top of the chalkboard and trace letters with ballpoint pen.
The pressure of the pen will make an indent in the plywood:
7. Paint on and inside the indent left behind by the pen:

8. Seal the painted surface with Minwax poly clear semi-gloss:
9. Predrill holes in both upper corners for jute.
Thread jute from back and tie knot then repeat for other corner:
10. For the wrapping I used cello bags and these cute free Christmas tags:
 
I’m linking up to:
Christmas Crafts @ Shanty 2 Chic
Christmas Craft Party @ Nesting Place
SAS @ Funky Junk
Nifty Thrifty Sunday @ Nifty Thrifty Things
DIY Project Parade @ The DIY Showoff
Tutorials & Tips Tuesday @ Home Stories A to Z
Strut Your Stuff @ Somewhat Simple
Share Awesomeness Thur @ The 36th Avenue
Pretty Things Thursday @ Scissors & Spatulas
Flaunt it Friday @ Chic on a Shoestring
Frugal Friday @ The Shabby Nest
SAS @ Just a Girl
Remodelaholics Anonymous @ Remodelaholic
inspiration board @ Carolyns Homework
Sunday Showcase Party @ Under the Table & Dreaming
Weekend Bloggy Reading @ Serenity Now

You may also like...

  • “W” is for Wood Favor Tags“W” is for Wood Favor Tags
  • “G” is for Greenwich“G” is for Greenwich
  • Cross Stitch Monogram Ornament PlacecardCross Stitch Monogram Ornament Placecard
  • DIY Wedding Cake Ornament FavorsDIY Wedding Cake Ornament Favors
Share this post:

Filed Under: CHRISTMAS, CRAFTS, CRAFTS, DIY, FOR HER, FOR HIM, GIFTS, HOME DECOR, PAINT, SEASONAL3 Comments

Reader Interactions

Comments

  1. Desiree @ The 36th AVENUE says

    November 30, 2012 at 5:17 PM

    Super cute! I am featuring them tomorrow on my blog!

    Reply
  2. Tonna @ Navy Wifey Peters says

    December 3, 2012 at 7:19 AM

    Oh wow! These are awesomely cute ornaments! Very creative!

    T'onna
    Submarine Sunday Link Party

    Reply
  3. Jess Klintworth says

    December 14, 2012 at 12:38 PM

    These are adorable! I've pinned you to my pinterest board here: http://pinterest.com/pin/134826582566117210/

    Reply

Leave a Reply Cancel reply

Your email address will not be published. Required fields are marked *

Primary Sidebar

Hi! I’m Jaime

Jaime Costiglio

Hello!

Thank you for stopping by.
Join me for lots of DIY.

Read more

Get new posts via email

Handbuilt Holiday: Gift Project Plans

handbuilt holiday gift project plans

Collection of DIY gift project plans to build.

The Home Depot Tool Prospective

THD Prospective

Tools to consider for the DIYer.

Archives

The Home Depot Logo
Copyright © 2023 Jaime Costiglio · Custom site by Moonsteam Design

Privacy Policy