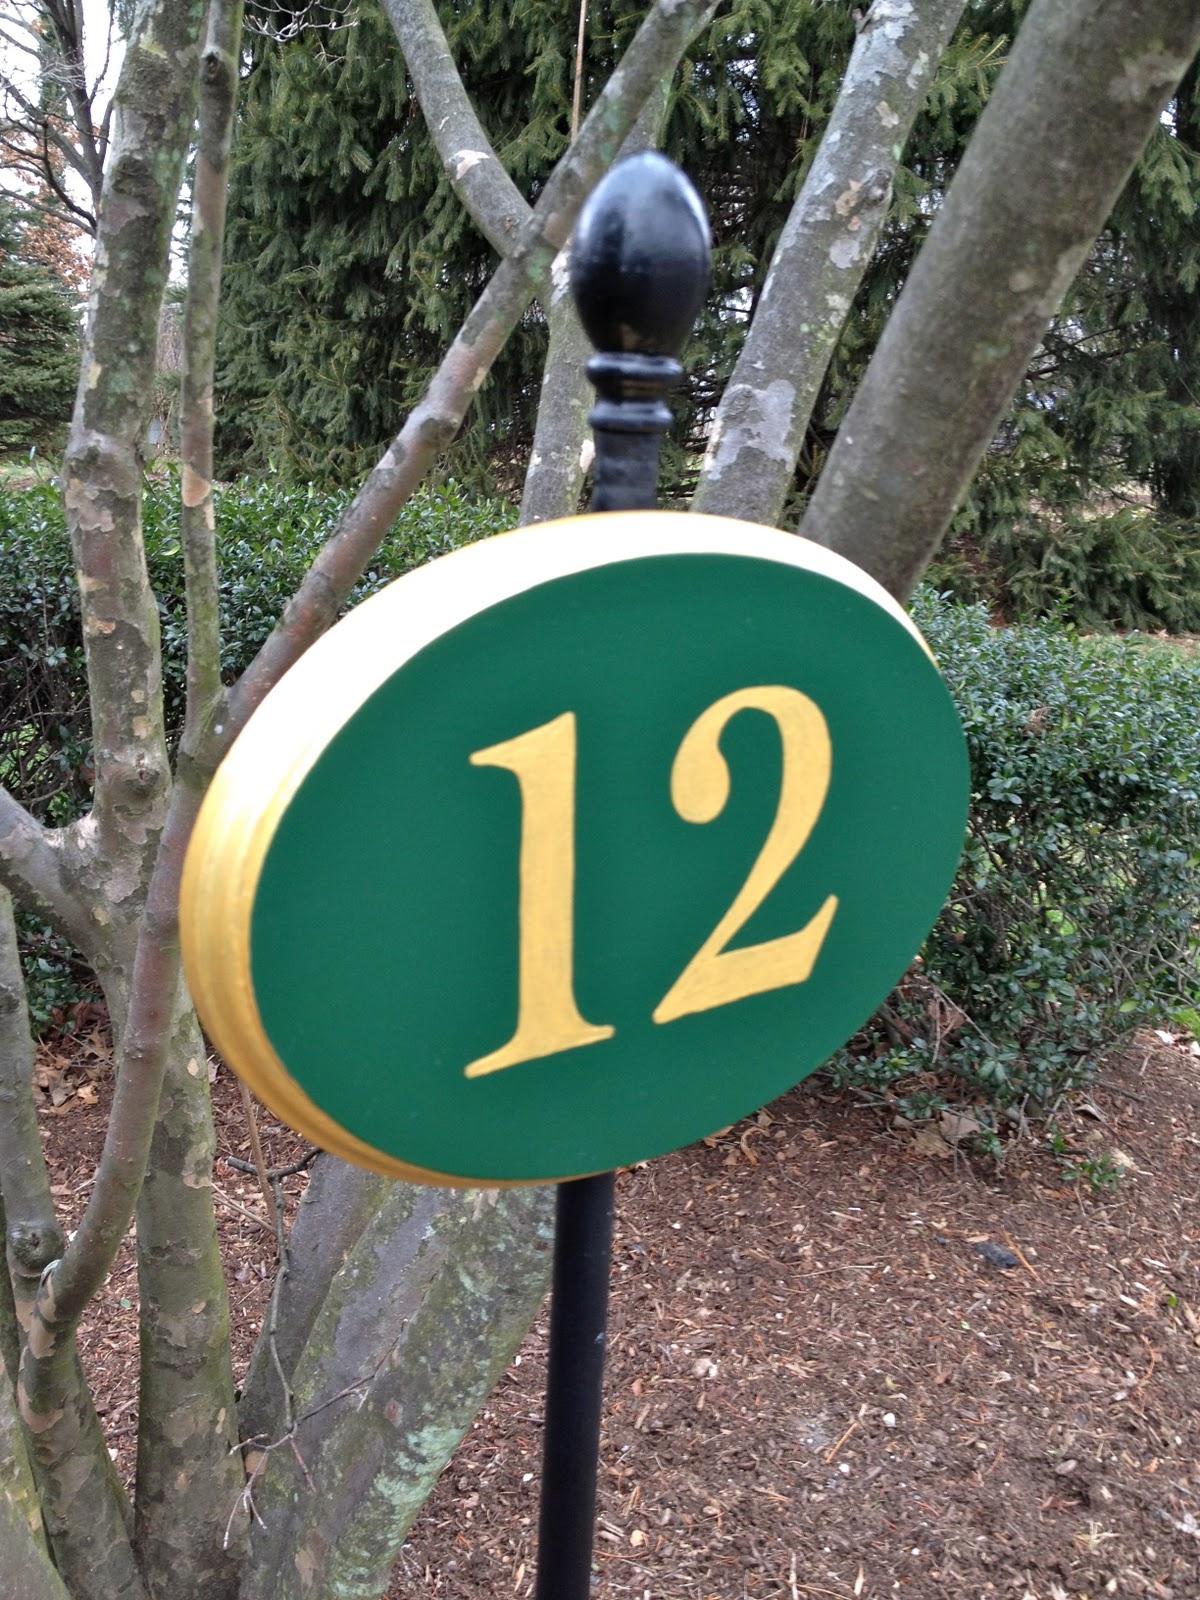
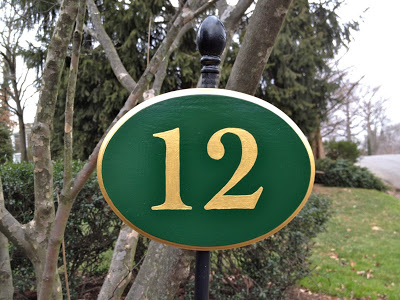
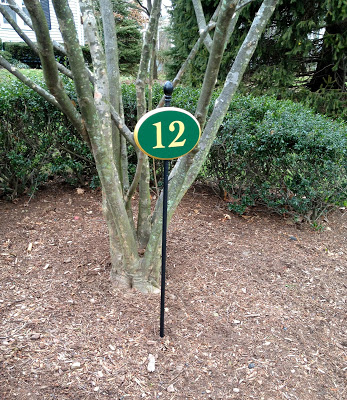
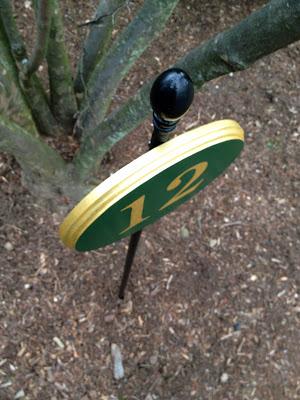
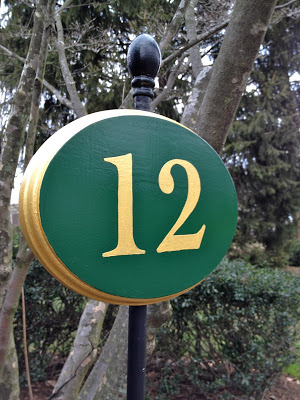
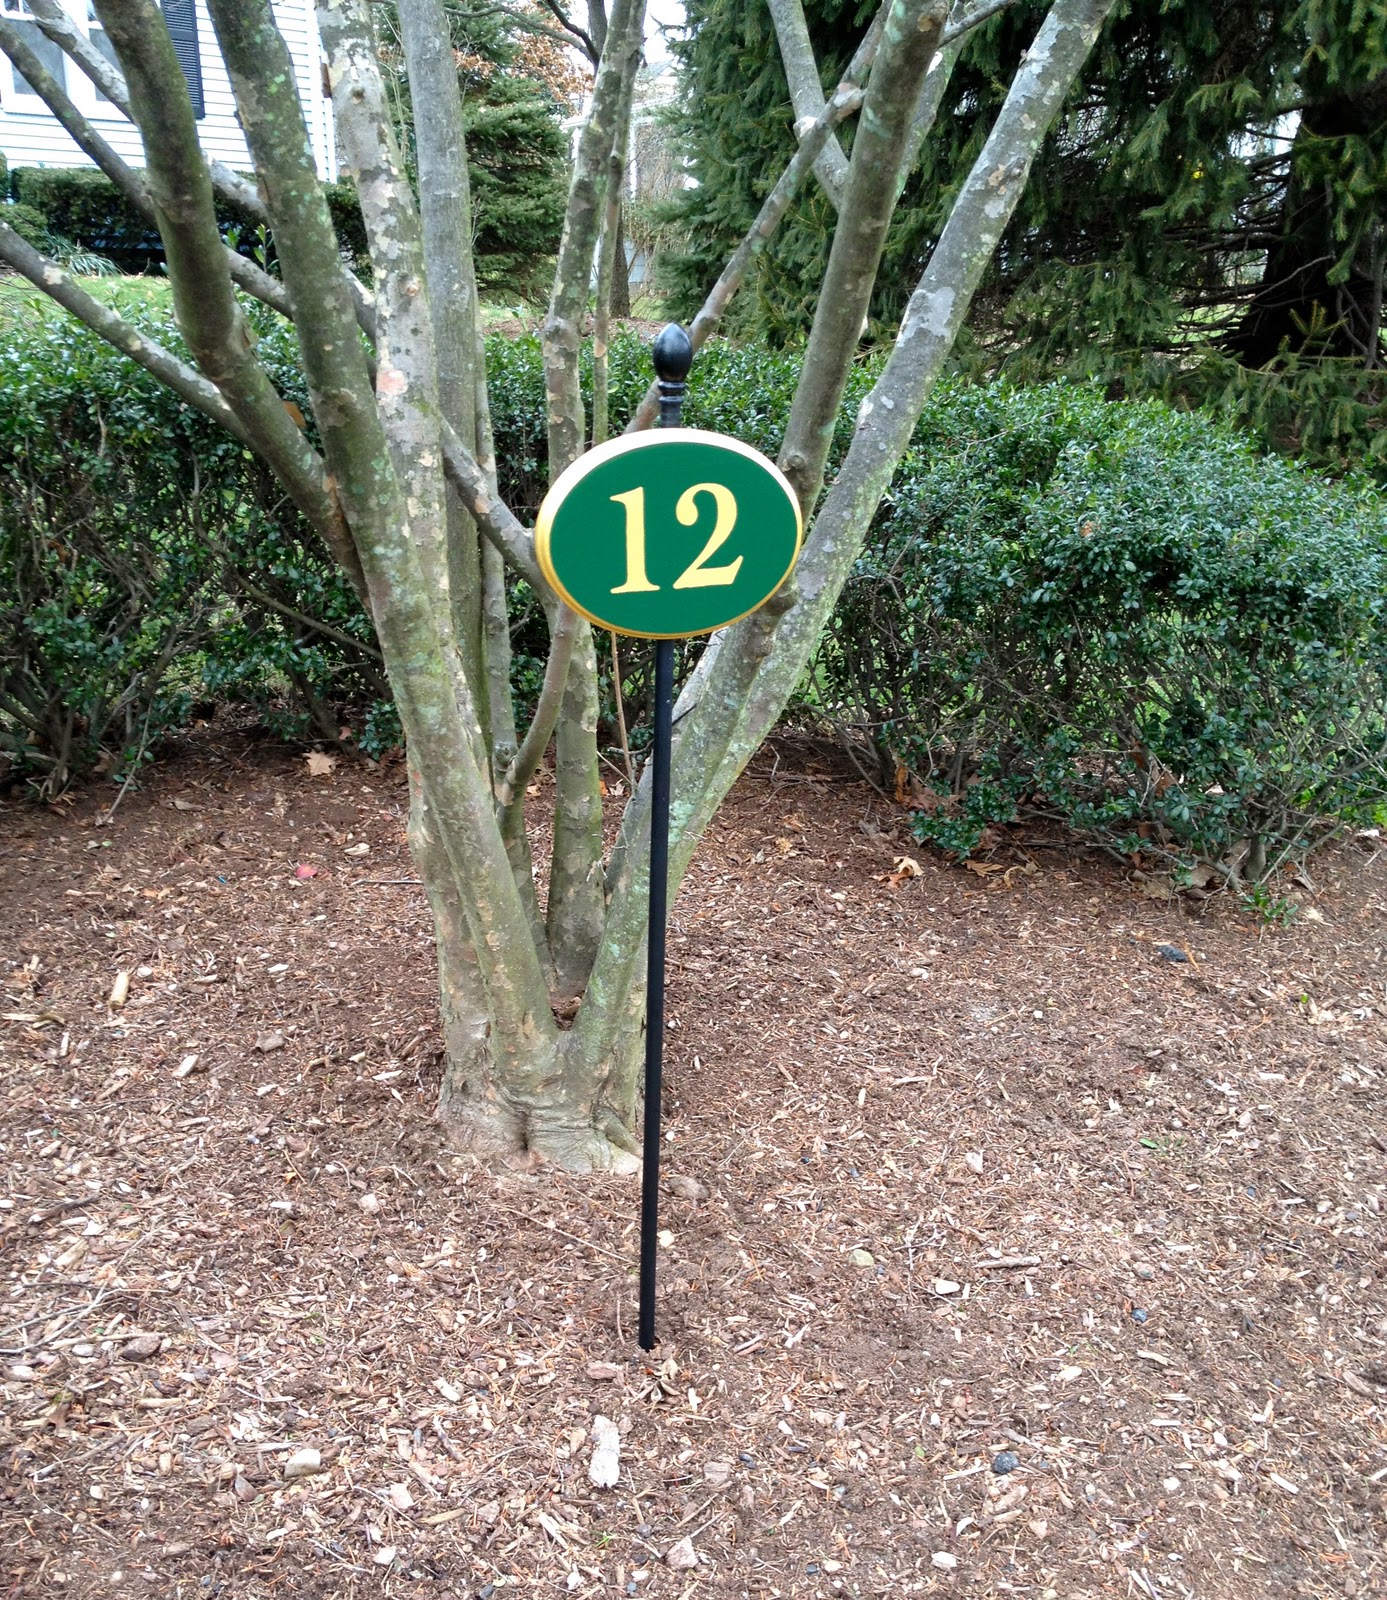
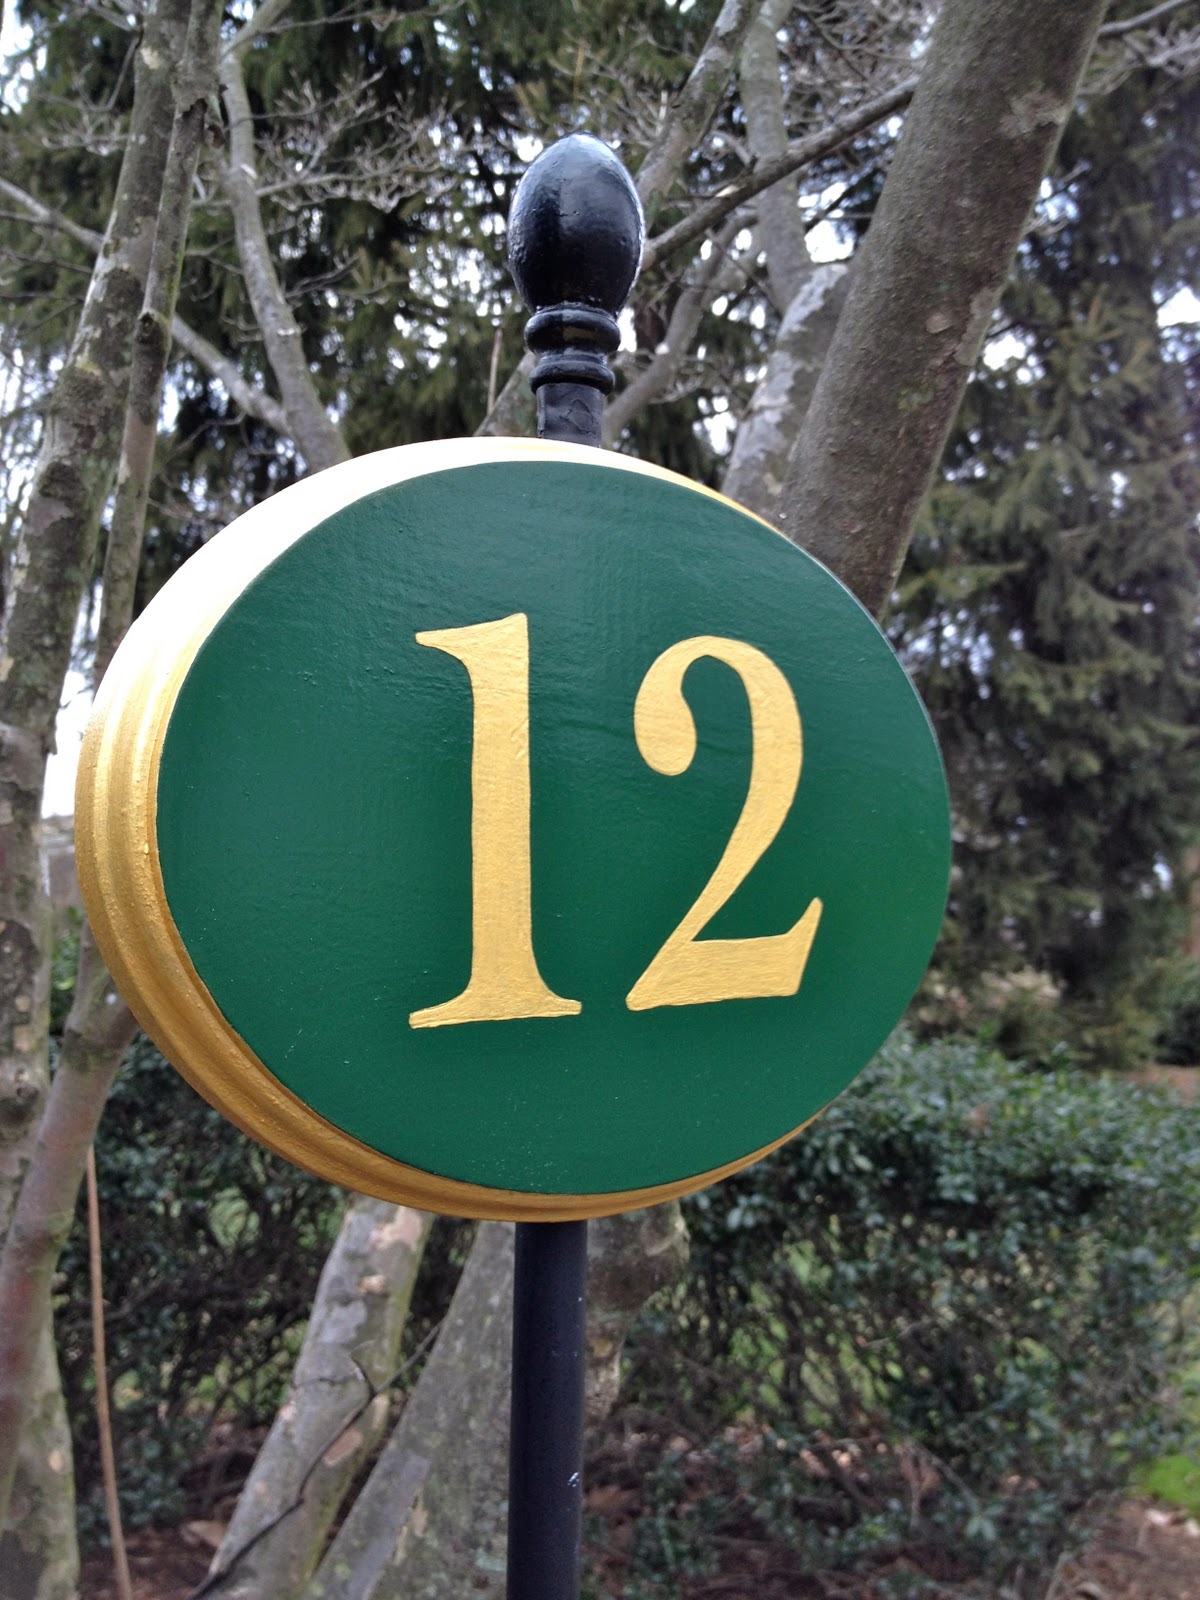
Painting: a house number plaque.


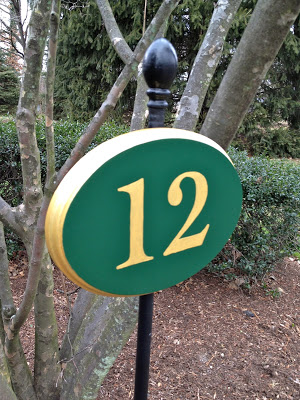


A custom request for a friend.

Or you can purchase something similar like this:

Yes their numbers are carved and gilted in 23k gold and the price reflects that!!
But my version should suffice:
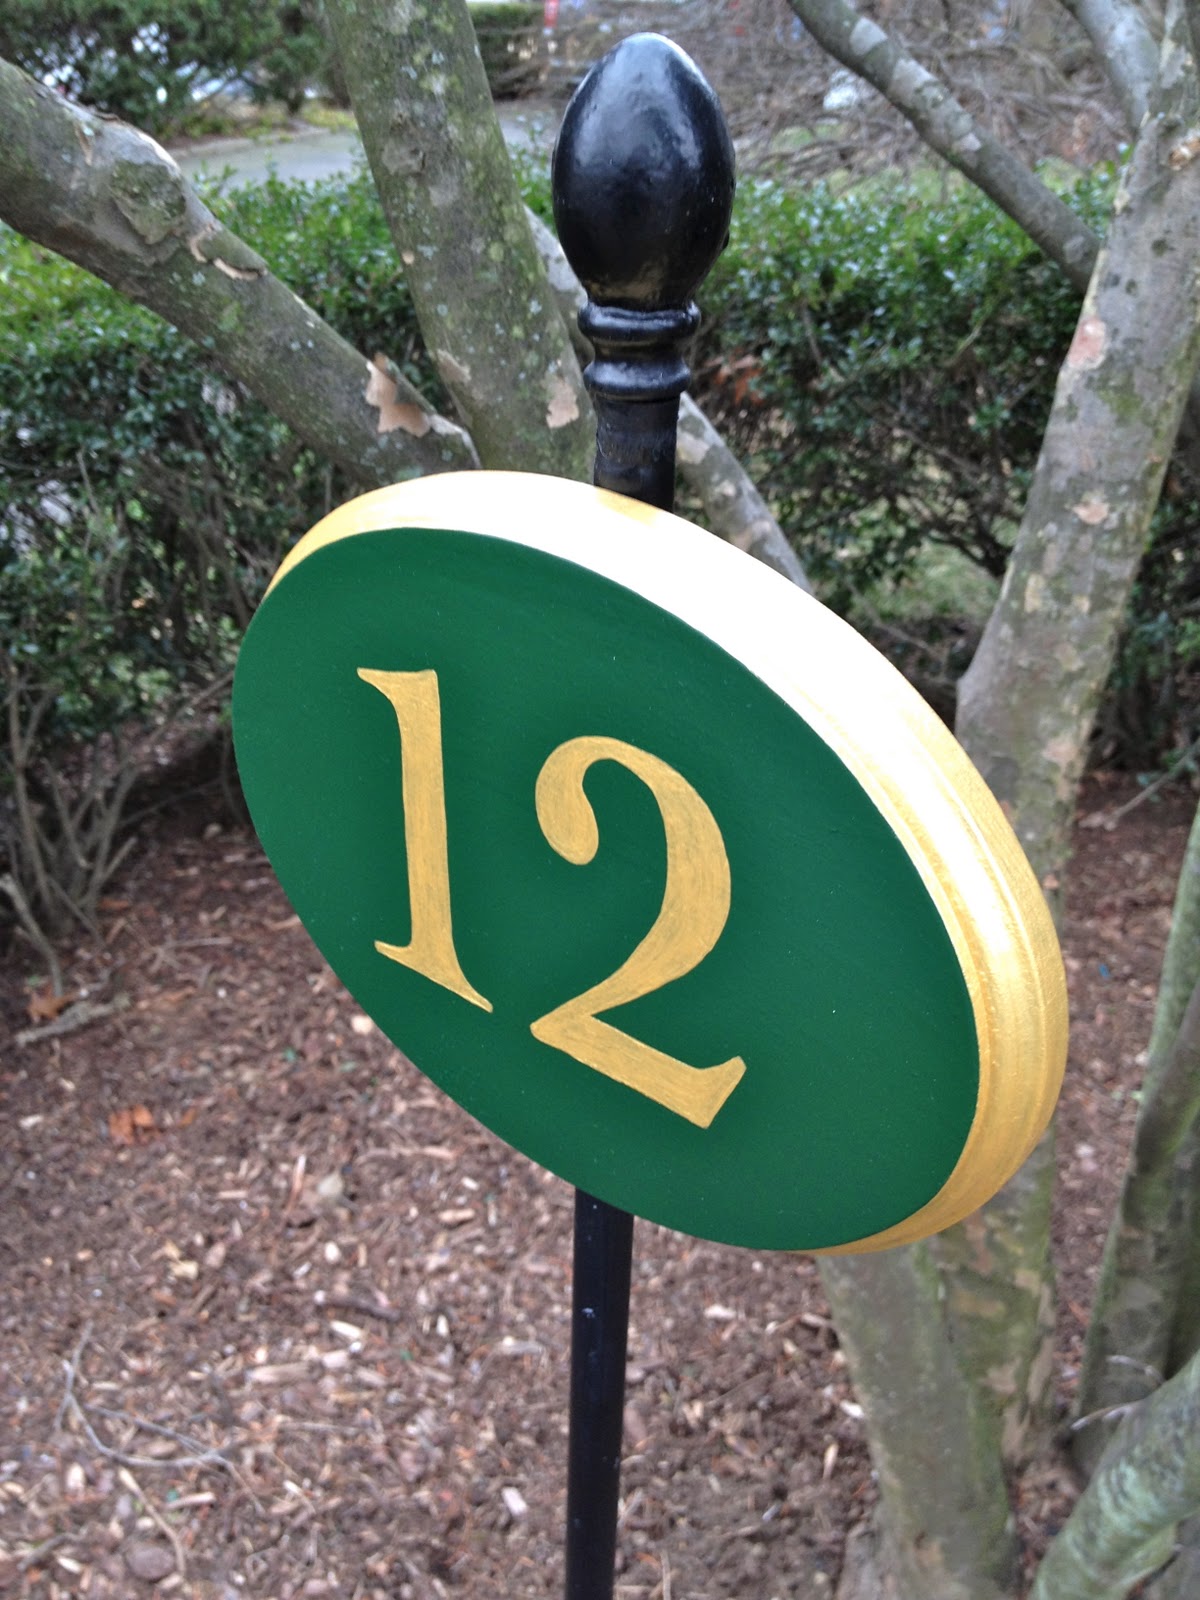
Here’s how I made the plaque:
1. Using an oval wood plaque 9″w x 7″h (ordered from here) sand and prime: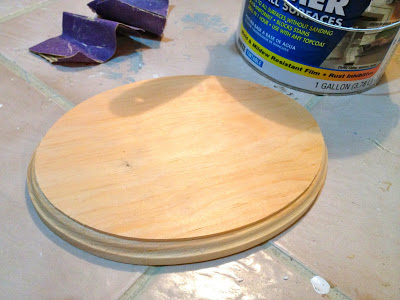
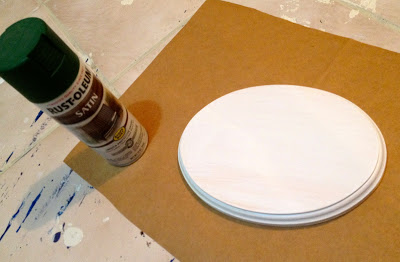


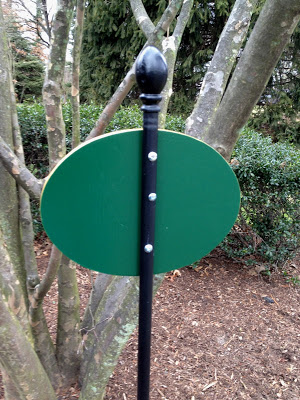
1. Using an oval wood plaque 9″w x 7″h (ordered from here) sand and prime:


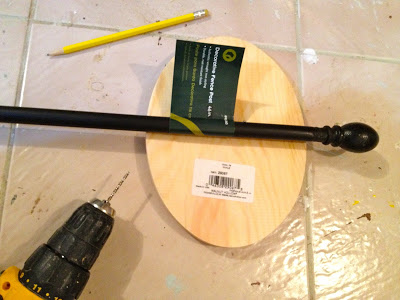
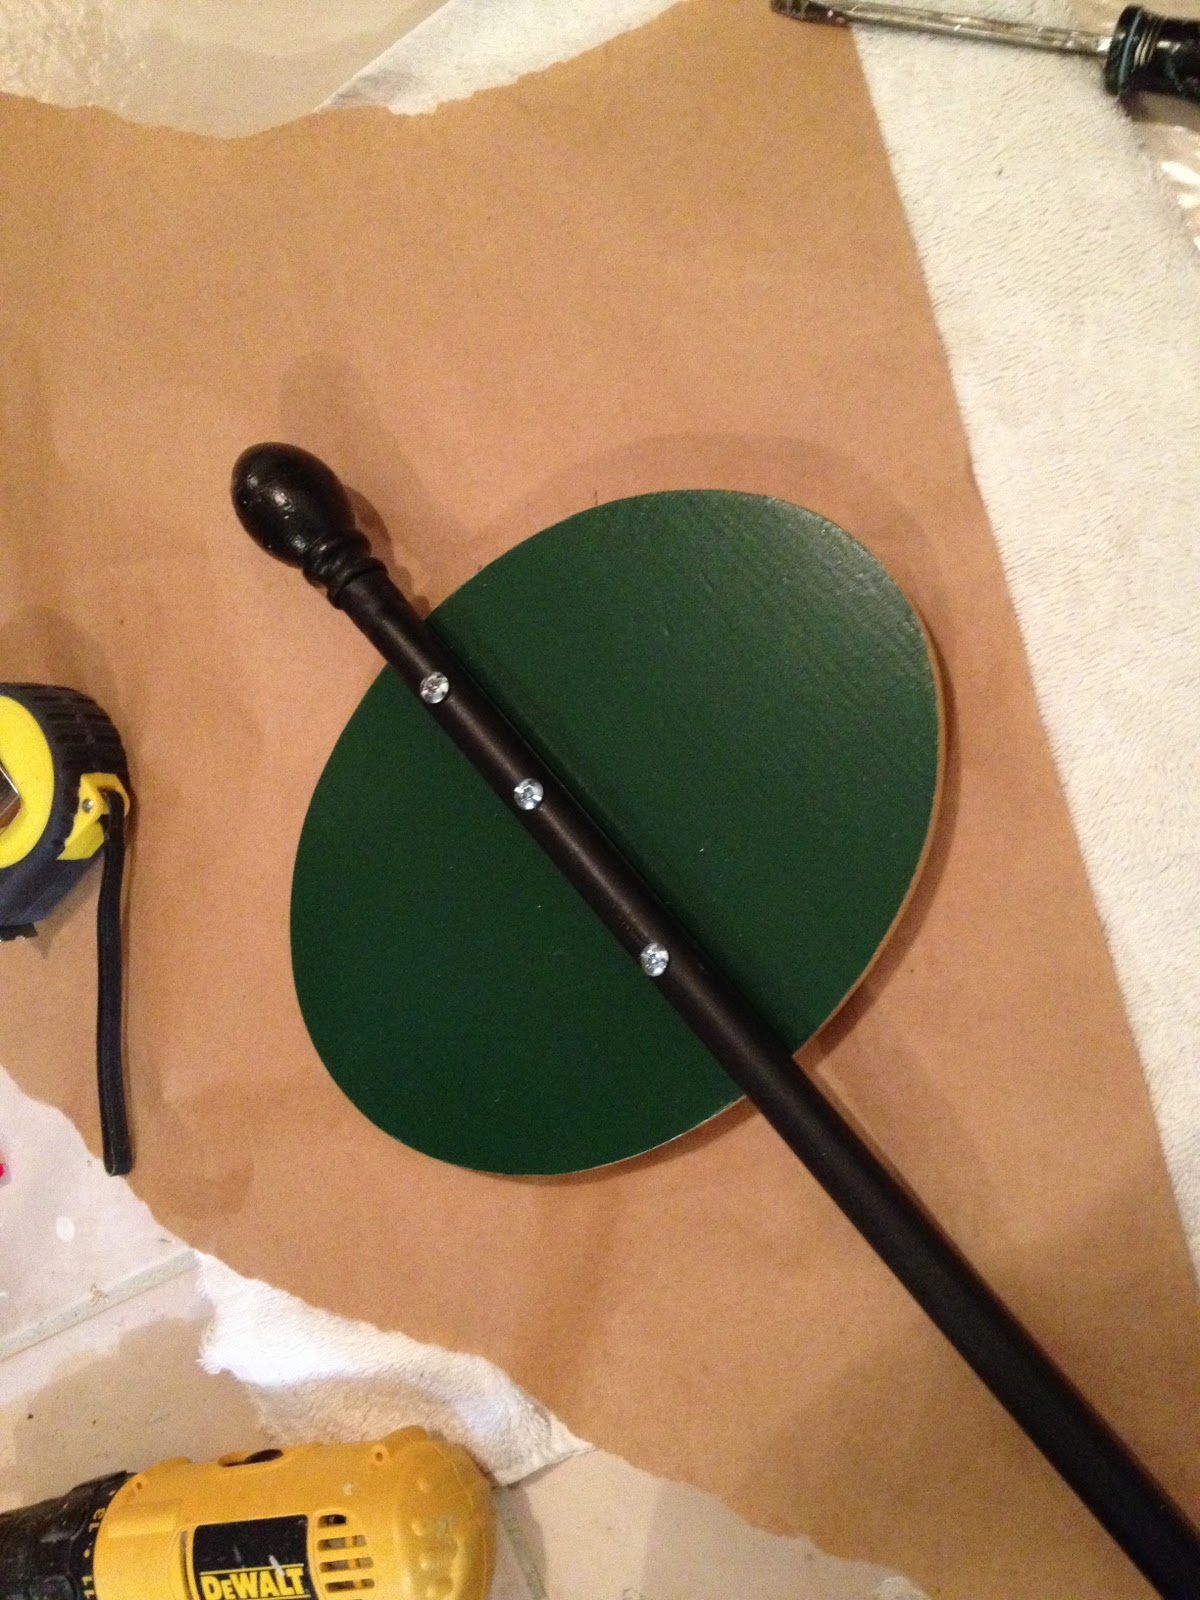
2. Predrill holes in decorative fence post (I found this one at Home Depot.):

Two holes will suffice, I made three.

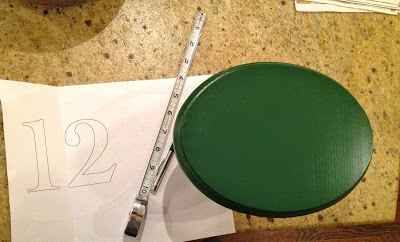
3. Paint wood, both sides, two coats Rustoleum hunter green.
Print out numbers to fit:

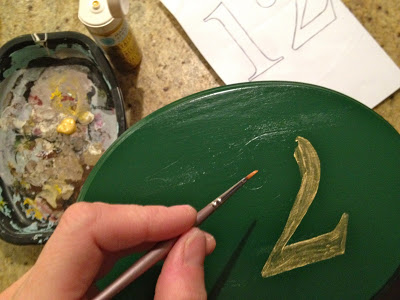
4. Center numbers on oval, using ballpoint pen trace numbers to leave indent in wood:

5. Paint numbers and edge using Martha Stewart gold metallic:
You will need multiple, multiple coats to get a solid, opaque gold color.

6. Seal, both sides, three coats Minwax Helmsman clear gloss:

7. Face down, center oval on stake and screw into place. Use a dab of super glue in between screw and wood for security.

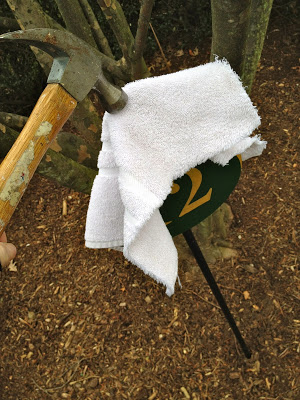
8. Hammer into place, be sure to cover stake with cloth before hammering into ground.


Thanks MC for a new and different project.
I’m linking up to:

Whatcha Got Weekend @ Lolly Jane
SAS @ Funky Junk
Weekend Wrap Up @ Tatertots & Jello
Sundae Scoop @ I Heart Naptime
Sister Sunday @ Sisters of the Wild West
Sunday Showcase Party @ Under the Table & Dreaming
Just Something I Whipped Up @ The Girl Creative
DIY Fall Festival @ The DIY Showoff
Made by You Mondays @ Skip to My Lou
Making the World Cuter @ Making the World Cuter
Nifty Thrifty @ Coastal Charm
Tuesday Treasures @ My Uncommon Slice of Suburbia
Tutorials & Tips Tuesday @ Home Stories A to Z
Good Life @ A Beach Cottage
Delightfully Inspiring @ Delightful Order
Transformation Thursday @ The Shabby Creek Cottage
Strut Your Stuff @ Somewhat Simple
Share Awesomeness Thur @ The 36th Avenue
Flaunt it Friday @ Chic on a Shoestring
Tickled Pink @ 504 Main
Frugal Friday @ The Shabby Nest
SAS @ Just a Girl
Feathered Nest @ French Country Cottage
Remodelaholics Anonymous @ Remodelaholic
inspiration board @ Carolyns Homework


LOVE this idea, jaime!
Great job.
Great work!
It looks great, and who needs hammered gold to sit around outside??
simple but sweet,I love it 🙂
Love your sign! Your such a sweet person to make that for your friend!
Perfect! We just finished building our new home (haven't been in it yet, but that is another long story), and this would look great out front. Thanks for sharing. I'm now following you, so stop by and visit. I love meeting new blog friends, Lori
I think I'm gonna have to do this project. Thanks for sharing.
Jules
SO need to do this! Thanks for sharing!
That looks great! Awesome job! I am a new follower, come visit me sometime…
http://www.blissimagesandbeyond.blogspot.com/
Erika
So pretty and such a classic and timeless look. The fence post is beautiful-I've never seen that at home depot. Fantastic work!
I really need to try my hand at the painting thing. You make it look so easy! Thanks for linking up to the 1st Project of the Year Party!
Visiting from the Shabby Nest! Absolutely love the house number! Thanks for the inspiration!
blessings,
karianne
I really love the job you have done it looks fantastic and is explained clearly. Quite frankly I think it is better the the gold gilded example- by far!
Lou
LOVE THIS IDEA! it turned out great!