• Home
  • Blog
  • About
  • Contact
    • Disclosure
    • Privacy Policy
  • SHOP
  • Widget area for main menu

    • Email
    • Facebook
    • Instagram
    • Pinterest
    • Twitter
    • YouTube
  • Skip to primary navigation
  • Skip to main content
  • Skip to primary sidebar

Jaime Costiglio

build - paint - sew

  • BUILD
    • BEDS
    • BENCHES
    • DESKS
    • DRESSERS
    • GAMES & TOYS
    • SCRAP WOOD
    • SHELVES
    • STORAGE
    • TABLES
  • TOOLS
  • PAINT
    • CRAFTS
    • FURNITURE
    • HOME DECOR
  • SEW
    • GIFTS
    • HOME DECOR
    • POUCHES
  • HANDBUILT HOLIDAY
    • 2021
    • 2019
    • 2018
    • 2017
    • 2016
    • 2015
    • 2014
    • 2013
  • GIFTS
    • BABIES
    • KIDS
    • FOR HER
    • FOR HIM
    • TEACHERS
    • WEDDINGS
  • SEASONAL
    • 4TH OF JULY
    • FALL
    • HALLOWEEN
    • CHRISTMAS
    • SUMMER
    • SPRING
    • ST. PATRICK’S DAY
    • THANKSGIVING
    • VALENTINE’S DAY
    • WINTER
  • SALTBOX PROJECT
    • BATHROOMS
    • DINING ROOM
    • EXTERIOR
    • FAMILY ROOM
    • FOYER / MUDROOM
    • KIDS BEDROOMS
    • KITCHEN
    • LIVING ROOM
    • MASTER BEDROOM
    • PLAYROOM
  • SCROLL SAW

“A” is for Arrow Signs

March 14, 2014

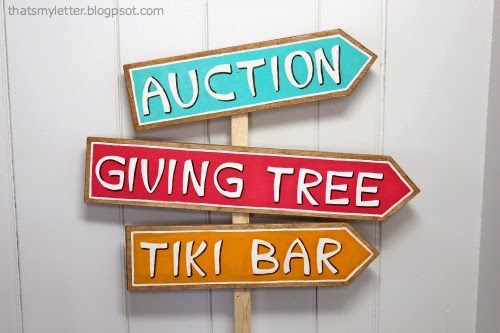
Paint: diy arrow signs
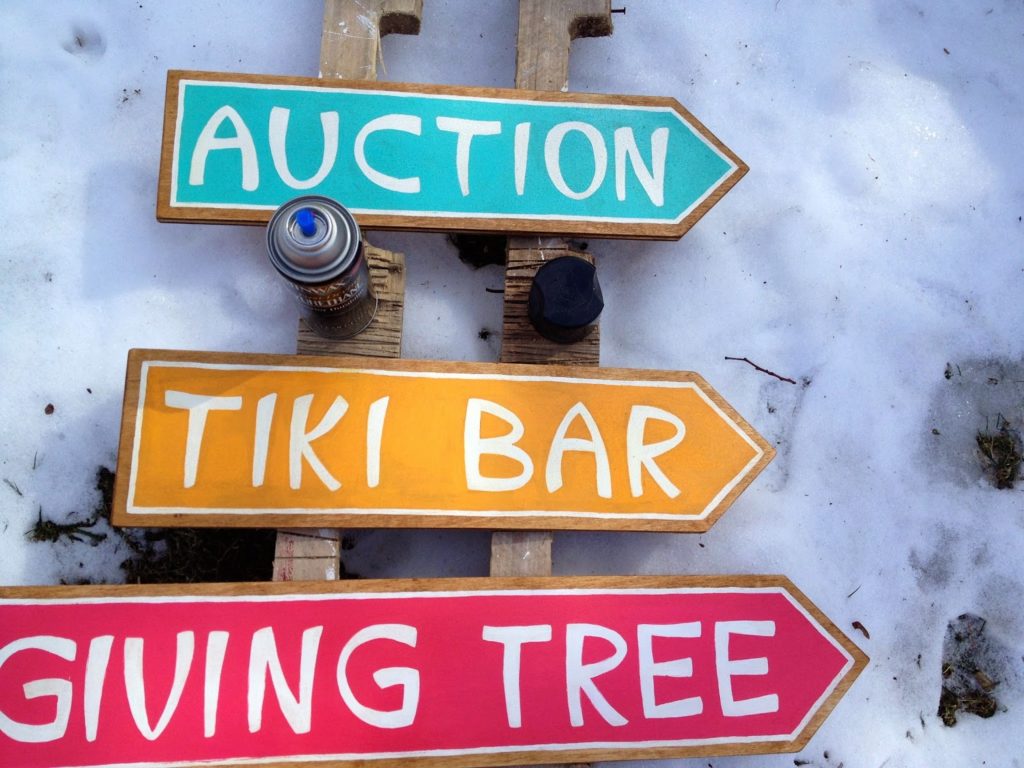
Make your own arrow signs using wood scraps and paint.
No stencils.
No fancy vinyl cutting machine.

These signs happen to be part of the decor for a fund raising event at my kid’s school, the theme is ‘surf’s up’ so we’re doing vintage beach and surf related decor.
You can use any font, I choose King Lava in keeping with the theme of the party.
How to make arrow signs:

1. Cut 1/2″ plywood to size (my arrows measure 5 1/2″w x 20-24″l).
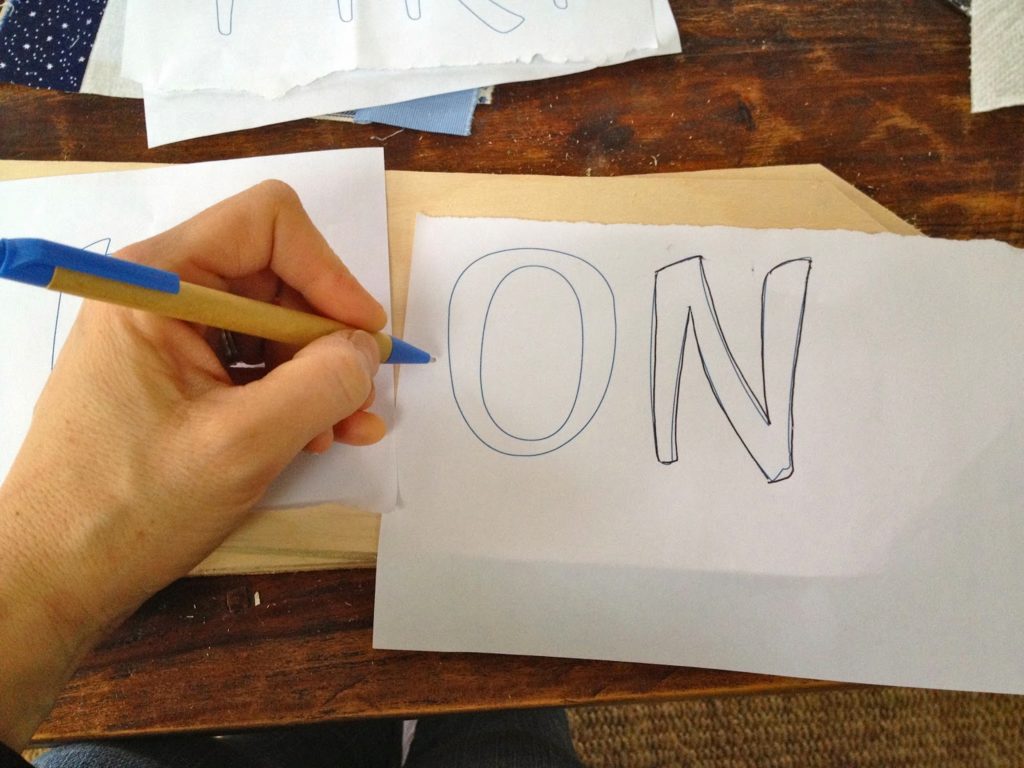
2. Print lettering.  I used King Luau font here at 250 point.
 Line up lettering on plywood and trace outline using a ballpoint pen.  Use heavy pressure to leave an indent in the wood.
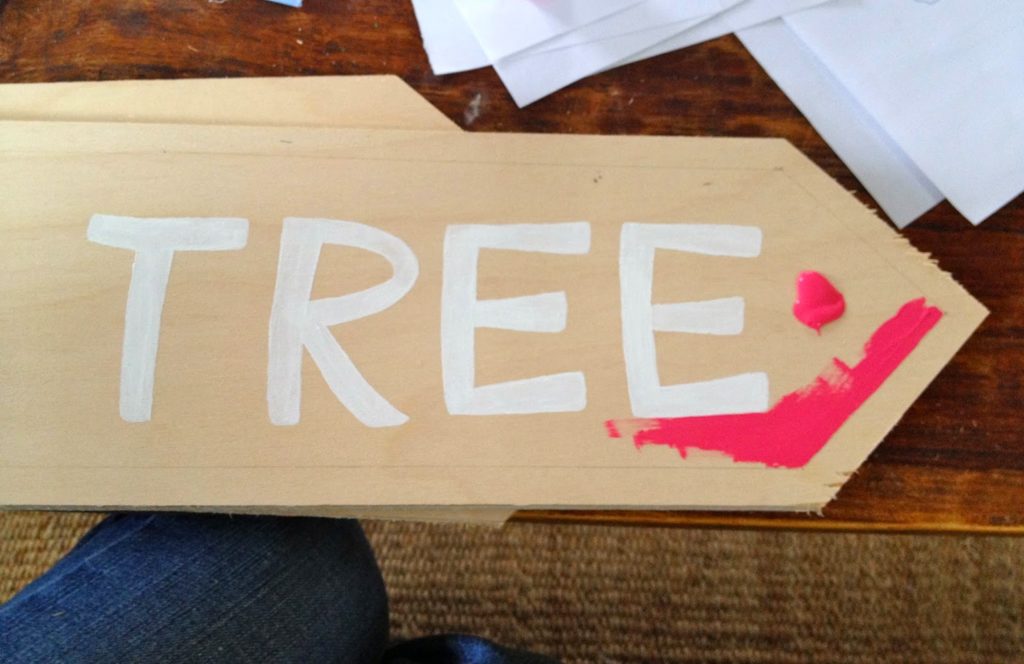
3. Paint on and inside the indent using white for the letters (use acrylic craft paint) then go around the letters and paint background color:
4. Add a thin stripe of white around edge of colored background:

5. Apply stain (I used Minwax golden oak):

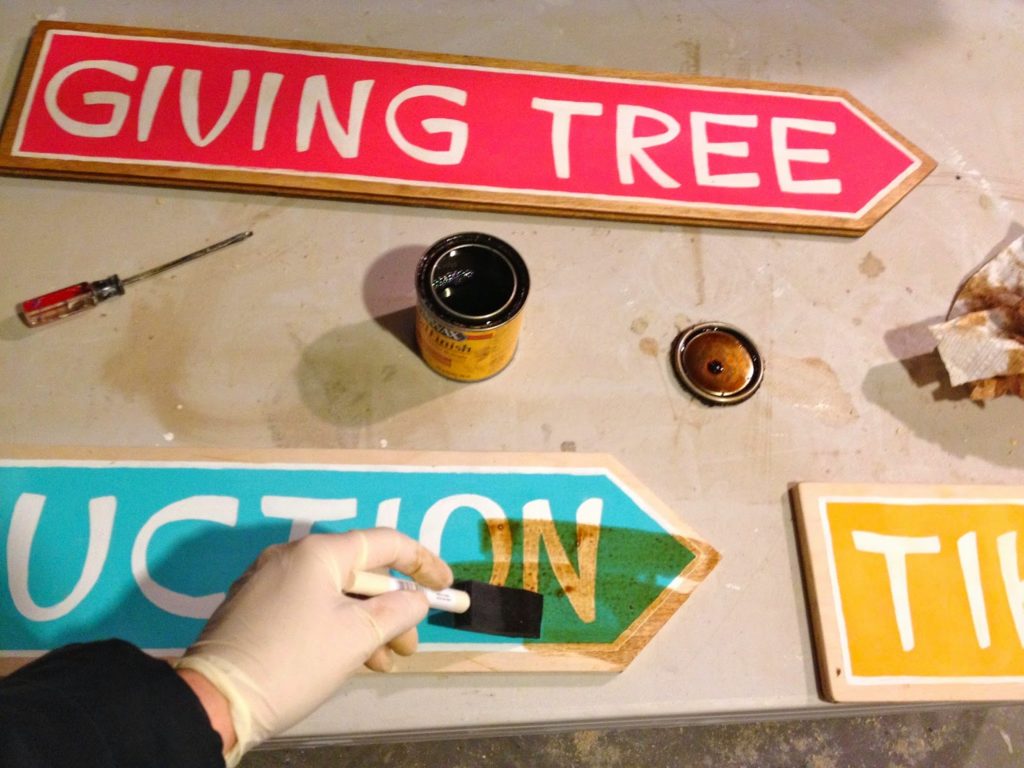
6. Seal with clear gloss spray poly:

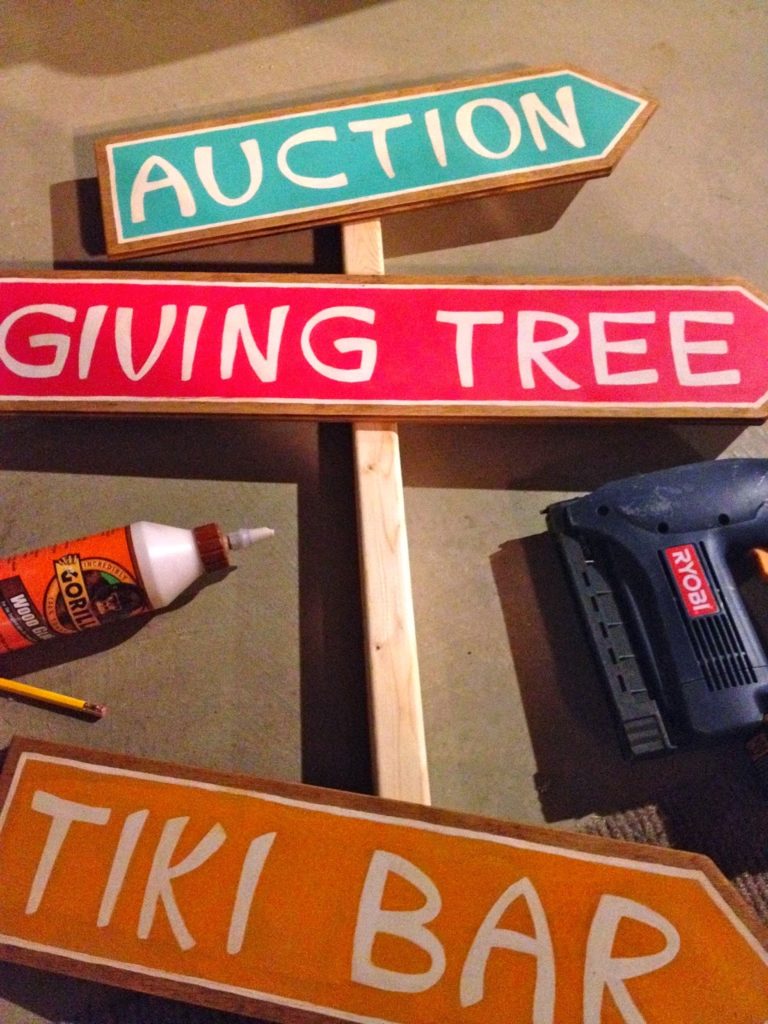
7. Secure to 2×2 furring strip post with glue and finish nails:

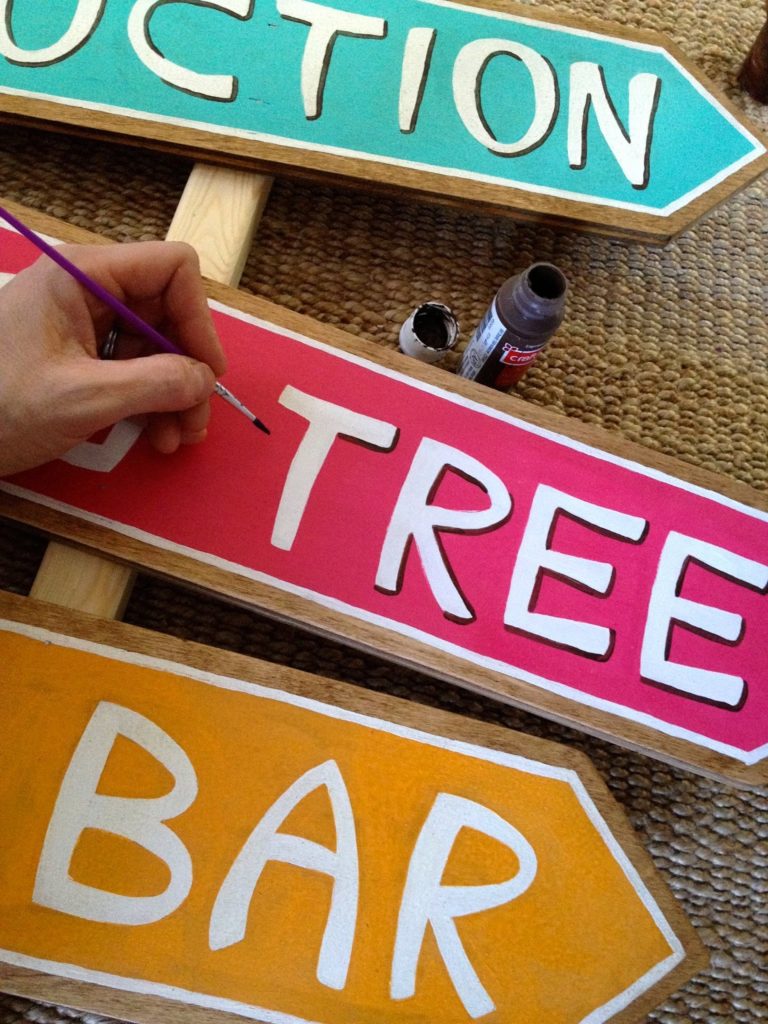
8. I decided the lettering needed more definition, using dark brown paint highlight each letter to the right and down:  (Consider doing this step before applying the poly seal.)


I’m linking up to:

The 36th Avenue

Nifty Thrity Sunday @ Nifty Thrifty Things
Inspiration Exchange @ City Farmhouse
SAS @ Funky Junk
That DIY Party @ The DIY Showoff
Tutorials & Tips Tuesday @ Home Stories A to Z
Share Awesomeness Thur @ The 36th Avenue
Pretty Things Thursday @ Scissors & Spatulas
Flaunt it Friday @ Chic on a Shoestring
Frugal Friday @ The Shabby Nest
Furniture Feature Friday @ Miss Mustard Seed
SAS @ Just a Girl
Remodelaholics Anonymous @ Remodelaholic
inspiration board @ Carolyns Homework
Sunday Showcase Party @ Under the Table & Dreaming

You may also like...

  • Self Standing Station SignsSelf Standing Station Signs
  • DIY Giant Marquee LettersDIY Giant Marquee Letters
  • DIY Danger Keep Out Skull & Crossbones SignDIY Danger Keep Out Skull & Crossbones Sign
  • “K” is for Kids Party Decor & Favors“K” is for Kids Party Decor & Favors
Share this post:

Filed Under: BUILD, DIY, HOME DECOR, HOME DECOR, PAINT, SCRAP WOOD5 Comments

Reader Interactions

Comments

  1. Inspire Me Heather says

    March 14, 2014 at 3:06 PM

    Super cute signs! No stencils?? Wow, you do nice lettering!

    Reply
  2. Our Pinteresting Family says

    March 14, 2014 at 3:56 PM

    You did a great job. It looks fantastic. Thanks for sharing this tip on how to create these.

    Reply
  3. Crystelle Boutique says

    March 14, 2014 at 5:41 PM

    SUCH cute signs! I just totally love those arrow tree posts thingies…. have been wanting to make one for a long time now. You beat me to it! Looking good, Jaime!!!

    TGIF !! 🙂
    x Crystelle
    Crystelle Boutique

    Reply
  4. Kimberly from 'bugaboo' says

    March 14, 2014 at 7:34 PM

    how cute! I'm a long time follower, but rarely post comments. Just wanted to let you know how often I've loved and pinned your creations!

    bugaboo, mini, mr & me

    Reply
  5. Schulz Family says

    March 14, 2014 at 8:21 PM

    that is very cool. Good Idea for a birthday party

    Reply

Leave a Reply Cancel reply

Your email address will not be published. Required fields are marked *

Primary Sidebar

Hi! I’m Jaime

Jaime Costiglio

Hello!

Thank you for stopping by.
Join me for lots of DIY.

Read more

Get new posts via email

Handbuilt Holiday: Gift Project Plans

handbuilt holiday gift project plans

Collection of DIY gift project plans to build.

The Home Depot Tool Prospective

THD Prospective

Tools to consider for the DIYer.

Archives

The Home Depot Logo
Copyright © 2023 Jaime Costiglio · Custom site by Moonsteam Design

Privacy Policy