• Home
  • Blog
  • About
  • Contact
    • Disclosure
    • Privacy Policy
  • SHOP
  • Widget area for main menu

    • Email
    • Facebook
    • Instagram
    • Pinterest
    • Twitter
    • YouTube
  • Skip to primary navigation
  • Skip to main content
  • Skip to primary sidebar

Jaime Costiglio

build - paint - sew

  • BUILD
    • BEDS
    • BENCHES
    • DESKS
    • DRESSERS
    • GAMES & TOYS
    • SCRAP WOOD
    • SHELVES
    • STORAGE
    • TABLES
  • TOOLS
  • PAINT
    • CRAFTS
    • FURNITURE
    • HOME DECOR
  • SEW
    • GIFTS
    • HOME DECOR
    • POUCHES
  • HANDBUILT HOLIDAY
    • 2021
    • 2019
    • 2018
    • 2017
    • 2016
    • 2015
    • 2014
    • 2013
  • GIFTS
    • BABIES
    • KIDS
    • FOR HER
    • FOR HIM
    • TEACHERS
    • WEDDINGS
  • SEASONAL
    • 4TH OF JULY
    • FALL
    • HALLOWEEN
    • CHRISTMAS
    • SUMMER
    • SPRING
    • ST. PATRICK’S DAY
    • THANKSGIVING
    • VALENTINE’S DAY
    • WINTER
  • SALTBOX PROJECT
    • BATHROOMS
    • DINING ROOM
    • EXTERIOR
    • FAMILY ROOM
    • FOYER / MUDROOM
    • KIDS BEDROOMS
    • KITCHEN
    • LIVING ROOM
    • MASTER BEDROOM
    • PLAYROOM
  • SCROLL SAW

DIY Wood Nativity Figures

December 5, 2013

Build: diy nativity figures
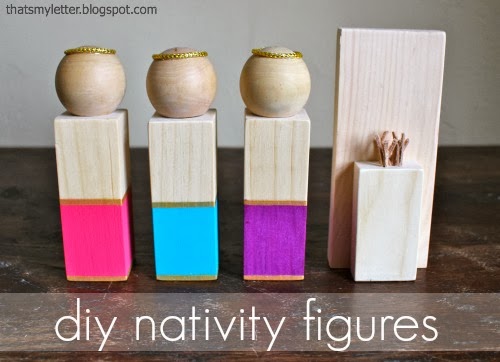
Build your own simple nativity figures using wood scraps.
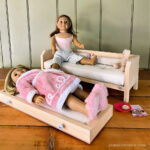
All the figures fit together in this diy manger to make a complete nativity scene that’s totally kid friendly.

I painted the base of each wood block to symbolize the different characters.
It’s simple and organic and perfect for kids to bang around.

The kings are royal colors with gold trim and a gold crown:
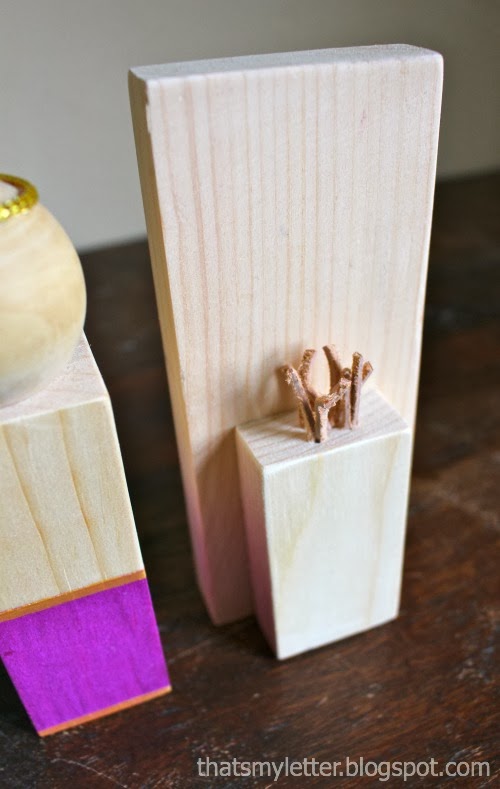
The camel could be any barn animal really, I added leather tufts to look like hair:

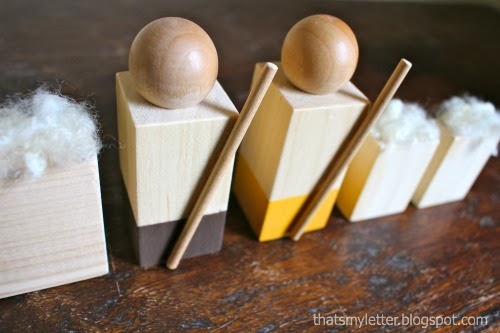
And the shepherds carry staffs to mind their furry sheep:

How to make wood nativity people:

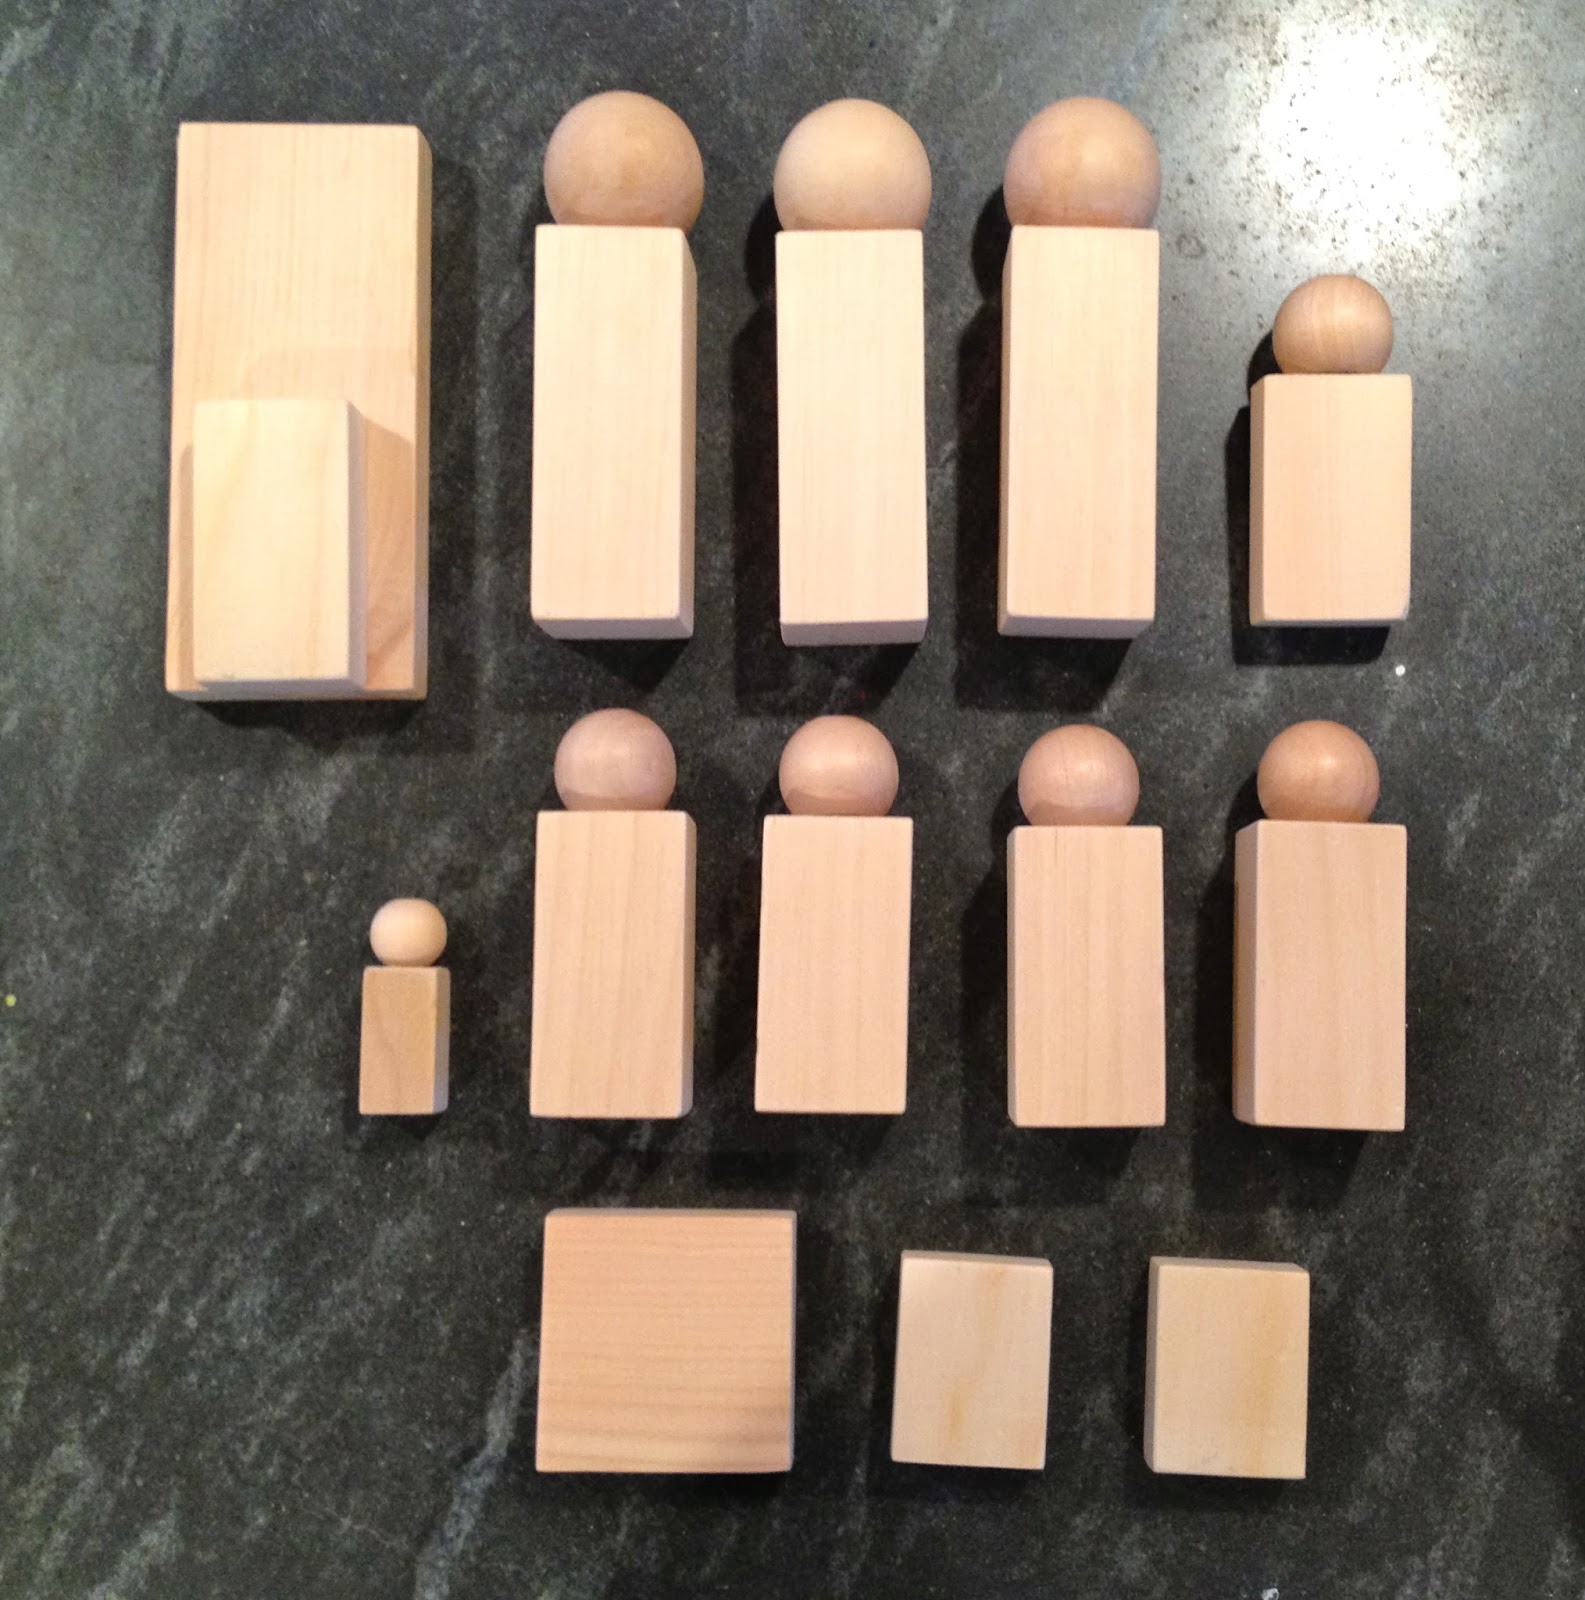
1. Cut all the pieces using scraps:
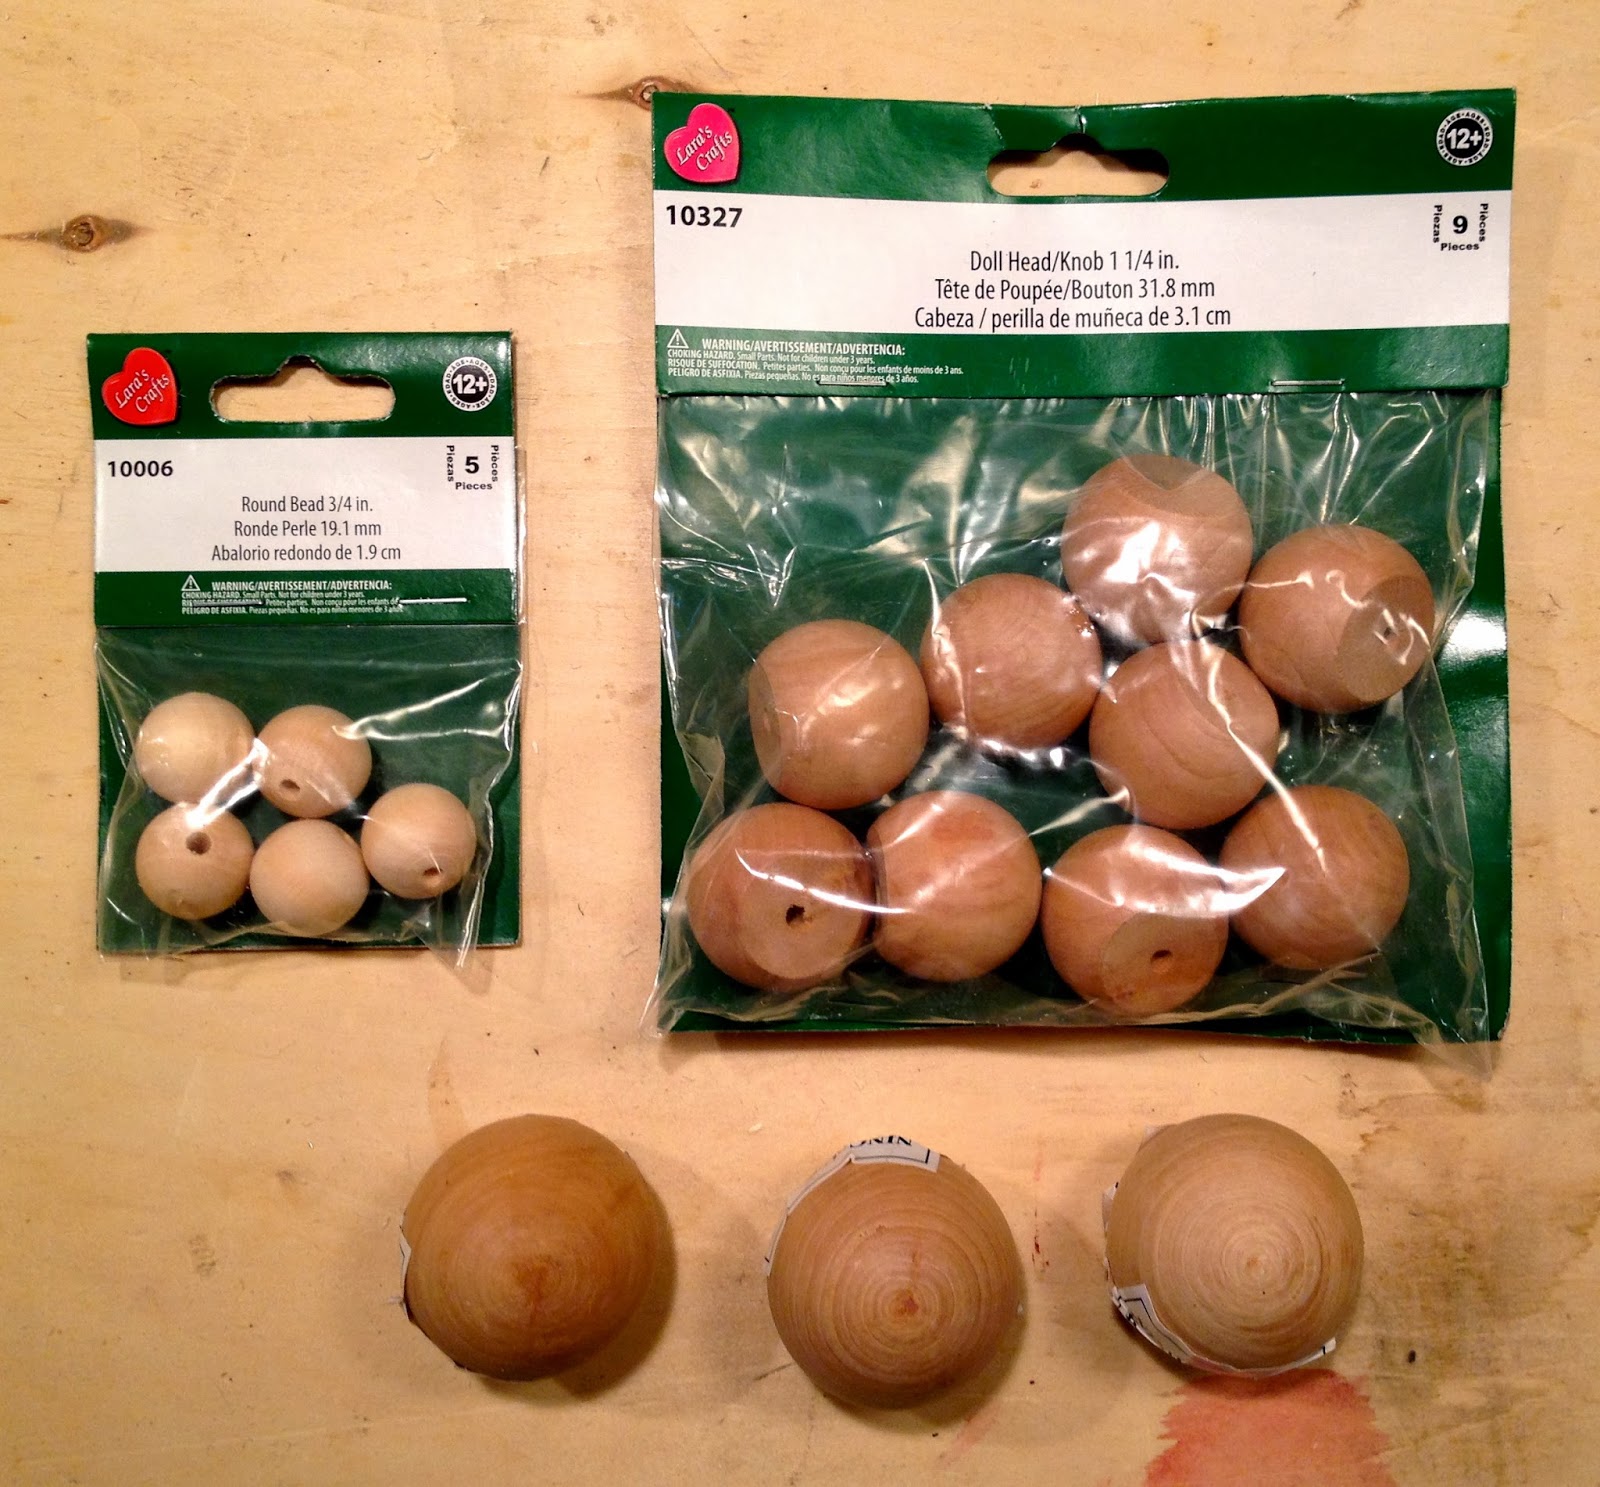
2. The heads are round doll heads:
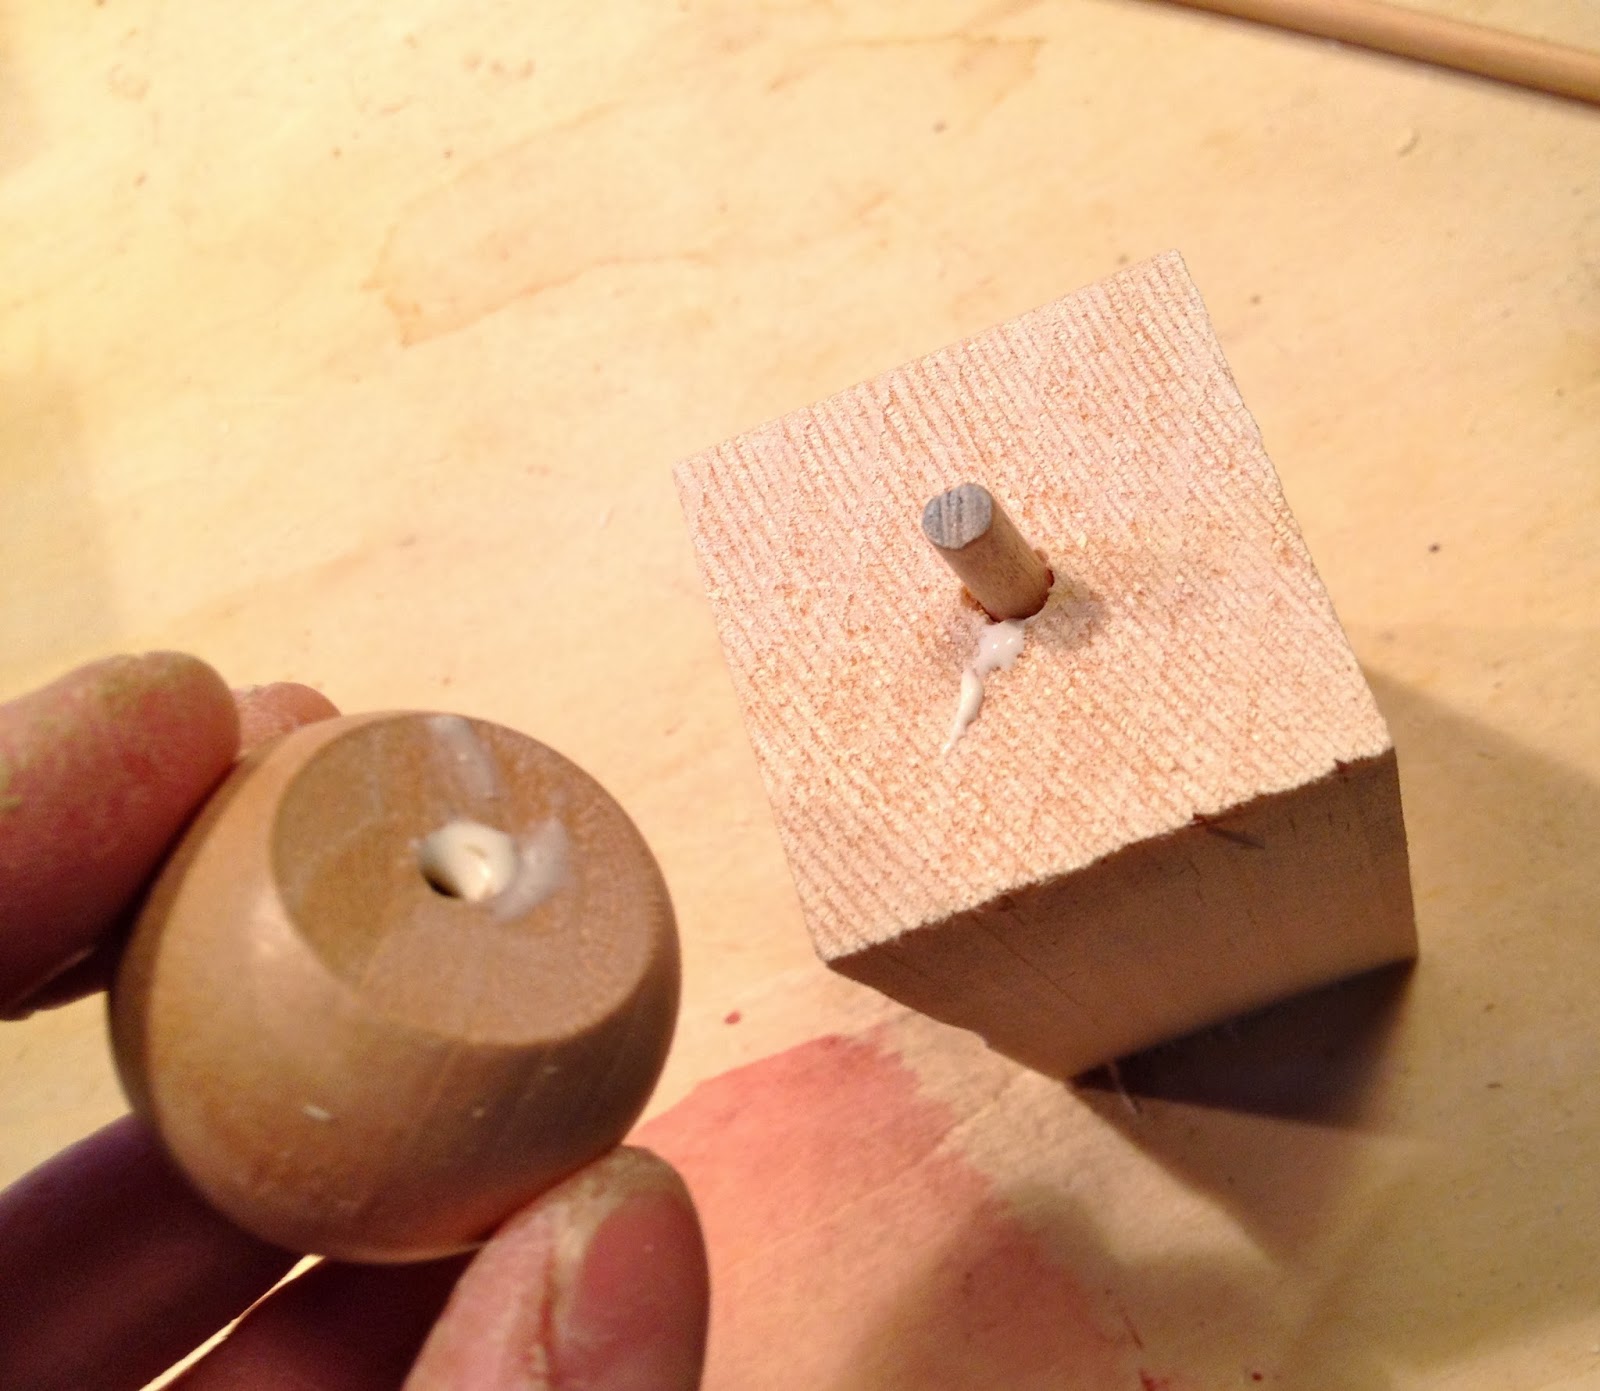
3. To attach the heads to the body using a small 3/16″ dowel cut at 1″ long:

Drill a hole into the center of the wood block, use wood glue and insert one end of dowel, apply glue to hole in doll head and insert onto dowel:

4. All figures complete.
(The camel is glued and nailed together from the back side.)

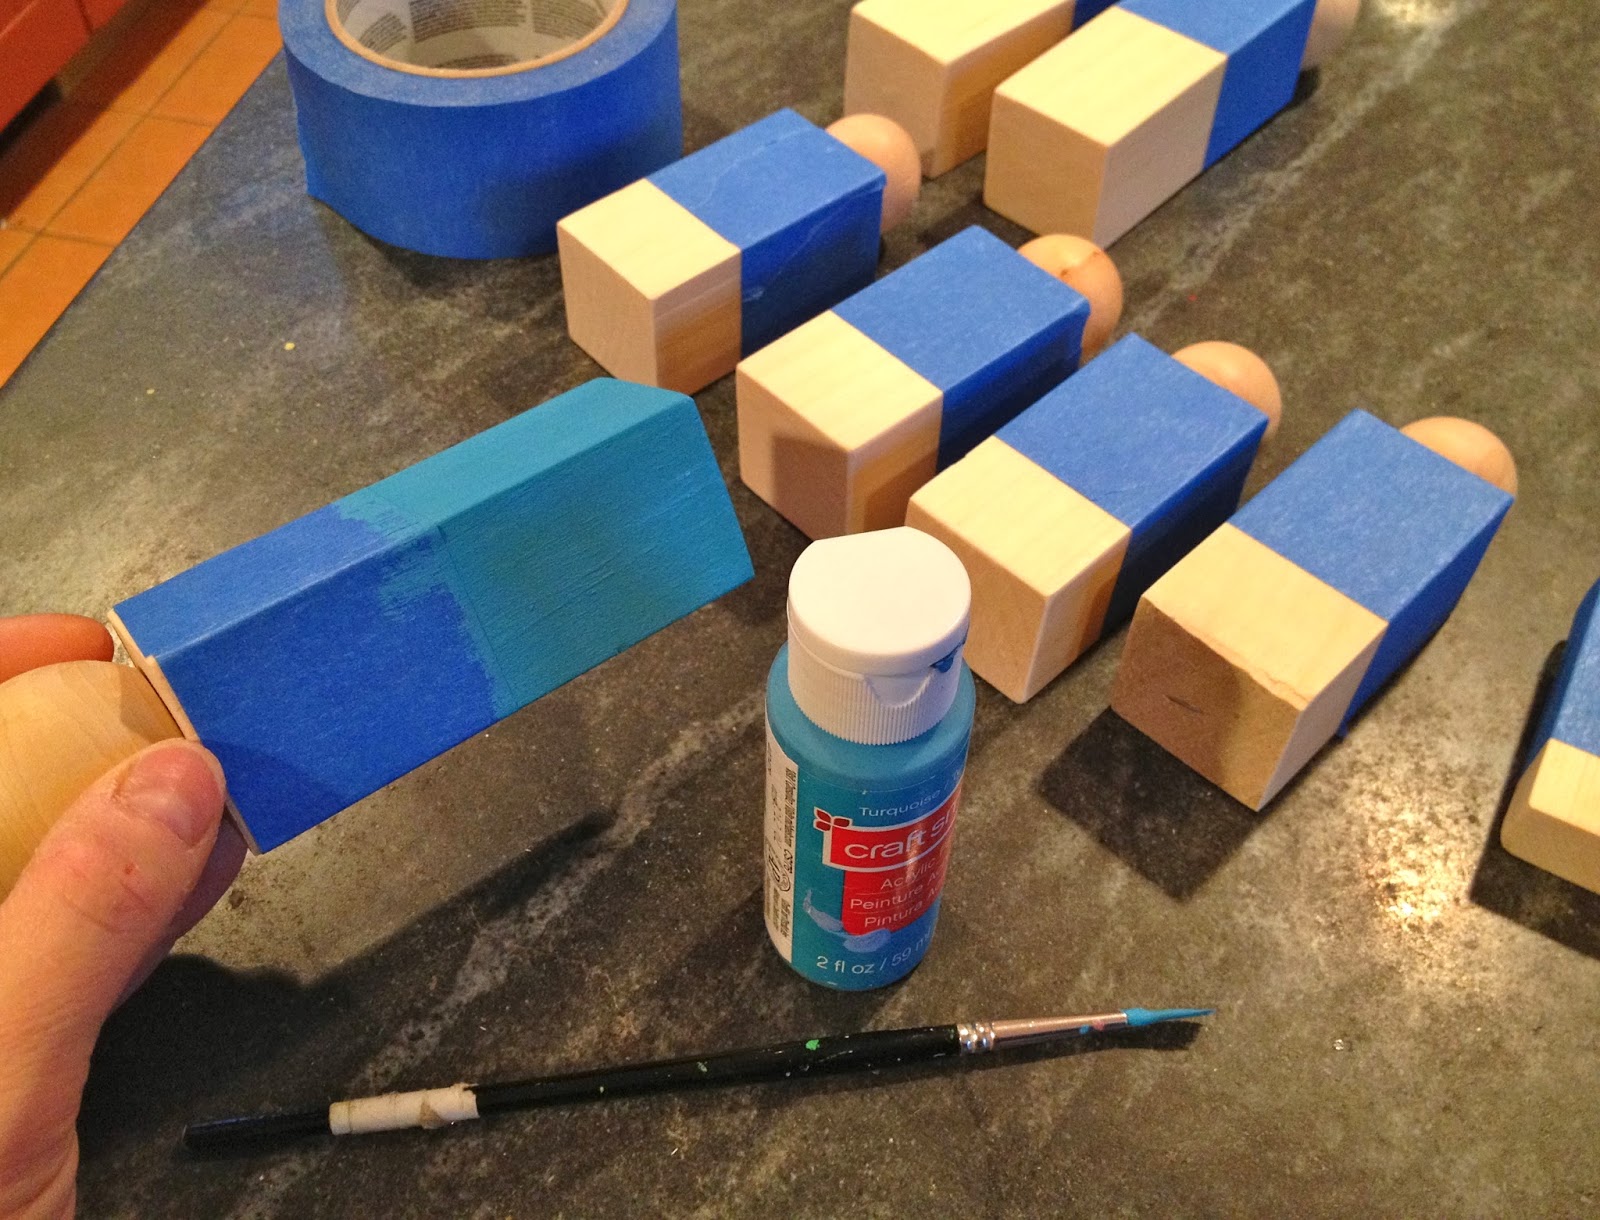
5. Use painters tape to mask off upper portion of body then paint lower portion using acrylic craft paint:

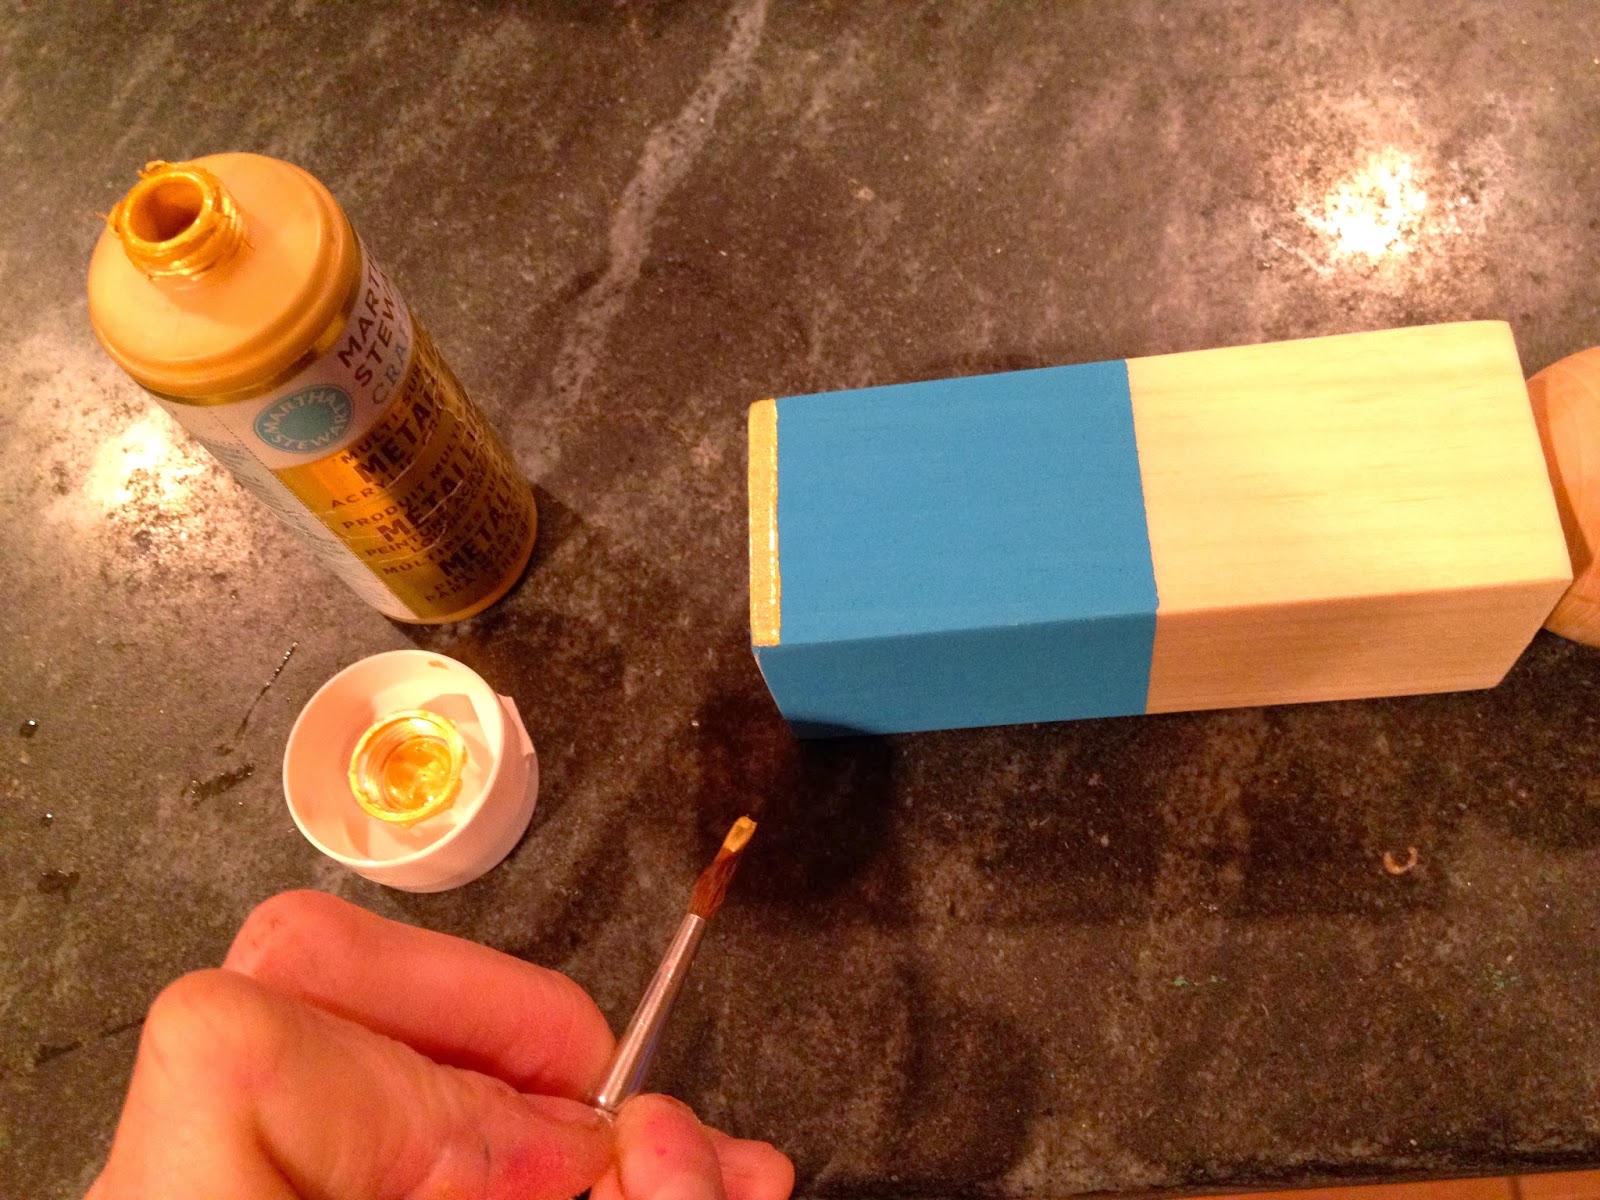
For the kings I added gold trim on both edges:

6. Seal the paint by spraying everything clear satin poly:
Then add gold crowns and angels gold ribbon halo.
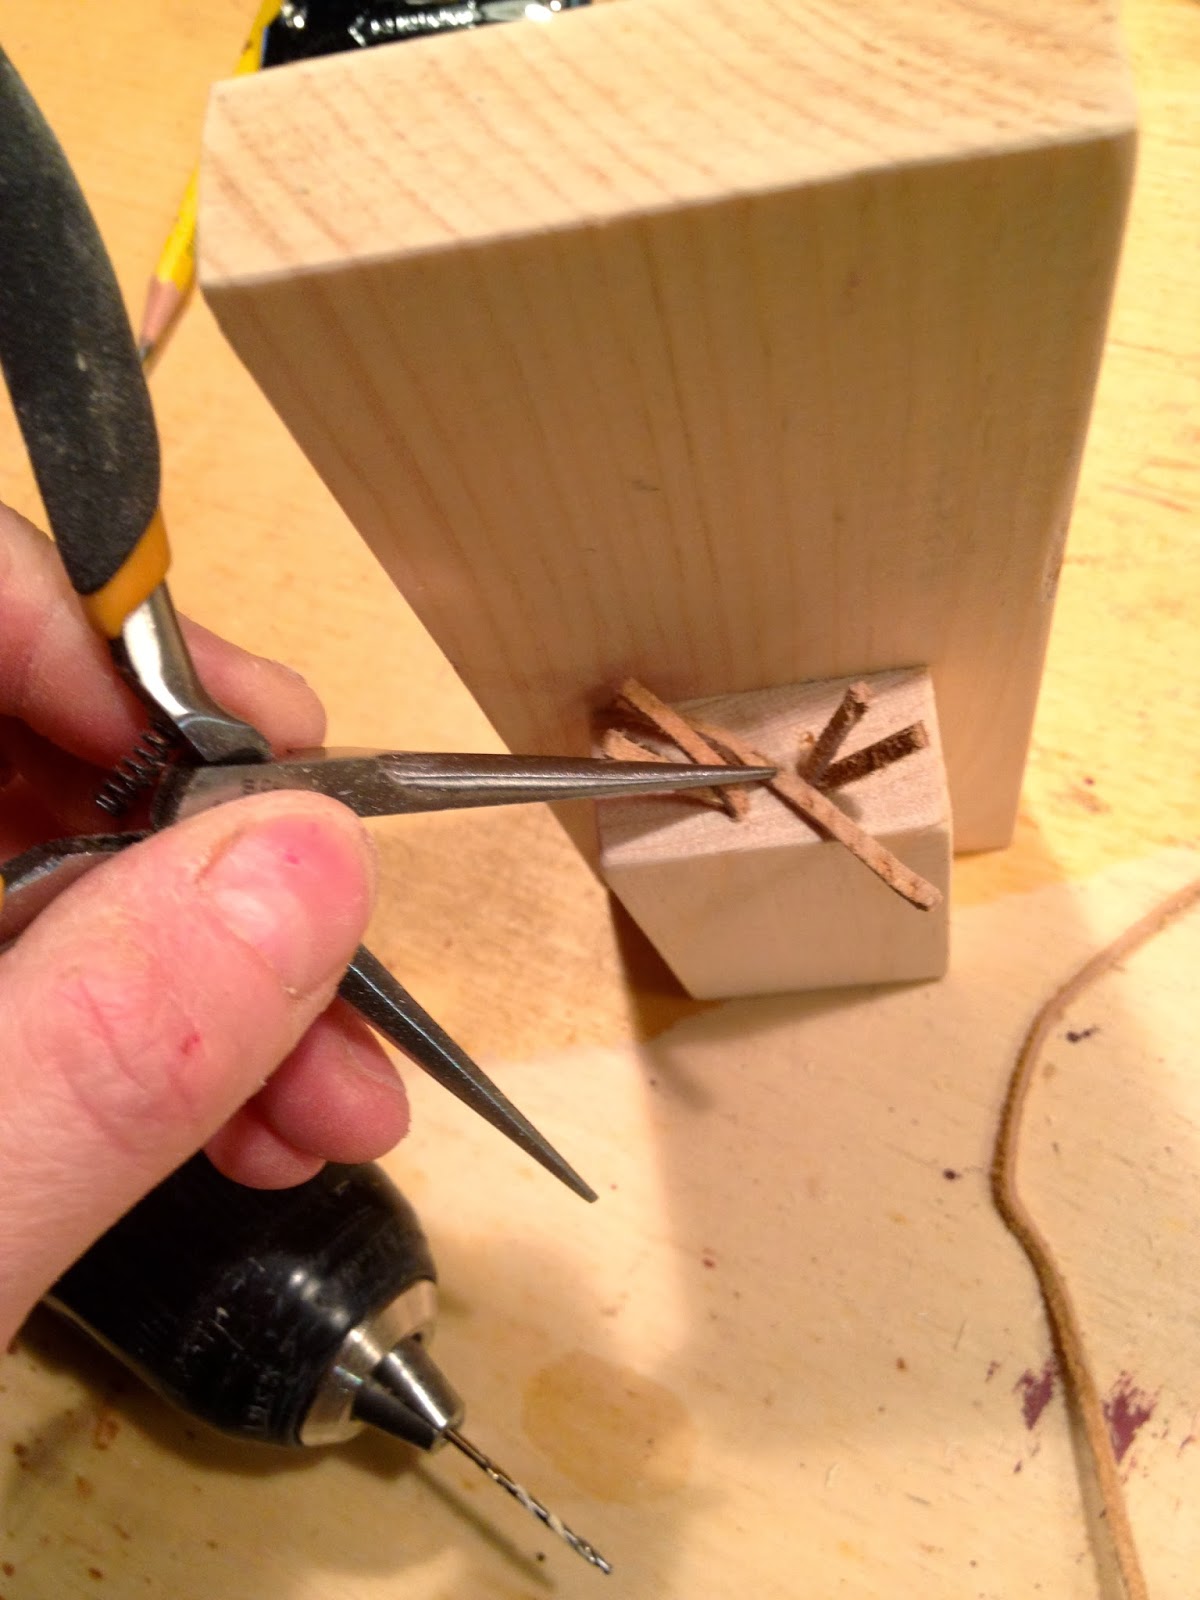
7. For the camel’s hair drill small holes into wood block:
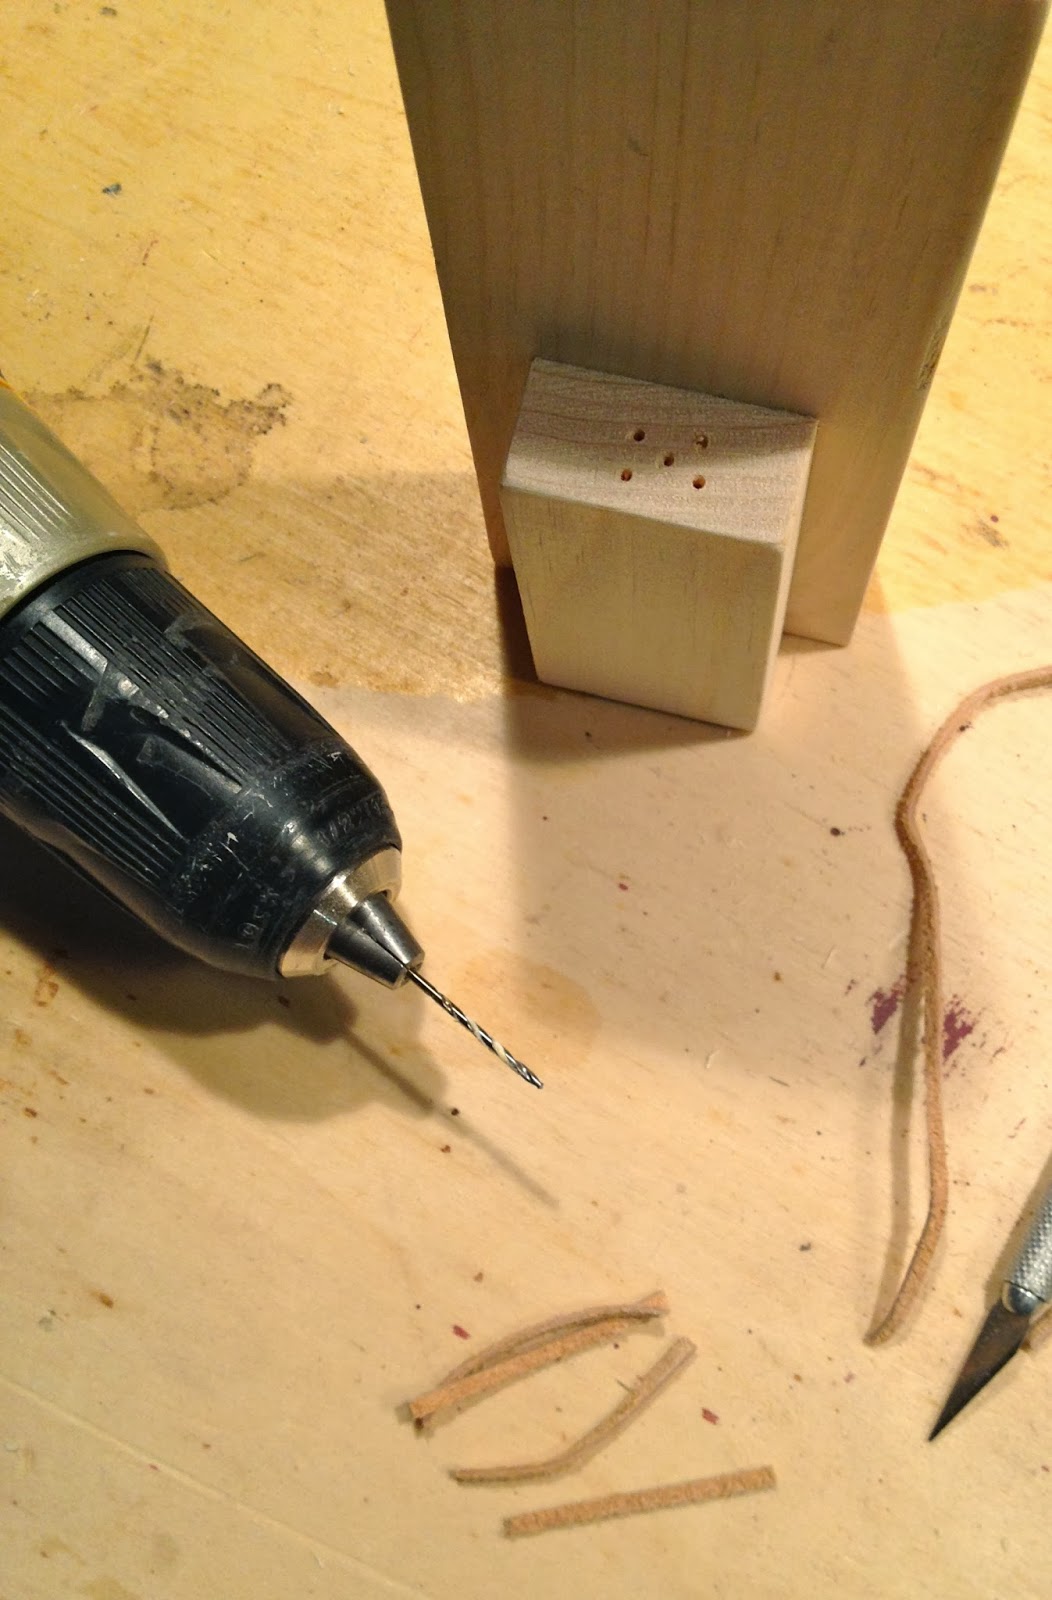
8. Cut 2″ pieces of leather cording.  
Place sharp object at middle of leather piece and shove down into hole:

The sheep’s wool is simply hot glued directly to the wood.

You may also like...

  • Cross Stitch Monogram Ornament PlacecardCross Stitch Monogram Ornament Placecard
  • DIY Charcuterie BoardDIY Charcuterie Board
  • DIY Kids Play BarnDIY Kids Play Barn
  • DIY 18″ Doll Trundle BedDIY 18″ Doll Trundle Bed
Share this post:

Filed Under: 2013, BUILD, CHRISTMAS, CRAFTS, CRAFTS, DIY, GAMES & TOYS, GIFTS, HANDBUILT HOLIDAY, KIDS, PAINT, SEASONAL3 Comments

Reader Interactions

Comments

  1. [email protected] says

    December 5, 2013 at 6:45 PM

    I have been proud of myself lately for using wood scraps to trim out signs…this has be blown away 😉
    So cute!

    Reply
  2. Jacquelyn says

    December 18, 2018 at 3:22 PM

    I have had this project on my list for the past 3 years and finally did it! It turned out wonderful. Thank you so much!

    Reply
    • Jaime says

      December 19, 2018 at 7:51 AM

      Love hearing this Jacquelyn, so glad you made the nativity figures (and manger too I hope!). My kids still love these wooden figures, so fun.

      Reply

Leave a Reply Cancel reply

Your email address will not be published. Required fields are marked *

Primary Sidebar

Hi! I’m Jaime

Jaime Costiglio

Hello!

Thank you for stopping by.
Join me for lots of DIY.

Read more

Get new posts via email

Handbuilt Holiday: Gift Project Plans

handbuilt holiday gift project plans

Collection of DIY gift project plans to build.

The Home Depot Tool Prospective

THD Prospective

Tools to consider for the DIYer.

Archives

The Home Depot Logo
Copyright © 2023 Jaime Costiglio · Custom site by Moonsteam Design

Privacy Policy