• Home
  • Blog
  • About
  • Contact
    • Disclosure
    • Privacy Policy
  • SHOP
  • Widget area for main menu

    • Email
    • Facebook
    • Instagram
    • Pinterest
    • Twitter
    • YouTube
  • Skip to primary navigation
  • Skip to main content
  • Skip to primary sidebar

Jaime Costiglio

build - paint - sew

  • BUILD
    • BEDS
    • BENCHES
    • DESKS
    • DRESSERS
    • GAMES & TOYS
    • SCRAP WOOD
    • SHELVES
    • STORAGE
    • TABLES
  • TOOLS
  • PAINT
    • CRAFTS
    • FURNITURE
    • HOME DECOR
  • SEW
    • GIFTS
    • HOME DECOR
    • POUCHES
  • HANDBUILT HOLIDAY
    • 2021
    • 2019
    • 2018
    • 2017
    • 2016
    • 2015
    • 2014
    • 2013
  • GIFTS
    • BABIES
    • KIDS
    • FOR HER
    • FOR HIM
    • TEACHERS
    • WEDDINGS
  • SEASONAL
    • 4TH OF JULY
    • FALL
    • HALLOWEEN
    • CHRISTMAS
    • SUMMER
    • SPRING
    • ST. PATRICK’S DAY
    • THANKSGIVING
    • VALENTINE’S DAY
    • WINTER
  • SALTBOX PROJECT
    • BATHROOMS
    • DINING ROOM
    • EXTERIOR
    • FAMILY ROOM
    • FOYER / MUDROOM
    • KIDS BEDROOMS
    • KITCHEN
    • LIVING ROOM
    • MASTER BEDROOM
    • PLAYROOM
  • SCROLL SAW

“M” is for Marriage Plaque #2

June 10, 2012

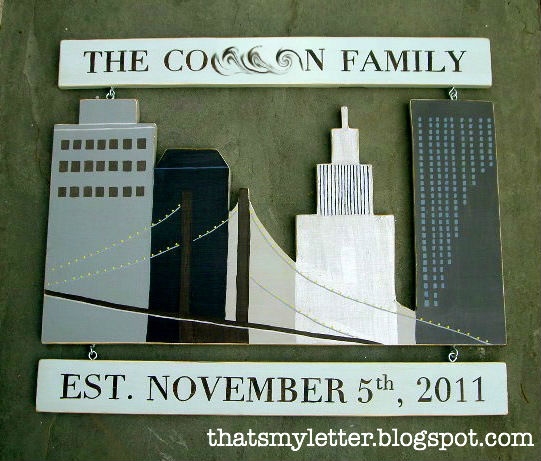
Paint: NYC marriage plaque

A bridal shower gift for an engaged couple getting married on New Year’s Eve.  I cut the New York City skyline from 1/2″ plywood and painted the buildings and Brooklyn Bridge in bright colors.
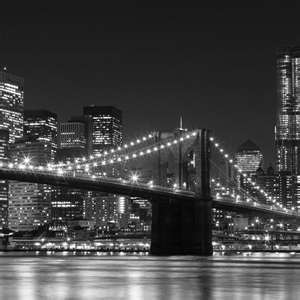
I used lots of google images, like this one below, as my inspiration:

Once the buildings were painted I added the personalization with the new(for the bride) family name and their wedding date:

I had previously made the same style plaque for the brother who got married last fall.
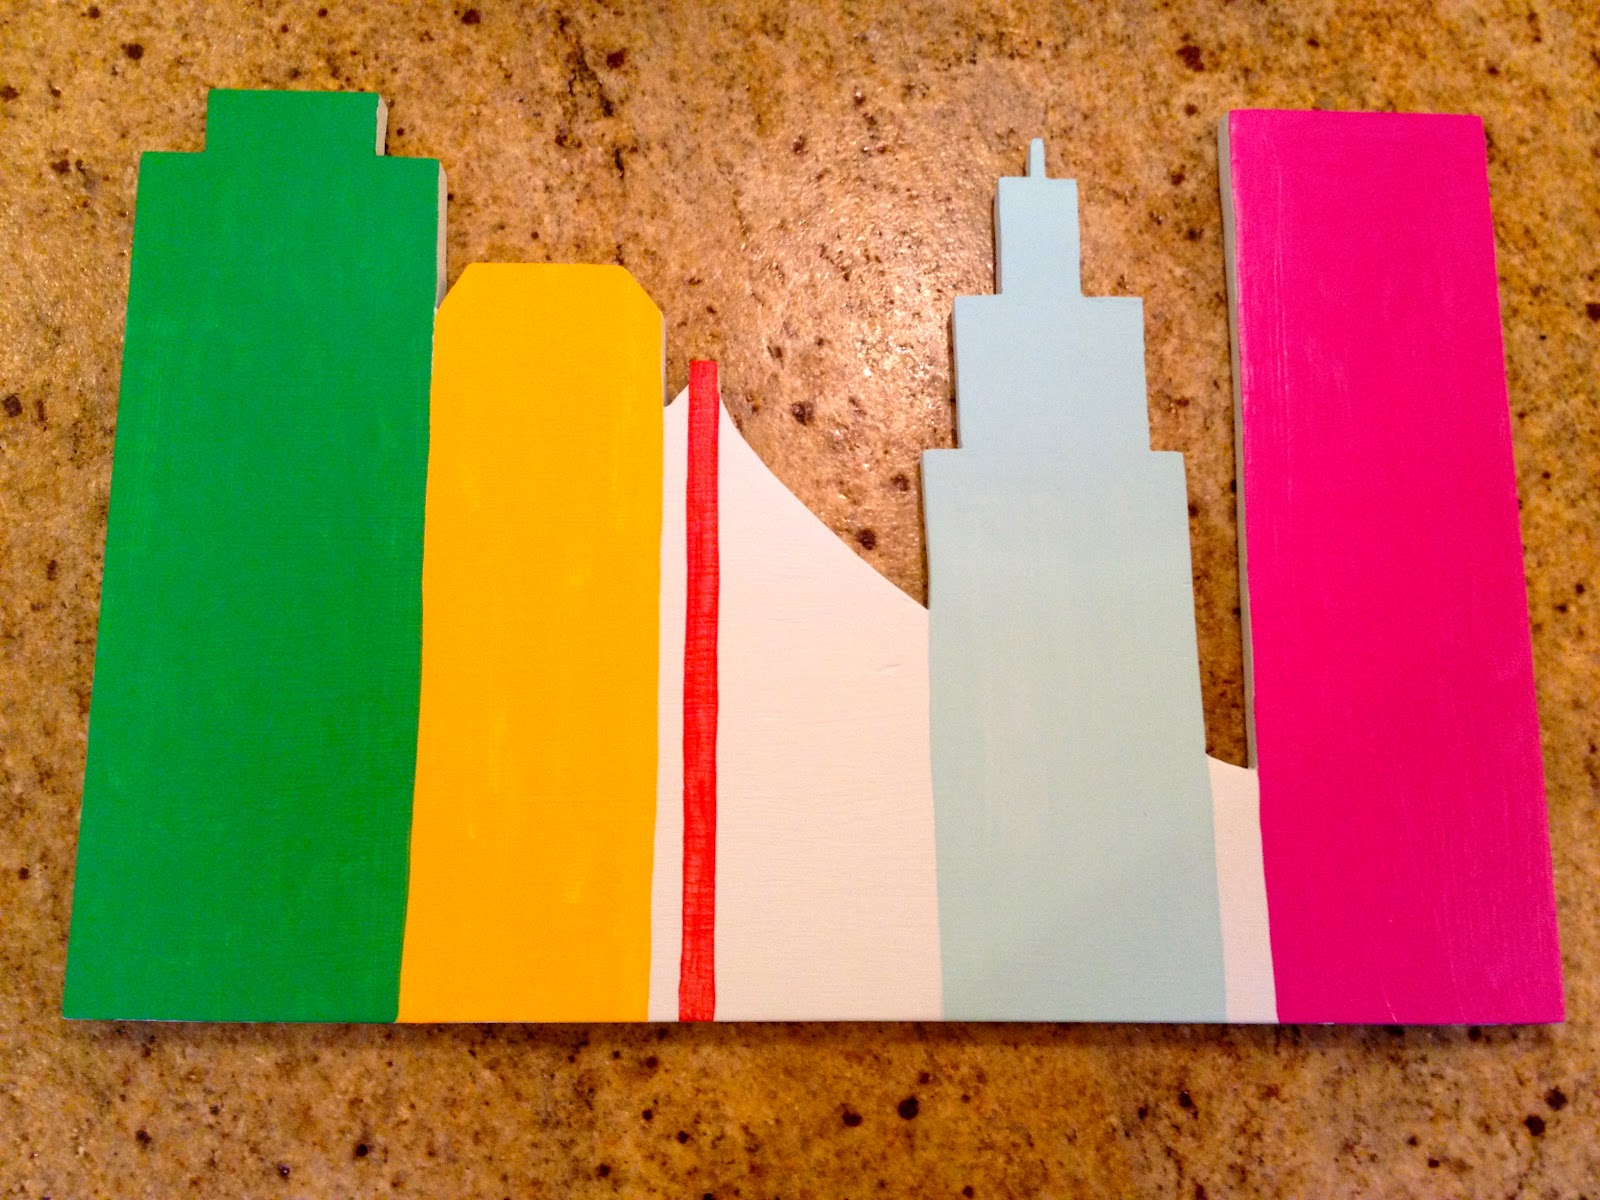
This time around the only request was to ‘change the colrs’ and I had so much fun doing so.

Here’s how I made the plaque:

1. Cut skyline from 18″w x 12″h piece of 1/2″plywood using jigsaw:
2. Prime, paint solid background color then paint buildings:

3. Cut personalization pieces from 1/2″ plywood at 18″ x 2″.
Prime and paint.
Print out lettering to fit then trace with ballpoint pen:

4. Paint inside the lines and add decorative details to buildings.
5. Attach personalization pieces to building with screw eyes:

I’m linking up to:
Whatcha Got Weekend @ Lolly Jane
SAS @ Funky Junk
Sister Sunday @ Sisters of the Wild West
Just Something I Whipped Up @ The Girl Creative
DIY Fall Festival @ The DIY Showoff
Made by You Monday @ Skip to My Lou
Nifty Thrifty @ Coastal Charm
Tuesday Treasures @ My Uncommon Slice of Suburbia
Tutorials & Tips Tuesday @ Home Stories A to Z
Good Life @ A Beach Cottage
Transformation Thursday @ The Shabby Creek Cottage
Strut Your Stuff @ Somewhat Simple
Share Awesomeness Thur @ The 36th Avenue
Flaunt it Friday @ Chic on a Shoestring
Frugal Friday @ The Shabby Nest
SAS @ Just a Girl
Feathered Nest @ French Country Cottage
Remodelaholics Anonymous @ Remodelaholic
inspiration board @ Carolyns Homework

You may also like...

  • “C” is for Chore Chart“C” is for Chore Chart
  • “H” is for Historical Plaque“H” is for Historical Plaque
  • “O” is for Optimistic“O” is for Optimistic
  • “S” is for Silent Night“S” is for Silent Night
Share this post:

Filed Under: DIY, GIFTS, HOME DECOR, PAINT, WEDDINGS1 Comment

Reader Interactions

Comments

  1. Vickie @ Ranger 911 says

    June 10, 2012 at 1:50 AM

    That's a very fun personalized gift you've created! Nice job designing the piece!

    Reply

Leave a Reply Cancel reply

Your email address will not be published. Required fields are marked *

Primary Sidebar

Hi! I’m Jaime

Jaime Costiglio

Hello!

Thank you for stopping by.
Join me for lots of DIY.

Read more

Get new posts via email

Handbuilt Holiday: Gift Project Plans

handbuilt holiday gift project plans

Collection of DIY gift project plans to build.

The Home Depot Tool Prospective

THD Prospective

Tools to consider for the DIYer.

Archives

The Home Depot Logo
Copyright © 2026 Jaime Costiglio · Custom site by Moonsteam Design

Privacy Policy