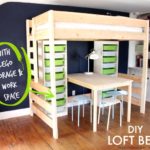
Build: giant lego table
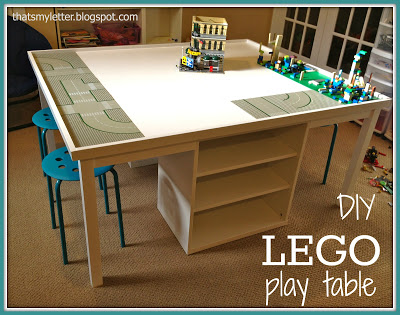
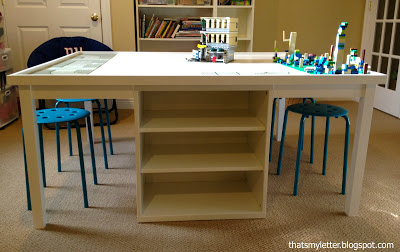

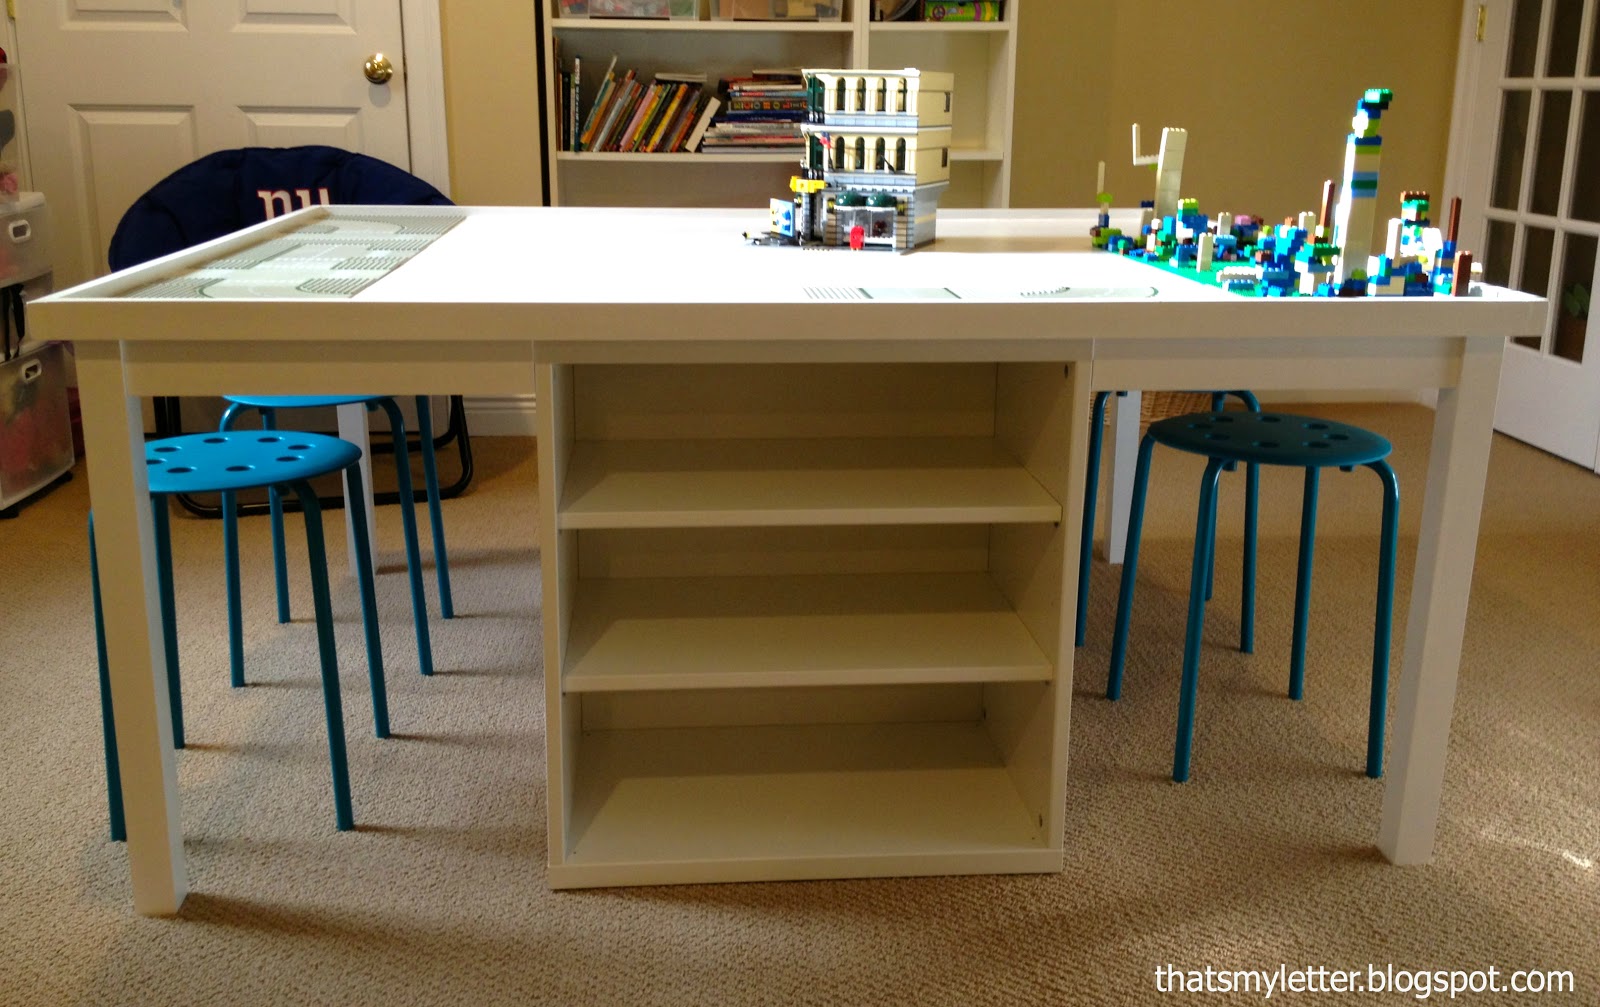
A giant lego play table space designed for storage and seating area:

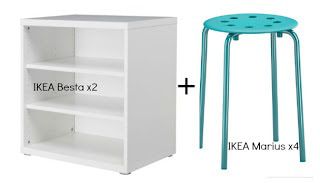
After multiple sketches and ideas my friend’s husband came up with a beautifully executed layout incorporating 2 IKEA Besta shelves and 4 IKEA Marius stools:

I simply executed his sketch up and built a great big lego playspace.
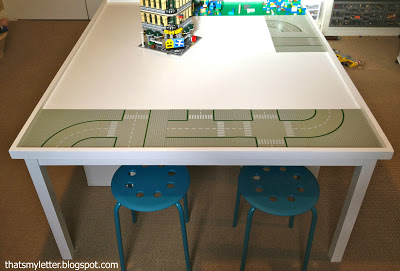
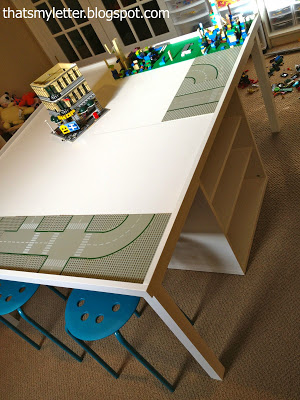
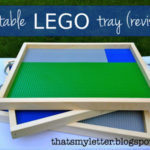
The table top lego play area is 50″ x 60″ (actually a tiny bit bigger) to hold multiple baseplates.
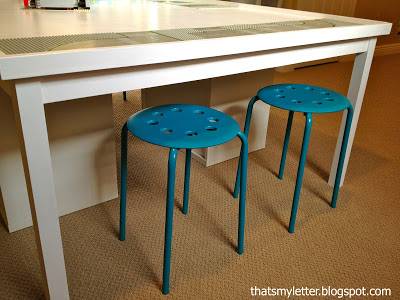
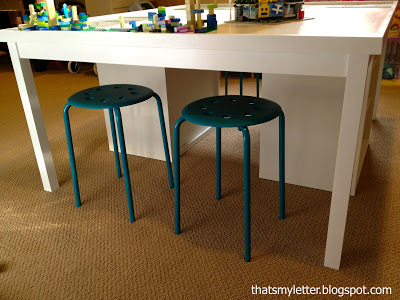
Two stools on either end:


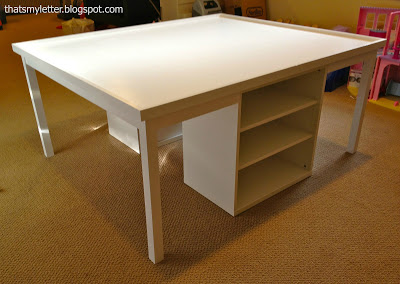
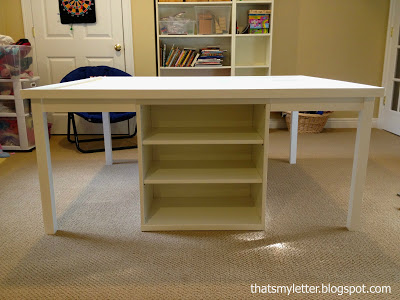
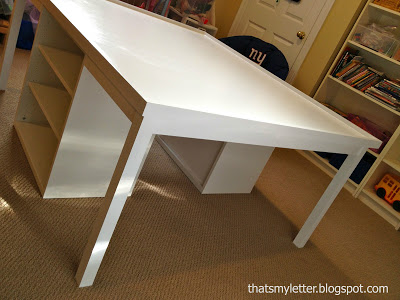
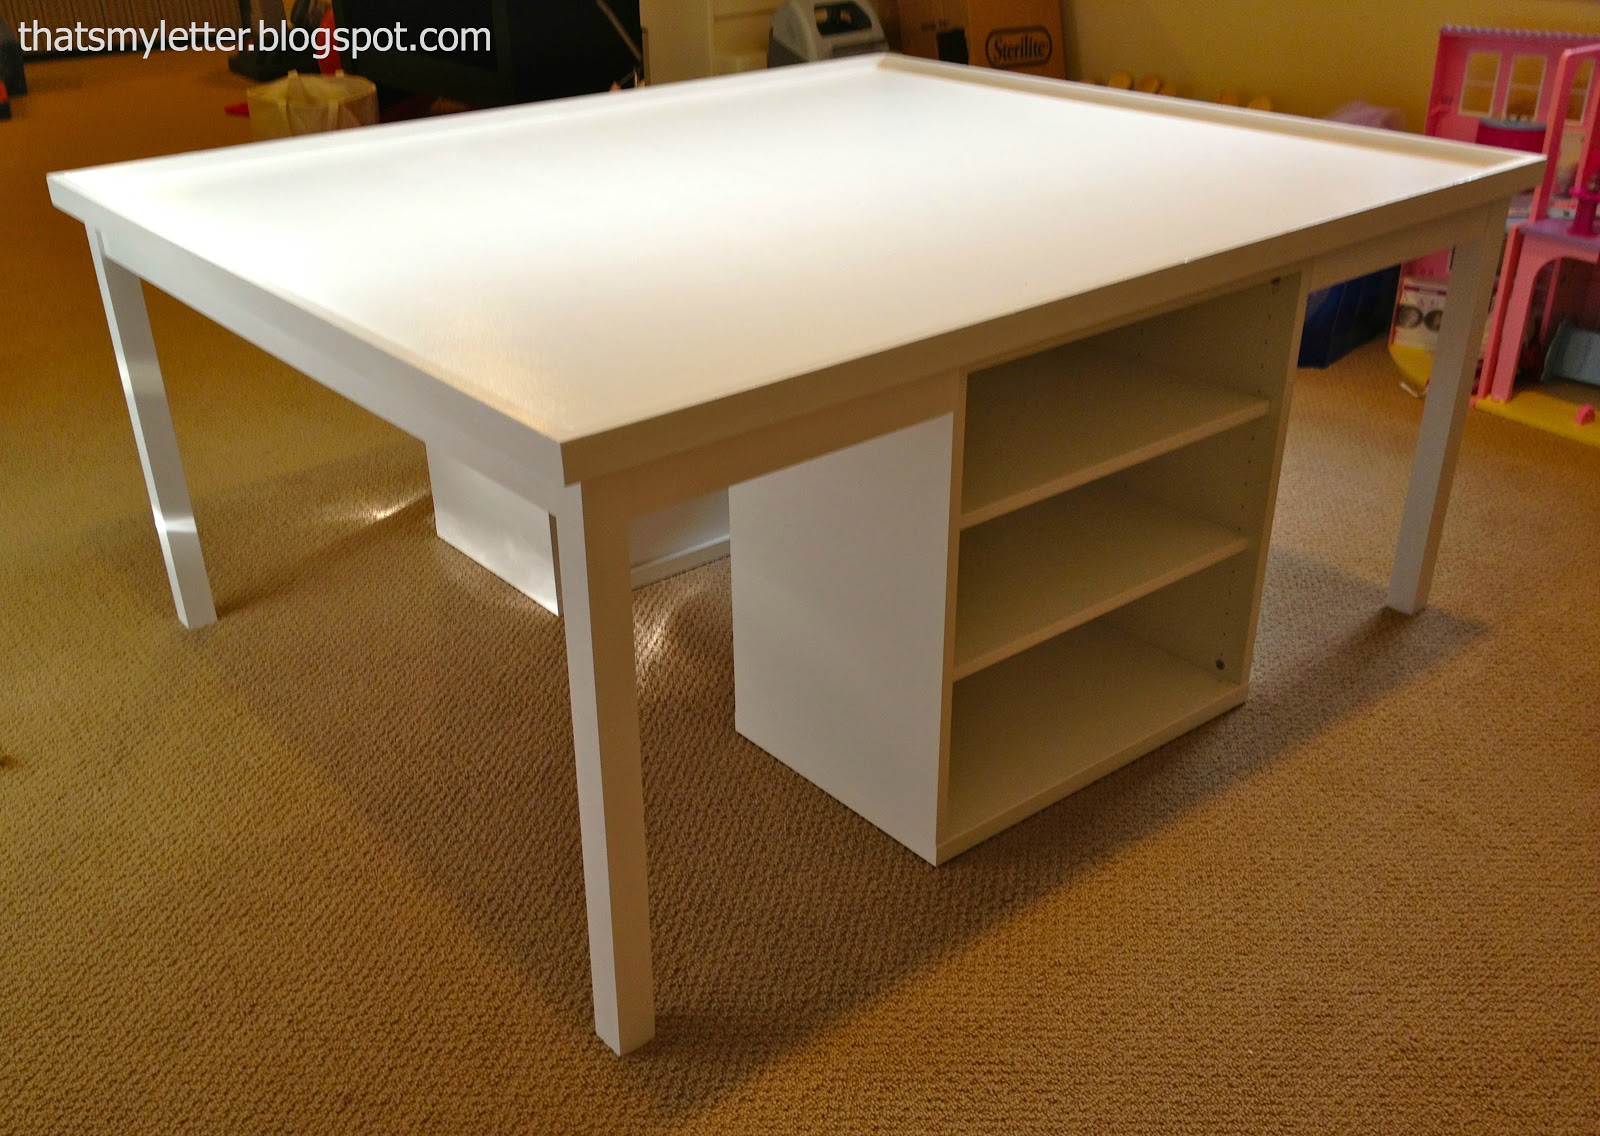
The Besta shelves are smack in the middle and help support the table along with four 1 3/4″ square legs.
We trimmed the table top with 1×2 to form a lip edge so no legos fall off the table:

And the 1×3 aprons provide support, provide a place to screw the legs into and hide the support frame underneath:


Here’s how to build the lego table:
1. Cut 2 3/4″ plywood @ 30 1/8″ x 50 1/4″.
Make pocket holes on all 4 sides and secure the middle seam together:
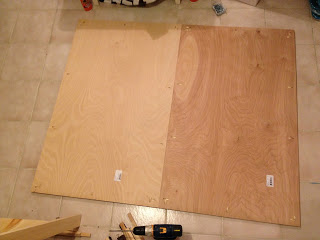

1. Cut 2 3/4″ plywood @ 30 1/8″ x 50 1/4″.
Make pocket holes on all 4 sides and secure the middle seam together:

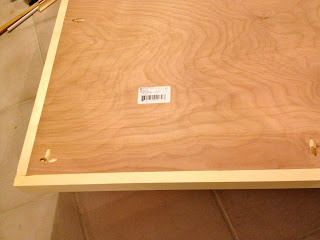
2. Add 1×2 lip edge from bottom using pocket holes:
(You must do this first since these pocket holes will be blocked by the base support frame.)

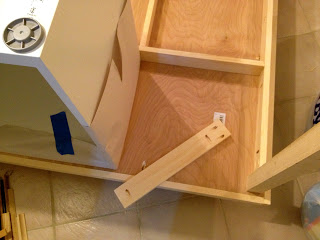
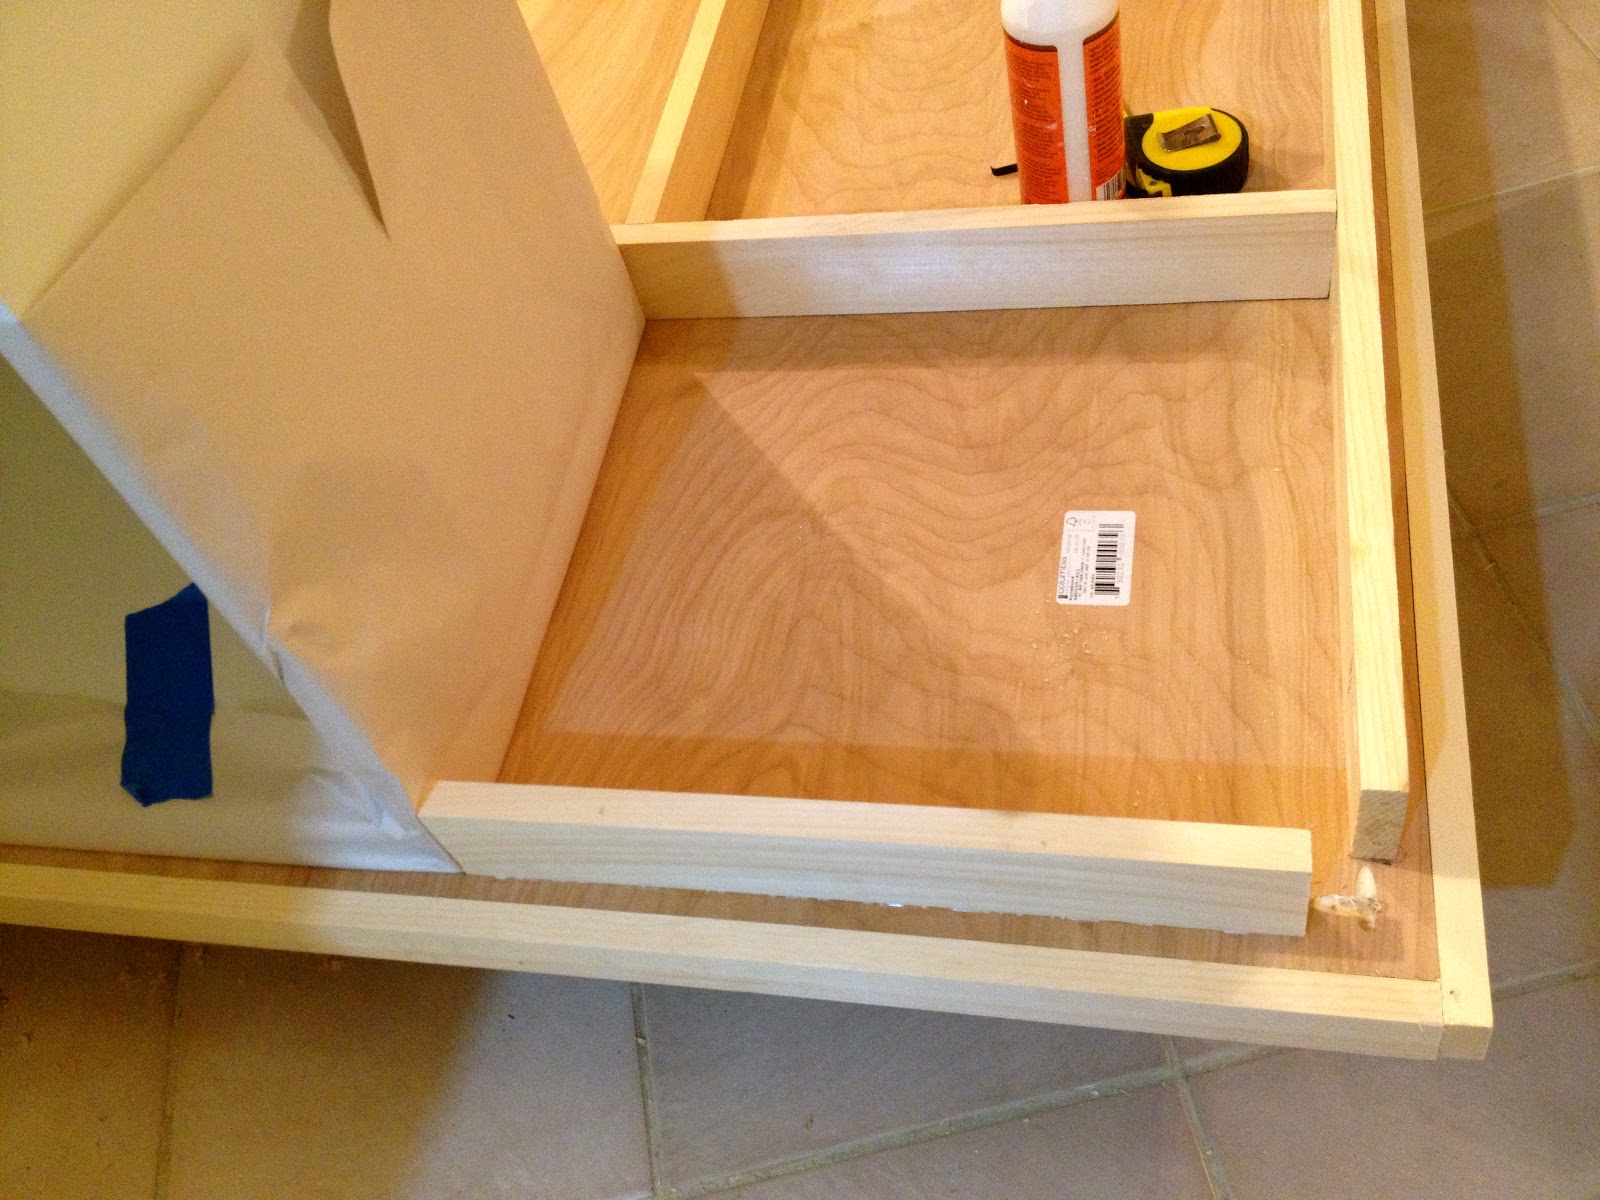
3. Build base support frame separate using 1x3s then secure it to the plywood top with pocket holes in the 1x3s:

4. Place the Besta shelf in position to be sure the 1×3 apron piece will fit with the leg in position (but not attached):

Thankfully mine fit but now’s your chance to trim the apron if it’s too snug.
Then secure the apron with pocket holes:
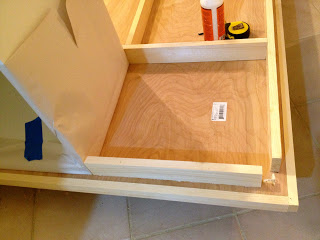
5. All built. DO NOT ATTACH the legs until the table is in place.
In the picture below the legs are NOT attached, just in place:
In the picture below the legs are NOT attached, just in place:

6. Prime Zinsser oil based one coat.
Paint 3 coats high gloss white enamel.
that is awesome!!!!! wow- sawyer would love it!
Looks fantastic and fun!
KC
looks like you painted your stools too, which look Fantastic!
Seriously, will you ever stop amazing me – unbelievable! You are so crazy talented. Take care, Laura
Very cool project. I know a lot of kids who would love having this around.
This is AMAZING! I'm e-mailing this to my husband right now! haha
We just bought our two boys a train set, but wanted something multipurpose instead of just a train table. and I think this would be perfect!
I would LOVE it if you would share this over on my weekly Friday link-up.
http://www.parloandlogi.com/
This is great – just need a kids room big enough to fit it in!
Wowza!!! That is amazing. My kiddos are too young for it right now, but in 5 years, I can definitely see us making a table like this. Your kids are very lucky!
Looks great! My four year old would LOVE this!
Amazing! This will be perfect in our new family room. We've been trying to figure out how to build a Lego/craft/puzzle/everything else table. Great instructions, thanks for sharing!
Amazing! This will be perfect in our new family room. We've been trying to figure out how to build a Lego/craft/puzzle/everything else table. Great instructions, thanks for sharing!
This is amazing! We're almost done with finishing our basement and could really use one of these down there in the kid's play area! Thanks for the how to!
Great project!! Do you have plans for this?
1. What is the length of the legs?
2. Did you sand prior to and after primer?
3. What type of paint did you use on the Ikea stools?
4. What is the model number of the Ikea Besta shelves?
This is perfect for our needs. Can I get the plans for this?
Thanks Marnae, the only plans I have for this project are the photos and descriptions in the post.
Sorry if this is a dumb question but 3/4” ply is expensive and comes in 48×96” pieces. Your design requires two pieces, why not make it 48×60 and only require one? It would also likely be stronger than two pieces.
Hi John, This lego play table was a custom size for a friends basement play space. You can make it any size you need.