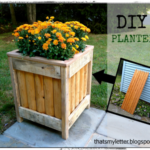
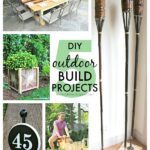
Building pieces for your outdoor space provides many opportunities for problem solving. Today’s DIY vertical planter does just that, it is the answer to a few minor issues by providing vertical interest and creating a divider or screen. So let’s build this vertical planter!

A DIY tutorial to build a vertical planter. Create a self standing planter that adds visual interest and makes a great screen with tons of space for plants.
I’m sharing my version of the vertical planter we’ll be building at The Home Depot DIY Workshop this Saturday, April 11th, 2015 at 10am. The workshop team and I will be demonstrating how to build a vertical planter and we want you to join us.


I’ll be at the New Rochelle Home Depot #1245:
The Home Depot
55 Weyman Avenue
New Rochelle, NY 10805

This DIY Workshop is being held throughout the country at many Home Depot store locations. Click here and enter your zip code or city and state to find a workshop location nearest to you.
The vertical planter for the workshop was designed by Ben Uyeda from Homemade Modern. But I made my own custom version to fit my space and I’m sharing the plans down below.

As a result my version is self standing, requires no fence and made from cedar boards. See my plans down below if you want to build your own.


Vertical Planter Materials:
- 4 – 2x10x8’ exterior grade boards
- 4 – 2x4x8’ exterior grade boards
- 9 – 1x4x8’ cedar boards
- 3” exterior screws
- 1 ½” exterior screws
Cut List:
- 4 – 2×10 @ 48” (vertical supports)
- 16 – 2×4 @ 21” (planter bases)
- 36 – 1×4 @ 24” (planter sides)

Step 1: Attach planter bases in between vertical supports as per sketch using 3” countersunk screws.

Step 2: Attach side slats flush to base keeping ½” gap between slats. Attach at both sides using 1 ½” countersunk screws.

Step 2 complete: With one side of slats complete now is a good time to install the hardware cloth across the bases and plastic lining.


Step 3: Repeat the same process in Step 2 on the other side attaching the side slats keeping ½” gap between slats. Attach at both sides using 1 ½” countersunk screws.
Thanks for joining me for this vertical planter project. Because it’s a fairly simple build with straight cuts you can easily modify the size to fit your space.
Please follow me on social media for sneak peeks and more project inspiration:

*The Home Depot partners with bloggers such as me for DIY Workshop program. As part of this program, I received compensation for my time. They did not tell me what to purchase or what to say about any product mentioned in these posts. The Home Depot believes that consumers and bloggers are to form their own opinions and share them in their own words. The Home Depot’s policies align with WOMMA Ethics Code, FTC guidelines and social media engagement recommendations.

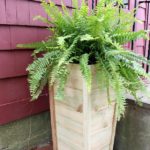
This turned out so well! I love that it's free standing!
This looks like such an easy build! I plan on using it to add a little privacy to our patio.
You totally rocked this — and hello detailed plans and steps! #fistbump LOVE IT!