Calling all superhero loving folks out there! It’s another Handbuilt Holiday project today, the perfect superhero playhouse for all superhero lovers. Ana White and I are busy little elves working to bring you a new gift idea you can build just in time for the holidays.

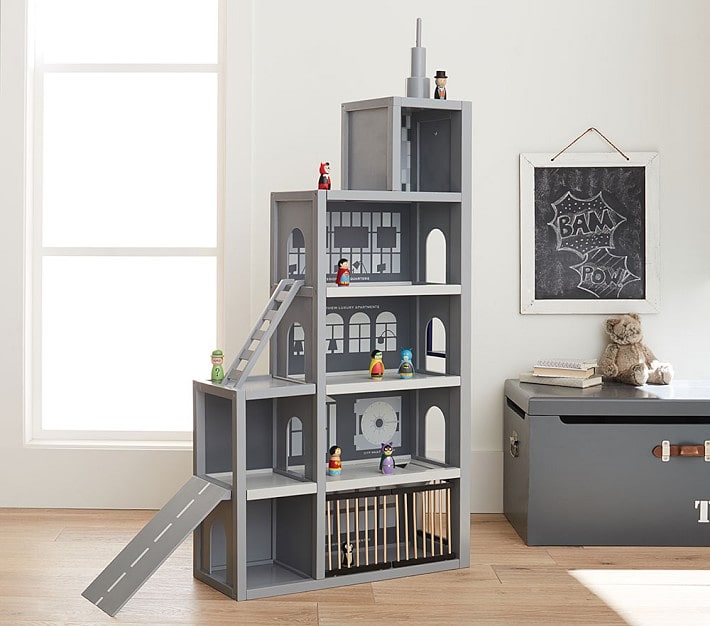
A DIY tutorial to build a superhero lair playhouse. Make this spacious playhouse just for superheros complete with doorways, a working elevator and jail.
Years ago Ana and I collaborated to create a portable superhero playhouse that I built for my then 5 year old son who was obsessed superheros. Now, 7 years later, we are back with this superhero playhouse lair that’s much bigger and has some fun amenities.

Naturally Superman would be riding in the elevator ;). This superhero playhouse is extremely spacious and capable of housing many superheros. Clearly our collection is lacking these days since my son has outgrown them but you can see there’s so much space with five levels.


We were inspired by the Pottery Barn superhero city that is no longer available:
You could paint this superhero playhouse to make it more finished and add fun city-like details.


Click here for complete step by step plans at Ana’s site to build this superhero lair playhouse.
Build Notes:
- make two face frames the same (keeping pocket holes at backside)
- use a quart paint can to draw the arched pattern for the doorways
- predrill holes in flat metal off center (for elevator)

When making the face frames for this superhero playhouse use a scrap piece of wood as a spacer for consistent spacing between floors without having to measure every time. Also be sure to make two face frames identical, this will keep the pocket holes on the backside of each frame.


For the arched doorways I used a quart can of paint as my pattern. It makes the perfect circle size for this project. Cut one arch and then use the cut out piece as your pattern for all the other arches.
Superhero Playhouse Elevator:
- Be sure to measure your exact space for the elevator and modify the cuts to fit. Follow my sketch below for dimensions.

Elevator Supplies:
- 2 – 1×2 @ 7 1/8″ (top and bottom)
- 2 – 1×2 @ 8″ (sides)
- 1×8 (2 scraps) trimmed down as per sketch above (floor and ceiling)
- 1 – Ziploc freezer storage bag
- 1 – 6″ surface bolt

The superhero playhouse elevator is composed of a flat face frame and two curved pieces for the floor and ceiling. Use pocket holes and 1 1/4″ wood screws to assemble.

On the underside of the floor, install the sliding bolt at center. Drill a hole through the face frame so the bolt can slide through. This is the stopping mechanism for the elevator at each floor.
You’ll need to drill corresponding holes in the exterior of the playhouse side to accept the bolt. Check the photos above for hole location.
Lastly to add the elevator glass cut down a freezer ziploc bag to fit the elevator. Then use hot glue to attach the plastic to the edge of the elevator floor and ceiling.

Jail Supplies:
- 2 – 1×2 @ 16 5/8″
- 10 – 1/4″ dowel @ 7″
- 1/4″ drill bit
- 2 small hinges
- magnetic latch


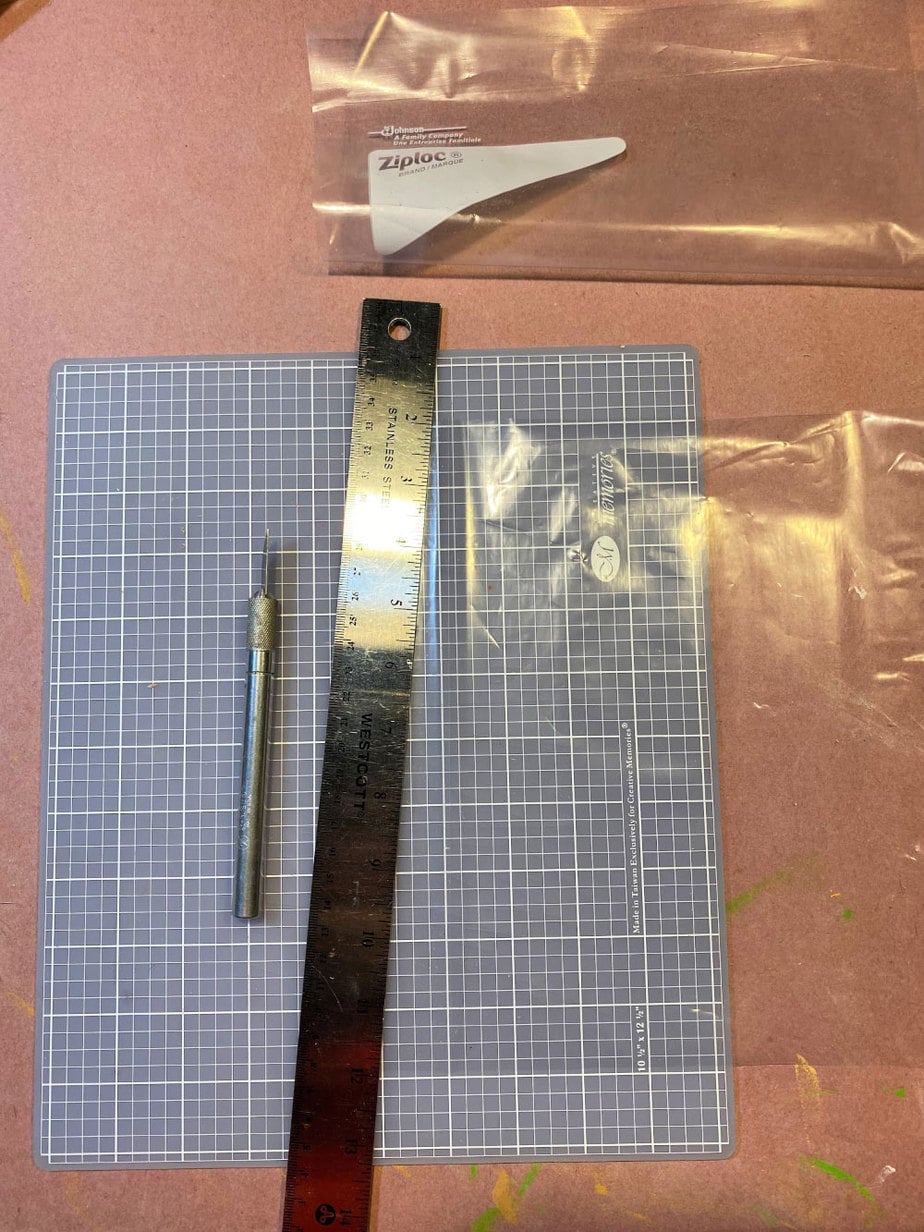
Measure the space for your jail and set up the pieces. Use a piece of painters tape to mark the depth on your drill bit for each jail dowel.

Then mark the spacing for each dowel. I used 10 dowels with about 1 1/2″ between each dowel. Drill a hole for each dowel paying attention to the depth on the drill bit.
Apply wood glue into each hole, insert dowels and then clamp together until dry. Install the jail with two hinges at top and a magnetic latch at bottom to keep the door from swinging out.
Thanks for joining us for another Handbuilt Holiday gift project. Be sure to stop back every Friday leading up to Christmas for a new project plan you can build and give. And if you’re looking for a gift idea we’ve got six years worth of holiday gift plans here.


Could you email me the plans for the Super Hero playhouse, if possible. I can see your plans but can’t print them, very possible your site is down and for this I am saddened. Trying to build this for my 7 year old, and having the actual plans would be very helpful!