
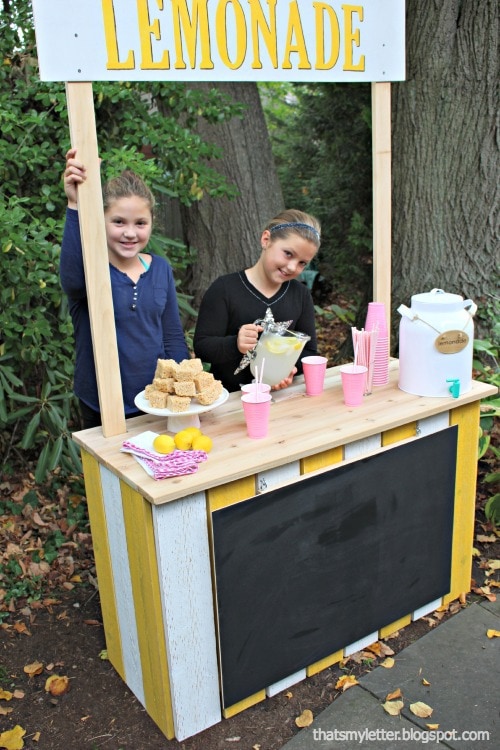
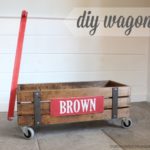
It’s Friday and that means another Handbuilt Holiday gift build from Ana White and me! Today we are sharing this cuter than cute lemonade cart. Honestly what little kid would not want this fun toy? I wish I was three again!

This lemonade cart is the 3rd build in the 2015 series. Last week we shared the changing screen with mirrors and the week before was this stuffed animal zoo:


Today is a super fun and over the top cute lemonade cart!

Ana made easy to follow free plans for you here but be sure to check down below for more details on how I painted the cart, how to make the awning and attach the wheels.

This lemonade cart is perfectly sized for 2, 3 and 4 year olds. It’s super sturdy but if you’re worried about stability just make the wheels decorative.

The neighbor boys getting their hands on the treats!
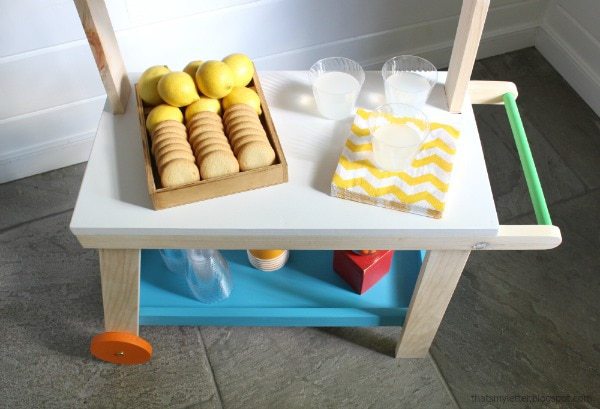
I used almost all scrap wood to make this cart so very little cost was involved.
The tutorial for the diy gumball machine is here, it’s a fun kids put together craft we did for a birthday party.

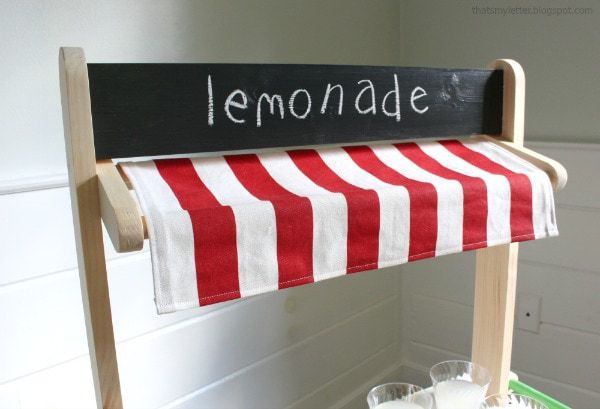
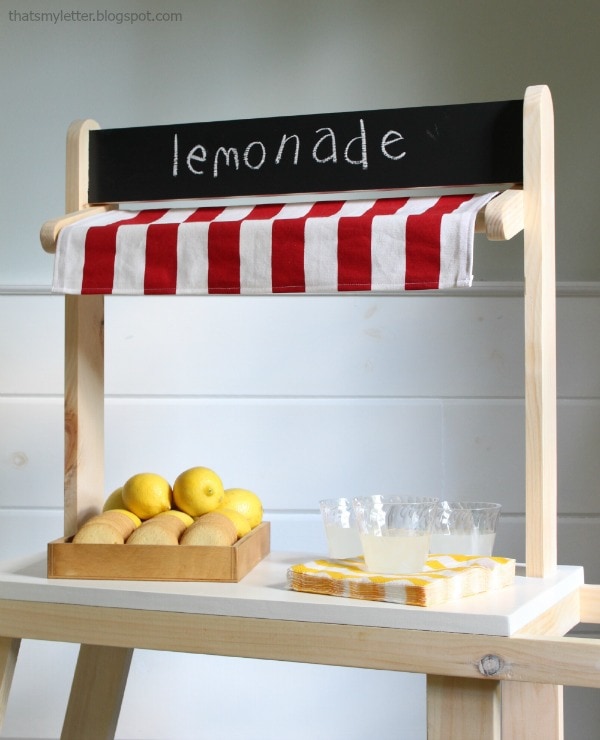
The addition of the awning really puts this cart over the top. It’s a simple rectangular piece of fabric hemmed on four sides with only straight stitch sewing involved (instructions down below). Of course you could use hot glue or stitch witch to get similar results but it’s definitely a worthy addition.

How to build a kids lemonade cart:
Check out the free plans at Ana White’s site here.
Make your cuts and assemble following her plans.

For the rounded edges (which are always a good idea with toys for young kids) trace the edge of a bottle or can that is similar in width to the board. Then use a jigsaw to cut and sand super smooth.
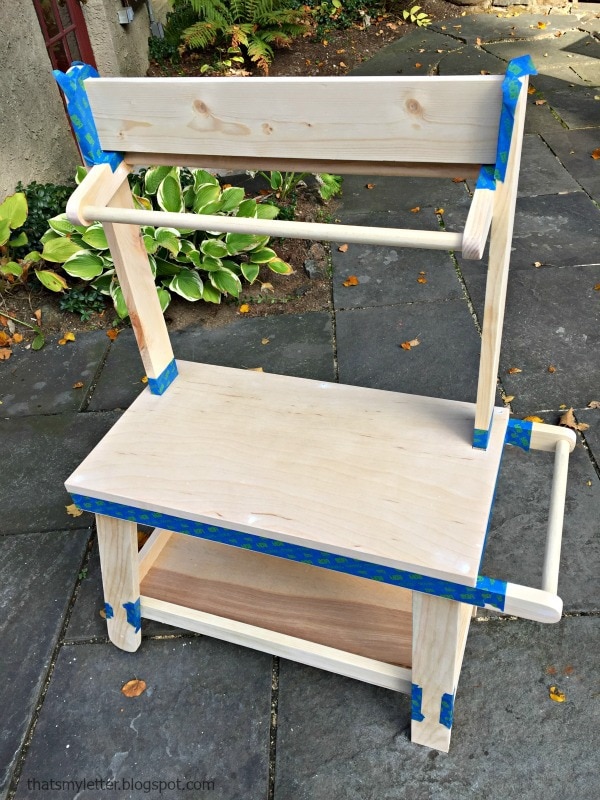
Once the cart is assembled and sanded well tape off the edges where paint meets the natural wood.
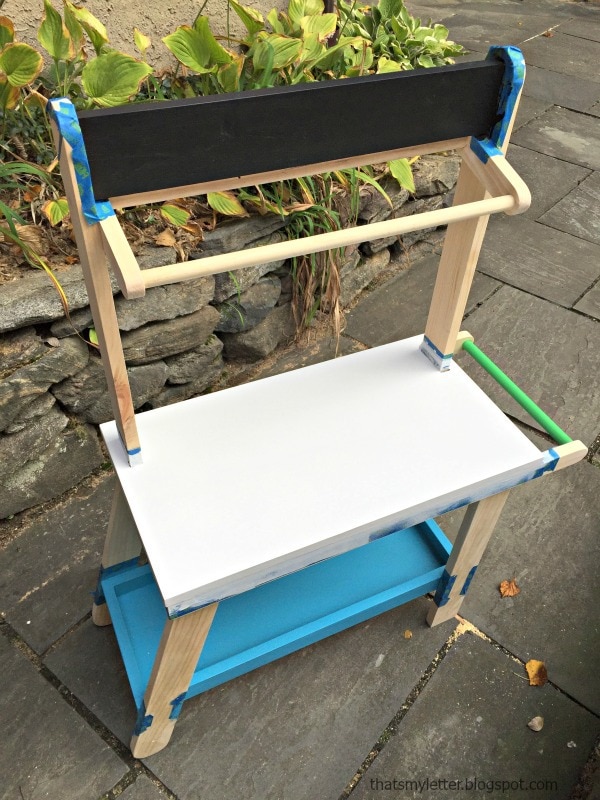
Paint all the different colors and parts, two coats sanding in between. You could also seal the natural wood if desired with wipe on poly to protect from wear.
To make the awning:
Finished size: 19″w x 9″l
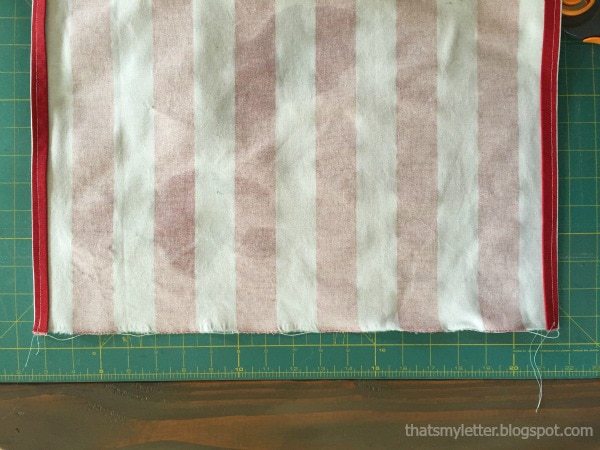
Step 1: Cut one piece of fabric at 21″w x 10 1/2″l. Press in the side raw edges 1/2″ and then again 1/2″ and top stitch to hem. The finished width of the awning should be 19″.
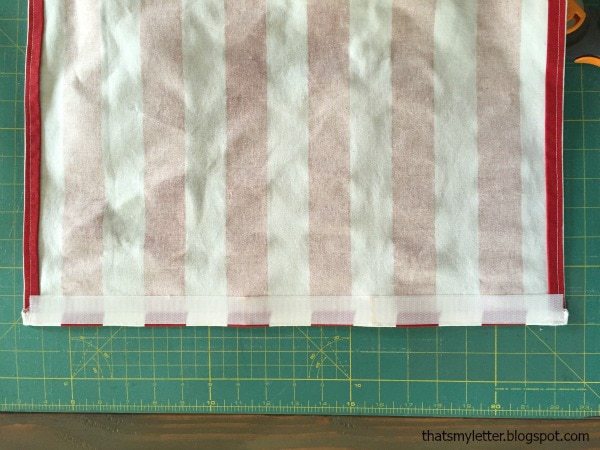
Step 2: Press one long raw edge in 1/2″ then pin one side of velcro and sew in place.
Step 3: On the other long raw edge press in 1/2″ and then again 1/2″ and top stitch to create hem.
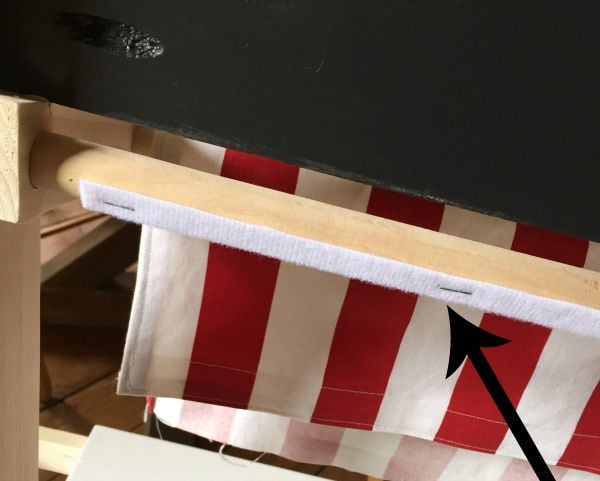
Step 4: Staple other side of velcro to dowel at back.
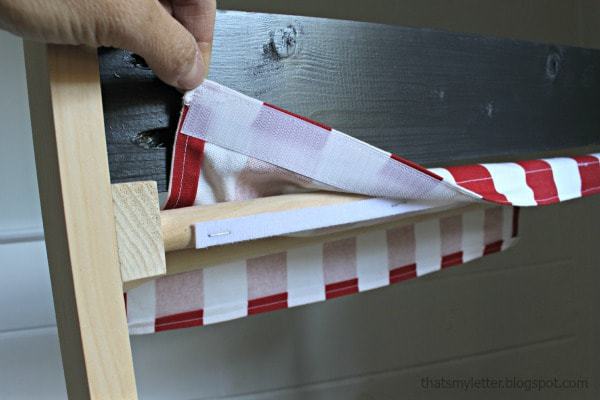
Step 5: Attach awning to cart using velcro.
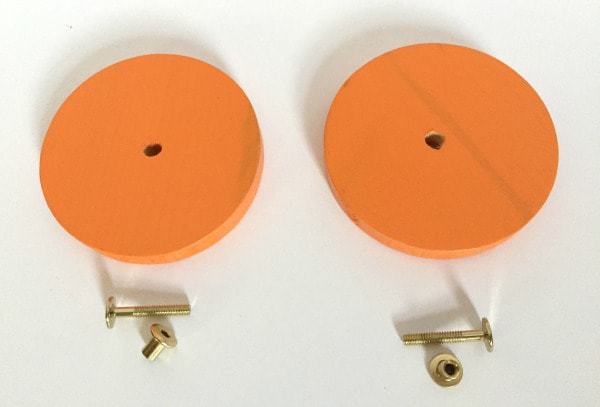
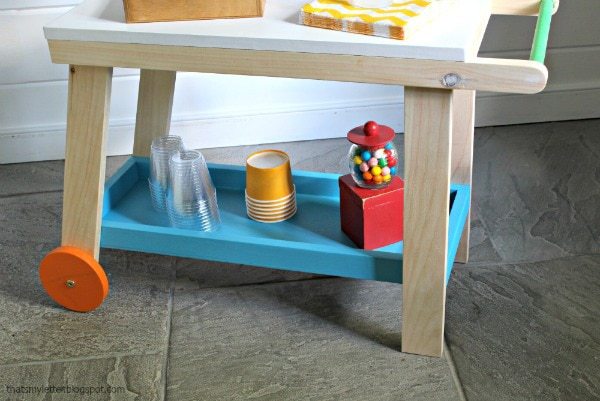
For the wheels I used precut 5″ wood circles from the craft store. Predrill the center hole to fit a connecting bolt and nut. This style of bolt & nut will allow the wheel to spin while still keeping everything attached.

Predrill the hole in the cart leg at center and insert bolt from one side and nut into other then tighten using hex wrenches.

Thank you to Ana White for making such beautiful and simple plans!
Another option for a lemonade stand for bigger kids:
More Handbuilt Holiday builds from 2014:
And 2013:


Could you please share which craft store you purchased the wheels from? I've had a hard time finding them (I'm working on the doll stroller).
Thanks!
~Dory