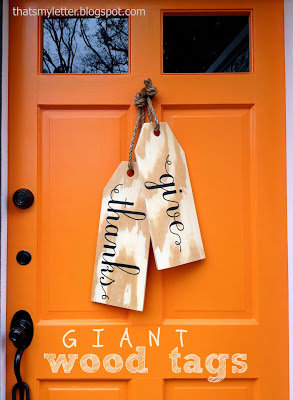
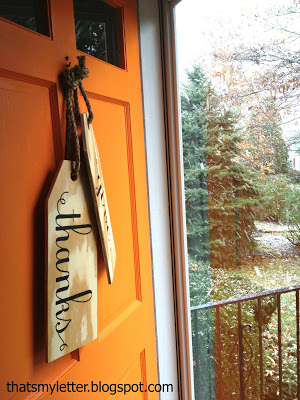
Using wood to make decor makes my heart go pitter patter. I had this crazy idea to make giant wood tags and hang on the front door as seasonal decor. This is a simple wood project that makes playing with scale so much fun.
A DIY tutorial to make giant wood tags. Create a unique wreath alternative front door decor with giant wood tags perfect for any season.
This project happens to fit the Thanksgiving theme however you could paint anything on these wood tags – happy holidays, your last name – whatever fits your theme.
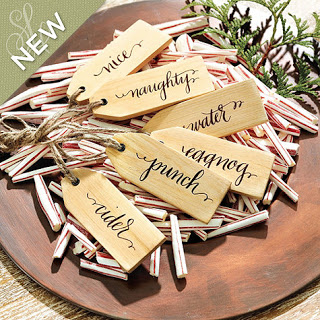
I was inspired by these Ballard Designs wood holiday tags (no longer available). They are the perfect size to hang on drink dispensers.
Their tags are 4″ x 1 1/2″ and meant to label drinks and such.
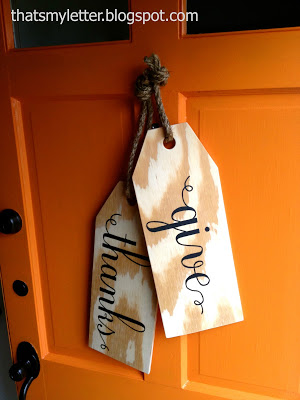
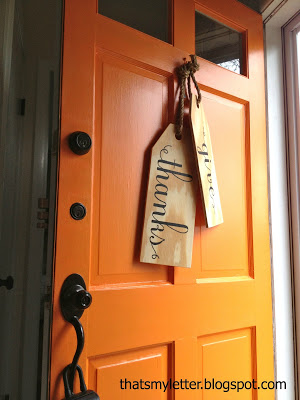
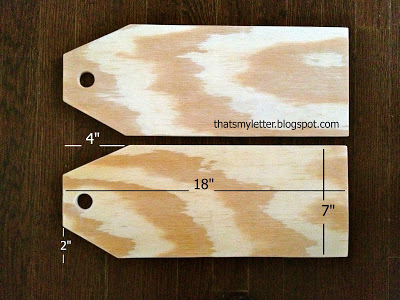
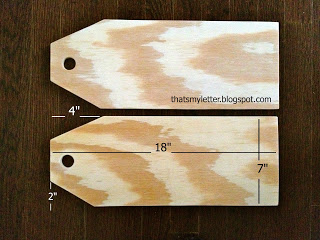
But I decided to go big and made these GIANT wood tags for our front door. My wood tags measure 18″l x 7″w.
Painted Words
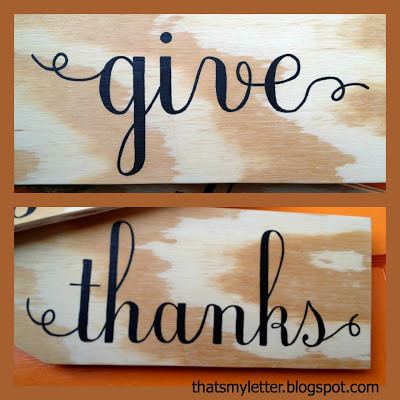
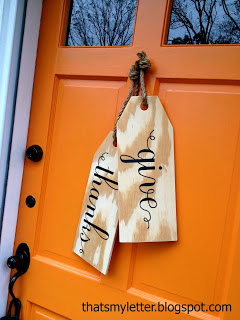
I handpainted the words give and thanks.
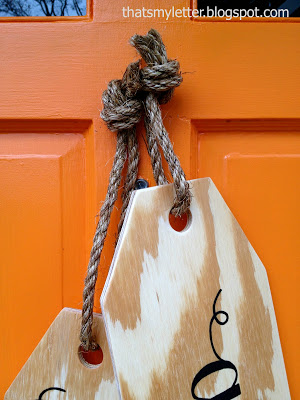
Then added some jute rope to hang the tags just as they would be tied onto a package.
Below are the step by step instructions to make these giant wood tags.
Supplies:
- 1/2″ plywood scrap pieces (2 pieces 18″ x 7″)
- miter saw
- drill and 1″ spade or forstner bit
- computer print out of lettering
- ballpoint pen
- acrylic craft paint
- paintbrush
- sisal rope
- clear monofilament
- clear spray poly (optional)
Step 1: Cut 1/2″ plywood to size and drill a 1″ hole at center top.
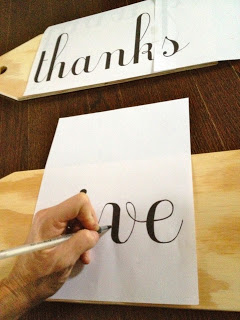
Step 2: Print out words to fit. I used Ecolier font at 550 point. Using a ballpoint pen trace letters onto wood with heavy pressure.
Step 3: Then paint on and inside the indent left behind by the pen using black acrylic craft paint.
If desired seal with clear semi-gloss poly to protect from moisture. My tags hang behind a storm door window so they really aren’t exposed to much weather.
Step 4: Add rope and tie in a knot. To keep rope held together use clear monofilament and then hang on door.
Thanks for joining me for this wood tags project. Please leave any questions in the comments below and be sure to follow me on social media for sneak peeks, tools and project inspiration:
Instagram / Pinterest / Facebook / Youtube / Twitter
SHOP THIS PROJECT:





THESE LOOK TERRIFIC, GREAT IDEA!
Oh I love these – they are so big! They look great on your front door.
Too cute! I'm thinking of making smaller ones with paint sticks. ~ Maureen
WOW! You did a great job painting those and it is such a cool idea to use them in such a non traditional way! Plus, I love the color of your door!
Angela
what a great alternative to a wreath! great idea!
So happy to see that you all are well and back to creating! I love these so much…I noticed the tags in my catalog right away, but never thought about them being giant! What a great idea!!
Great job,I love your tags!
I love these!!!
Wow! I love these!
I Like!
We don't celebrate Thanksgiving in The Netherlands, but I do like the concept.
Love,
Bianca
These are so fantastic! I love seeing unique ideas and this is definitely one of them : ) I'm pinning!
Love the idea and the execution -so mush more fun than a wreath! Take care, Laura
I love this idea! So cute and original! I'm always looking for something different for our door besides a wreath. Thanks for sharing!
Came back to let you know that I'm sharing this on our facebook page as Pin of the Week : )
Fabulous project! Would you mind adding a link back to my party as well, please? Thanks! 🙂
Wow! Love your door color and wood tags! You must have a very steady hand. My letters would not look as smooth and perfect as yours. lol
Julie
Your wooden tags are beautiful Jaime! Love your door too, orange is such a happy colour and perfect for Thanksgiving decorating!!
Love these tags!! Where did you get the font from?
Love these!! Great idea 🙂
Very cute! I love tags, just realized I used them in the last two posts I have done!!! I never thought of making giant tags for the front door!! I like these!!!
Well, here I am again… I LOVE giant tags and am totally going to rip them off, like this week~ You are fantastic!
wow, i love this project its so creative. i would love it if you would come and link it up at http://www.twiggstudios.com/2012/11/sunday-show-off-link-party.html
thankyou xxx
Yeah, I'll be making some of these! I like that it's such a simple alternative to a wreath. Very cool, Jaime!
Wow, it's been a long time since I've seen such a fresh idea! The maxi look is awesome on the door 🙂
These are just perfect!!!
Love them and will be making some for xmas – thanks so much for sharing
Hugs,
You always have great ideas and tutorials! I'm forwarding to my husband and have hime cut some of these to make for my front door, love this!
I have never seen anything quite like this before. I'm loving the look…especially on your bright orange door. Consider this pinned!
Also, I see you're from Westchester! Though I'm living in Orlando, I actually grew up in Mamaroneck. We'll be there this Christmas, in fact. Small world!
-Lauren
Wowzers! I saw these (well, the Xmas ones) via knockoffdecor. I sooo want to make them but I have double doors. Should I just hang one on each door or is that odd?? Help!
Beautiful job! The words came out perfect.
These are awesome! I was looking for something new for our front door. These are perfect 🙂
These tags are so awesome! I shared on my facebook page today and I hope you had some new friends come over. They rock!
Love the tags and orange door! Nice break from the traditional wreath. Great tutorial about how to do the hand painting
Where did you find your jute rope and how thick is it?
I have made a set of these and am having trouble getting them to stay separated ….. Please help
Vicki – the tags are screwed together at an angle on the back. For a detailed pic of the screws see my post here:
http://thatsmyletter.blogspot.com/2012/11/w-is-for-wood-tags-2-christmas-version.html
Love these! So much I featured them in my Fall Door Decor post today! http://kraftymama.blogspot.com/2014/10/fall-door-decor-round-up.html
Cute<3 Your door color is amazing! Pinned
I love your wood signs so much I did some for Christmas. I linked back to you. Would love for you to check them out here http://flipflopsandsnowboots.com/wood-christmas-tags-page/
Thanks for the great DIY and inspiration! Tiffany
I am loving these! So creative and such a perfect message. I would love it if you would stop by and share this over at Celebrate it Sunday. The party stays open until Saturday afternoon! I am pinning this and sharing over at FB and Twitter!
Hi,
I just found your blog, and I'm hoping you'll see my comment even though this post is from 2012. I love both your wooden tags, and also your orange door. It is the color I've been looking for!! Could you please tell me the paint company and color. I would so appreciate your help!
Thank you,
Laurie
I LOVE these! thank you so much for sharing the instrutions also..
I plan to 'flip' mine and paint Merry Christmas on the back so I can use these 'double duty' for the
Holidays!
Cant wait to make these for family and friends next year!!!
love it..thanks so much..
These are so cute! How do you get them to stay offset from each other so they don't just hang one in front of the other?
Absolutely brilliant! And it looks SO pretty!!!
Hello-silly question, but do you sell the wooden door tags?
Hi Lori, thanks for asking but I do not sell the door tags.
how do you get the tags not to cross over each other when they hang? thanks marsha
Hi Marsha, the tags are screwed in position to each other on the back. There is a photo of the screws from the back in my post here: https://jaimecostiglio.com/w-is-for-wood-tags-2-christmas-version/
Love, love, love your orange door!!! Your tags look great hanging on it. Definitively looks like fall!!
Looks great! What degree did you set your miter saw to in order to achieve that angle?
Thanks!
Thanks Brandi, I don’t remember the degree but if I had to guess I would say 20.