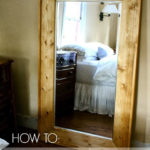
If you follow me on Instagram then you know I’ve been slaving away in the bathroom recently working on a little makeover. Today I’m sharing how to make this super simple framed mirror using basic lumber. This frame can easily be modified to fit your mirror size.

A DIY tutorial to make a simple framed mirror. How to frame out a mirror of any size with wood using this simple technique.
I shared a sneak peek of the newly framed mirror hung in place in the bathroom renovation.

I still have a bit of touch up painting to do in there and then on to installing towel bars and such, here’s hoping I finish up today! But the framed mirror is complete and it was such an easy project. Plus it can be applied to so many other framing situations.
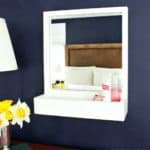
Mitered Corners:

Loving those mitered corners. The entire frame is made from 1×2 boards cut with 45 degree miters. And if you keep a 1/4″ reveal on the front side it adds a nice lip plus you have hidden space on the back side for hardware!

Yes that’s me taking the photo because it’s impossible to get a straight on mirror picture without being in the picture!

For this framed mirror I stained the wood with Minwax early american then sealed it with a wipe on poly in satin finish.
Below are step by step instructions including materials and cut lists. I used an inexpensive store bought mirror and removed the original plastic frame. Please be sure to measure your mirror before making any cuts for this project.

Frame Materials:
- 2 – 1x2x8 pine boards
- 1 – mirror (15 ½” x 17 ½”)
- 6 – mirror clips
- 1 ¼” pocket hole screws
- 1 ¼” finish nails
- wood glue
Cut List:
Interior pieces:
- 2 – 1×2 @ 18 1/2″, both ends 45 degree miter not parallel (long side interior)
- 2 – 1×2 @ 16 1/2″, both ends 45 degree miter not parallel (short side interior)
Exterior pieces:
- 2 – 1×2 @ 20”, both ends 45 degree bevel not parallel (long side exterior)
- 2 – 1×2 @ 18″, both ends 45 degree bevel not parallel (short side exterior)
Framed Mirror Steps:

Step 1: MEASURE YOUR MIRROR FIRST! The mirror portion must be ½” larger on all sides of the interior measurements you see above in my Step 1 sketch. For example: The long interior measurement here is 15 ½” so the mirror must be 16 ½”h. Hence this will give you enough mirror to hold in place with the mirror clips on the back of your framed mirror.
Cut the four interior frame pieces and use pocket hole construction to attach the four mitered corners. Then attach the short ends to the long ends using wood glue and 1 ¼” pocket hole screws.

The pocket holes will take a bite out of the side of your 1×2 but don’t worry that bite will be covered by the next step.

Step 2: Attach the exterior frame pieces. Maintain a ¼” reveal on the front side (see photo below and use a scrap piece of ¼” plywood as a spacer when nailing). Then use wood glue and 1 ¼” finish nails to attach the exterior pieces to the interior frame.


Step 3: Put the mirror in place then predrill and attach the mirror clips with 3/4″ wood screws.

You can see how the side portion of the frame exterior conceals the mirror clips as well as your hanging device. Then to hang you can use D rings or wire and screws, whatever works for you!

Thanks for joining me for this framed mirror project. Please follow me on social media for sneak peeks and more project inspiration:
Instagram / Pinterest / Facebook / Youtube / Twitter
SHOP THIS PROJECT:

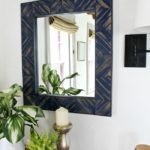
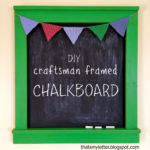
For another frame idea using this same method see my giant bulletin board here.

I am working on a bathroom makeover as well, and was thinking about a wood framed mirror just like this! I might have to try my hand at creating one.
Also LOVE how you took the pictures with the trees in the mirror, so clever. : )
Michaela @ The Lodge on Haydon
I wanted to come back to this post and say Thank you! About a year ago, I wanted to frame out a full length mirror and followed a tutorial on another blog that was about using tongue and groove board – so the mirror sits in the groove. So I did all that, but COULD NOT make it fit. So I surrendered and it sat in the back corner of my basement, until I saw this!
We don't have a router to do the edging, so my eureka moment after seeing your post was to adapt. I lowered the table saw really far down and cut off the back of the groove without touching the front, so now I have the nice flat egde to lay the mirror on and use mirror clips.
I didn't frame out the outside, since my pieces were wider and my pocketholes fit.
So again, thanks so much for all your posts, I don't often comment.
Jaime,
I love the mirror frame, AND the chalkboard! I have so many mirrors that I've salvaged from other projects. Another project to add to my to-do list.
pinning!
gail