• Home
  • Blog
  • About
  • Contact
    • Disclosure
    • Privacy Policy
  • SHOP
  • Widget area for main menu

    • Email
    • Facebook
    • Instagram
    • Pinterest
    • Twitter
    • YouTube
  • Skip to primary navigation
  • Skip to main content
  • Skip to primary sidebar

Jaime Costiglio

build - paint - sew

  • BUILD
    • BEDS
    • BENCHES
    • DESKS
    • DRESSERS
    • GAMES & TOYS
    • SCRAP WOOD
    • SHELVES
    • STORAGE
    • TABLES
  • TOOLS
  • PAINT
    • CRAFTS
    • FURNITURE
    • HOME DECOR
  • SEW
    • GIFTS
    • HOME DECOR
    • POUCHES
  • HANDBUILT HOLIDAY
    • 2021
    • 2019
    • 2018
    • 2017
    • 2016
    • 2015
    • 2014
    • 2013
  • GIFTS
    • BABIES
    • KIDS
    • FOR HER
    • FOR HIM
    • TEACHERS
    • WEDDINGS
  • SEASONAL
    • 4TH OF JULY
    • FALL
    • HALLOWEEN
    • CHRISTMAS
    • SUMMER
    • SPRING
    • ST. PATRICK’S DAY
    • THANKSGIVING
    • VALENTINE’S DAY
    • WINTER
  • SALTBOX PROJECT
    • BATHROOMS
    • DINING ROOM
    • EXTERIOR
    • FAMILY ROOM
    • FOYER / MUDROOM
    • KIDS BEDROOMS
    • KITCHEN
    • LIVING ROOM
    • MASTER BEDROOM
    • PLAYROOM
  • SCROLL SAW

DIY Cupcake Carrier (large)

May 26, 2015

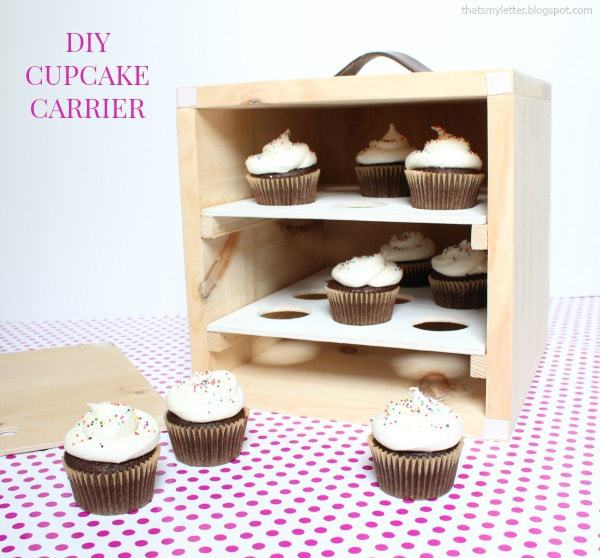
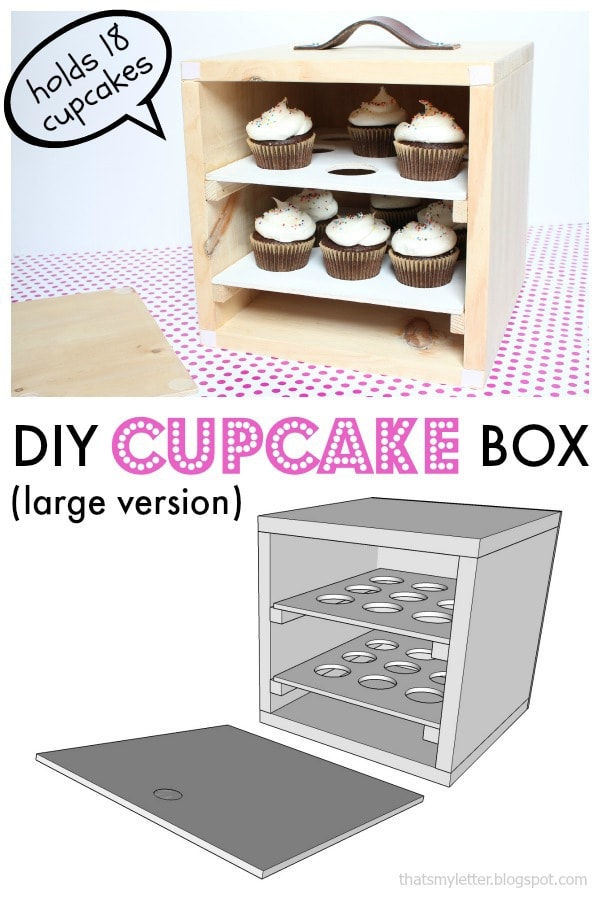
Last week I shared the 4 pack cupcake carrier but today it’s the real deal because in all honesty you’re definitely more likely to need 18 cupcakes than 4!
A simple wood box with inserts means you can deliver these cupcakes in style!
For this little creation I was inspired by Anthropologie’s Wooden Cake Box Carrier:
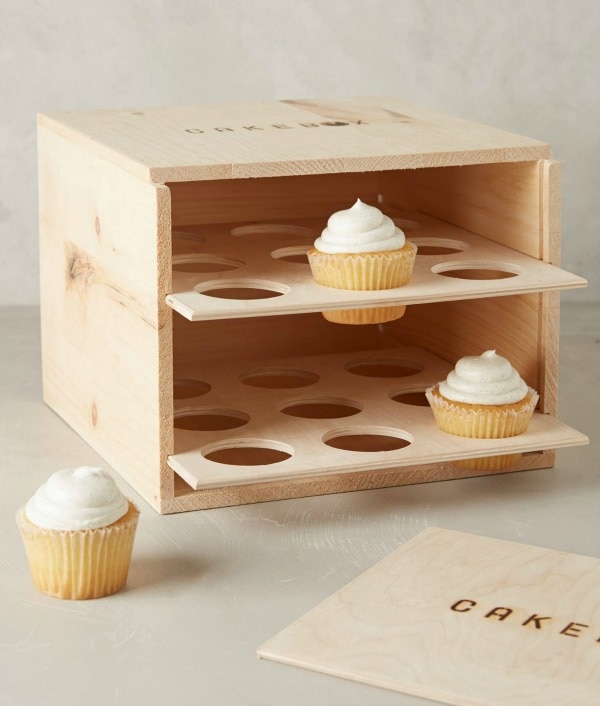
Their version is $75 plus shipping and sold out until 6/22.  Guess that means you’ll want to DIY this project!

This cupcake box holds 18 regular size cupcakes.  You could also make mini inserts and fit a ton of those little two-bite morsels.
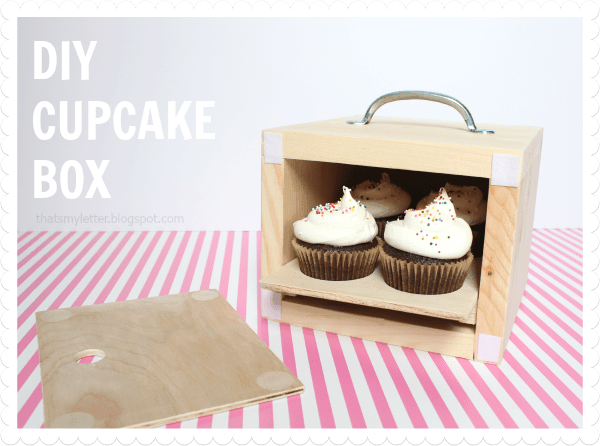
I added a leather handle to this version, any handle or long pull will do the trick.
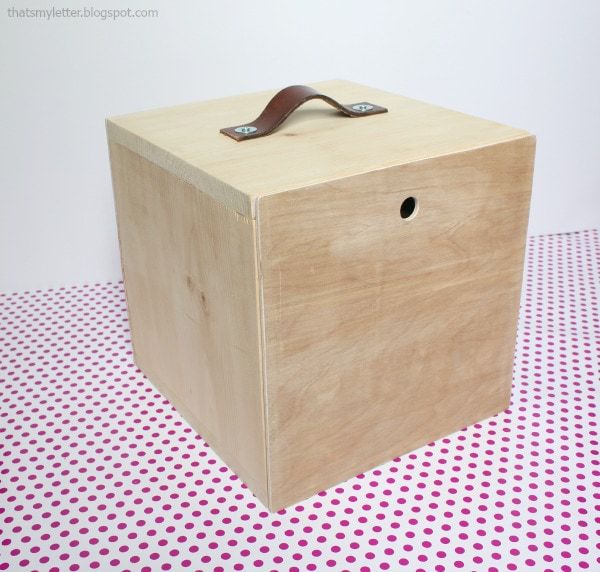
So unsuspecting!  A few pieces of velcro holds the door in place (be sure to staple the velcro on the box corners).
Below I will show you how to make this cupcake carrier.  As always be careful and use caution when operating power tools.
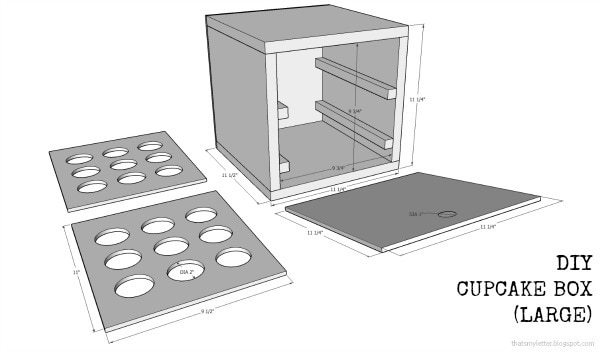
To view the PDF version of these plans please click here.

Materials:                                                       Cut
List:
           
1 – 1x12x6 pine board                                            2
– 1×12 @ 9 3/4” (sides)
1 – ¾” square dowel                                               2
– 1×12 @ 11 1/4” (top & bottom)
¼” plywood scraps                                                 4
– ¾” square dowel @ 11 ¼” (glides)
                                                                                2 – ¼” plywood @
11 ¼” x 11 1/4” (back & front)
                                                                                2
– ¼” plywood @ 11” x 9 ½” (inserts)
2 1/8” hole saw                                                       
1 ¼” & ¾” finish nails                                             
wood glue     

¾” spade bit
Step 1: Make sides. 
Attach square dowel glides to sides using glue and 1 ¼” finish
nails.
  Make 2 mirror images.

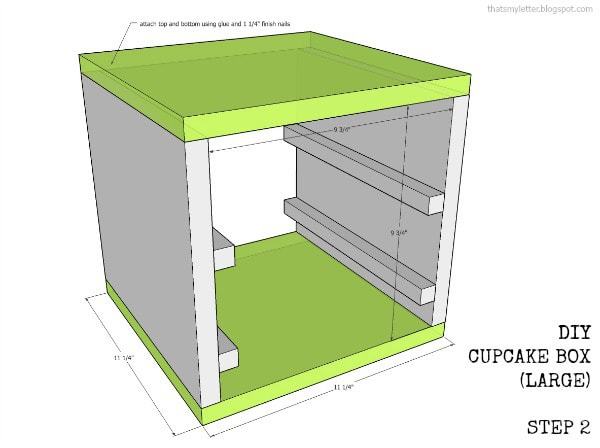
Step 2: Top & bottom.  Attach sides to top and bottom using glue and
1 ¼” finish nails.

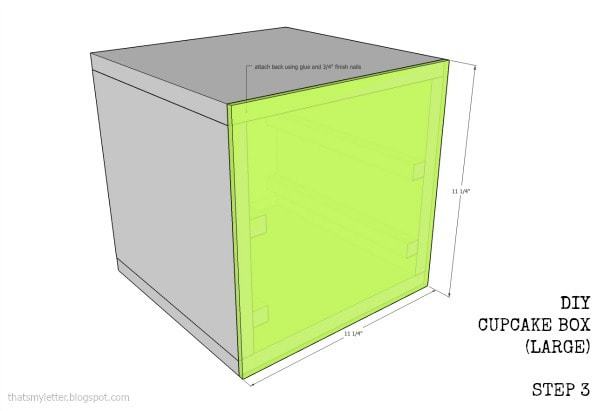
Step 3: Back.  Attach back to box using glue and ¾” finish
nails.

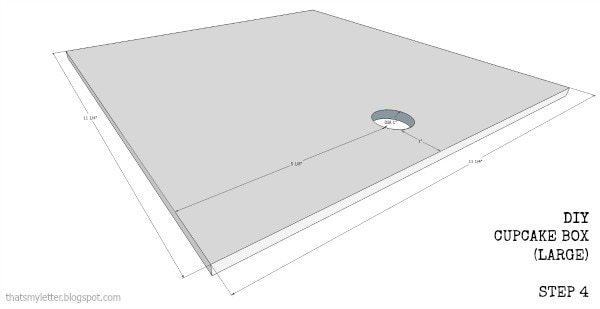
Step 4: Front cover.  Cut hole in front cover using ¾” spade bit.

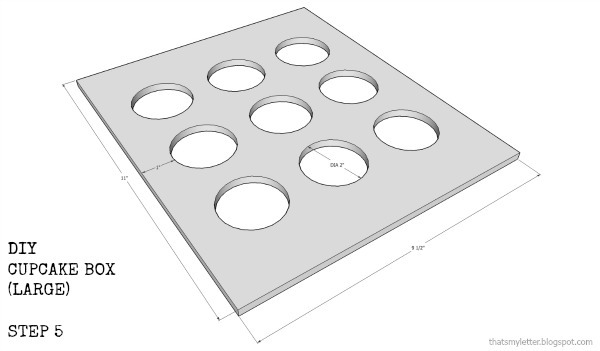
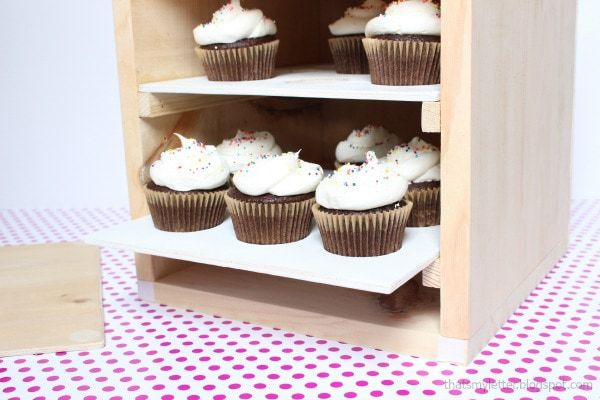
Step 5: Inserts.  Make cupcake holder inserts using 2 1/8” hole
saw (for doorknobs) with equal spacing.
  

Sand well.  Add velcro closures using staple gun and handle at top center.

For details on the cute little 4 pack version click here.

You may also like...

  • DIY Tabletop Ice Cream ParlorDIY Tabletop Ice Cream Parlor
  • DIY Cupcake Box (4 pack)DIY Cupcake Box (4 pack)
  • DIY Charcuterie BoardDIY Charcuterie Board
  • DIY Kids Play BarnDIY Kids Play Barn
Share this post:

Filed Under: BUILD, DIY, HOME DECOR, PAINT, STORAGE3 Comments

Reader Interactions

Comments

  1. Mindi Carwin says

    May 29, 2015 at 5:13 AM

    Jaime you are amazing this is just awesome!

    Reply
  2. Kay says

    January 22, 2022 at 12:19 AM

    This looks super cool! I think I’m going to change this up to make the dimensions wide enough to fit either two stacked pies OR cupcakes so it’s super versatile, but I love this design!

    Reply
    • Jaime says

      January 23, 2022 at 7:20 AM

      Great idea Kay! Do share once it’s complete.

      Reply

Leave a Reply Cancel reply

Your email address will not be published. Required fields are marked *

Primary Sidebar

Hi! I’m Jaime

Jaime Costiglio

Hello!

Thank you for stopping by.
Join me for lots of DIY.

Read more

Get new posts via email

Handbuilt Holiday: Gift Project Plans

handbuilt holiday gift project plans

Collection of DIY gift project plans to build.

The Home Depot Tool Prospective

THD Prospective

Tools to consider for the DIYer.

Archives

The Home Depot Logo
Copyright © 2026 Jaime Costiglio · Custom site by Moonsteam Design

Privacy Policy