• Home
  • Blog
  • About
  • Contact
    • Disclosure
    • Privacy Policy
  • SHOP
  • Widget area for main menu

    • Email
    • Facebook
    • Instagram
    • Pinterest
    • Twitter
    • YouTube
  • Skip to primary navigation
  • Skip to main content
  • Skip to primary sidebar

Jaime Costiglio

build - paint - sew

  • BUILD
    • BEDS
    • BENCHES
    • DESKS
    • DRESSERS
    • GAMES & TOYS
    • SCRAP WOOD
    • SHELVES
    • STORAGE
    • TABLES
  • TOOLS
  • PAINT
    • CRAFTS
    • FURNITURE
    • HOME DECOR
  • SEW
    • GIFTS
    • HOME DECOR
    • POUCHES
  • HANDBUILT HOLIDAY
    • 2021
    • 2019
    • 2018
    • 2017
    • 2016
    • 2015
    • 2014
    • 2013
  • GIFTS
    • BABIES
    • KIDS
    • FOR HER
    • FOR HIM
    • TEACHERS
    • WEDDINGS
  • SEASONAL
    • 4TH OF JULY
    • FALL
    • HALLOWEEN
    • CHRISTMAS
    • SUMMER
    • SPRING
    • ST. PATRICK’S DAY
    • THANKSGIVING
    • VALENTINE’S DAY
    • WINTER
  • SALTBOX PROJECT
    • BATHROOMS
    • DINING ROOM
    • EXTERIOR
    • FAMILY ROOM
    • FOYER / MUDROOM
    • KIDS BEDROOMS
    • KITCHEN
    • LIVING ROOM
    • MASTER BEDROOM
    • PLAYROOM
  • SCROLL SAW

“D” is for Dumplings

November 6, 2012

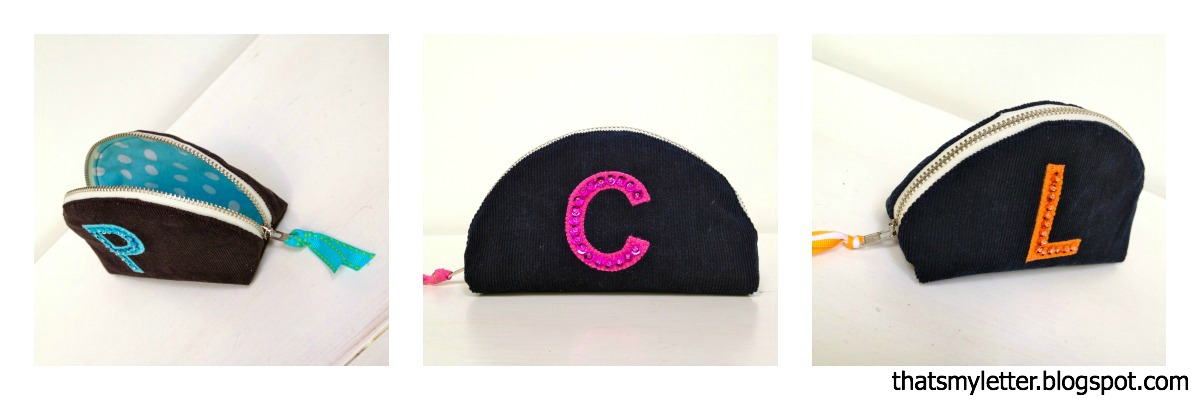
Sew: corduroy dumpling pouches

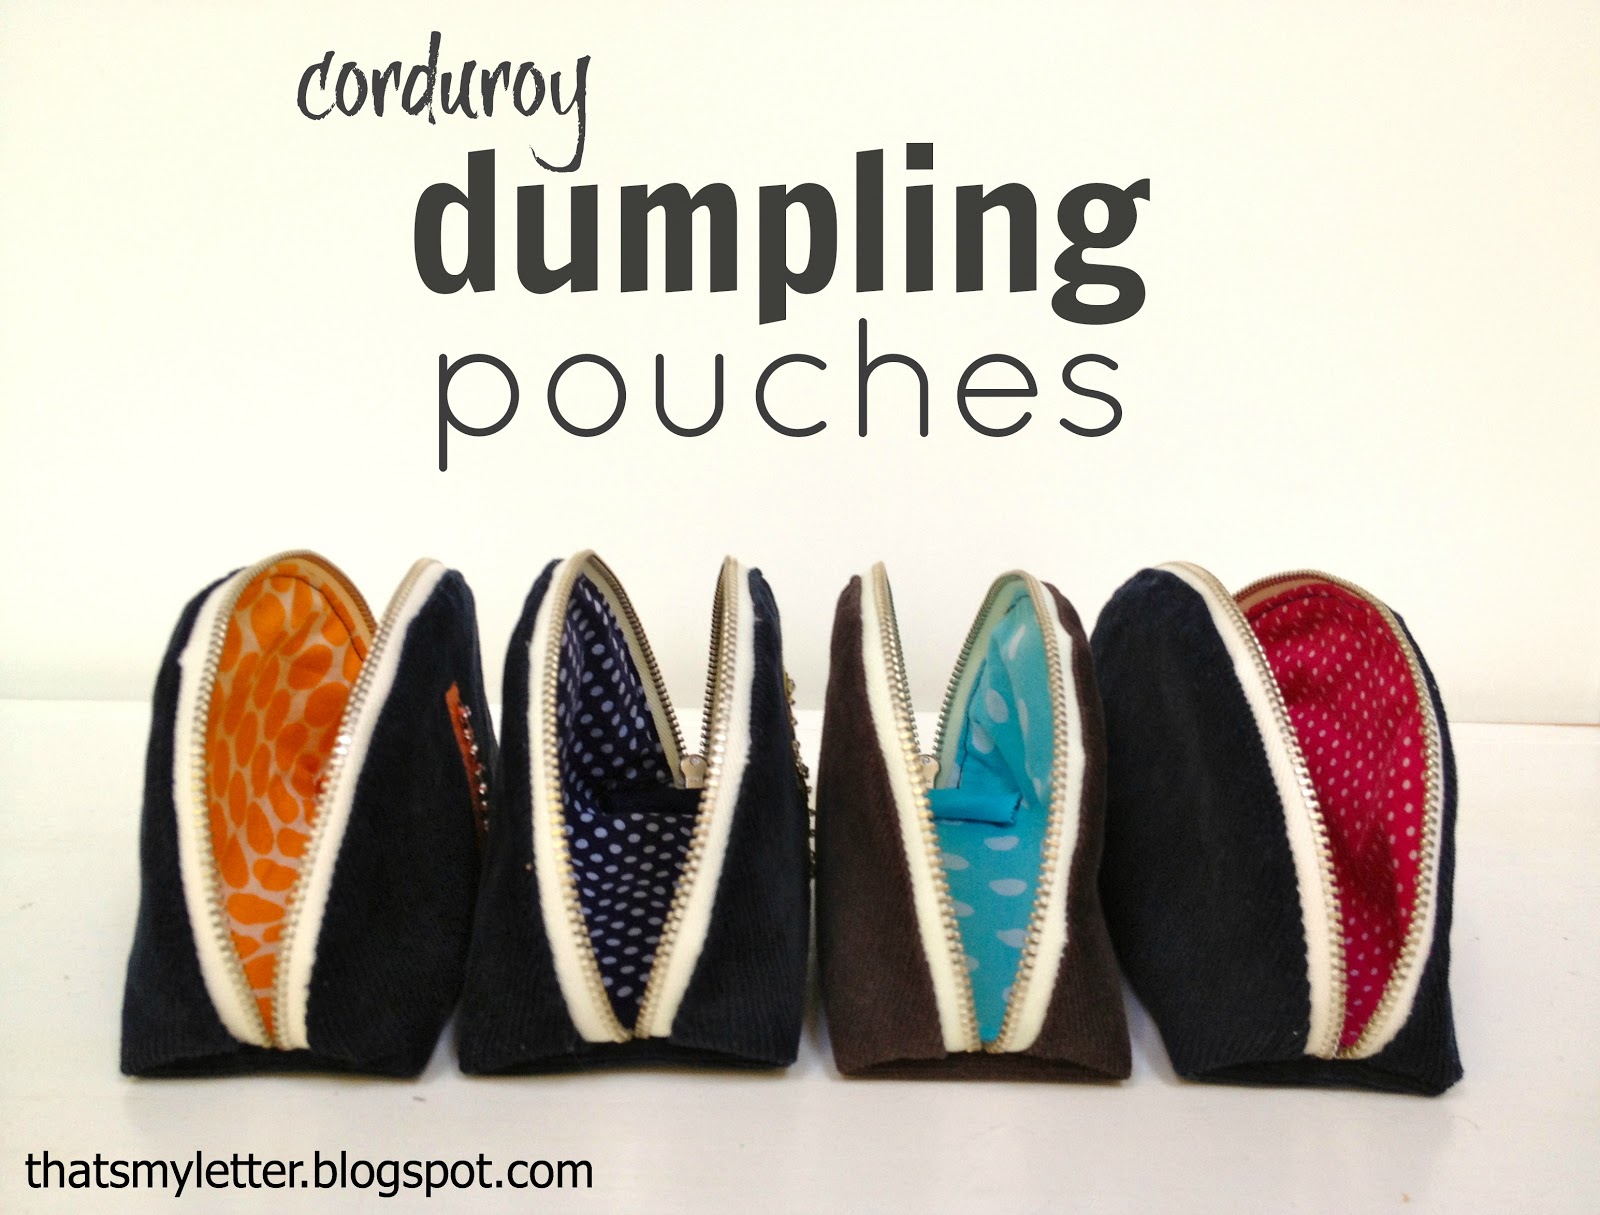
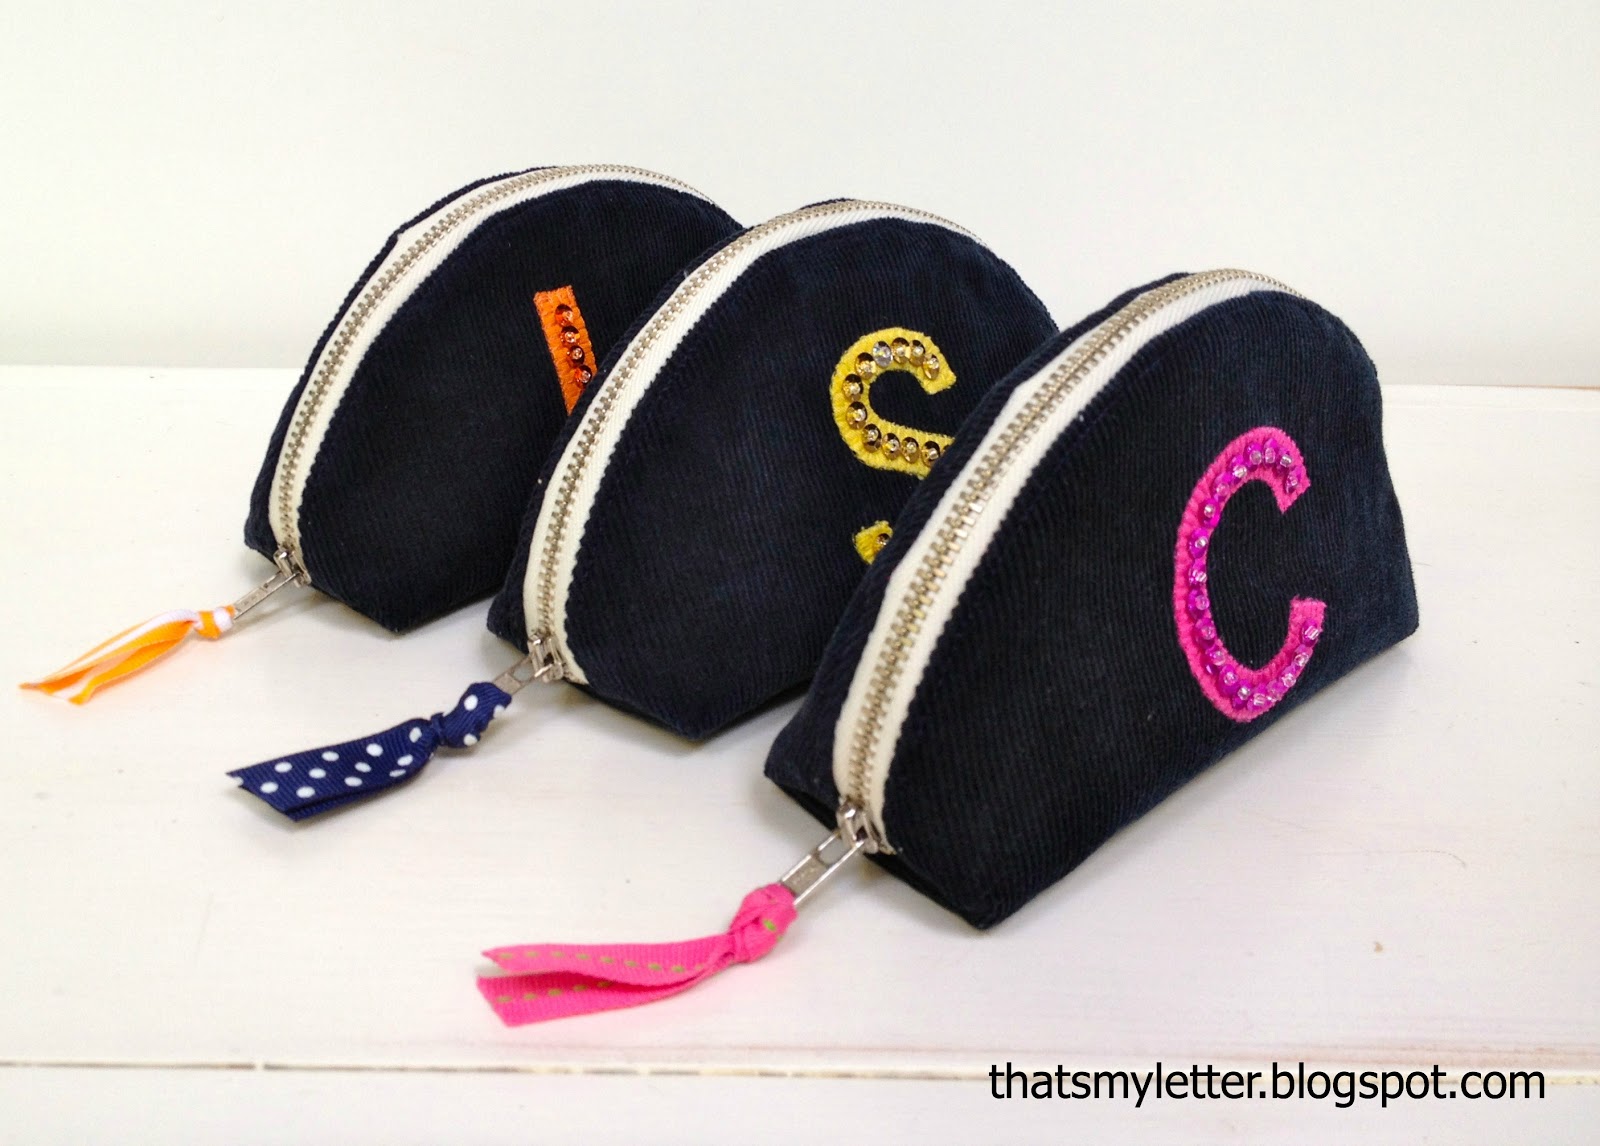
Personalized with sequined letter and fun lining fabric:

Easy to make dumpling pouches using a free PDF pattern from Michelle patterns.

Just the right size for money, lip balm, any small personal item will fit.

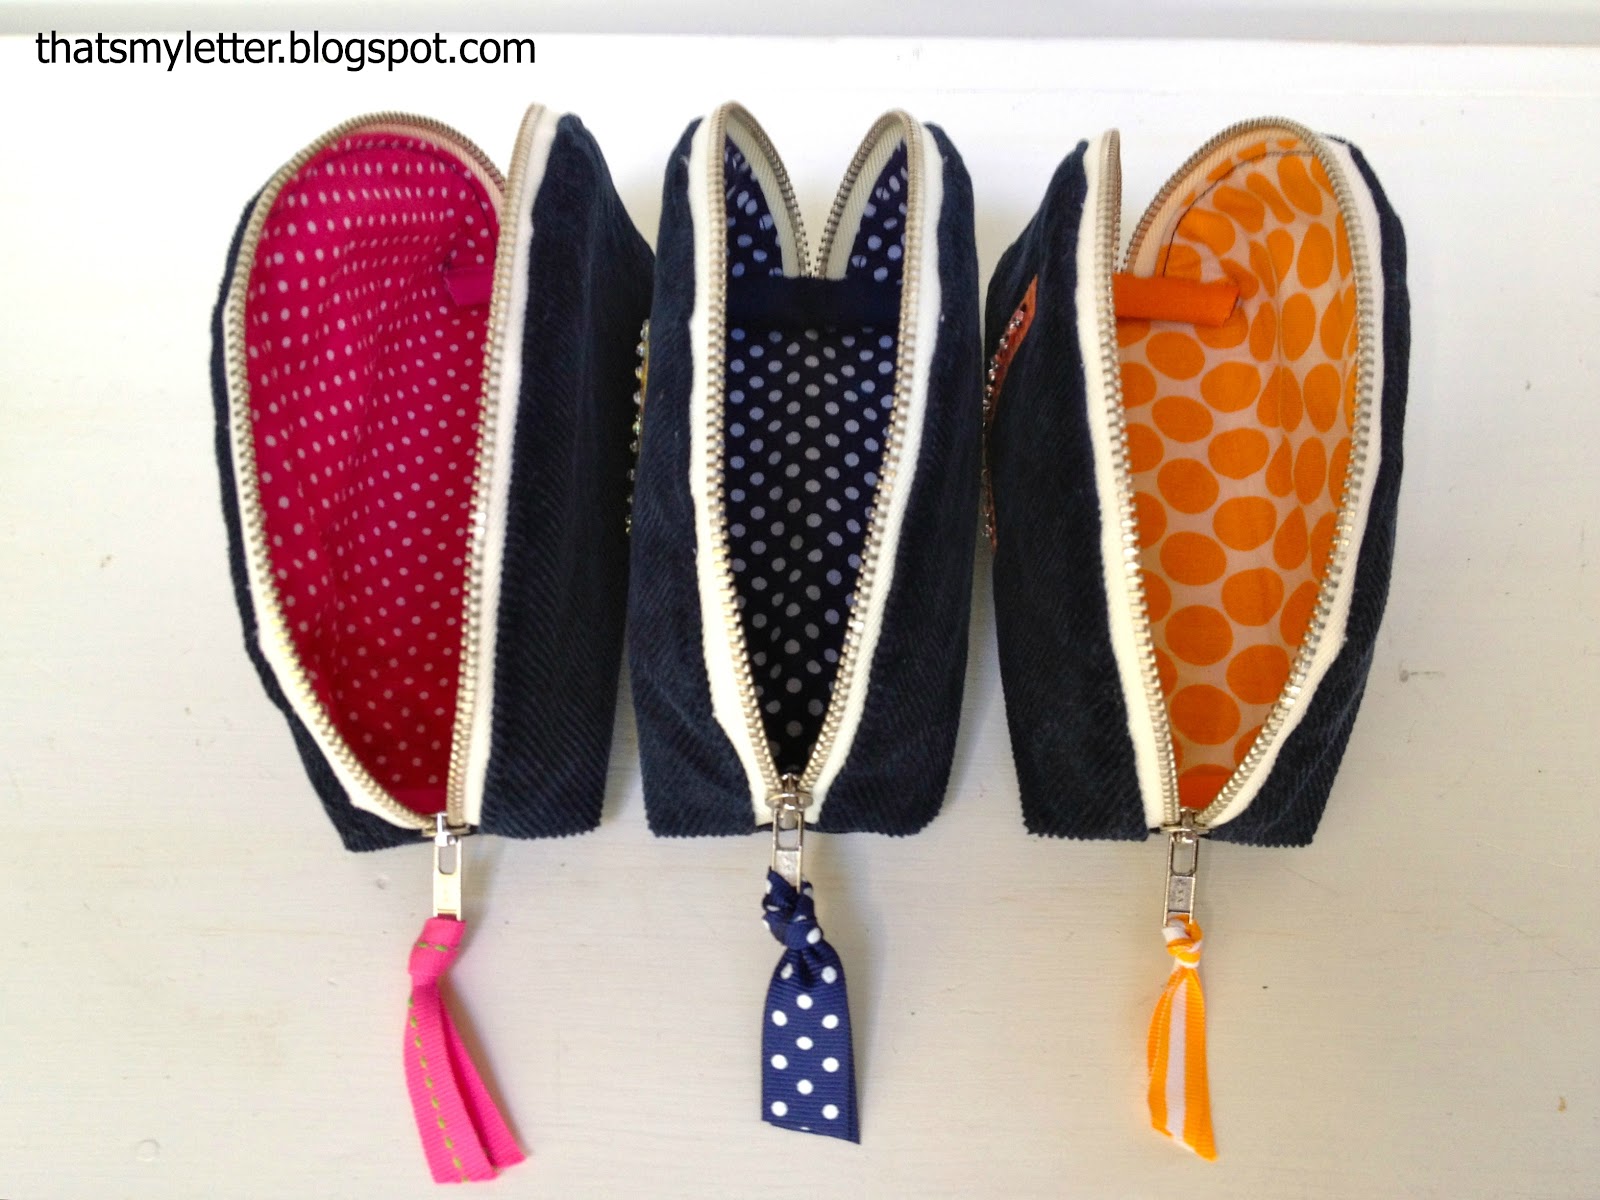
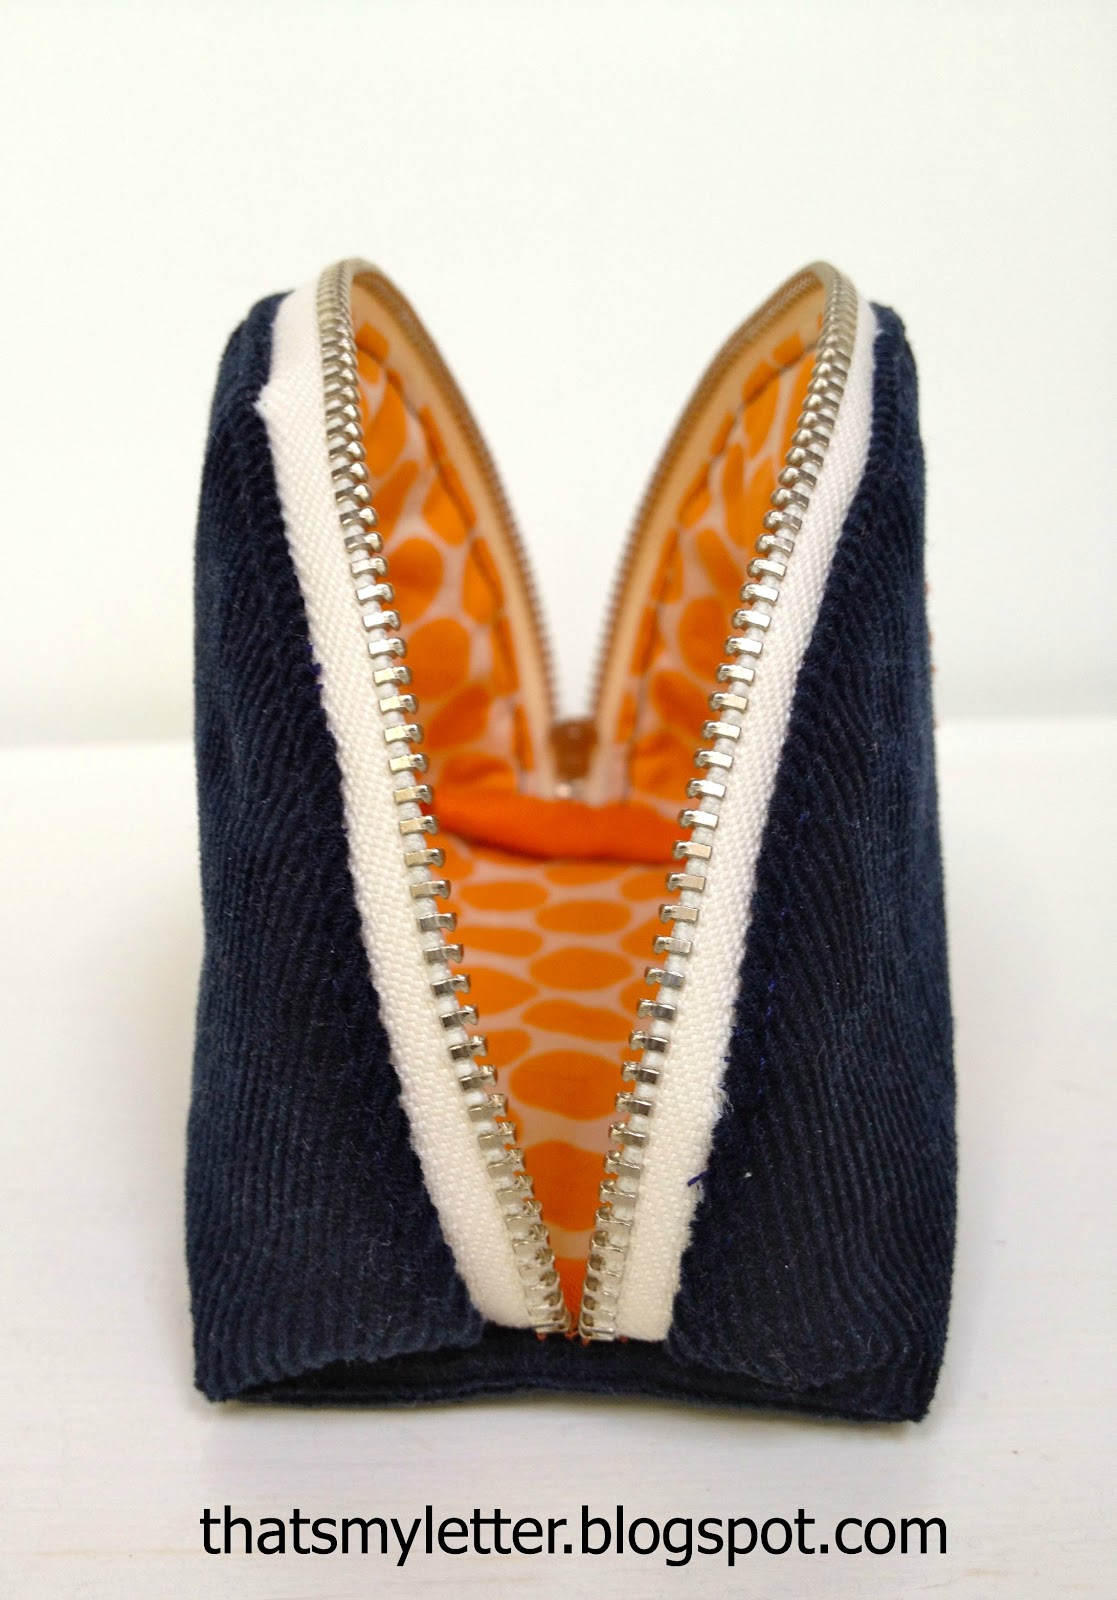
I love the industrial looking metal zipper and the dumpling format which allows the pouch to open completely side to side:
The perfect Christmas gift for friends and teachers to slip in a gift card!
I’ve only just begun here:
Here’s how I made the dumpling pouches:

1. Go to Michelle patterns and download your free PDF pattern, print and cut out.
I used the larger size (the easier one), the smaller size (the harder one) will make a very small pouch.
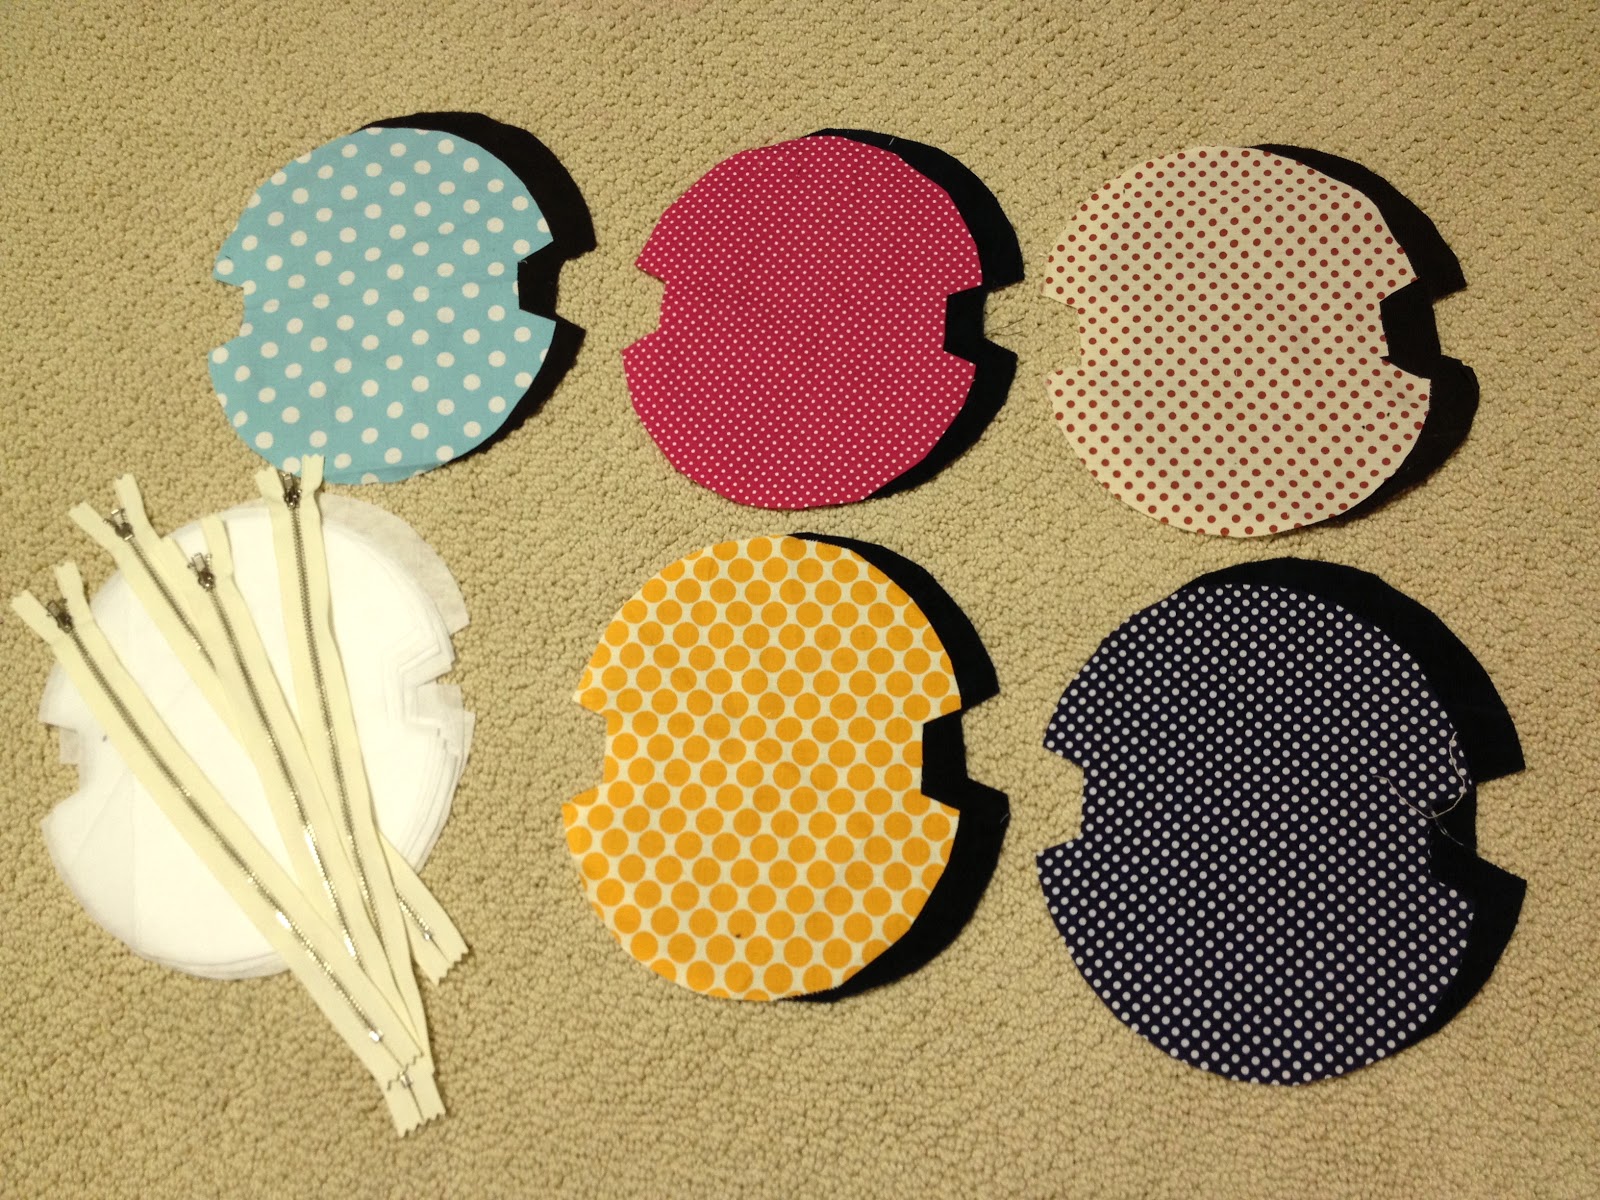
2. Cut out fabrics and interfacing.
I order my zippers from Jennie at Zip It, I used 12″ vanilla metal zips.
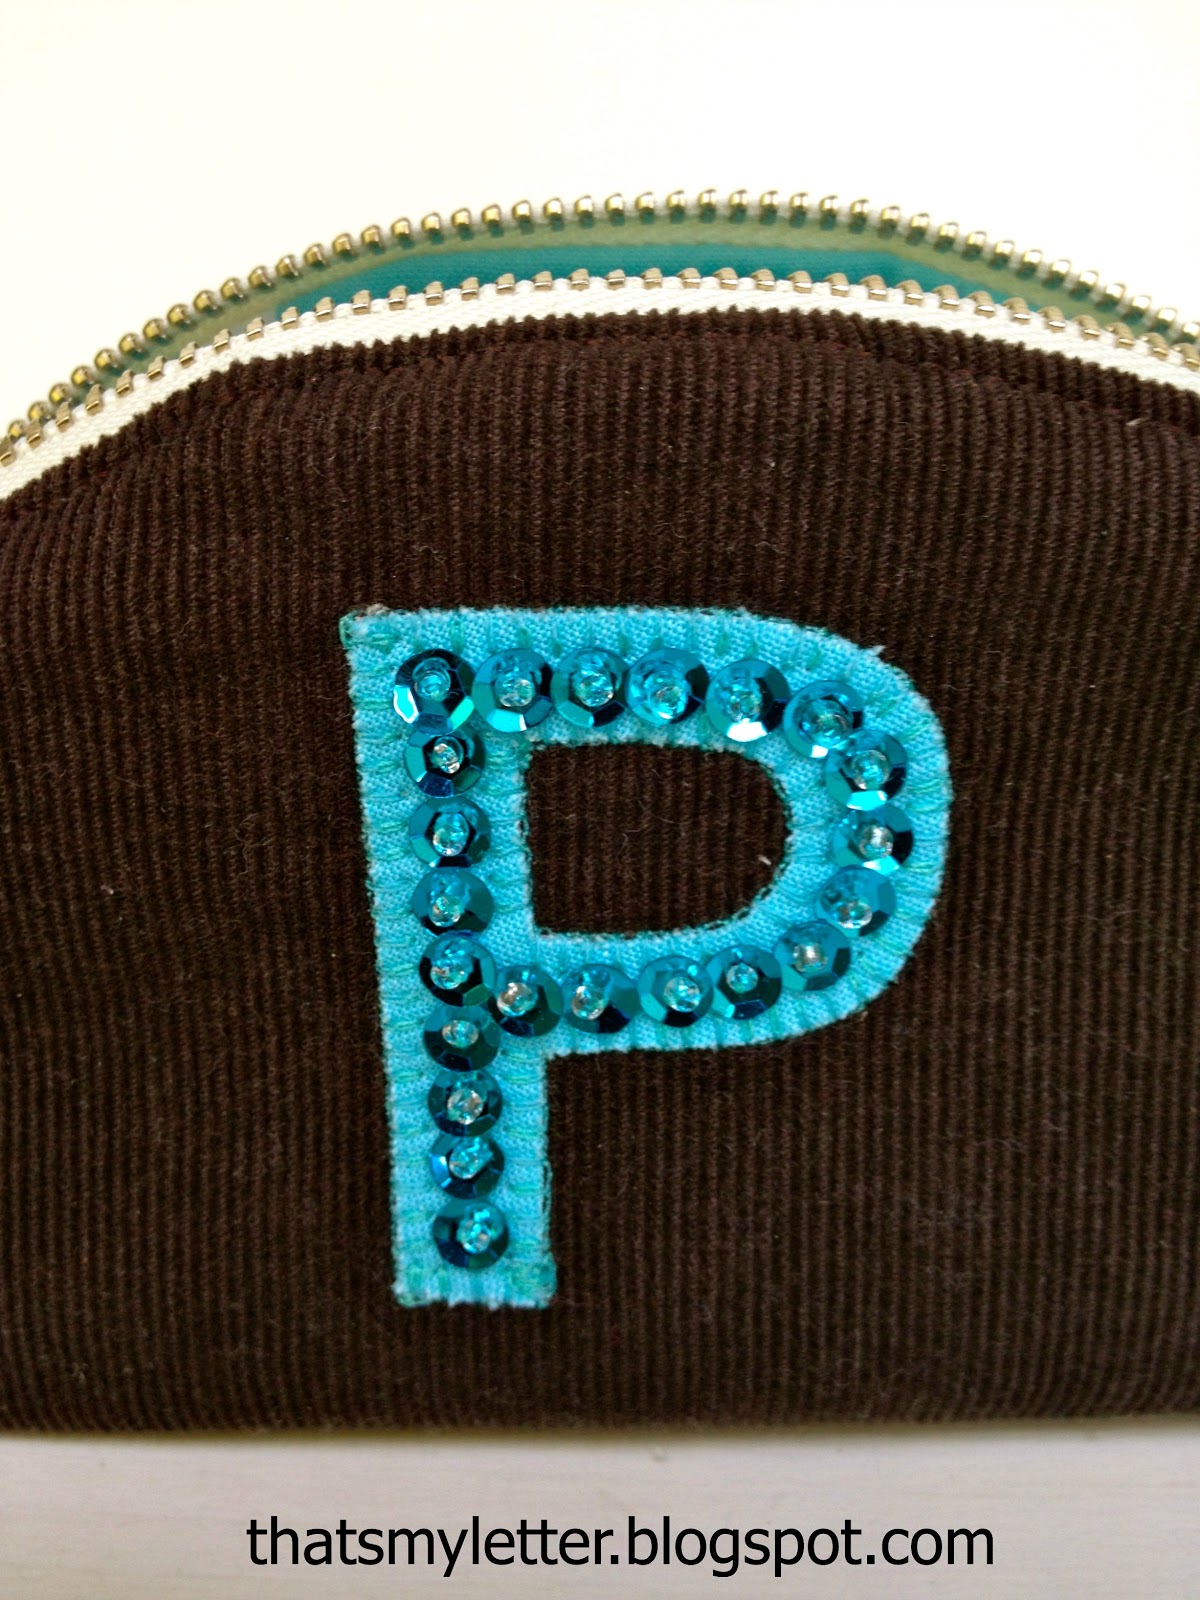
3. Cut out fabric letter (how to make letters here) and pin in place.
Using a button hole or zig zag stitch letter in place.
Then hand sew sequins on top of letter.

4. Now follow the pattern directions and baste zipper in place:

5. Then add lining right sides together and sew zipper in place:

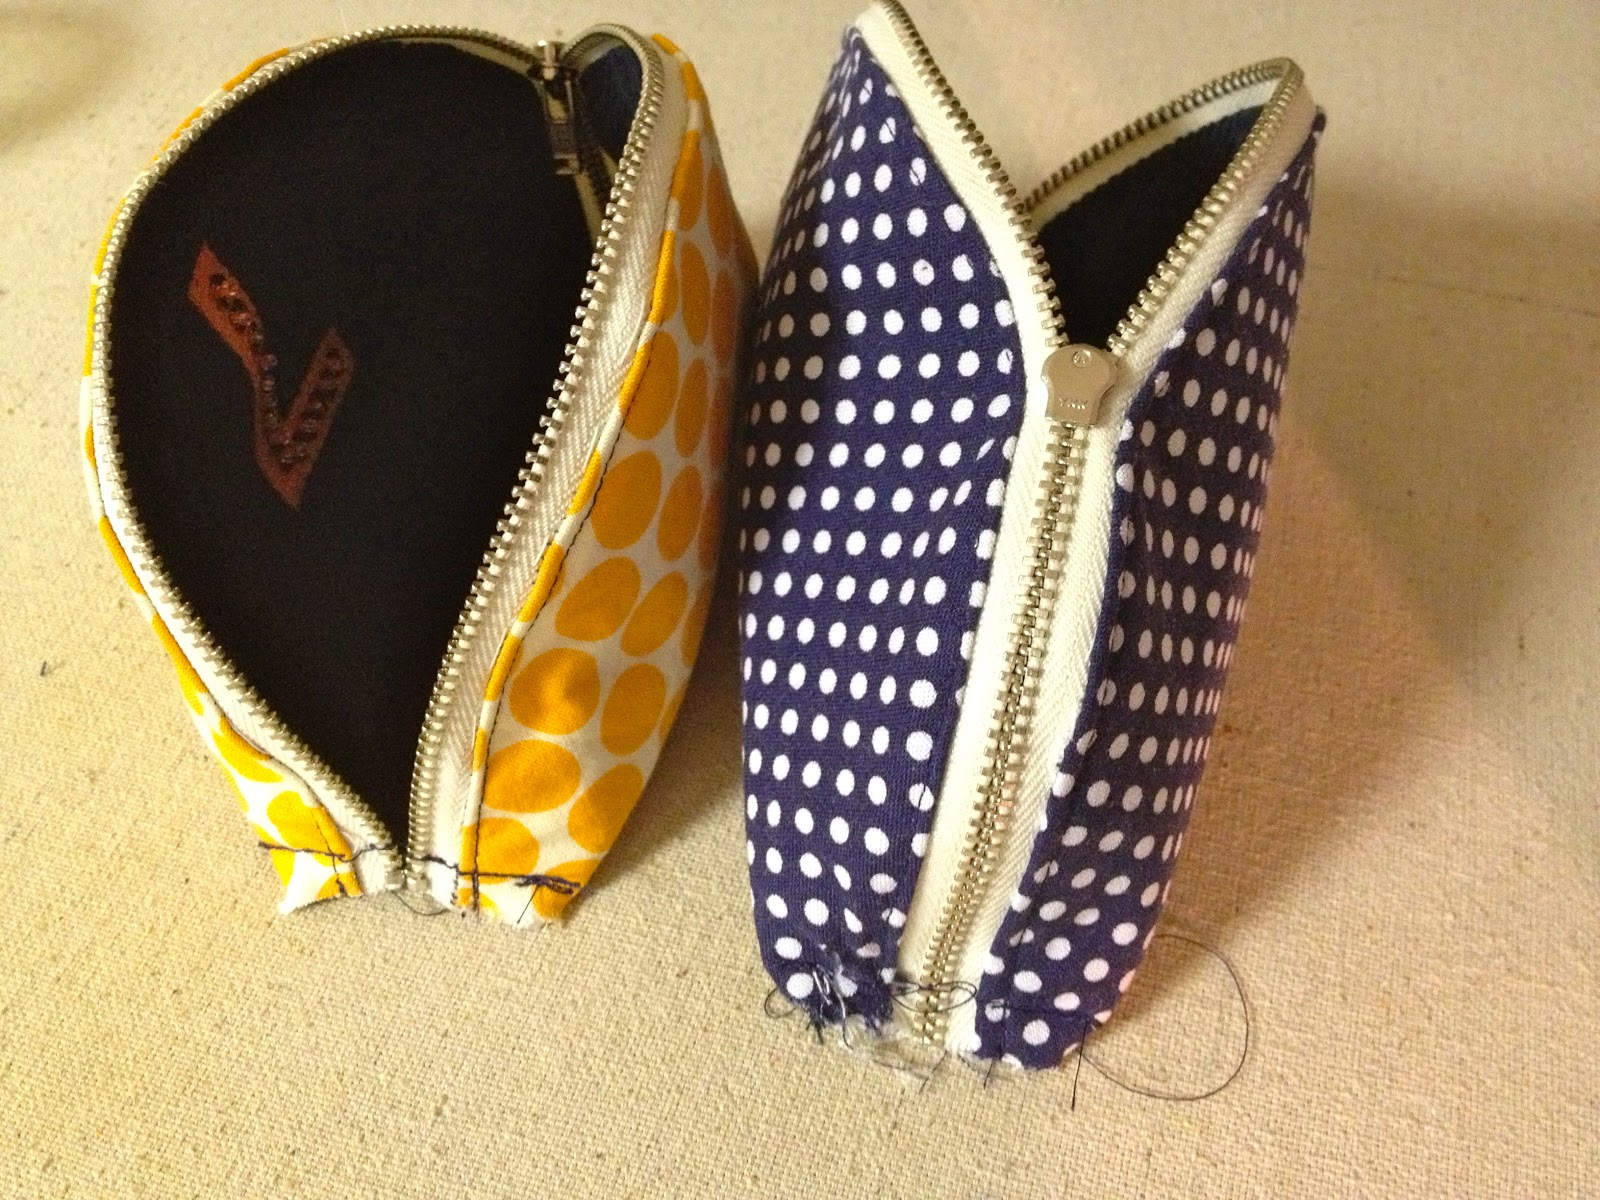
6. Turn right side out and topstitch zipper for a finished edge.
7. Turn lining side out and match up corner seams, straight stitch across:

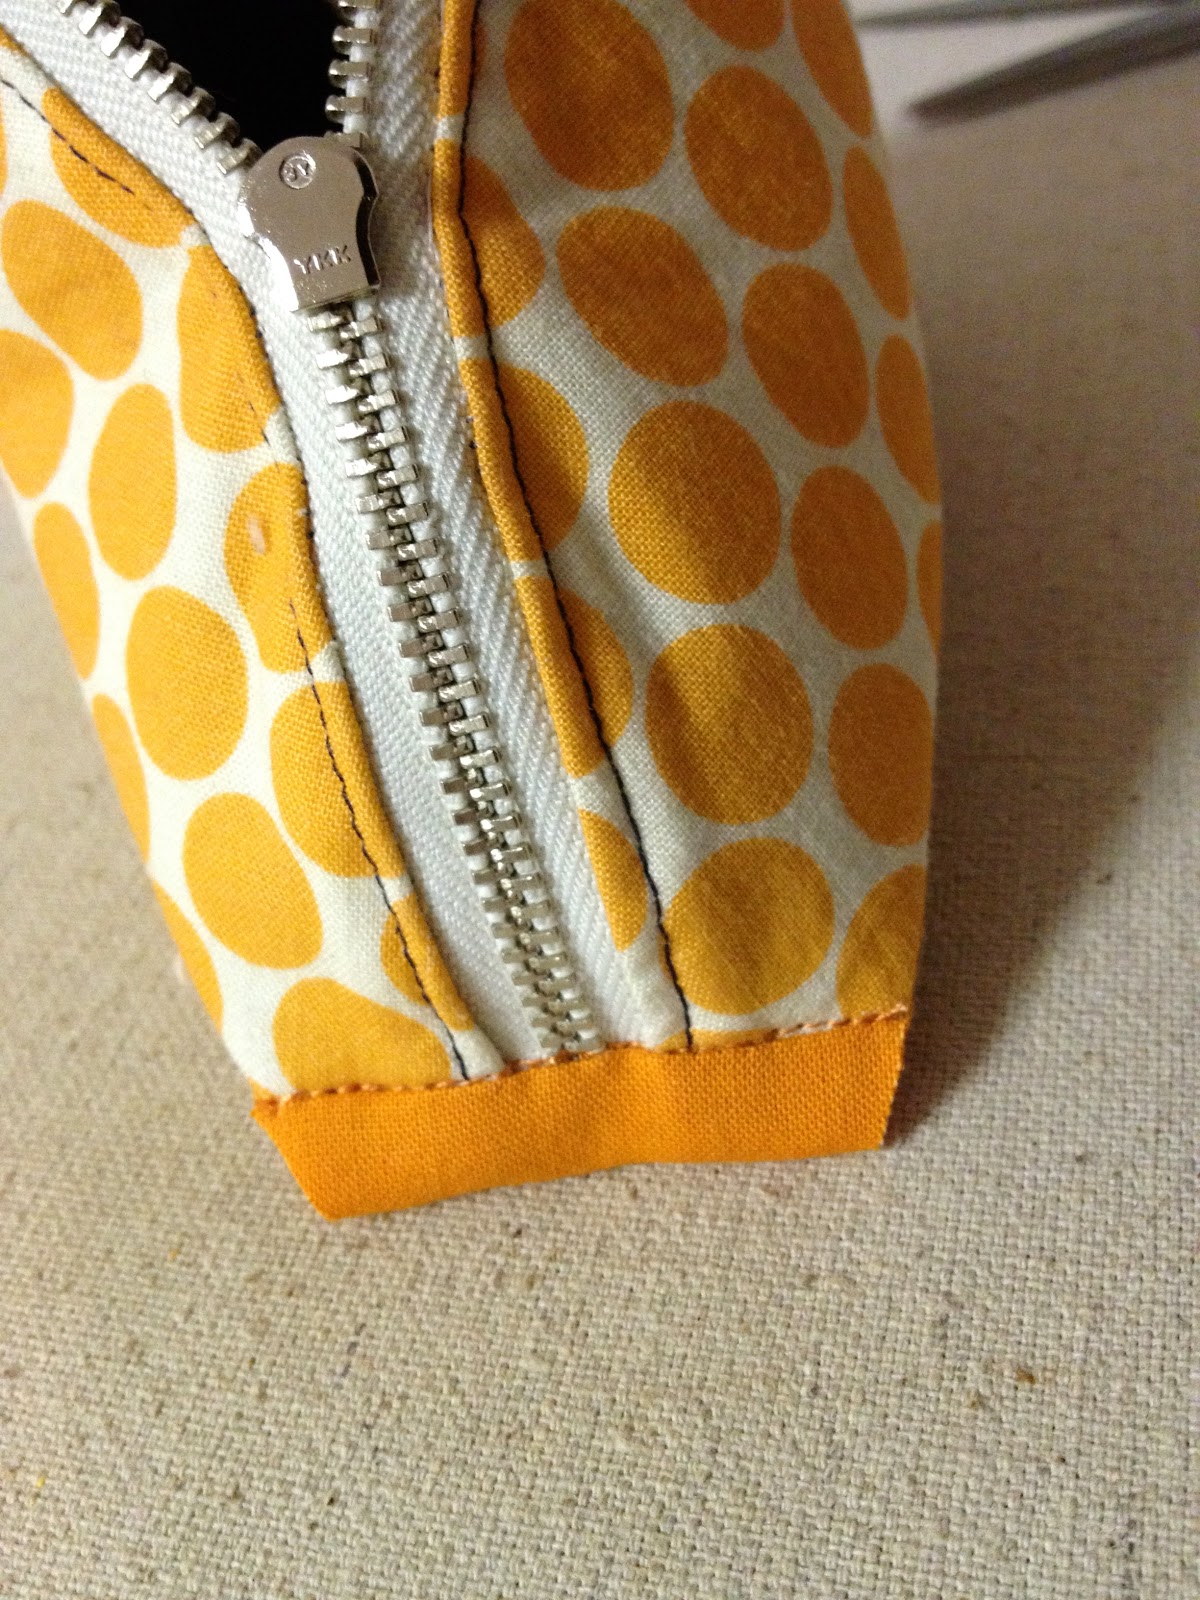
8. Add some matching binding to cover that seam:

9. Turn right side out and add ribbon to zipper pull:
Now you’re ready to give.
I’m linking up to:
 SAS @ Funky Junk

Nifty Thrifty Sunday @ Nifty Thrifty Things
DIY Project Parade @ The DIY Showoff
Tutorials & Tips Tuesday @ Home Stories A to Z
Strut Your Stuff @ Somewhat Simple
Share Awesomeness Thur @ The 36th Avenue
Pretty Things Thursday @ Scissors & Spatulas
Flaunt it Friday @ Chic on a Shoestring
Frugal Friday @ The Shabby Nest
SAS @ Just a Girl
Remodelaholics Anonymous @ Remodelaholic

inspiration board @ Carolyns Homework
Sunday Showcase Party @ Under the Table & Dreaming
Weekend Bloggy Reading @ Serenity Now

Textiles @ Freckled Laundry

You may also like...

  • Painted Zipper Pouch with Stylin PaintPainted Zipper Pouch with Stylin Paint
  • Wood & Leather Bed Free PlansWood & Leather Bed Free Plans
  • DIY Village Cut Out Wreath & DecoArt / Cricut GiveawayDIY Village Cut Out Wreath & DecoArt / Cricut Giveaway
  • DIY Moving AnnouncementsDIY Moving Announcements
Share this post:

Filed Under: DIY, FOR HER, FOR HIM, GIFTS, GIFTS, KIDS, POUCHES, SEW, SEWING, TEACHERS6 Comments

Reader Interactions

Comments

  1. potusmama says

    November 7, 2012 at 7:57 AM

    Fabulous!! Thank you for such fun, easy projects!

    Reply
  2. daiseyjayne.com says

    November 7, 2012 at 11:09 AM

    These are so cute! And your work is flawless, beautiful 🙂

    Reply
  3. senovia says

    November 7, 2012 at 2:43 PM

    I love your blog and I can't wait to see what projects you share next. Yesterday I made tote bags for my nieces for Christmas and used your fabric letter posts to put their name on the totes. I have to say that was stinking HARD!! I practiced the sewing part and it did NOT work at all. I give you lots of credit to make such amazing things that look perfect every time. You go girl!

    Reply
  4. Beth says

    November 7, 2012 at 4:51 PM

    Love this pattern, thanks for the link.

    Reply
  5. Chrissy Jordan says

    November 9, 2012 at 4:00 PM

    How cute! I would love it if you would share this over on F-it Fridays!

    http://www.parloandlogi.com/

    Reply
  6. Ana Lopes says

    November 11, 2012 at 3:09 AM

    Wow, so charming! Thanks so much for sharing the great tutorial! I'd love for you to visit my blog.
    Happy week!

    Hugs from Portugal,

    Ana Love Craft
    http://www.lovecraft2012.blogspot.com
    ! Love all details!

    Reply

Leave a Reply Cancel reply

Your email address will not be published. Required fields are marked *

Primary Sidebar

Hi! I’m Jaime

Jaime Costiglio

Hello!

Thank you for stopping by.
Join me for lots of DIY.

Read more

Get new posts via email

Handbuilt Holiday: Gift Project Plans

handbuilt holiday gift project plans

Collection of DIY gift project plans to build.

The Home Depot Tool Prospective

THD Prospective

Tools to consider for the DIYer.

Archives

The Home Depot Logo
Copyright © 2022 Jaime Costiglio · Custom site by Moonsteam Design

Privacy Policy