• Home
  • Blog
  • About
  • Contact
    • Disclosure
    • Privacy Policy
  • SHOP
  • Widget area for main menu

    • Email
    • Facebook
    • Instagram
    • Pinterest
    • Twitter
    • YouTube
  • Skip to primary navigation
  • Skip to main content
  • Skip to primary sidebar

Jaime Costiglio

build - paint - sew

  • BUILD
    • BEDS
    • BENCHES
    • DESKS
    • DRESSERS
    • GAMES & TOYS
    • SCRAP WOOD
    • SHELVES
    • STORAGE
    • TABLES
  • TOOLS
  • PAINT
    • CRAFTS
    • FURNITURE
    • HOME DECOR
  • SEW
    • GIFTS
    • HOME DECOR
    • POUCHES
  • HANDBUILT HOLIDAY
    • 2021
    • 2019
    • 2018
    • 2017
    • 2016
    • 2015
    • 2014
    • 2013
  • GIFTS
    • BABIES
    • KIDS
    • FOR HER
    • FOR HIM
    • TEACHERS
    • WEDDINGS
  • SEASONAL
    • 4TH OF JULY
    • FALL
    • HALLOWEEN
    • CHRISTMAS
    • SUMMER
    • SPRING
    • ST. PATRICK’S DAY
    • THANKSGIVING
    • VALENTINE’S DAY
    • WINTER
  • SALTBOX PROJECT
    • BATHROOMS
    • DINING ROOM
    • EXTERIOR
    • FAMILY ROOM
    • FOYER / MUDROOM
    • KIDS BEDROOMS
    • KITCHEN
    • LIVING ROOM
    • MASTER BEDROOM
    • PLAYROOM
  • SCROLL SAW

“D” is for Desk #3

February 3, 2011

A desk makeover.

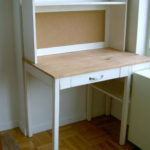
This desk used to be in the kid’s bedroom. 

Kids never use a desk in their bedroom, at least mine never did.

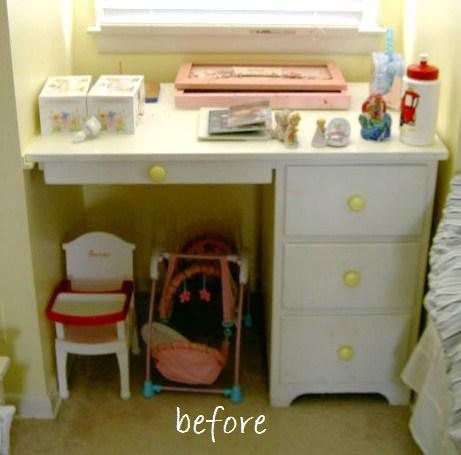
So I swiped it for our room.

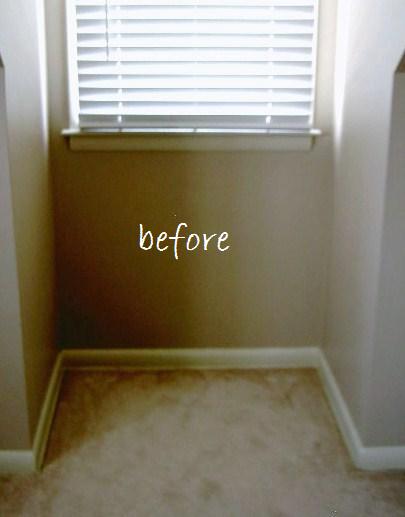
Which was like this:
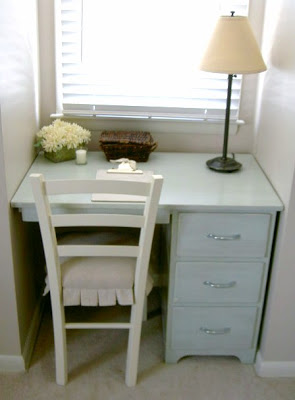
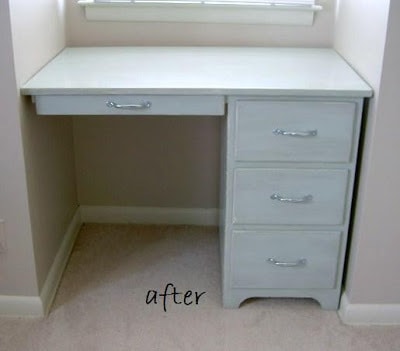
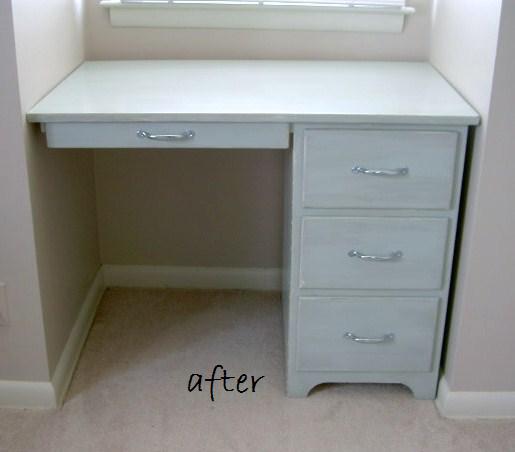
And now like this:

The kids will get a window seat with toy bins underneath, much more practical than a desk.
Here’s how I changed the desk:
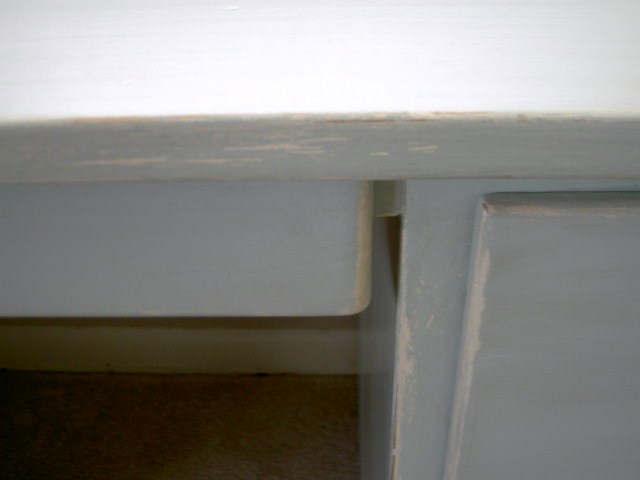
1. sanded (120 grit)
2. paint two coats (Martha Stewart rainwater, eggshell finish)
3. sanded to distress (120 grit)
4. stain (Minwax special walnut)
5. poly two coats (Minwax clear satin finish)

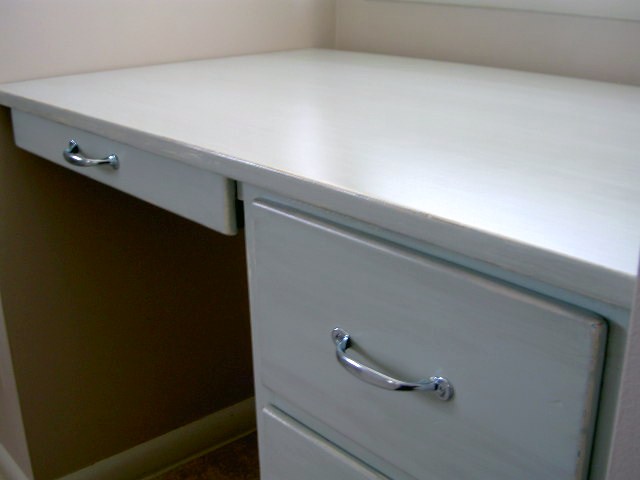
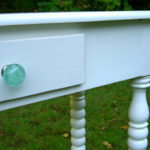
Added new hardware (chrome utility pulls):
I can say for certain I will make more use out of the desk in the next week then my kids ever did in the last five years.
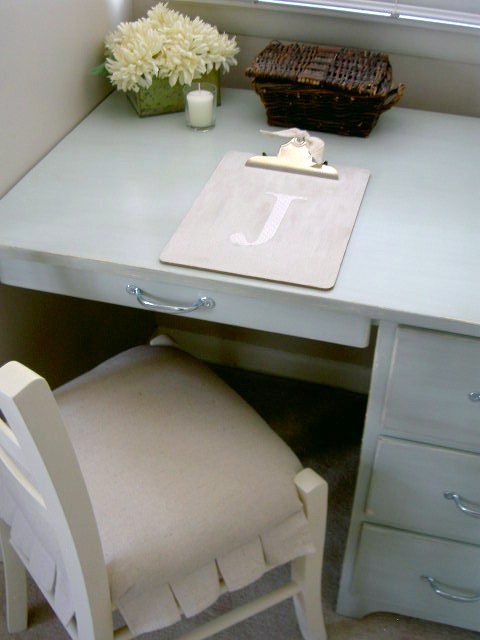
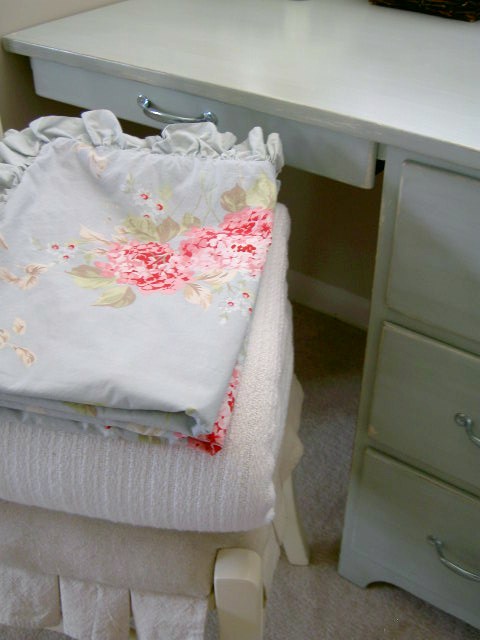
Some detail shots:
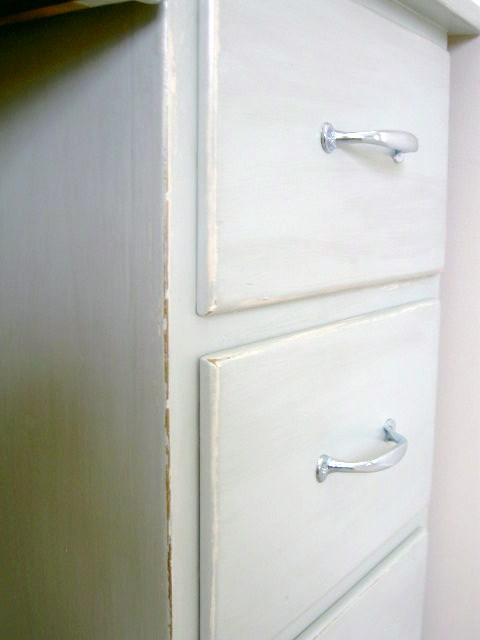
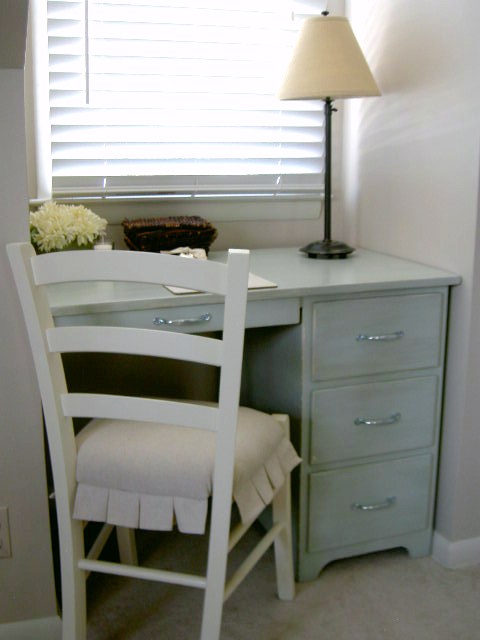
The color choice was pulled from our duvet cover:
One last side by side:
Making better use of something we already had, that’s a good project.
I’m linking up to:
 The Shabby Nest Between Naps On The Porch grabtt Remodelaholic Furniture Feature Fridays

You may also like...

  • Nightstand MakeoverNightstand Makeover
  • DIY Vanity MakeoverDIY Vanity Makeover
  • DIY Simple Desk with HutchDIY Simple Desk with Hutch
  • “D” is for Dresser“D” is for Dresser
Share this post:

Filed Under: DIY, FURNITURE, FURNITURE, PAINT15 Comments

Reader Interactions

Comments

  1. Linda@Coastal Charm says

    February 4, 2011 at 12:23 AM

    Jaime,
    Looks great in it's new space and I love the makeover. I have a weekly linky party called NIFTY THRIFTY TUESDAYS…would love to have you come by and join in on the fun…also having a GIVEAWAY going on…it’s a $65 gift card and some goodies from me!
    Blessings,
    Linda

    Reply
  2. Allison@FabRehab says

    February 4, 2011 at 3:47 AM

    I love that! It looks SO peaceful right in that nook! Well done!

    Reply
  3. Gracefully Vintage says

    February 4, 2011 at 11:10 PM

    Love the fix up, so modern… Great job, what a perfect spot for a desk..
    Thanks for stopping by my blog..
    love seeing comments.
    Karryann

    Reply
  4. Brook says

    February 5, 2011 at 10:54 PM

    Beautiful. Love the color choice. Perfect way to use that little nook.

    Reply
  5. Rene says

    February 6, 2011 at 1:18 PM

    That space looks great and is that a drop cloth I see?

    -Rene

    Reply
  6. Kate @ The Gaines Gang says

    February 7, 2011 at 5:56 PM

    GREAT! Before and after!

    It's a perfect fit!

    Thanks for sharing!

    Reply
  7. Life In The Thrifty Lane says

    February 8, 2011 at 4:30 AM

    What a nice makeover, love the color!

    Reply
  8. Diane at Perfectly Imperfect Life says

    February 8, 2011 at 4:35 AM

    The desk looks great and I'm really loving the cute little skirted chair. Adorable!

    Reply
  9. Cassie @ Primitive & Proper says

    February 8, 2011 at 11:29 PM

    wow- what a perfect little desk nook! love it, and love the fabric on the chair, too! sooo cute!

    Reply
  10. Danielle says

    February 9, 2011 at 4:06 PM

    Great makeover…that desk fit so perfectly and looks so inviting!

    Reply
  11. Kate@TwentySixToLife says

    February 11, 2011 at 7:21 PM

    I love the color you chose – fantastic work.

    Reply
  12. Samantha2818 says

    February 18, 2011 at 7:03 AM

    That little space was made for that desk. It looks perfect there and I love the chair too. Great job!
    ~Sam

    Reply
  13. Late Bloomers says

    February 18, 2011 at 2:56 PM

    Jaime- so cute! And I love the simple pulls that are really perfect on it!

    By the way, I'm a neighbor of sorts, over here in Orange County!

    Reply
  14. Kim @ Second Time Furniture says

    February 20, 2011 at 8:35 AM

    Very sweet!

    Reply
  15. Sarah @ Cozy.Cottage.Cute. says

    February 20, 2011 at 5:24 PM

    That is one adorable little space. Great job!!! 🙂

    Reply

Leave a Reply Cancel reply

Your email address will not be published. Required fields are marked *

Primary Sidebar

Hi! I’m Jaime

Jaime Costiglio

Hello!

Thank you for stopping by.
Join me for lots of DIY.

Read more

Get new posts via email

Handbuilt Holiday: Gift Project Plans

handbuilt holiday gift project plans

Collection of DIY gift project plans to build.

The Home Depot Tool Prospective

THD Prospective

Tools to consider for the DIYer.

Archives

The Home Depot Logo
Copyright © 2026 Jaime Costiglio · Custom site by Moonsteam Design

Privacy Policy