• Home
  • Blog
  • About
  • Contact
    • Disclosure
    • Privacy Policy
  • SHOP
  • Widget area for main menu

    • Email
    • Facebook
    • Instagram
    • Pinterest
    • Twitter
    • YouTube
  • Skip to primary navigation
  • Skip to main content
  • Skip to primary sidebar

Jaime Costiglio

build - paint - sew

  • BUILD
    • BEDS
    • BENCHES
    • DESKS
    • DRESSERS
    • GAMES & TOYS
    • SCRAP WOOD
    • SHELVES
    • STORAGE
    • TABLES
  • TOOLS
  • PAINT
    • CRAFTS
    • FURNITURE
    • HOME DECOR
  • SEW
    • GIFTS
    • HOME DECOR
    • POUCHES
  • HANDBUILT HOLIDAY
    • 2021
    • 2019
    • 2018
    • 2017
    • 2016
    • 2015
    • 2014
    • 2013
  • GIFTS
    • BABIES
    • KIDS
    • FOR HER
    • FOR HIM
    • TEACHERS
    • WEDDINGS
  • SEASONAL
    • 4TH OF JULY
    • FALL
    • HALLOWEEN
    • CHRISTMAS
    • SUMMER
    • SPRING
    • ST. PATRICK’S DAY
    • THANKSGIVING
    • VALENTINE’S DAY
    • WINTER
  • SALTBOX PROJECT
    • BATHROOMS
    • DINING ROOM
    • EXTERIOR
    • FAMILY ROOM
    • FOYER / MUDROOM
    • KIDS BEDROOMS
    • KITCHEN
    • LIVING ROOM
    • MASTER BEDROOM
    • PLAYROOM
  • SCROLL SAW

“C” is for Chevron #3

September 1, 2012

Sew: monogrammed chevron pouches
Zippered navy chevron pouches with bright colored monograms and lining to match:
(Each pouch measures 12″l x 7″h x 1.5″d at base.)

After making that last batch of chevron totes I used up some scraps to make these pouches:

Each with a personalized monogram:

Or in this case a single large letter:

Here’s how I made the chevron pouches:
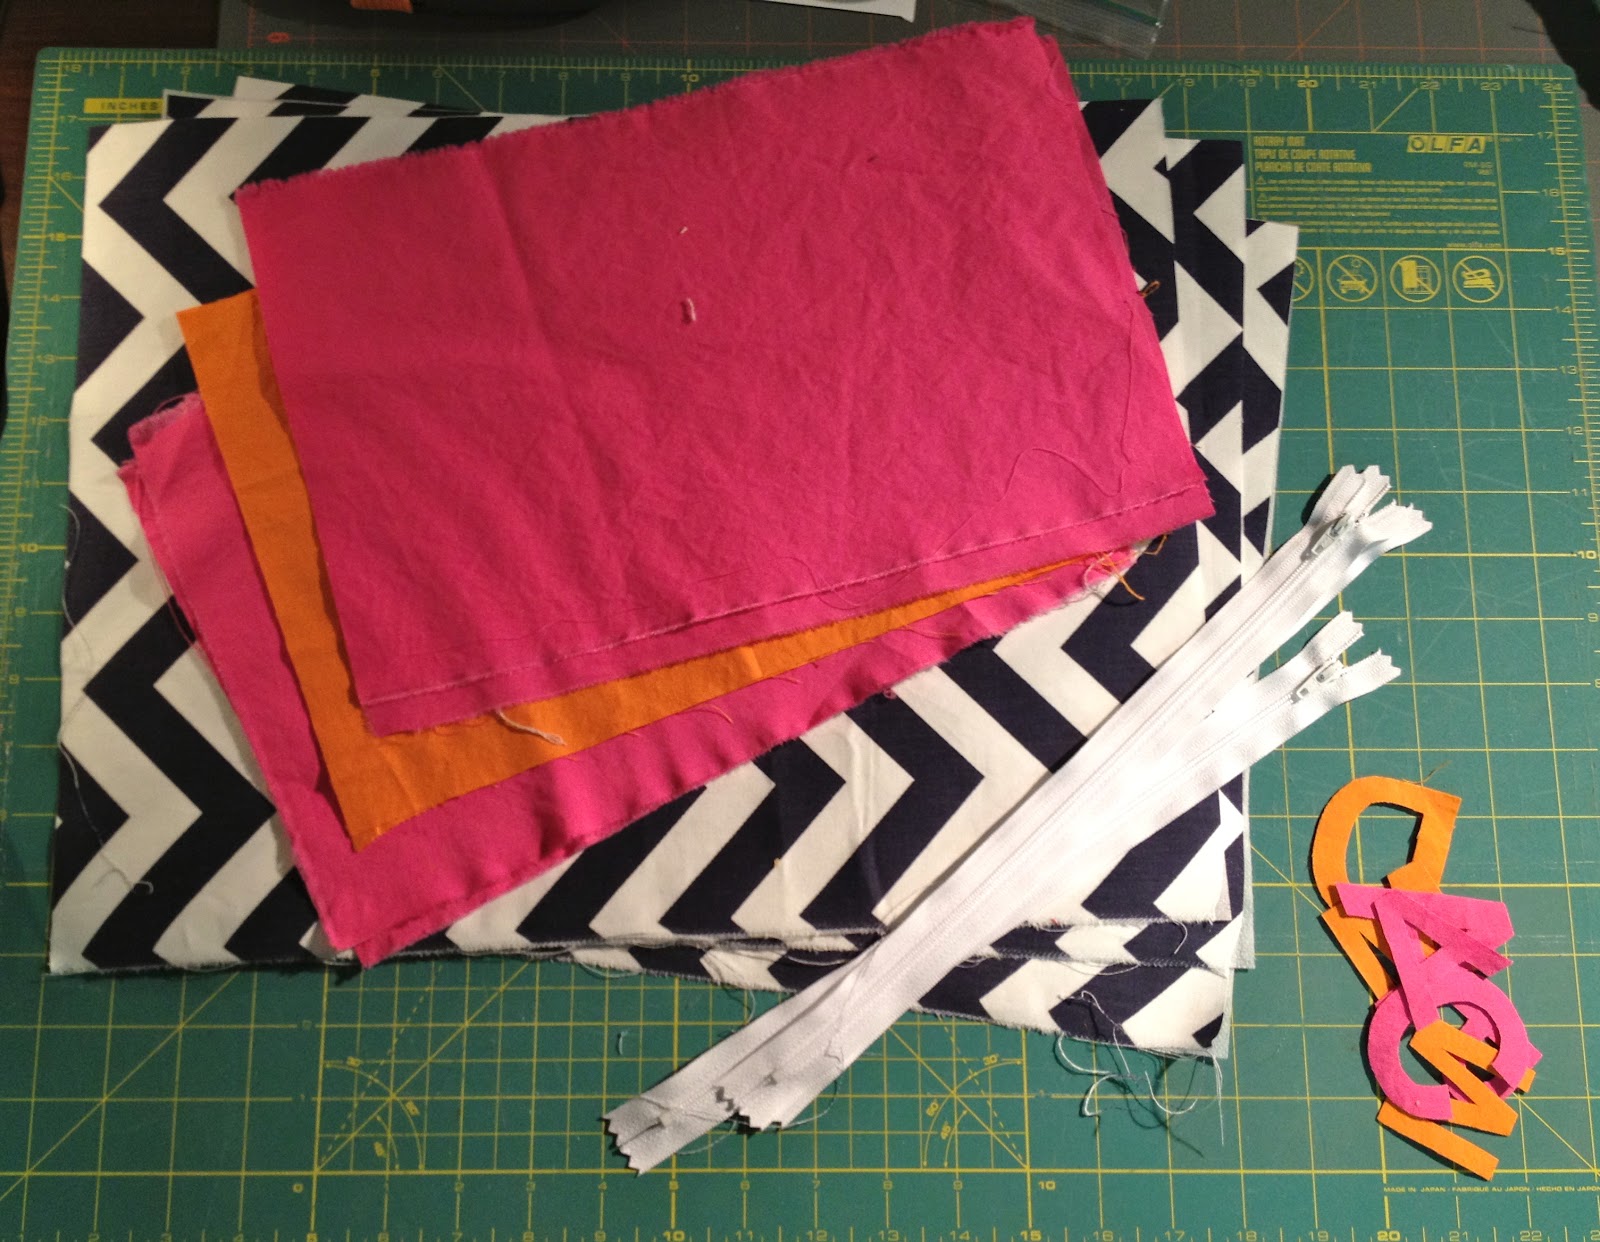
1. Supplies:
chevron: 13″ x 17″
med. weight fusible interfacing: 13″ x 17″
lining: 2 @ 13″ x 8.5″
zipper: 12″
fabric letters (how-to here)
grosgrain ribbon for zipper pull
2. Fuse interfacing to wrong side of chevron.
Pin letters in place on one half:

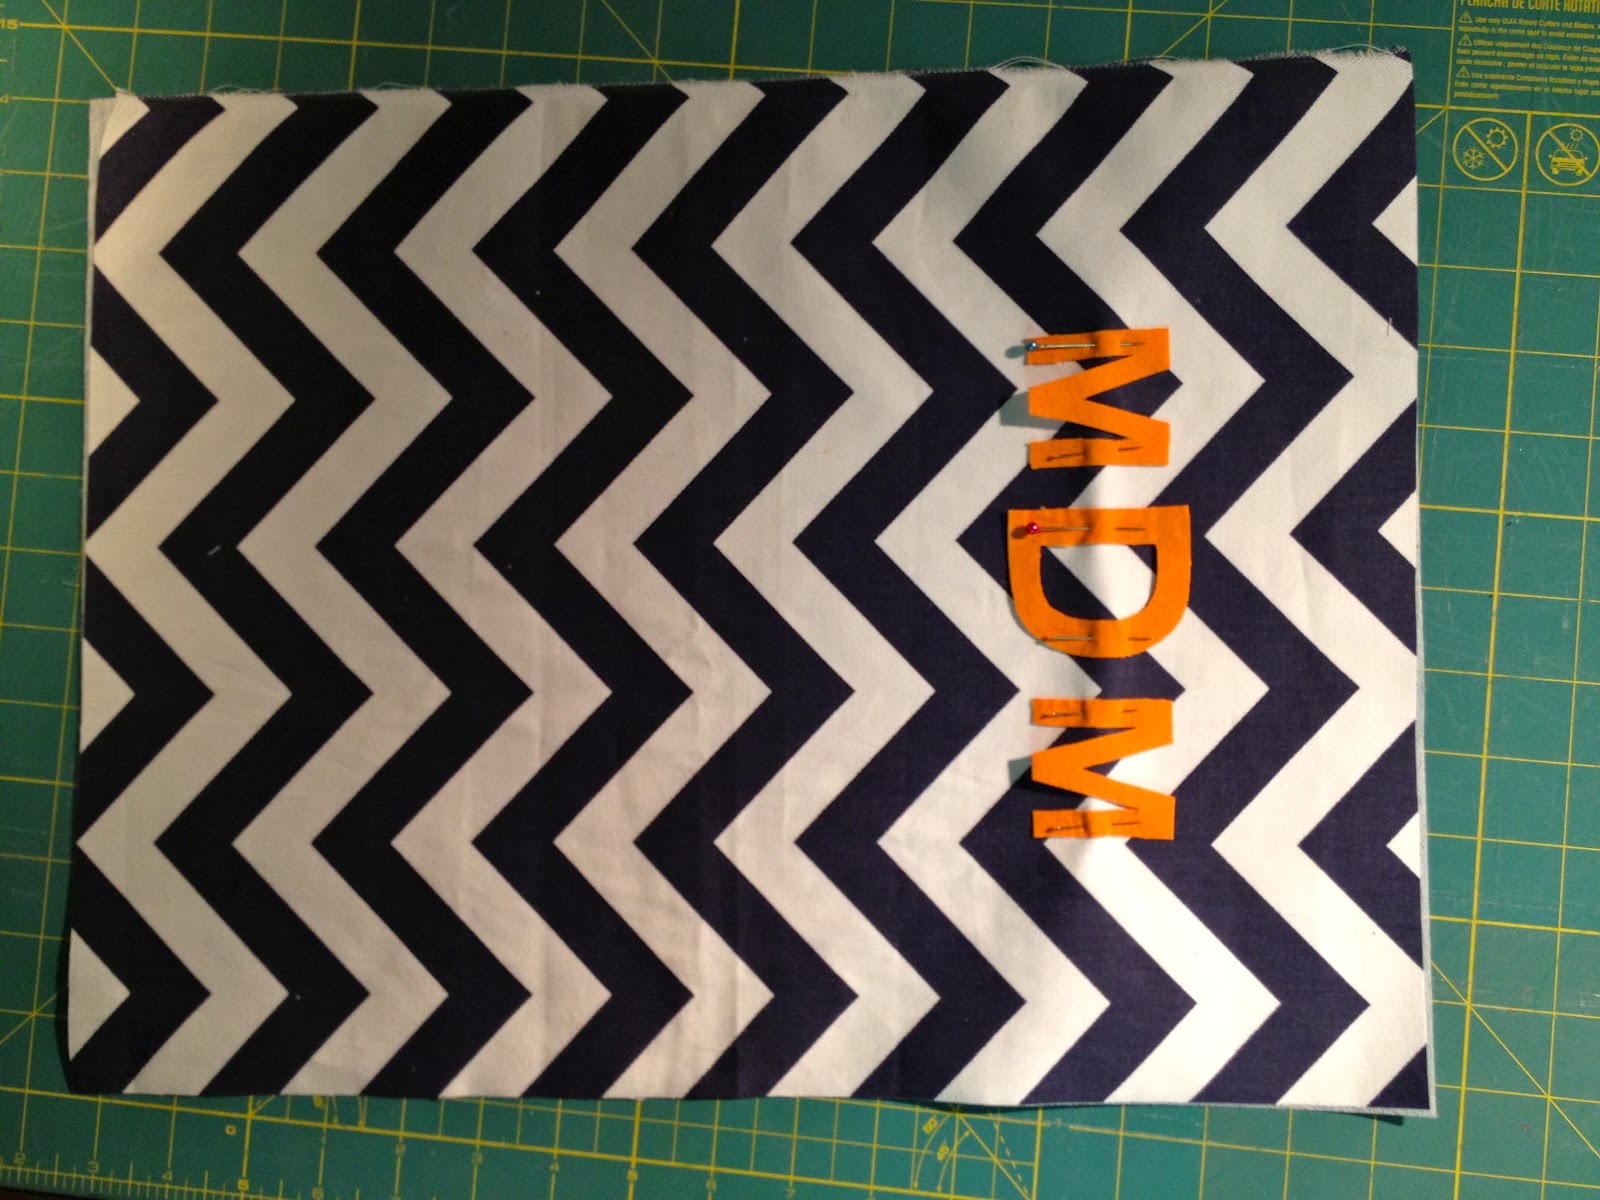
3. Zig zag stitch letters in place to secure:

4. Place zipper face down on one end then lining:
Straight stitch with zipper foot and repeat for other end.

5. Top stitch chevron in place to prevent chevron and lining from getting stuck in zipper:

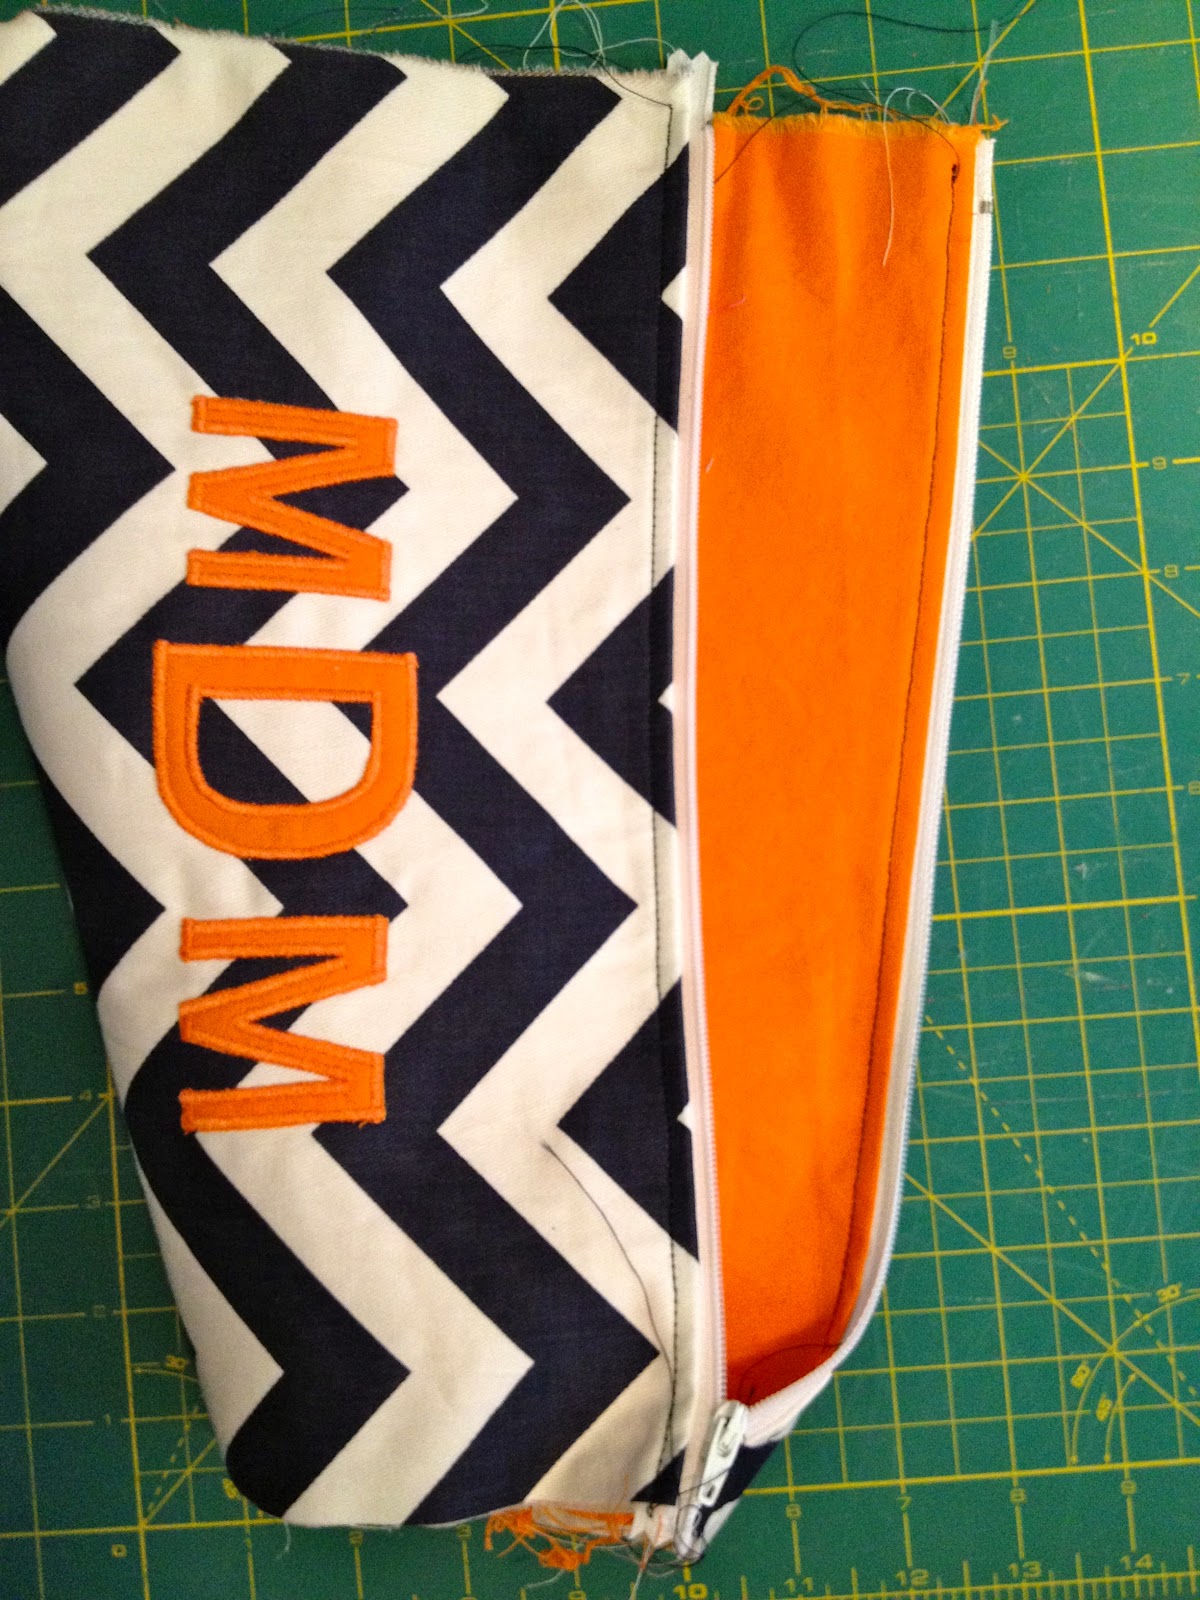
The top stitching creates a nice contrast finished edge:
6. Stitch sides together and miter corners:
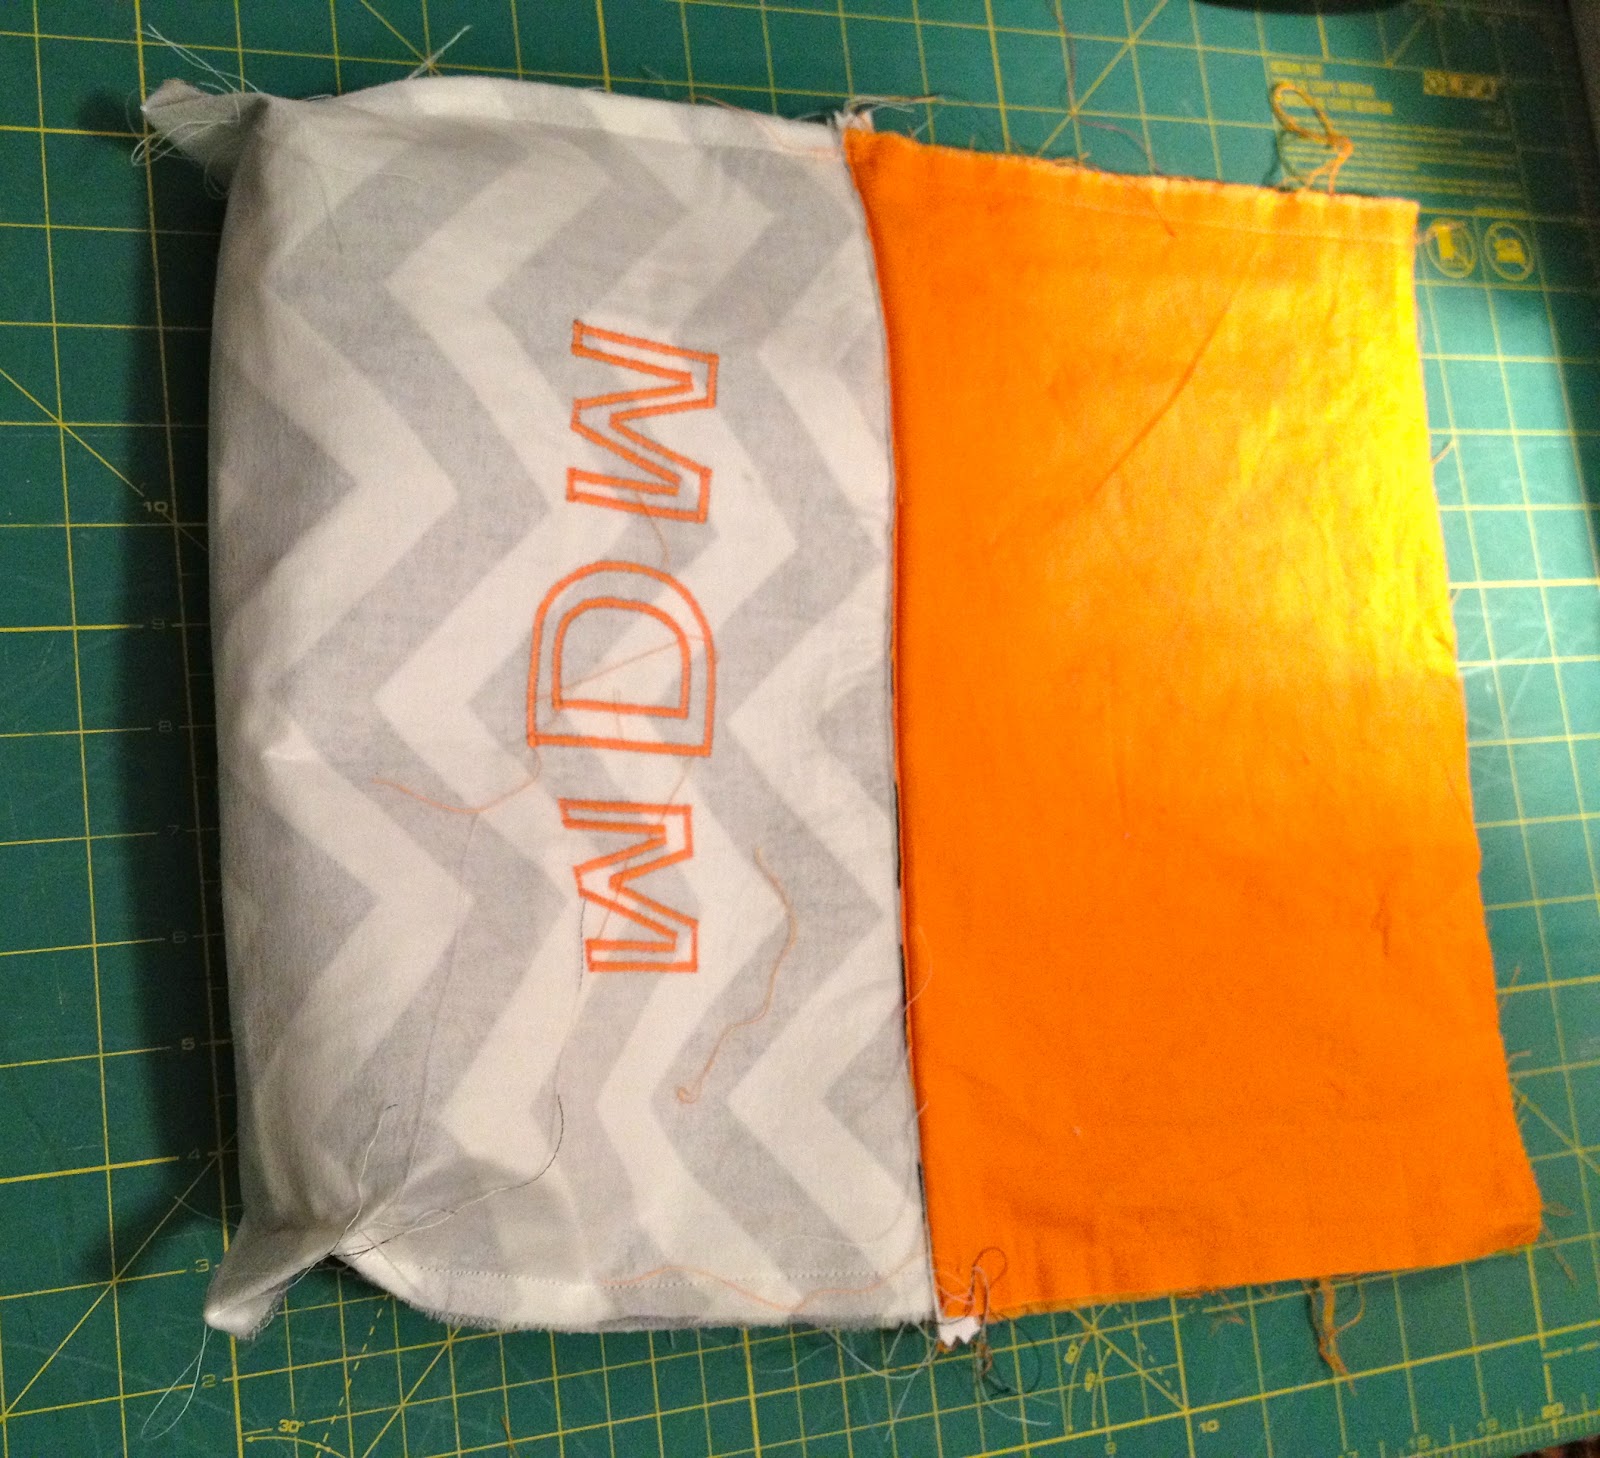
7. Turn right side out, press side seams open, press in bottom lining edge 1/2″ and top stitch closed:

8. Push lining down into pouch and press.
Add ribbon to zipper pull.
I’m linking up to:
SAS @ Funky Junk
Nifty Thrifty Sunday @ Nifty Thrifty Things
DIY Project Parade @ The DIY Showoff
Tutorials & Tips Tuesday @ Home Stories A to Z
Strut Your Stuff @ Somewhat Simple
Share Awesomeness Thur @ The 36th Avenue
Pretty Things Thursday @ Scissors & Spatulas
Flaunt it Friday @ Chic on a Shoestring
Frugal Friday @ The Shabby Nest
SAS @ Just a Girl
Remodelaholics Anonymous @ Remodelaholic
inspiration board @ Carolyns Homework
Textiles @ Freckled Laundry
Sunday Showcase Party @ Under the Table & Dreaming

You may also like...

  • Cross Stitch Monogram Ornament PlacecardCross Stitch Monogram Ornament Placecard
  • DIY Simple Personalized PillowsDIY Simple Personalized Pillows
  • DIY Embellished Monogram PouchDIY Embellished Monogram Pouch
  • “P” is for Painted Zipper Pouch“P” is for Painted Zipper Pouch
Share this post:

Filed Under: DIY, FOR HER, GIFTS, GIFTS, KIDS, POUCHES, SEW, SEWING, TEACHERS4 Comments

Reader Interactions

Comments

  1. Dee @ A Lapin Life says

    September 1, 2012 at 6:37 PM

    Your pouches and totes are super cute!

    Dee

    Reply
  2. Jen says

    September 1, 2012 at 10:46 PM

    Love these! I'm going to make one for my Aunt and Mother in law for their birthday. Love the color combinations!

    Jen
    sewfabulous-now.blogspot.com

    Reply
  3. Confessions of a Paper-Crafts Chick says

    September 3, 2012 at 11:48 AM

    These are the cutest!. I'd like to pop one of these inside of my handbag for lip gloss, etc.

    Reply
  4. Laurel @ Ducks in a Row says

    September 7, 2012 at 1:11 PM

    These are so cute = I think they will be my Christmas gifts! I love the monogram!

    Reply

Leave a Reply Cancel reply

Your email address will not be published. Required fields are marked *

Primary Sidebar

Hi! I’m Jaime

Jaime Costiglio

Hello!

Thank you for stopping by.
Join me for lots of DIY.

Read more

Get new posts via email

Handbuilt Holiday: Gift Project Plans

handbuilt holiday gift project plans

Collection of DIY gift project plans to build.

The Home Depot Tool Prospective

THD Prospective

Tools to consider for the DIYer.

Archives

The Home Depot Logo
Copyright © 2023 Jaime Costiglio · Custom site by Moonsteam Design

Privacy Policy