• Home
  • Blog
  • About
  • Contact
    • Disclosure
    • Privacy Policy
  • SHOP
  • Widget area for main menu

    • Email
    • Facebook
    • Instagram
    • Pinterest
    • Twitter
    • YouTube
  • Skip to primary navigation
  • Skip to main content
  • Skip to primary sidebar

Jaime Costiglio

build - paint - sew

  • BUILD
    • BEDS
    • BENCHES
    • DESKS
    • DRESSERS
    • GAMES & TOYS
    • SCRAP WOOD
    • SHELVES
    • STORAGE
    • TABLES
  • TOOLS
  • PAINT
    • CRAFTS
    • FURNITURE
    • HOME DECOR
  • SEW
    • GIFTS
    • HOME DECOR
    • POUCHES
  • HANDBUILT HOLIDAY
    • 2021
    • 2019
    • 2018
    • 2017
    • 2016
    • 2015
    • 2014
    • 2013
  • GIFTS
    • BABIES
    • KIDS
    • FOR HER
    • FOR HIM
    • TEACHERS
    • WEDDINGS
  • SEASONAL
    • 4TH OF JULY
    • FALL
    • HALLOWEEN
    • CHRISTMAS
    • SUMMER
    • SPRING
    • ST. PATRICK’S DAY
    • THANKSGIVING
    • VALENTINE’S DAY
    • WINTER
  • SALTBOX PROJECT
    • BATHROOMS
    • DINING ROOM
    • EXTERIOR
    • FAMILY ROOM
    • FOYER / MUDROOM
    • KIDS BEDROOMS
    • KITCHEN
    • LIVING ROOM
    • MASTER BEDROOM
    • PLAYROOM
  • SCROLL SAW

“C” is for Chevron #2

August 28, 2012

Sew: monogrammed chevron beach tote
In addition to the original chevron beach tote I added a smaller version with an orange monogram:

And a hint of orange in the lining just for fun:
The smaller version makes for a good purse size when you’re out and about:
Small size measures: 12″h x 16″w x 6″deep at base
Large size measures: 16″h x 20″w x 7.5″ deep at base

The original version is here:

Here’s how I made the chevron tote:

1. Follow the original plans here with modifications below.
exterior chevron: 32″ x 17″
interior drop cloth lining: 23″ x 17″
interior chevron strips: 3″ x 17″
interior orange strips: 2.5″ x 17″
Sew the interior lining piece as pictured below, I use 1/2″ SA everywhere:

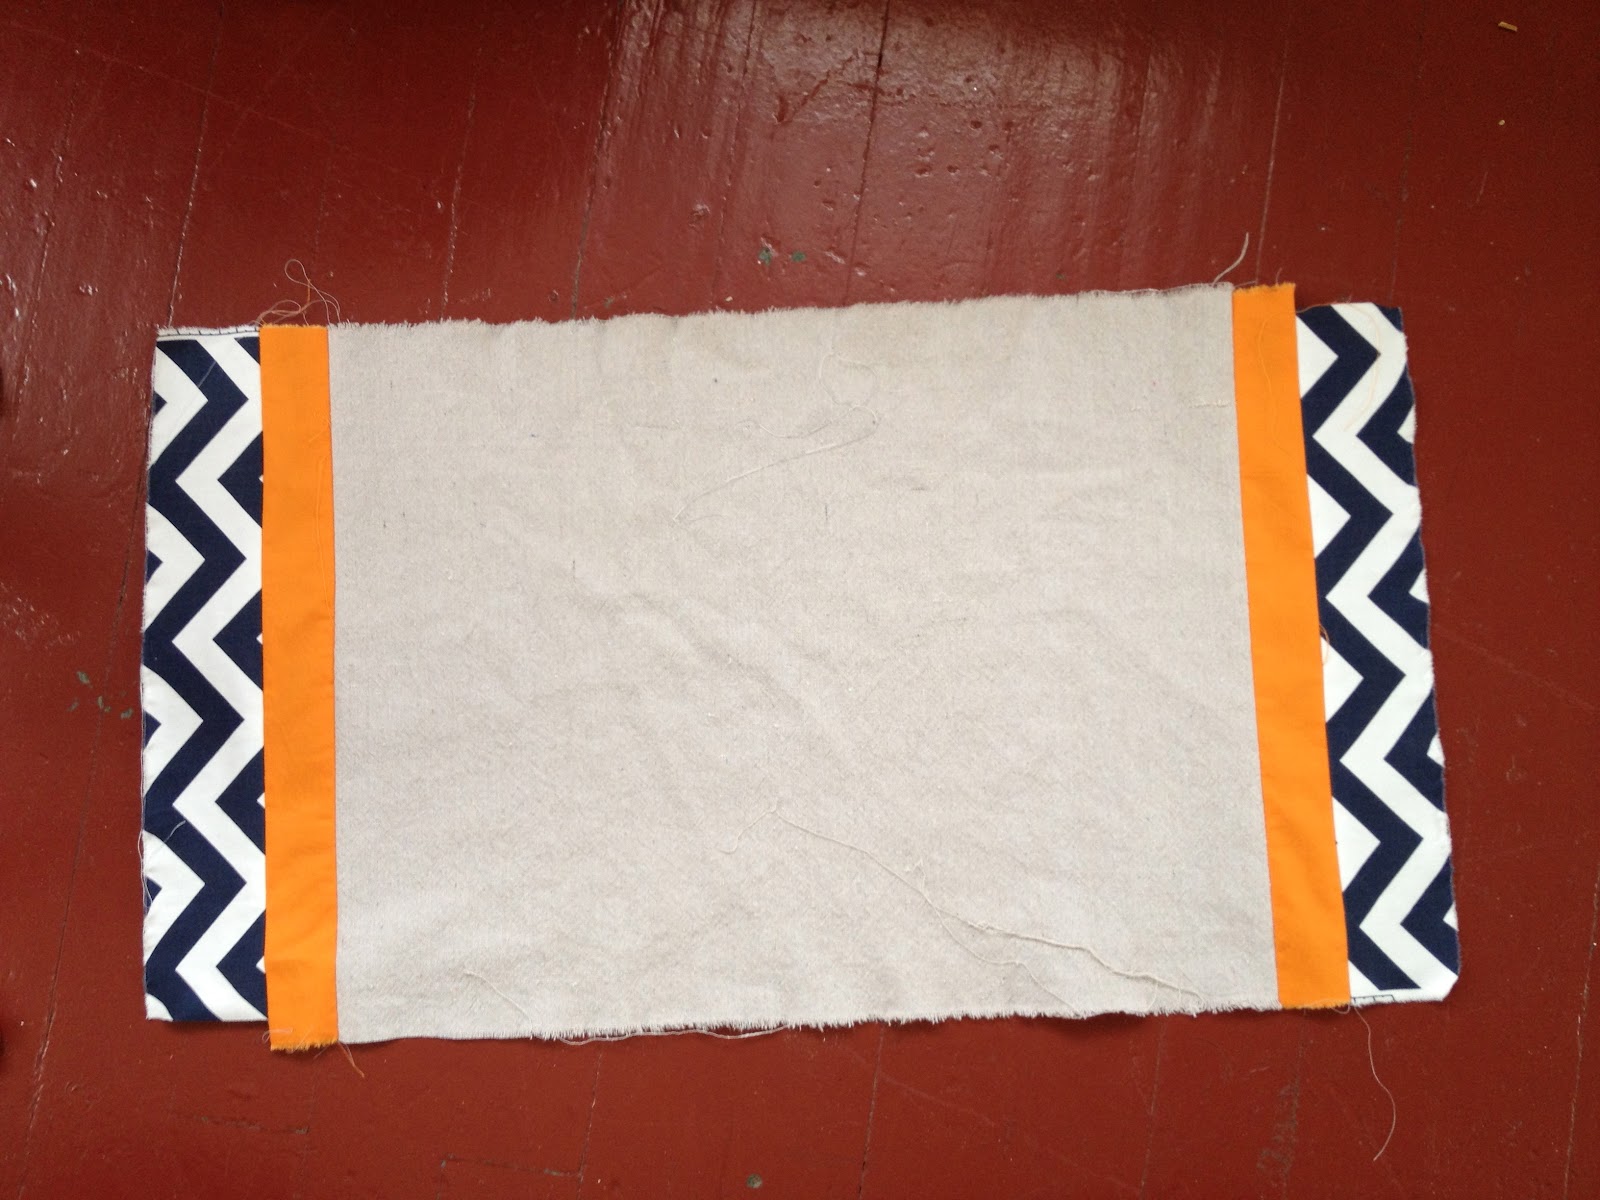
2. Miter the corners at 6″:

3. When stitching over the rope handles unravel the rope a bit to flatten and make sewing easier, going back and forward over the rope many times for a secure hold:
  DO NOT clip the excess rope, once bag is turned right side out it will catch between the top stitching for added strength. 

I’m linking up to:
SAS @ Funky Junk
DIY Project Parade @ The DIY Showoff
Tutorials & Tips Tuesday @ Home Stories A to Z
Strut Your Stuff @ Somewhat Simple
Share Awesomeness Thur @ The 36th Avenue
Pretty Things Thursday @ Scissors & Spatulas
Flaunt it Friday @ Chic on a Shoestring
Frugal Friday @ The Shabby Nest
SAS @ Just a Girl
Remodelaholics Anonymous @ Remodelaholic
inspiration board @ Carolyns Homework
Textiles @ Freckled Laundry
Sunday Showcase Party @ Under the Table & Dreaming

You may also like...

  • Cross Stitch Monogram Ornament PlacecardCross Stitch Monogram Ornament Placecard
  • DIY Simple Personalized PillowsDIY Simple Personalized Pillows
  • DIY Embellished Monogram PouchDIY Embellished Monogram Pouch
  • “P” is for Painted Zipper Pouch“P” is for Painted Zipper Pouch
Share this post:

Filed Under: DIY, FOR HER, GIFTS, GIFTS, SEW, SEWING5 Comments

Reader Interactions

Comments

  1. Hillcrest Acres says

    August 28, 2012 at 5:37 PM

    Love, love, love the tote!!!!

    Reply
  2. Danielle Bartran says

    August 29, 2012 at 1:46 PM

    I absolutely love these. I have to put this on the top of my to do list. I always love your tutorials, they are quick & easy…so looking forward to working on a bag for myself. Thank you for sharing!

    Reply
  3. ournextgreatadventure says

    August 31, 2012 at 3:32 AM

    I really really love the chevron and the pops of bright color you used!
    Sarah

    Reply
  4. Lauren @ The Well Crafted Home says

    September 5, 2012 at 6:13 PM

    This is super cute and I think I need one of these in my life 🙂 I would love to have you link this up at my link party! You can find it here:

    http://thewellcraftedhome.blogspot.com/2012/09/well-crafted-wednesday-19-link-party.html

    Reply
  5. freckled laundry says

    September 7, 2012 at 1:39 AM

    They are great, Jaime! I wish I would have begged you to make some for my little ones. Couldn't justify the PBK price tag for their totes. I'm too busy sewing things for everyone else that I didn't get a chance to make the striped ones you linked up a while back! Maybe next summer.Thanks for linking!

    Reply

Leave a Reply Cancel reply

Your email address will not be published. Required fields are marked *

Primary Sidebar

Hi! I’m Jaime

Jaime Costiglio

Hello!

Thank you for stopping by.
Join me for lots of DIY.

Read more

Get new posts via email

Handbuilt Holiday: Gift Project Plans

handbuilt holiday gift project plans

Collection of DIY gift project plans to build.

The Home Depot Tool Prospective

THD Prospective

Tools to consider for the DIYer.

Archives

The Home Depot Logo
Copyright © 2026 Jaime Costiglio · Custom site by Moonsteam Design

Privacy Policy