Chalkboard labels.
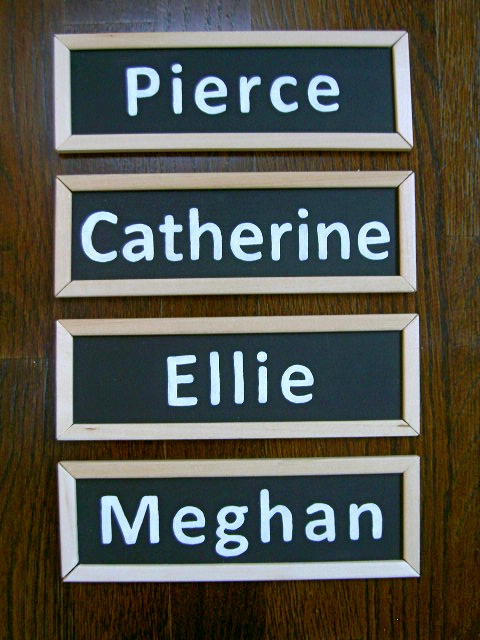
I made chalkboard labels.
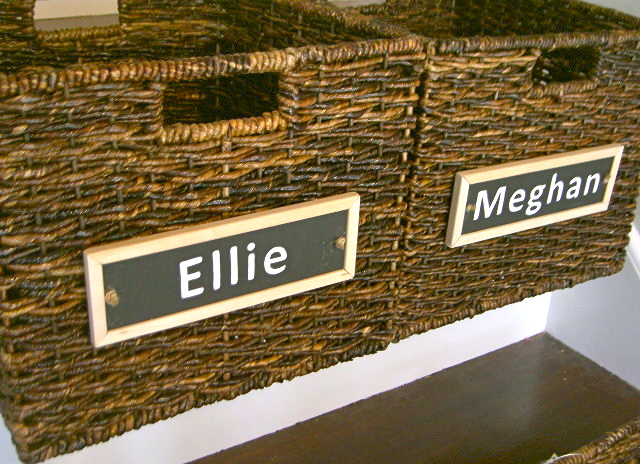
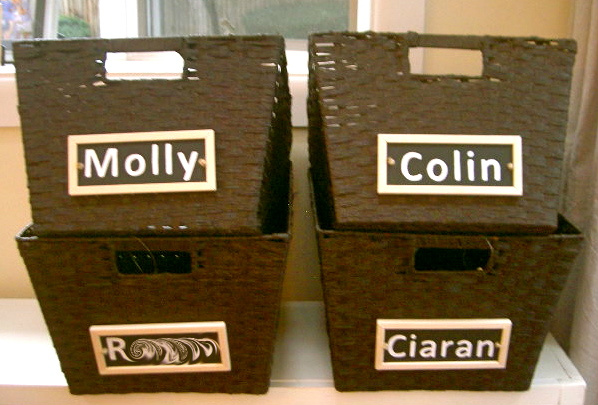
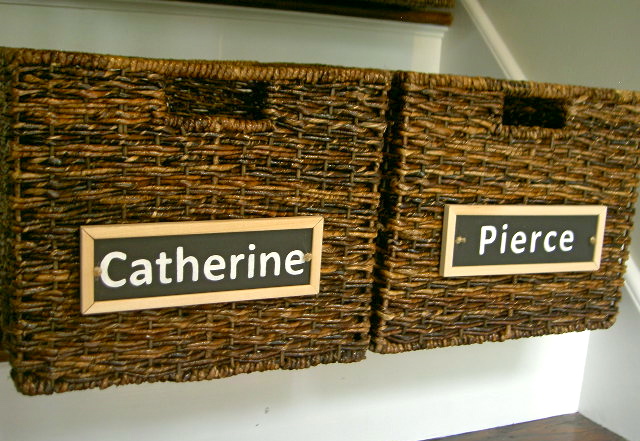
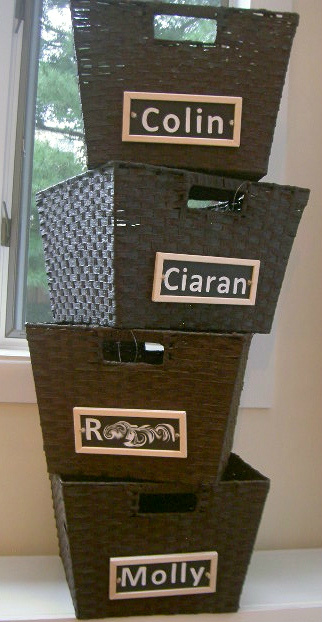
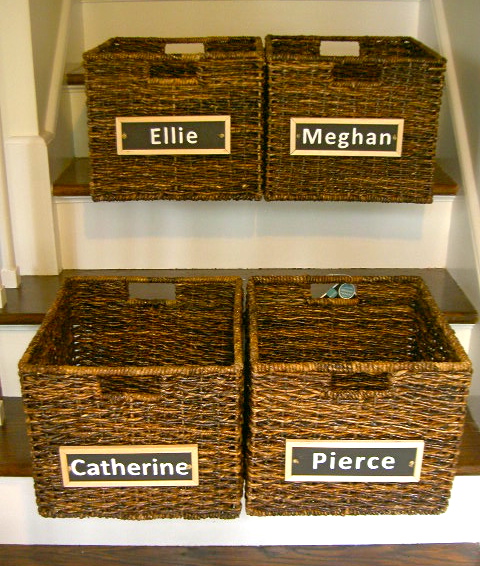
The perfect addition to wicker baskets.
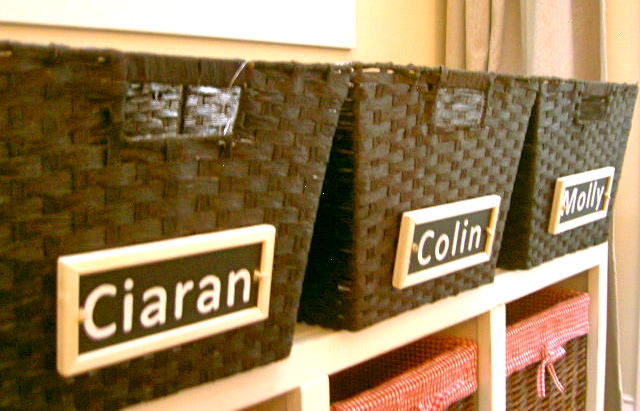
Personalized for each child to call their own.
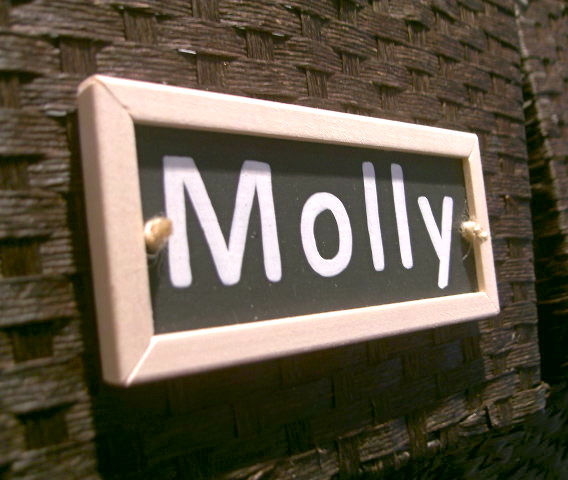
Inspired by Pottery Barn kids chalkboard labels:

You can purchase them at potterybarnkids.com – $8 for two labels except right now they are backordered until Oct 3.
Who wants to wait that long?
Here’s how I made the labels:
1. Cut 1/4″ plywood pieces:
4 @ 6.5″ x 2.5″
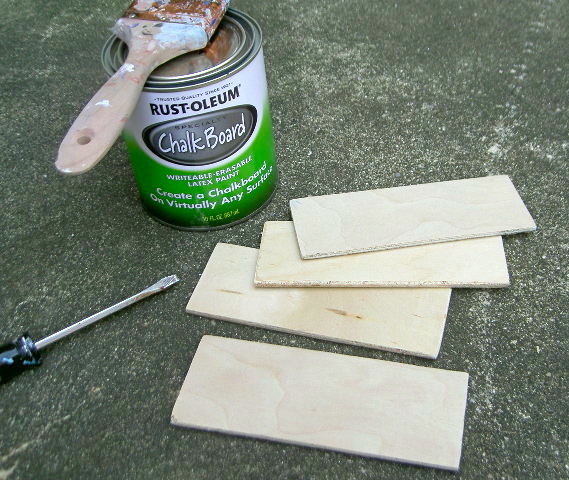
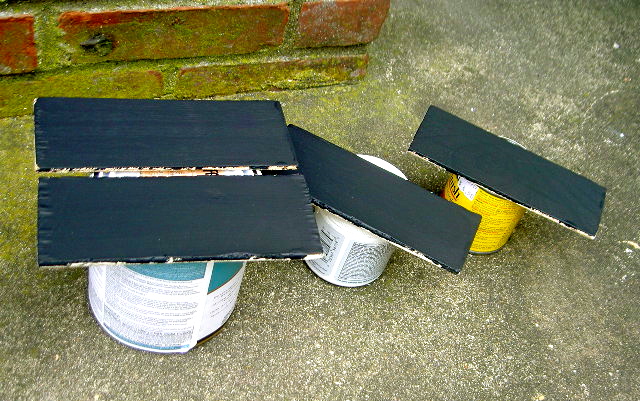
2. Paint using chalkboard paint, two coats.
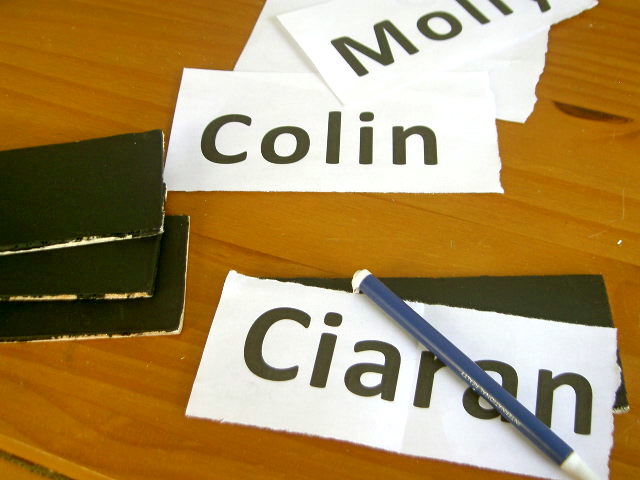
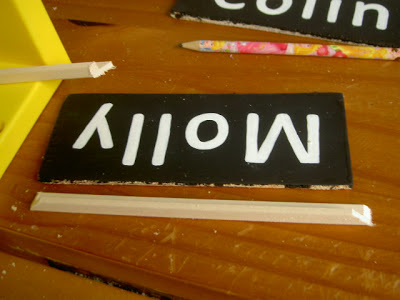
3. Personalize.
Print name to size, center paper on label, trace with ball point pen.
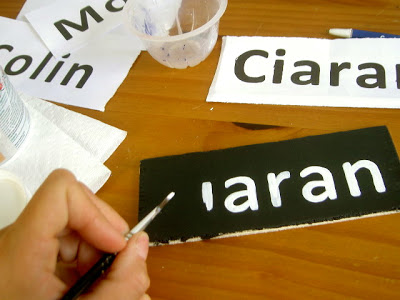
4. Paint inside the indent left by the pen using white eggshell finish.


5. Frame.
Use L shaped molding.
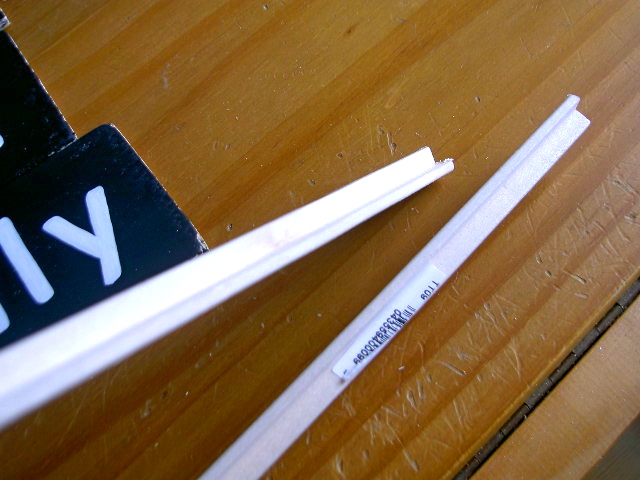
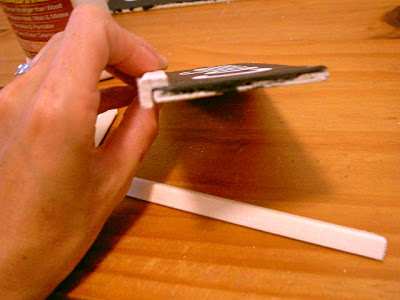
6. Using a miter box cut your pieces to length:

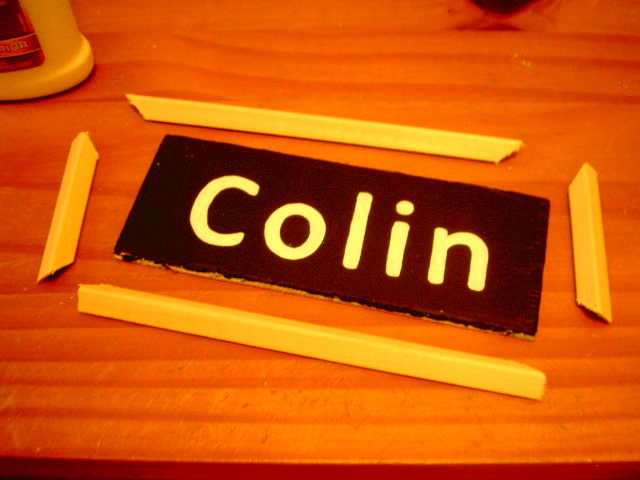
7. Check for a good fit and lightly sand cuts before gluing.
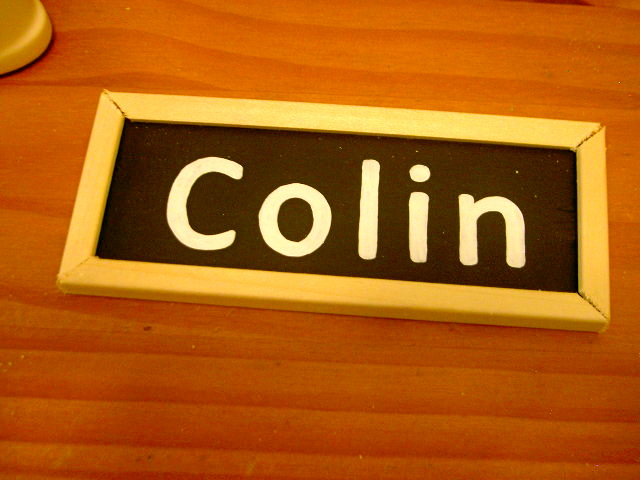
8. Glue frame on using wood glue, press flat edge to front of label:

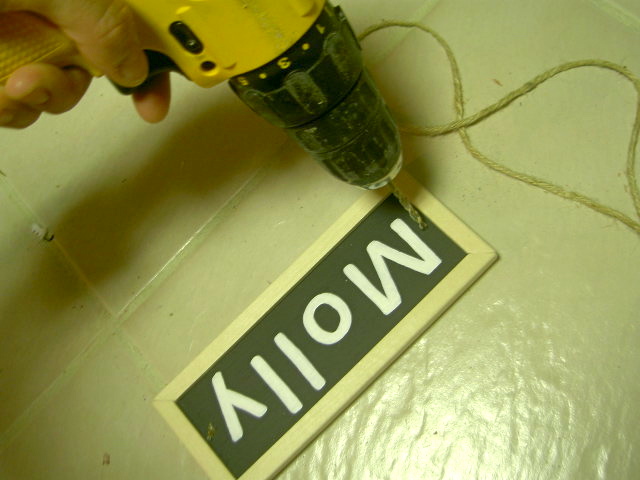
9. Labels complete.


10. Drill 2 holes to accommodate twine.
(Drill through front to avoid damaging letters.)
(Drill through front to avoid damaging letters.)
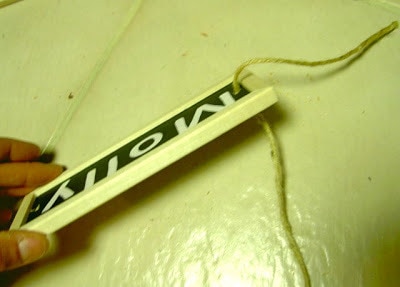
11. Push twine through one hole, tie knot.
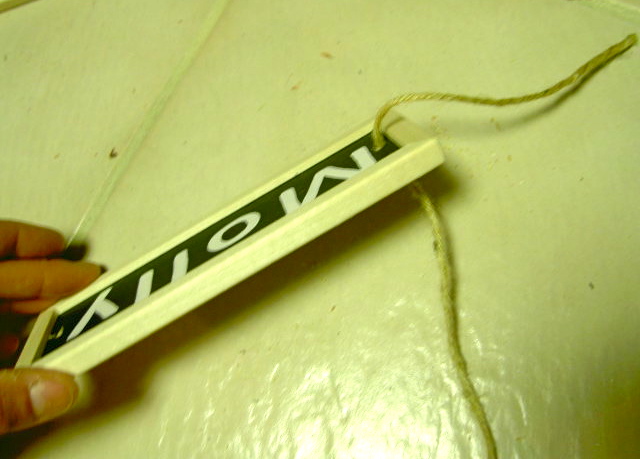
12. Using a yarn needle thread twine through basket:

13. Then thread back through other side and through hole in label:

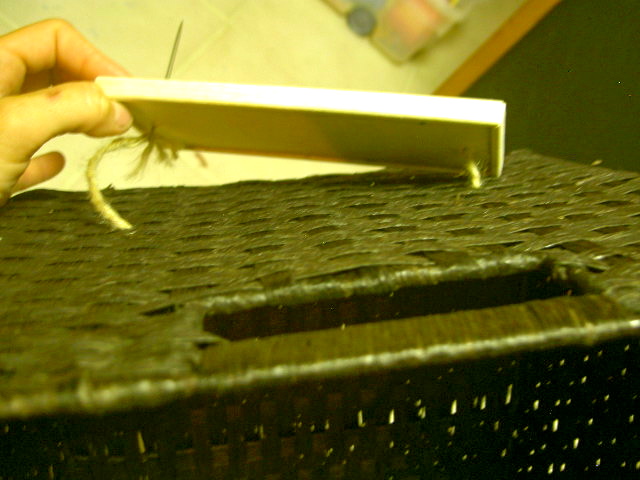
14. Pull twine snug and tie knot.


These baskets are part of a larger project to be completed next weekend.
Check back to see it all put together.
I’m linking up to:
Weekly Challenge @ The CSI Project
Whatcha Got Weekend @ Lolly Jane
SAS @ Funky Junk
Weekend Wrap Up @ Tatertots & Jello
Sundae Scoop @ I Heart Naptime
Sister Sunday @ Sisters of the Wild West
Sunday Showcase Party @ Under the Table & Dreaming
Just Something I Whipped Up @ The Girl Creative
DIY Project Parade @ The DIY Showoff
Made by You Mondays @ Skip to My Lou
Making the World Cuter @ Making the World Cuter
Nifty Thrifty @ Coastal Charm
Tuesday Treasures @ My Uncommon Slice of Suburbia
Tutorials & Tips Tuesday @ Home Stories A to Z
Good Life @ A Beach Cottage
Delightfully Inspiring @ Delightful Order
Transformation Thursday @ The Shabby Creek Cottage
Strut Your Stuff @ Somewhat Simple
Share Awesomeness Thur @ The 36th Avenue
Flaunt it Friday @ Chic on a Shoestring
Tickled Pink @ 504 Main
Frugal Friday @ The Shabby Nest
SAS @ Just a Girl
Feathered Nest @ French Country Cottage
Remodelaholics Anonymous @ Remodelaholic
inspiration board @ Carolyns Homework
those look amazing! i love how they make everything looks so clean and organized. 🙂
I just LOVE your blog!
What a great idea! You did a lovely job. Thanks for sharing.
Hope to see you on my blog:)
You make the best stuff!
So cute. Love your blog!
These are GREAT…better than PB's!!
And here I am again. Fab!
I love these they turned out just like the originals and look great these are awesome!
come link this up to scrappy saturdays @ candacecreations.blogspot.com
Another great idea! You should share this at my Shabby Shares Saturday link party over at http://rustic-crafts.com 🙂
LOVE this! Such a smart idea to use twine.
Visiting from Knock Off Decor
Fabulous chalkboards – thanks for sharing how you did it. Visiting from Funky Junk Interiors
Judy
Very Sweet… Sure transforms a basket and organizes everything. Might need to try.
~ Meredith From A Mother Seeking
A Mother Seeking…
This is fantastic!!! I love it! Great work. 🙂 I am excited to be your newest follower!
Brillant way to tackle this project! I just love the idea.