• Home
  • Blog
  • About
  • Contact
    • Disclosure
    • Privacy Policy
  • SHOP
  • Widget area for main menu

    • Email
    • Facebook
    • Instagram
    • Pinterest
    • Twitter
    • YouTube
  • Skip to primary navigation
  • Skip to main content
  • Skip to primary sidebar

Jaime Costiglio

build - paint - sew

  • BUILD
    • BEDS
    • BENCHES
    • DESKS
    • DRESSERS
    • GAMES & TOYS
    • SCRAP WOOD
    • SHELVES
    • STORAGE
    • TABLES
  • TOOLS
  • PAINT
    • CRAFTS
    • FURNITURE
    • HOME DECOR
  • SEW
    • GIFTS
    • HOME DECOR
    • POUCHES
  • HANDBUILT HOLIDAY
    • 2021
    • 2019
    • 2018
    • 2017
    • 2016
    • 2015
    • 2014
    • 2013
  • GIFTS
    • BABIES
    • KIDS
    • FOR HER
    • FOR HIM
    • TEACHERS
    • WEDDINGS
  • SEASONAL
    • 4TH OF JULY
    • FALL
    • HALLOWEEN
    • CHRISTMAS
    • SUMMER
    • SPRING
    • ST. PATRICK’S DAY
    • THANKSGIVING
    • VALENTINE’S DAY
    • WINTER
  • SALTBOX PROJECT
    • BATHROOMS
    • DINING ROOM
    • EXTERIOR
    • FAMILY ROOM
    • FOYER / MUDROOM
    • KIDS BEDROOMS
    • KITCHEN
    • LIVING ROOM
    • MASTER BEDROOM
    • PLAYROOM
  • SCROLL SAW

Vintage Cabinet Makeover

March 2, 2017

A vintage serving cabinet makeover.

vintage cabinet hardware latch detail
My friend asked if I would refinish this painted cabinet:

vintage storage cabinet before
Always eager for a good makeover I said ‘yes’ and after lots of muscle (and stripper) the cabinet is new again:

vintage storage cabinet after
Although it may only look like a paint job this cabinet needed a complete overhaul.
It’s built from tongue and groove pine: top, bottom, sides, doors AND shelves.
You can see in the before picture below that tongue and groove shelves aren’t exactly practical:
vintage storage cabinet before and after

 I removed the existing ‘shelves’ and installed 3/4″ plywood solid shelves:

vintage storage cabinet interior
The back also needed some attention.  Part of the center board was missing and hardware cloth stapled over that hole?  I replaced the broken board and now the cabinet is solid again:
vintage storage cabinet back before and after
Here’s a view from the inside:

vintage storage cabinet back interior before

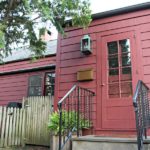
And now the hole is fixed and we can use the cabinet as it was intended:

vintage storage cabinet back interior after
My friend also asked for wheels on the cabinet, to make it mobile on her porch.

vintage cabinet refinished
You can see the wheels hidden below, not only do they make the cabinet mobile but they also keep the wood off the moist ground prolonging its life:

vintage cabinet refinished with wheels
My friend wants to use this cabinet on her covered porch which means it will be exposed to sun and moisture.  I sealed the exterior with MacKenzie & Stewart satin poly, it has the UV protection we need and leaves a beautiful soft sheen without that yellow tinge found in oil-based sealants:

distressed vintage cabinet

distressed vintage cabinet top
Perhaps my favorite part of this cabinet is the original hardware:
vintage cabinet original hardware
But it was sadly painted over and completely neglected:
vintage cabinet original hardware before
  
I did some serious work on the hardware to restore it back to its original beauty (except that missing piece on the right door) otherwise the details are so pretty.

vintage cabinet original hardware stripping paint
And here it is on my friend’s porch ready for action:

refinished storage cabinet on porch

Here’s how I refinished the cabinet:


1. Remove doors, all hardware and loose shelving.

2. Use Kwik Strip stripper or Citristrip stripping gel.
Work in sections always keeping the piece you’re working on parallel to earth, pour out stripper onto surface:


citristrip stripping gel
3. Use an old paintbrush to smooth stripper over surface, leaving a thick coating.
Immediately the old paint with bubble and loosen:

citristrip stripping gel on paint
4. Wait 30 minutes and then start scraping:
I prefer a plastic scraper that won’t gauge the wood.

scraping stripped paint
5. Repeat the stripper process for a second time if your paint is thick:

stripper activating paint
6. Once done using stripper and dry, sand off any excess paint:
Sand the entire cabinet, including the base.
The LEFT door is completely stripped and the RIGHT door is still covered with green:

stripped door versus painted door
7. Moving to the back I needed to repair this screen filled hole?:
poor patch job in back before
8. Remove the screen and staples.  Sand.
Then use a jigsaw to carefully remove the partial board:

remove cut board with jigsaw
All gone:

remove cut board

9. Enlist help to wash and hose down the entire cabinet:

kids helping to wash cabinet
10. Although not necessary I choose to bleach the wood prior to any refinishing just to really clean out any old crusties.
Mix 1/2 bleach and 1/2 water and brush all over cabinet, then let dry in the sun:

bleach cabinet to clean
11. Once dry I inserted a 1×4 pine board ripped to fit into the open gap in back:
replace missing board in back

 12. The board is attached using my Kreg jig and pocket holes on the inside:

pocket holes to attach missing board
13. Next cut 3/4″ plywood shelves for the interior:

install new plywood shelves
14. There was an existing ledge for the shelves to rest on but I also secured them to the side walls with pocket holes:

install new plywood shelves on ledge
15. Prime entire cabinet with Zinsser cover stain oil based primer.
Paint exterior one coat exterior grade white flat.

prime cabinet with zinsser
16. Sand to distress in keeping with tongue and groove style:

paint and distress cabinet
17. Apply Minwax classic grey stain:

apply classic grey stain to cabinet
No stain on LEFT, with stain on RIGHT:

white paint versus grey stain
18. Paint interior 3 coats high gloss white enamel:
(**Don’t forget to do the doors in all these steps too!)

paint interior high gloss white
19. Flip cabinet upside down and seal base and all visible cut ends using MacKenzie & Stewart Isle of Skye waterbourne satin poly:
seal with exterior grade poly

 20. Line up wheels in corners, leaving enough space for wheel and lock to spin freely without hitting feet:

attach wheels to base
21. Predrill and attach wheels:
Then apply another coat of satin poly, going over screws to seal.

screw wheels to base

22. Flip cabinet back upright and attach doors and hardware.
Then seal with two coats of MacKenzie & Stewart Isle of Skye waterbourne satin poly again going over hardware and screws to seal finish:

seal cabinet with exterior satin poly
Ready to use:
vintage cabinet on patio

You may also like...

  • Spring Lawn Project: Patch those Problem AreasSpring Lawn Project: Patch those Problem Areas
  • DIY Round Outdoor Dining Table with Outdoor AccentsDIY Round Outdoor Dining Table with Outdoor Accents
  • DIY Outdoor PlanterDIY Outdoor Planter
  • Mailbox Debate: Post or WallMailbox Debate: Post or Wall
Share this post:

Filed Under: DIY, FURNITURE, FURNITURE, PAINT14 Comments

Reader Interactions

Comments

  1. Korrie Bastian says

    August 3, 2012 at 12:29 AM

    You have really given this piece a new lease on life! Another fabulous project.

    Reply
  2. Allison@FabRehab says

    August 3, 2012 at 1:27 AM

    Fantastic redo, Jaime!!

    Reply
  3. Cassie @ Primitive & Proper says

    August 3, 2012 at 2:11 AM

    it looks awesome, jaime! LOVE the cleaned up hardware!

    Reply
  4. Chloe Grice says

    August 3, 2012 at 4:45 AM

    Lovely job! Really interesting to follow the whole process 🙂

    Reply
  5. Pamela says

    August 3, 2012 at 3:05 PM

    Great makeover!

    Reply
  6. Vickie @ Ranger 911 says

    August 3, 2012 at 4:09 PM

    You did a fantastic job restoring and revamping the cupboard so it will be around another few decades!

    Reply
  7. Inspired by you says

    August 3, 2012 at 10:11 PM

    Your hard work paid off. It looks fabulous!!

    Reply
  8. Life Of A Southern Couple - Brittany says

    August 4, 2012 at 2:53 AM

    Wow! You did an amazing job! I can tell there was lots of hard work put into this project but definitely worth it!

    Reply
  9. Corn in my Coffee-Pot says

    August 4, 2012 at 3:40 AM

    Great make over on the cupboard.
    I like that you added the castors to make it mobile.

    Pat

    Reply
  10. It's All Connected says

    August 4, 2012 at 5:07 PM

    I know that was a huge amount of work but it was so worth it! I love the idea of castors on an outdoor piece so you can move it aside to sweep out wind blown stuff and bugs. ~ Maureen

    Reply
  11. Jeannine says

    August 5, 2012 at 5:09 PM

    It's beautiful! Love the antique color!!

    Jeannine @ The Concrete Cottage

    Reply
  12. Lauren @ The Well Crafted Home says

    August 29, 2012 at 4:34 AM

    This is awesome! I will have to show this to my hubby 🙂 He likes to refinish furniture.

    I would love it if you linked this up at my link party! You can find it here:

    http://thewellcraftedhome.blogspot.com/2012/08/well-crafted-wednesdays-18-link-party.html

    Reply
  13. will says

    November 27, 2017 at 9:49 AM

    Just curious as to the dimensions of the vintage cabinet?
    I would like to make a replica.
    Thanks

    Reply
    • Jaime says

      November 28, 2017 at 8:06 AM

      Hi Will, Unfortunately I did that cabinet for a friend awhile back and I don’t have the dimensions. Sorry to disappoint.

      Reply

Leave a Reply Cancel reply

Your email address will not be published. Required fields are marked *

Primary Sidebar

Hi! I’m Jaime

Jaime Costiglio

Hello!

Thank you for stopping by.
Join me for lots of DIY.

Read more

Get new posts via email

Handbuilt Holiday: Gift Project Plans

handbuilt holiday gift project plans

Collection of DIY gift project plans to build.

The Home Depot Tool Prospective

THD Prospective

Tools to consider for the DIYer.

Archives

The Home Depot Logo
Copyright © 2026 Jaime Costiglio · Custom site by Moonsteam Design

Privacy Policy