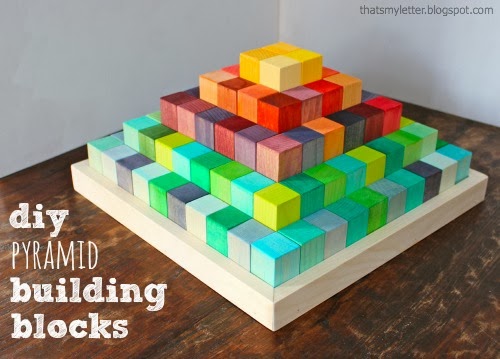
Build: diy building blocks
We still have eight building days left before Christmas and Ana White and I have come up with a few fast last minute gift builds.

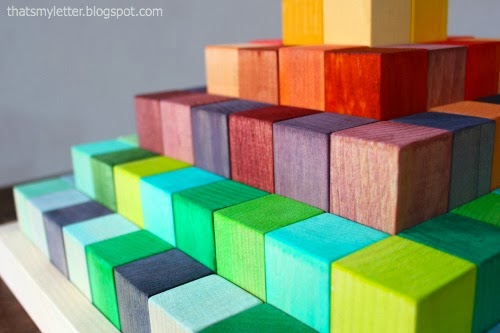
This set is made up of 100 building blocks!
And you don’t even need paint for all those glorious colors – I used gel food coloring on the blocks which makes this gift safe for toddlers who tend to stick everything in their mouths:
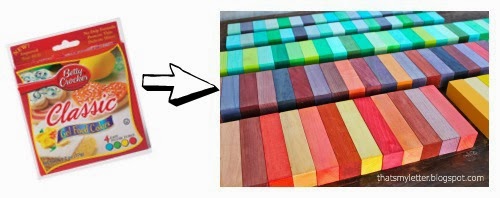
Check your kitchen cabinets and I bet you just might have the $4 set of Betty Crocker classic gel food colors, those 4 colors are capable of yielding quite a variation:

Ana’s plans are very straight forward, this is one of the most basic builds as it really only involves making a bunch of cuts. And I’ll show you a trick down below so you don’t have to measure out each cut.

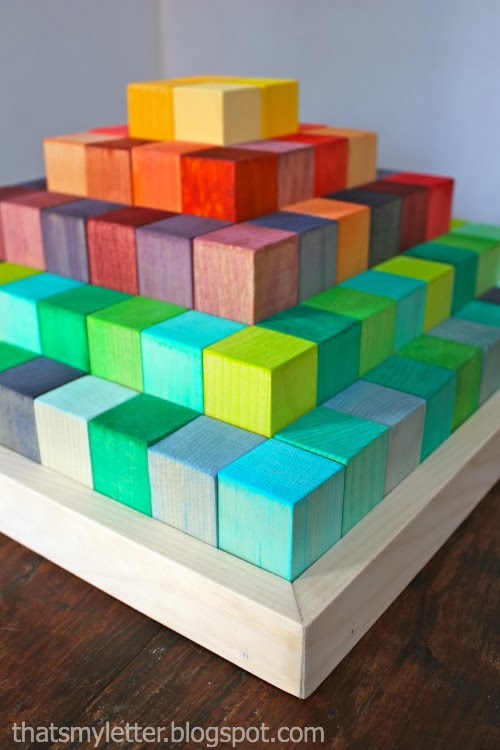
This build was inspired by The Land of Nod’s Greater Pyramid Blocks (large):

You can make your own diy version using Ana’s plans here.
I built this diy set of pyramid building blocks for about $50 in lumber, a fraction of the inspiration price.
I used 2x2x8 select white pine boards which cost about $9 per board but worth it for the smooth edges and near flawless, knot-free surface.
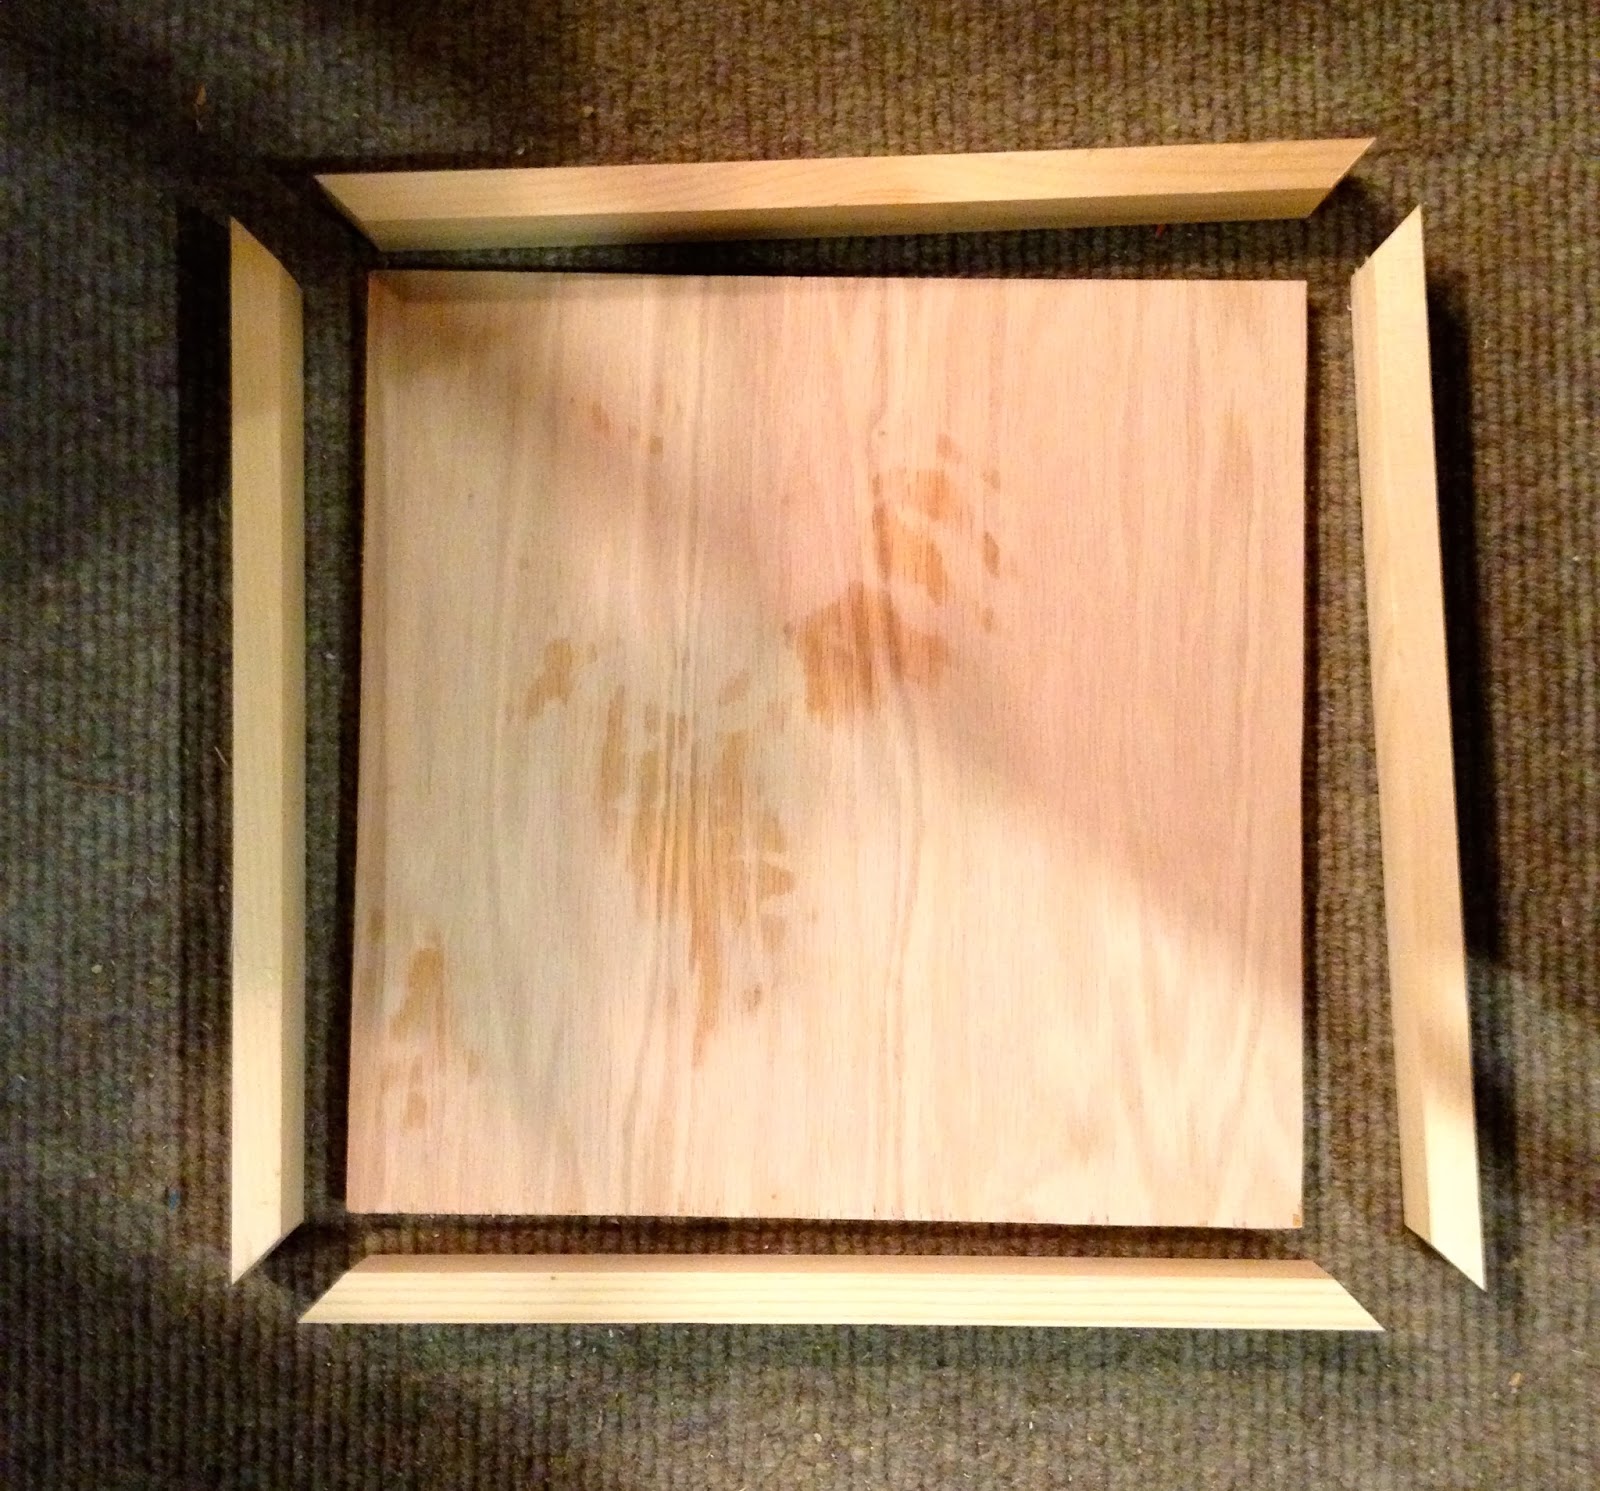
The carrying tray is a necessity to hold all those blocks:

How to make pyramid building blocks set:
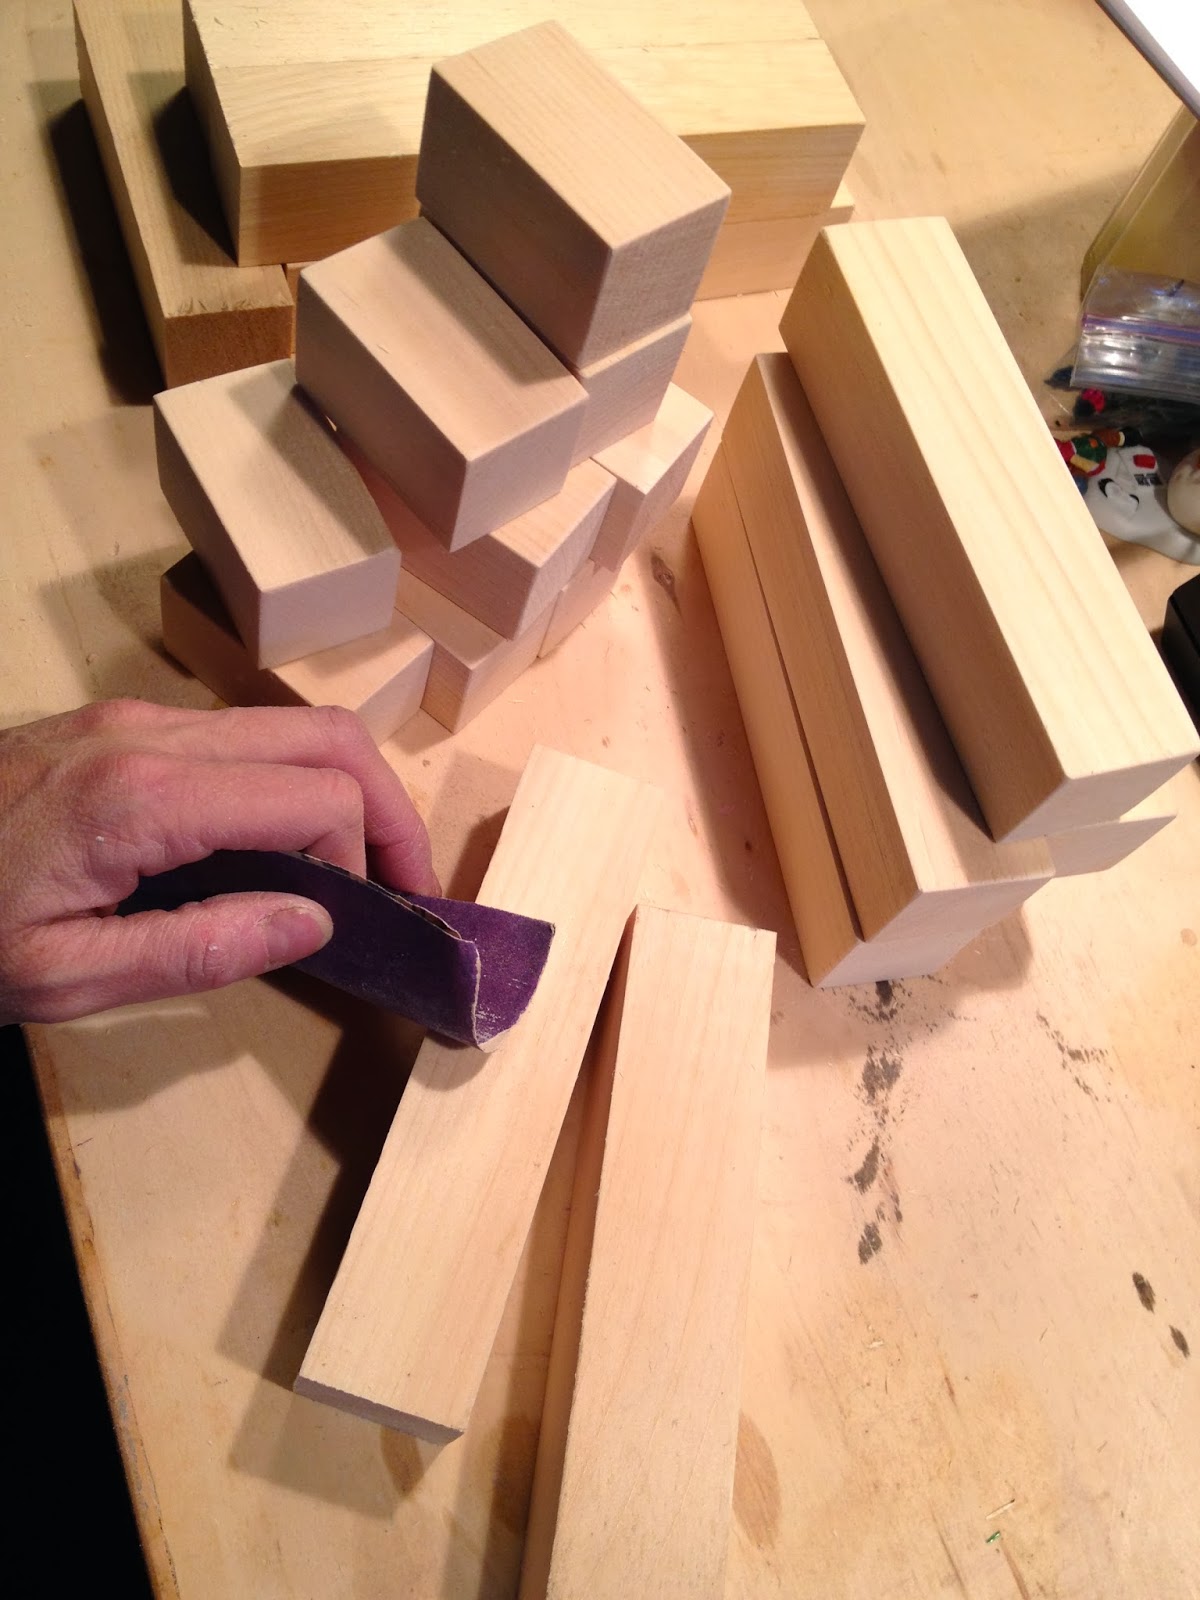
1. Follow Ana’s plans and cut lumber.
You will be making multiple cuts of each size so it’s best to set up a stop block or mark off your saw with tape:

That way you won’t have to measure each and every 100 cuts.
2. Sand – fair warning you need to sand 100 pieces:
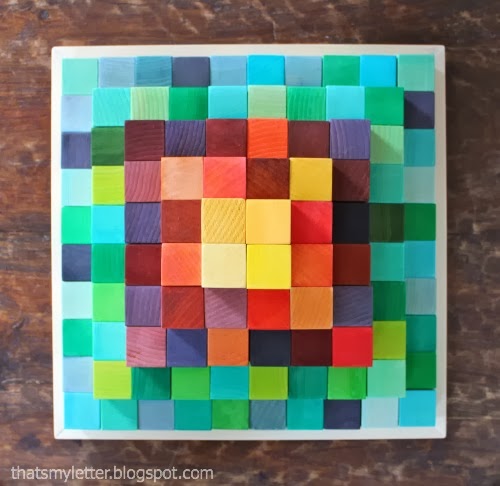
3. Set up the blocks as a pyramid and double check the length and width measurement.
My set measures exactly 15″ x 15″ so I cut my 1/2″ ply at 15 1/8″ x 15 1/8″ to give a tiny bit of wiggle room for removing the blocks – you don’t want the blocks too snug in the tray.

4. Cut tray pieces and assemble:
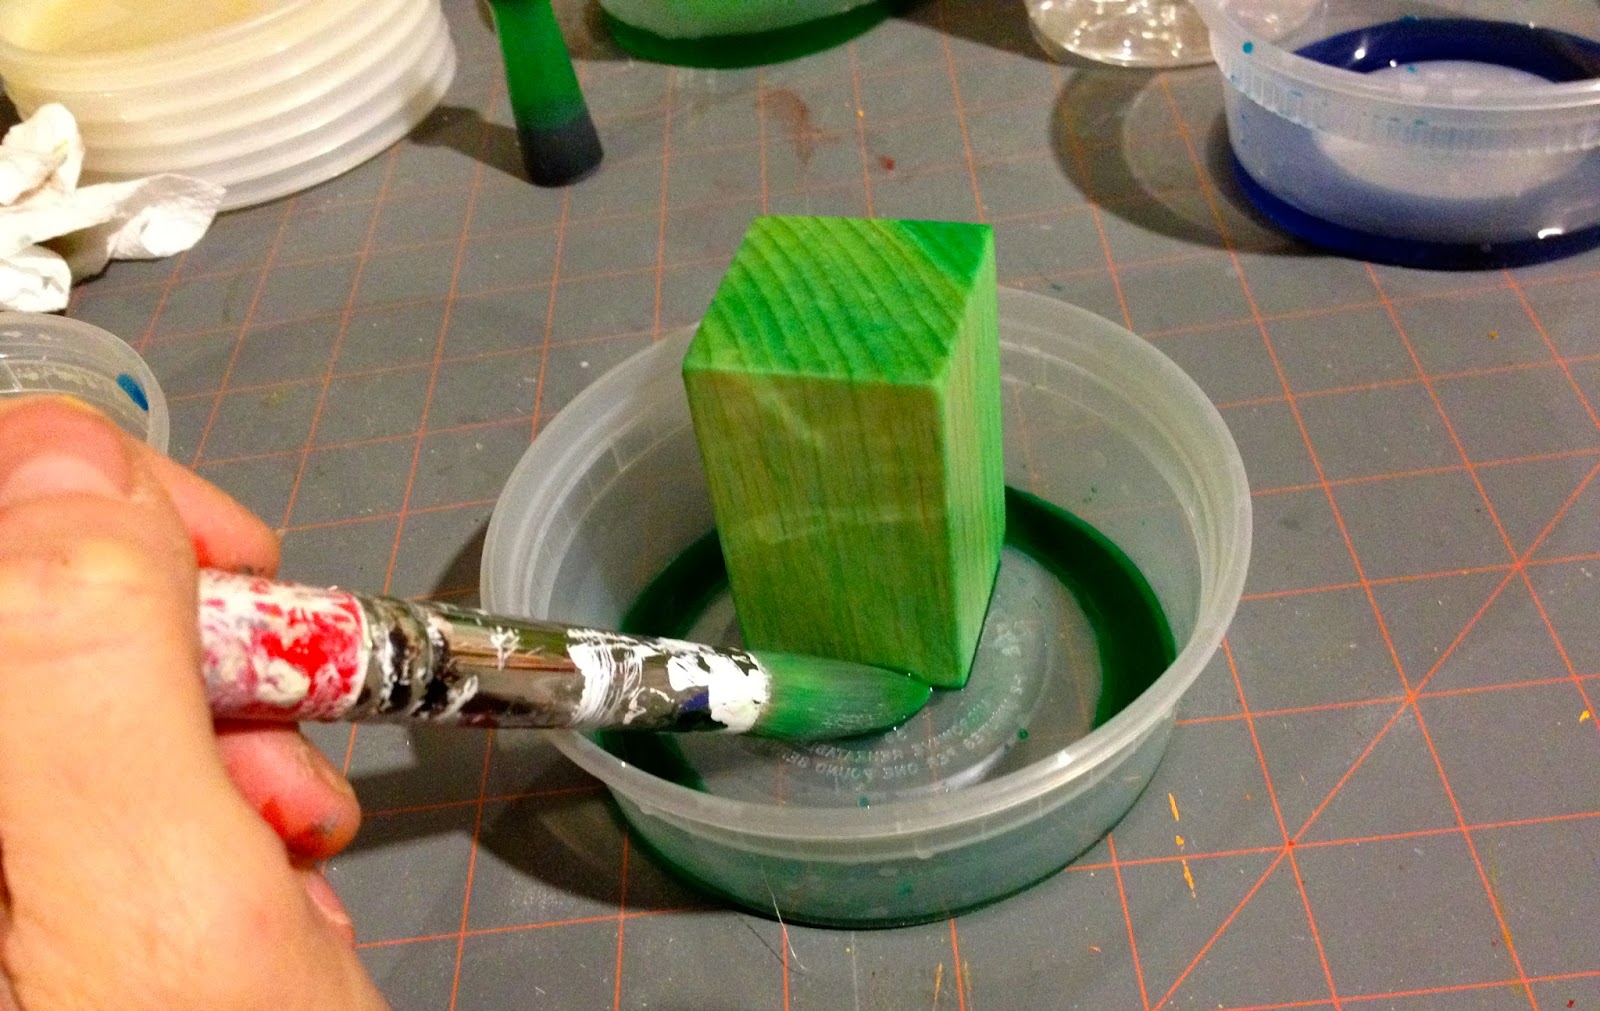
5. To add the food coloring place a drop of gel into a pint size food container, add equal parts vinegar and water. Stir with paint brush.
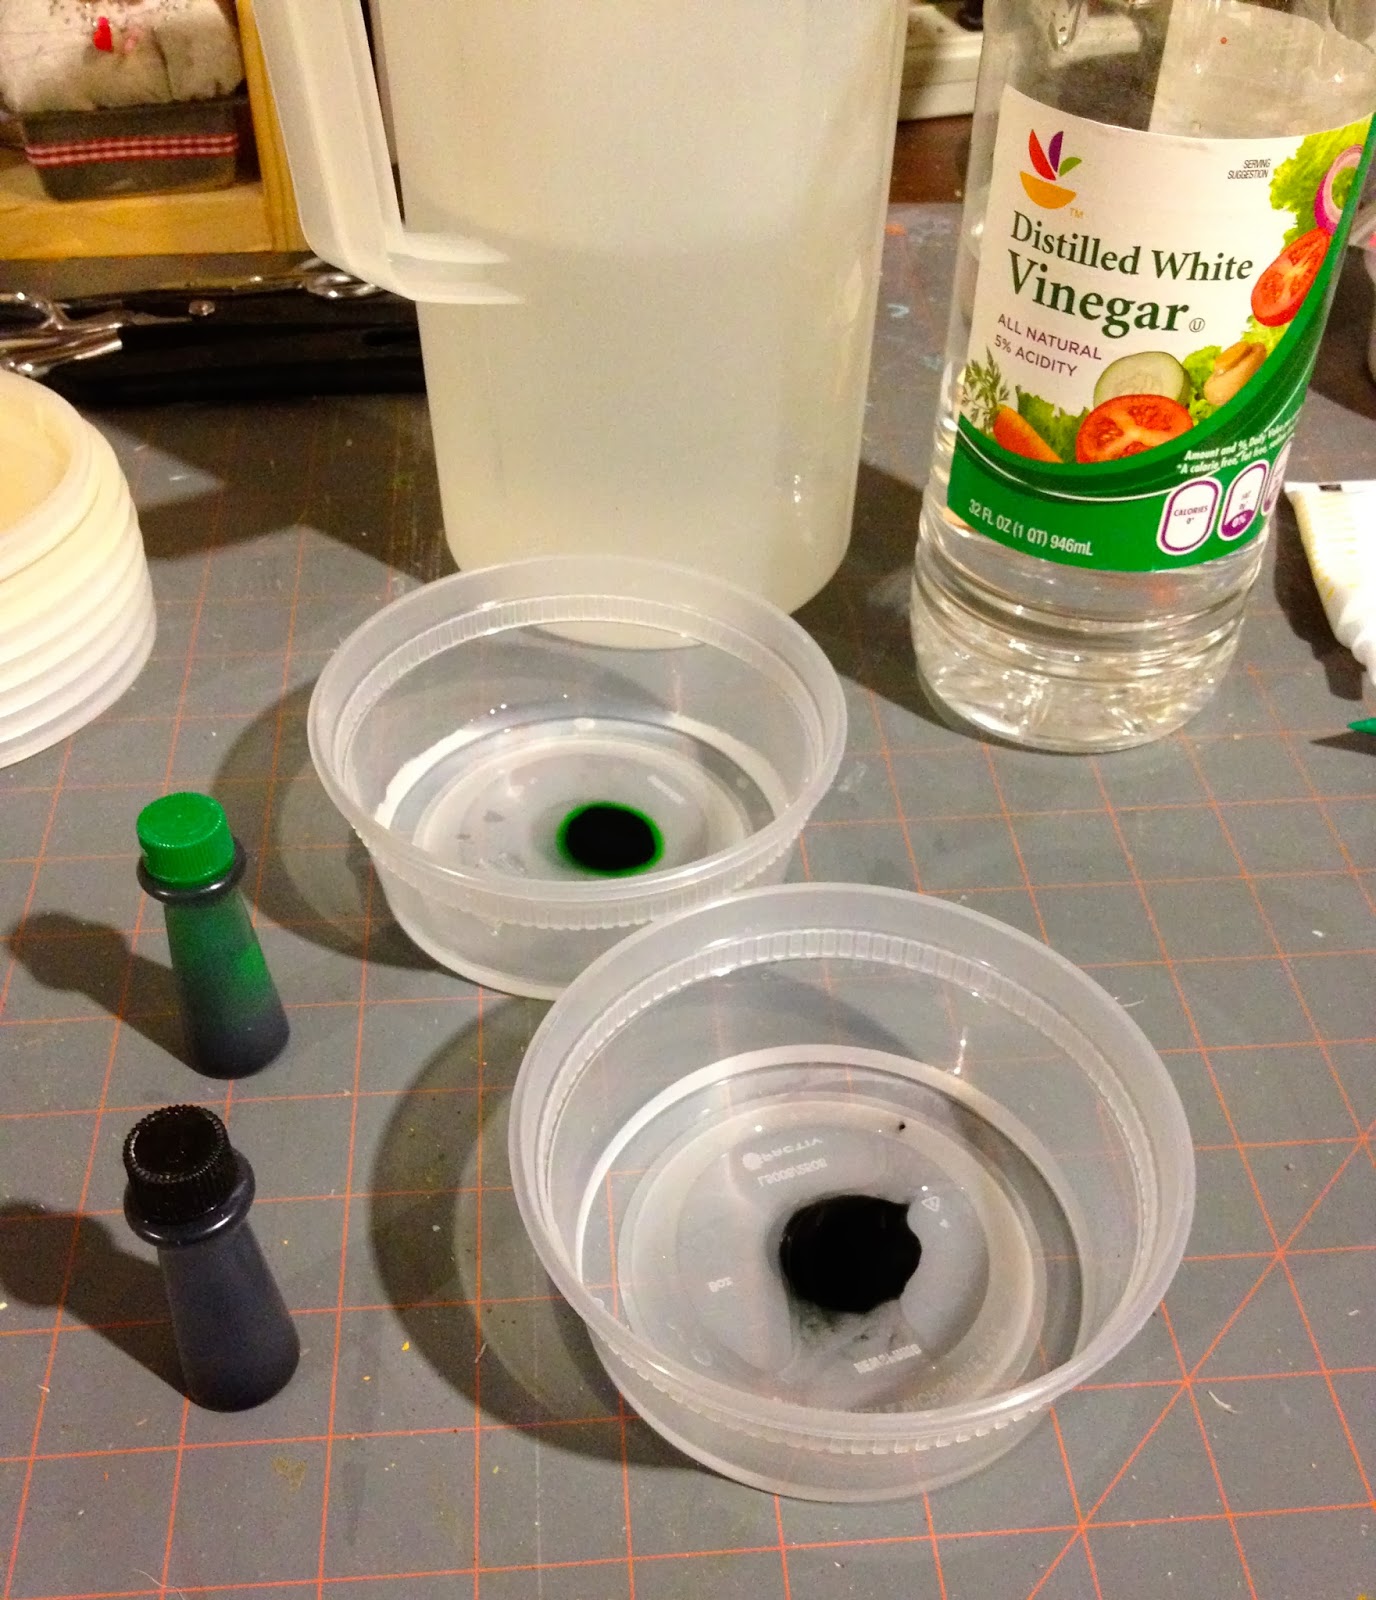
6. Place one building block in the container and brush on dye:
7. Experiment with the amount of liquid to food dye combination in order to get all different opacities.
The color variations are endless:
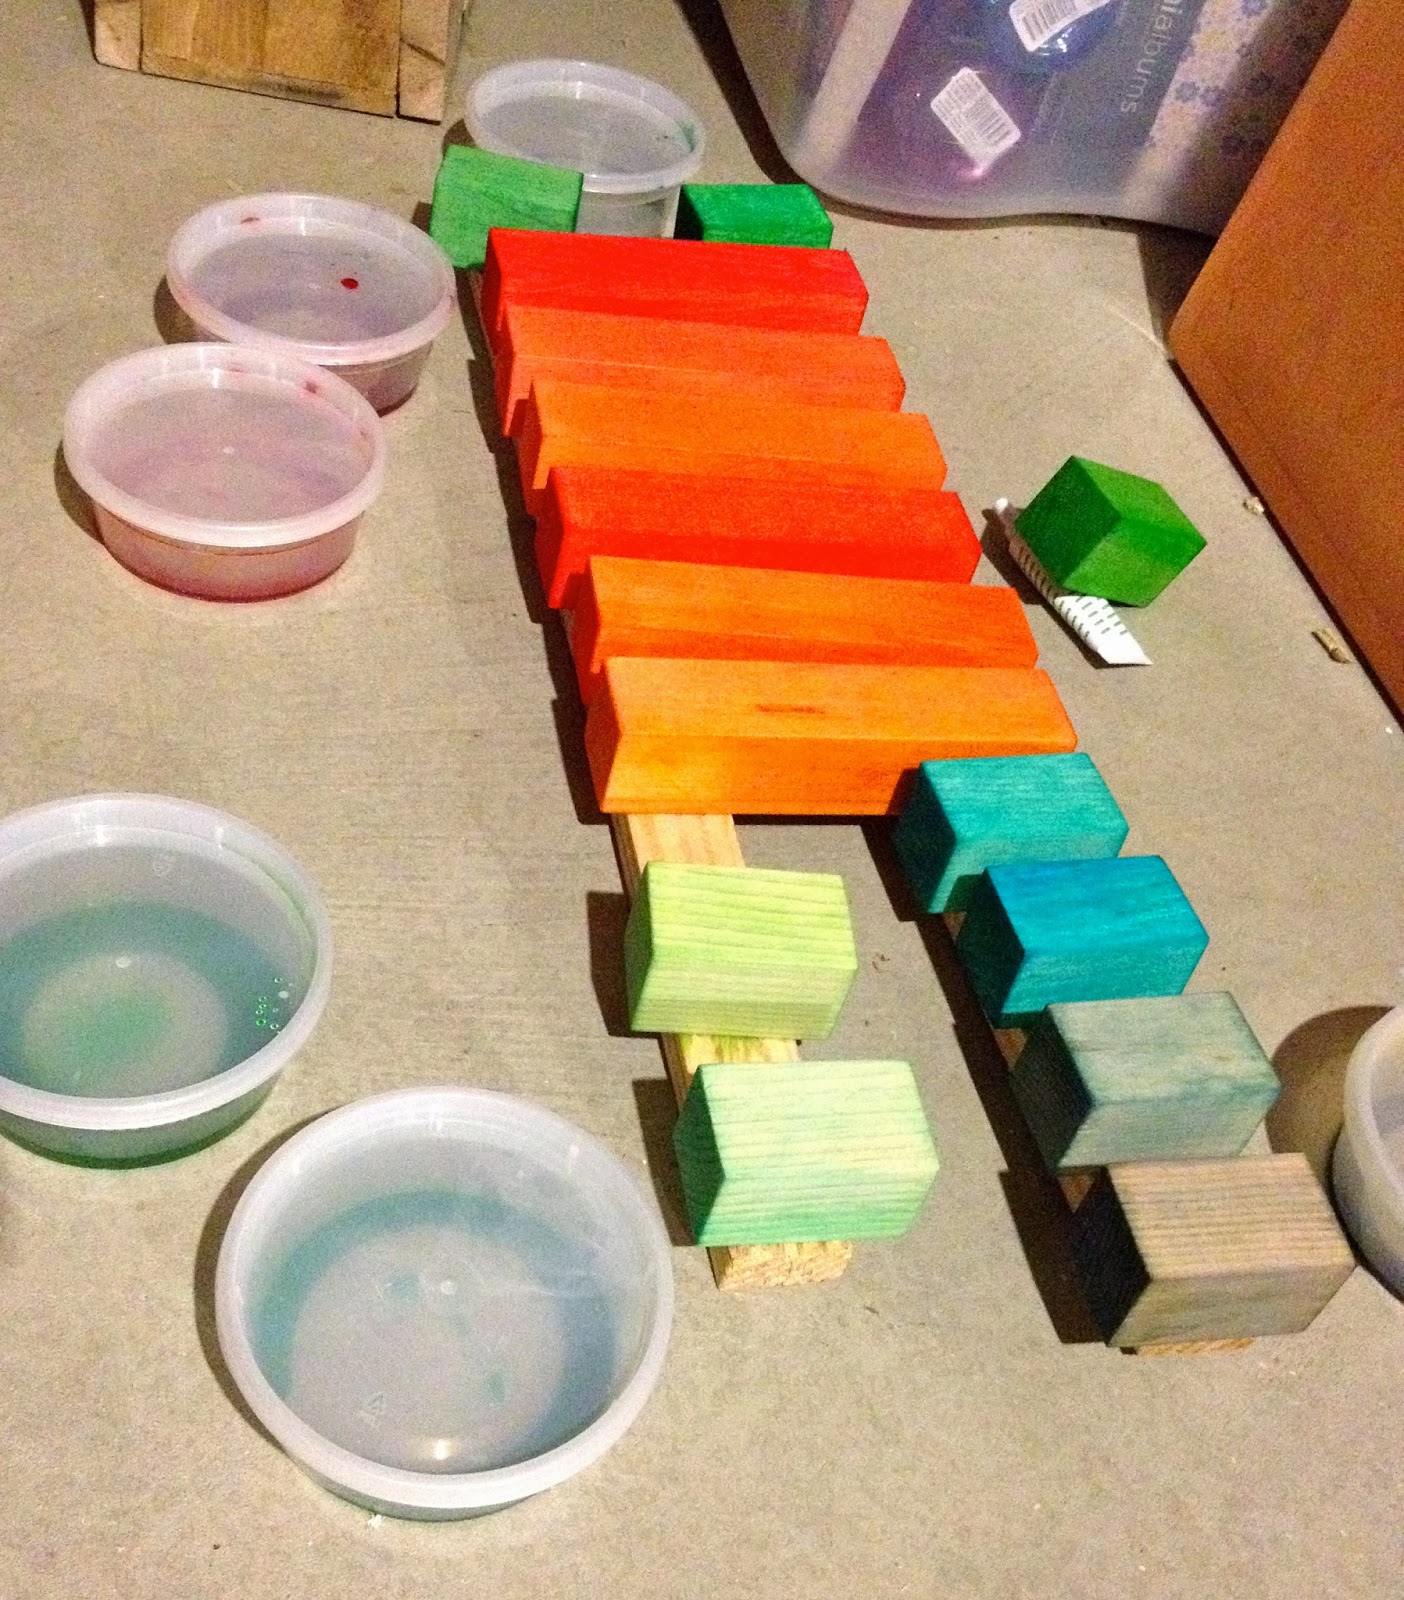
Apply multiple coats if desired to change the colors.
Check back Wednesday for another fast last-minute gift build from Ana White and me.


love this! great work. i am sanding done 2x2s for olliblox and i wish i would have thought to mark my saw with tape!
Great job! The company that makes that block set is Grimms Speil & Holz- an amazing German wooden toy maker. I adore them and have made the kids tons of blocks that were heavily inspired by their sets.
One thing you should probably note is that without a sealer on the blocks, they will absolutely bleed color if they get wet (drooled upon). I've dyed lots of wooden pieces with food coloring and vinegar- it's pretty, but, there is that issue if they'll be exposed to water.
I finish all my blocks with a very watered down version of acrylic paint and seal with beeswax/coconut oil- a lot more work, but, no bleeding color. 🙂
Do you ever experience cracking in the blocks? How would you prevent it? Thanks
Hi Sue, no cracking and it’s been over 5 years since I made these blocks. I used select 2×2 boards if that’s any help.
Oops- misspelled Spiel.
http://www.grimms.eu
These are beautiful, Jaime! What a great idea to use food coloring to dye them.
Love this one! I might make it for my daughter's birthday (in February). She has some of my old wood blocks, but I think these would be great, too. I'll have to consider what I want to use for color after the other comment about bleeding, hmmm…
Also, I was thinking about it and if you made the block set without the outer-most ring but bumped all of the heights down to the next level, you could make this with a little under 3 8 ft 2×2 boards. You'd get 64 blocks, but it would still be a nice size set (about 12 in wide depending on your actual width of the 2×2), especially if you might be combining them with other wood blocks you have when actually playing with them. So your cuts would be:
4 – 2x2s @ 6 1/2"
12 – 2x2s @ 5 1/4"
20 – 2x2s @ 3 3/4"
28 – 2x2s @ 2 1/2"
Will the food coloring come of if they get wet? Or will wet little hands get stained if they touch them?
nevermind, i just saw the comment above
These are so pretty! I love the varying colors. Ryan's actually planning to make Henry's gift from an Ana White plan on Saturday (nothing like waiting til the last minute). Maybe he can sneak in these blocks, too.
Oh my goodness. This is so beautiful and I love that it's toddler safe, too. If you have time, I'd love for you to share at our Link It or Lump It party!
http://www.delineateyourdwelling.com/2013/12/link-it-or-lump-it-party-19.html
How would you seal them with beeswax and coconut oil. I just made these for My nephew and would love to deal them.
How would you seal them with beeswax and coconut oil. I just made these for My nephew and would love to deal them.