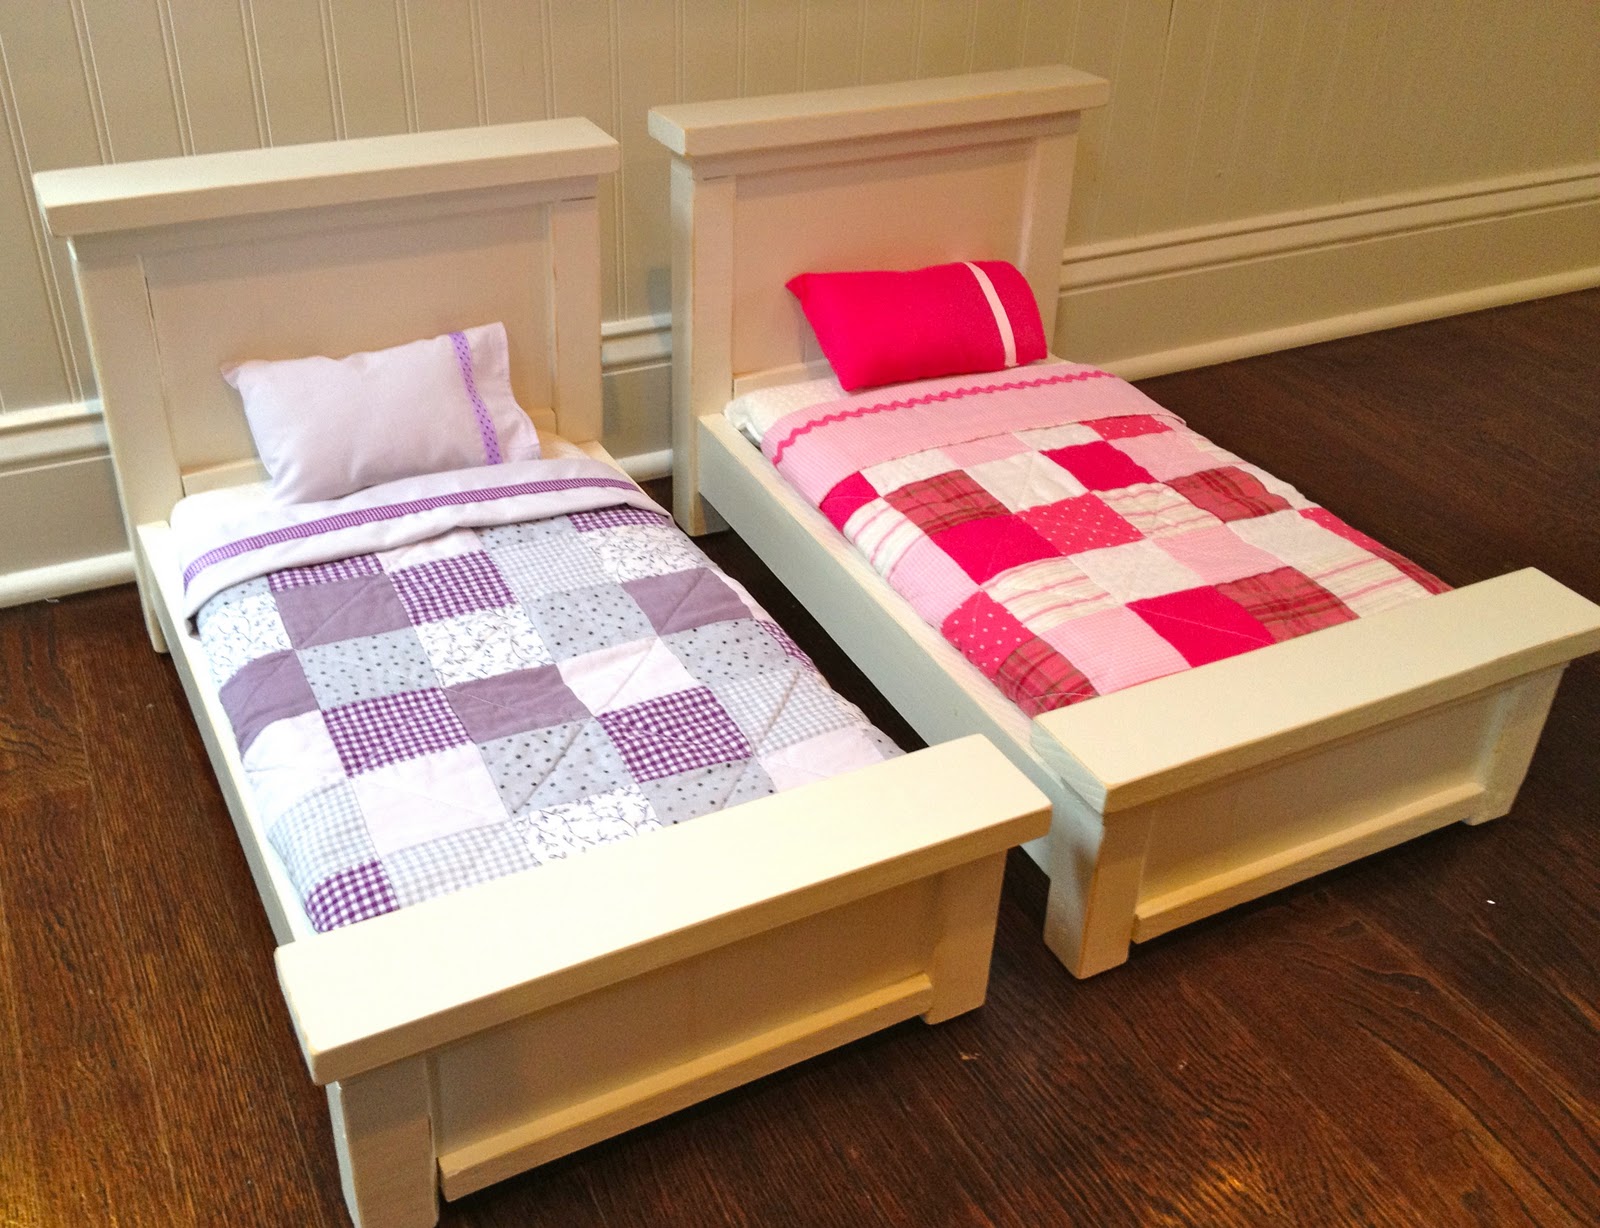
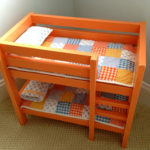
Farmhouse style doll beds built for two cousins:
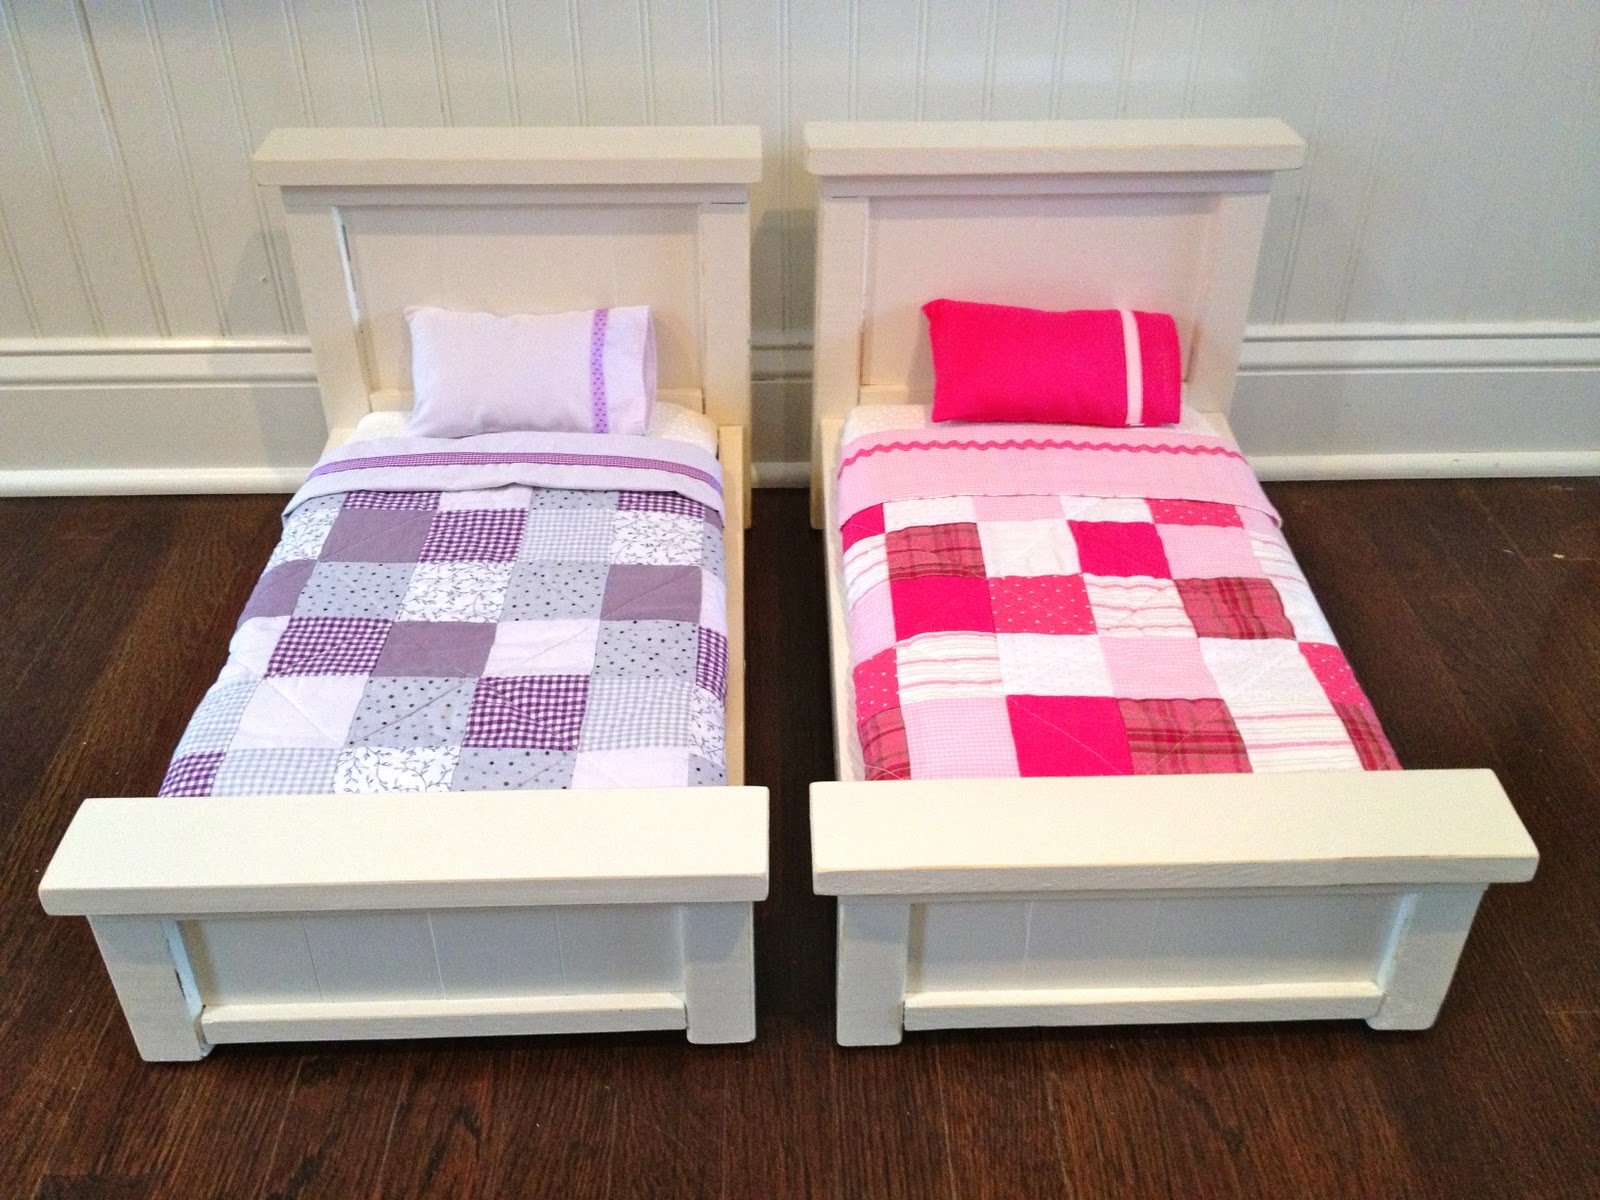
I used Ana White’s plans here and modified the width one less slat.
Perfect fit for their American Girl dolls or any 18″ doll.
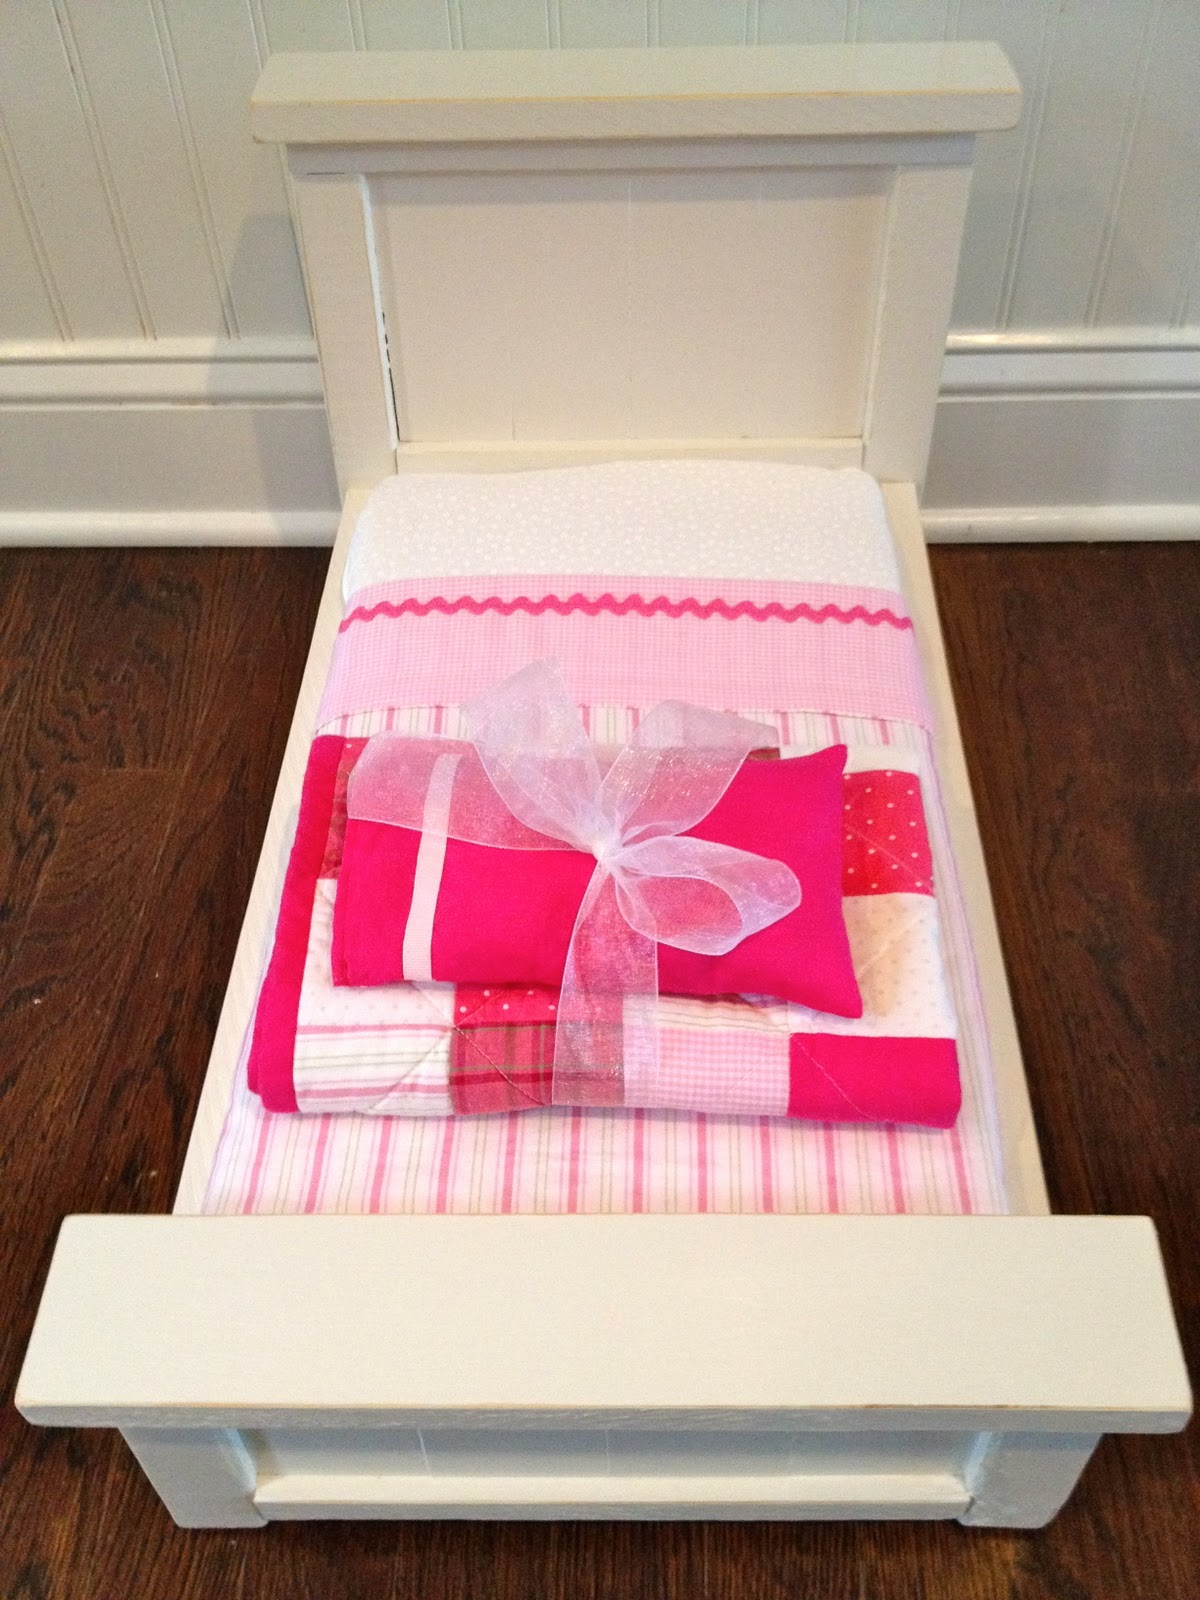
The customer requested one pink:

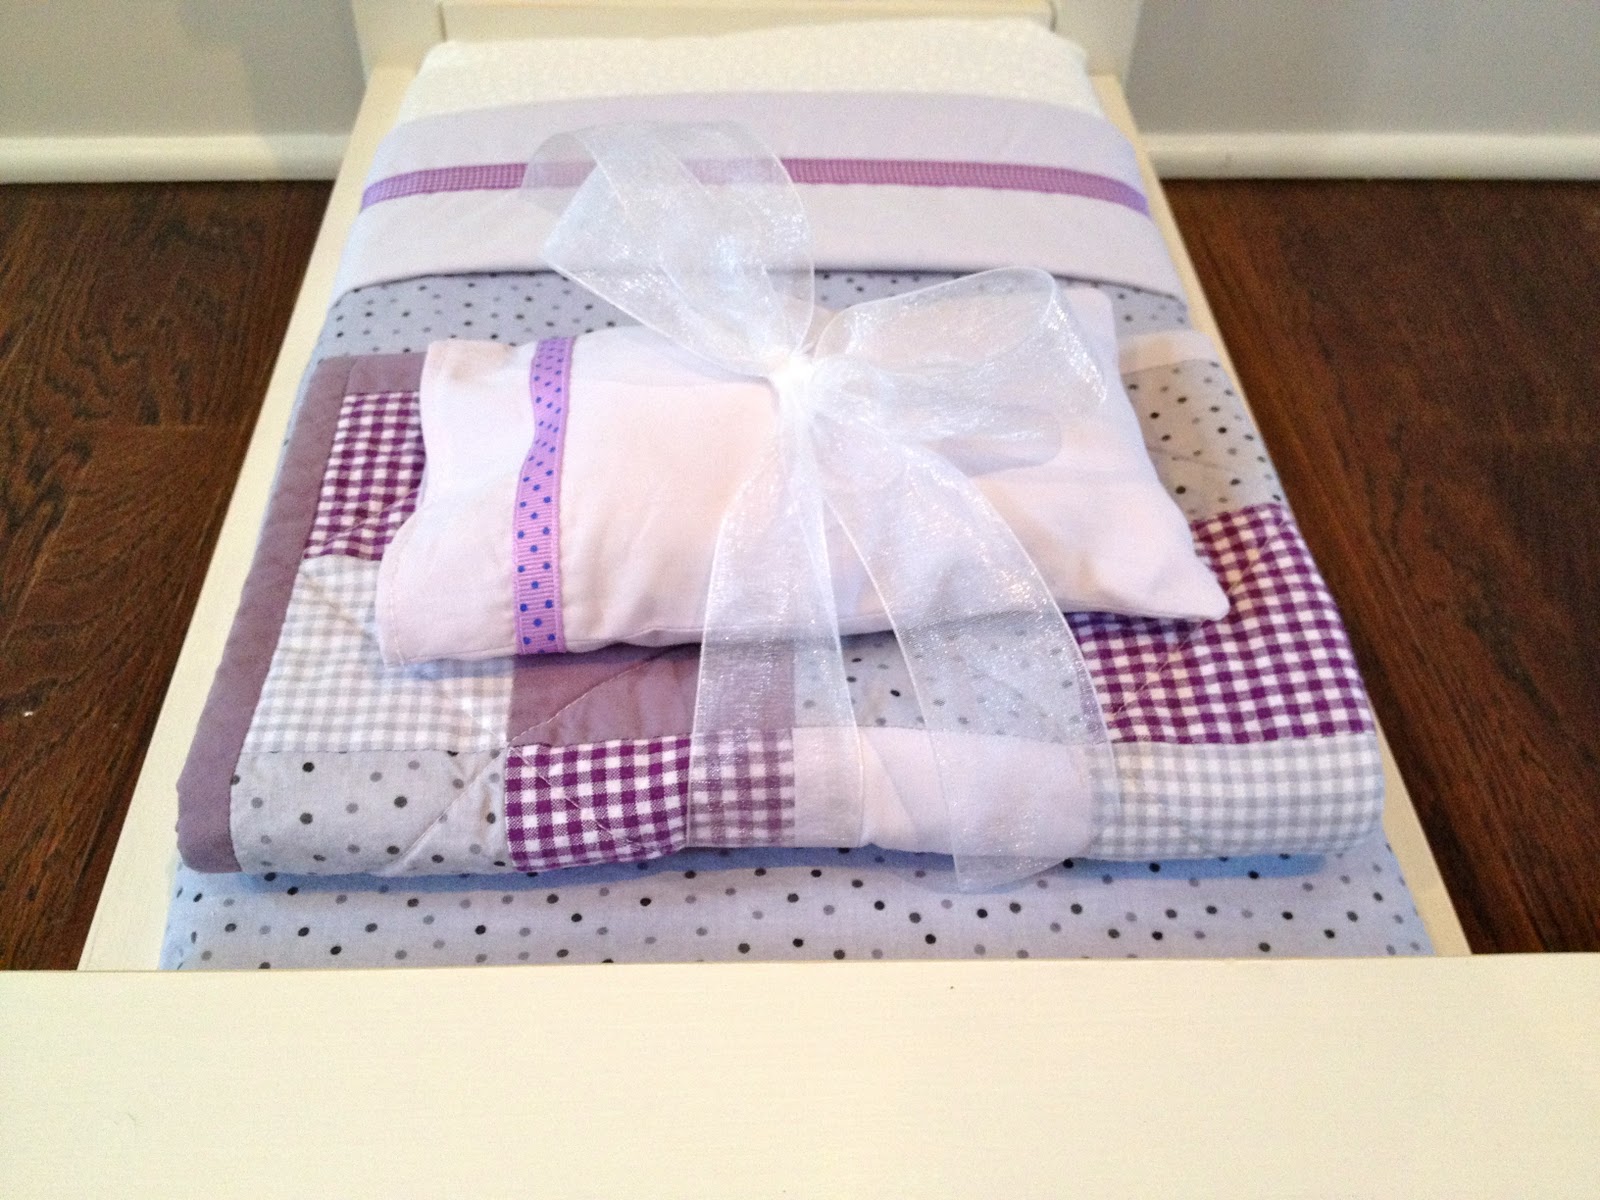
And one purple:
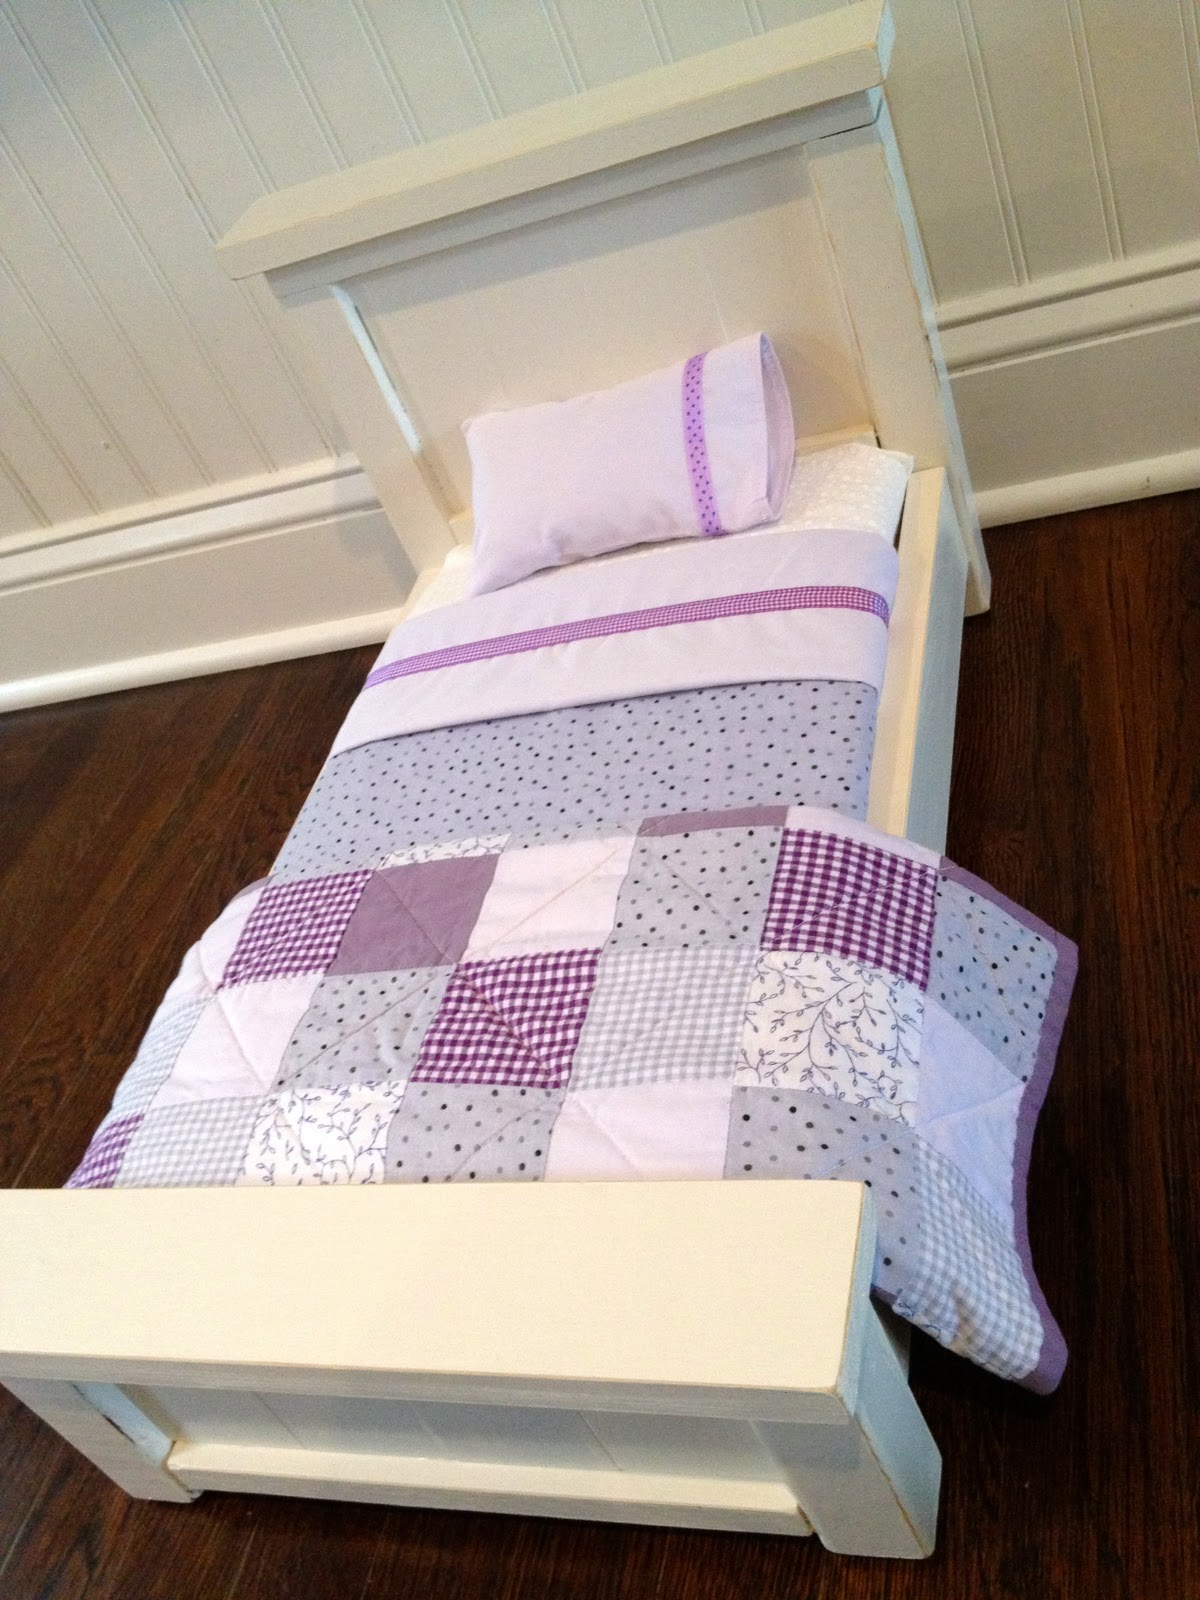
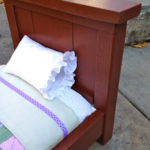
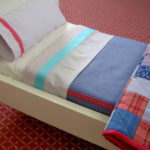
These two beds just might be my most favorite of all the doll beds I’ve built so far.
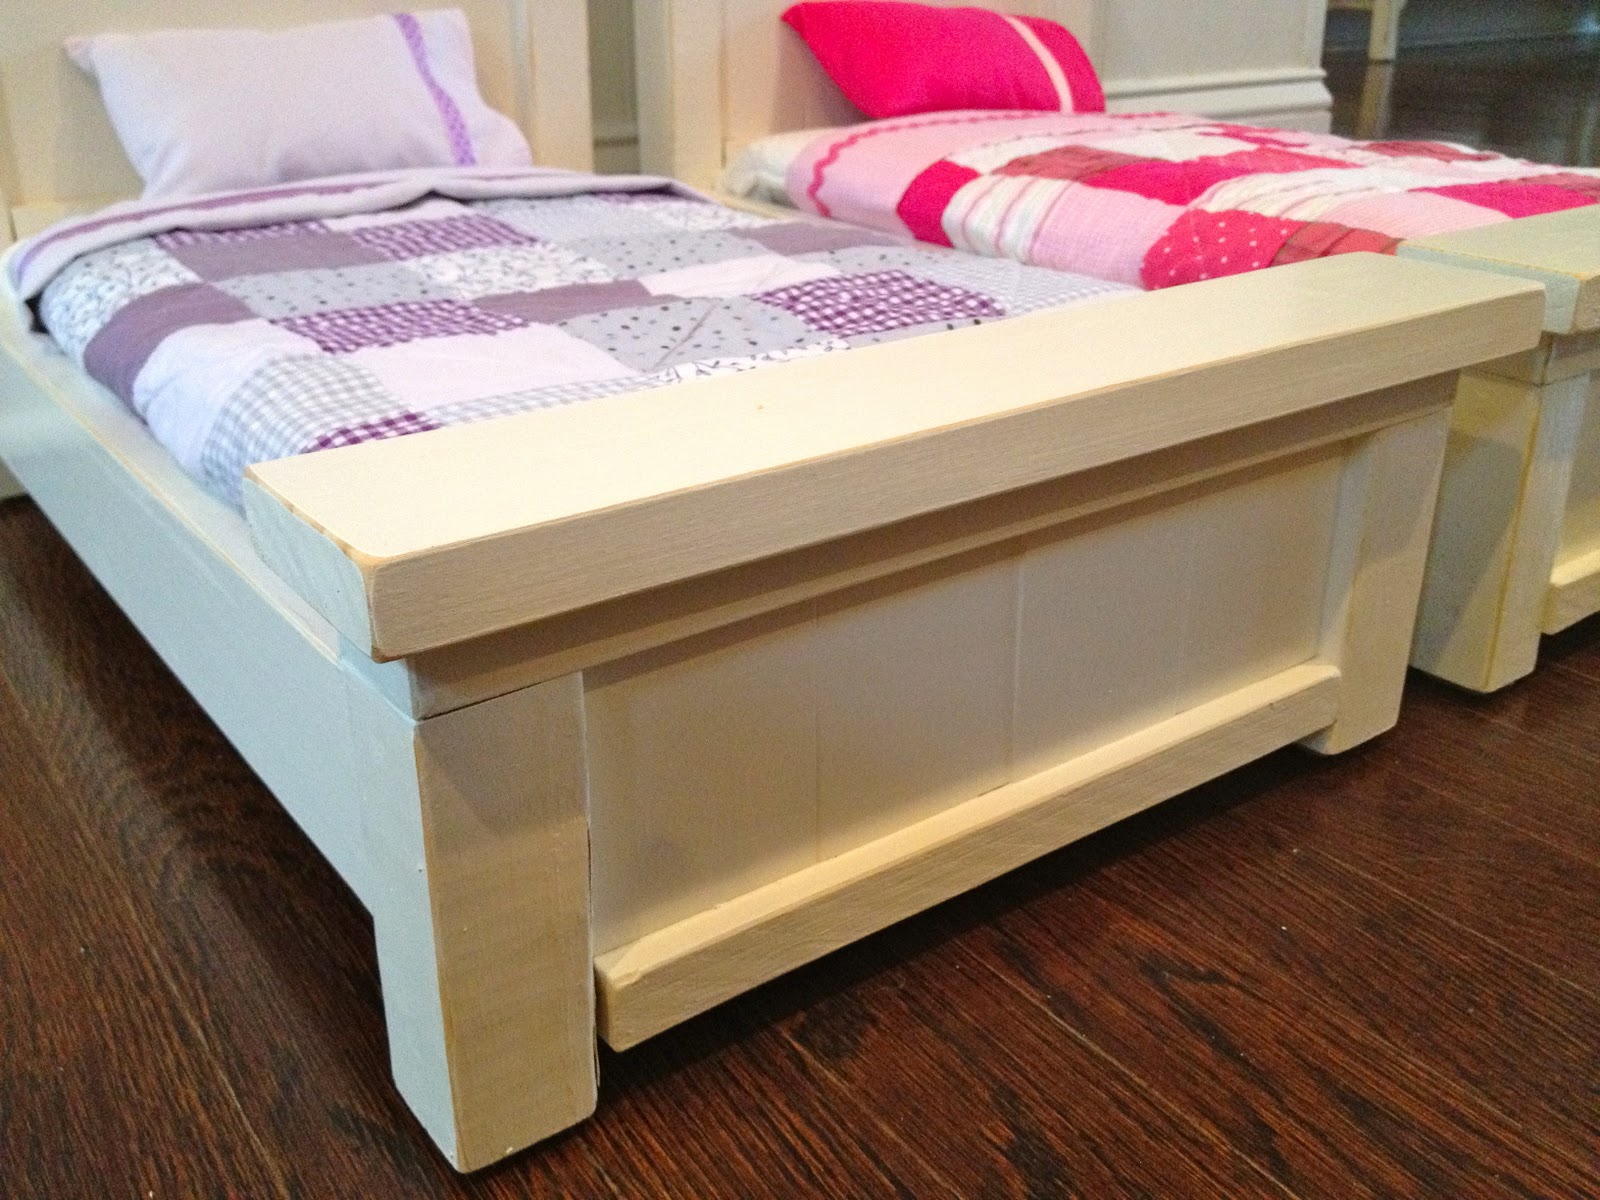
The quilts are so hard to resist.

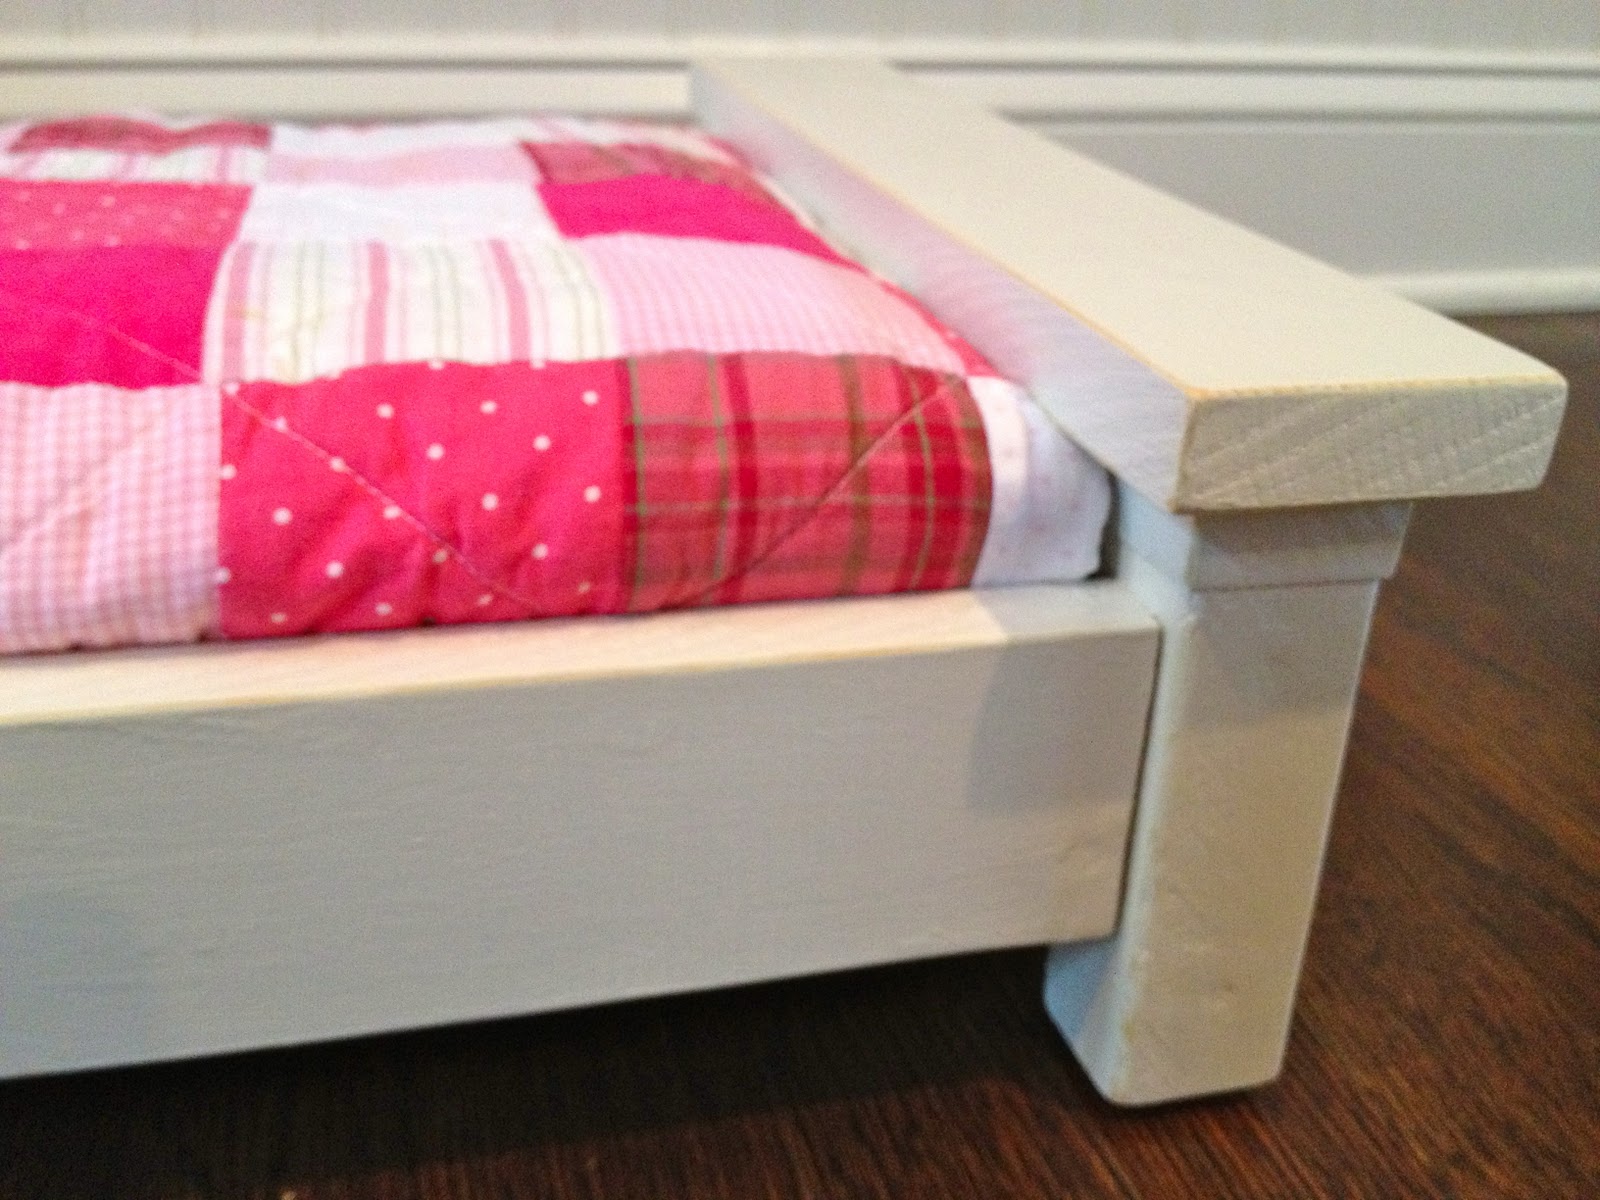
Like fabric candy, so yummy tucked inside the side rail.
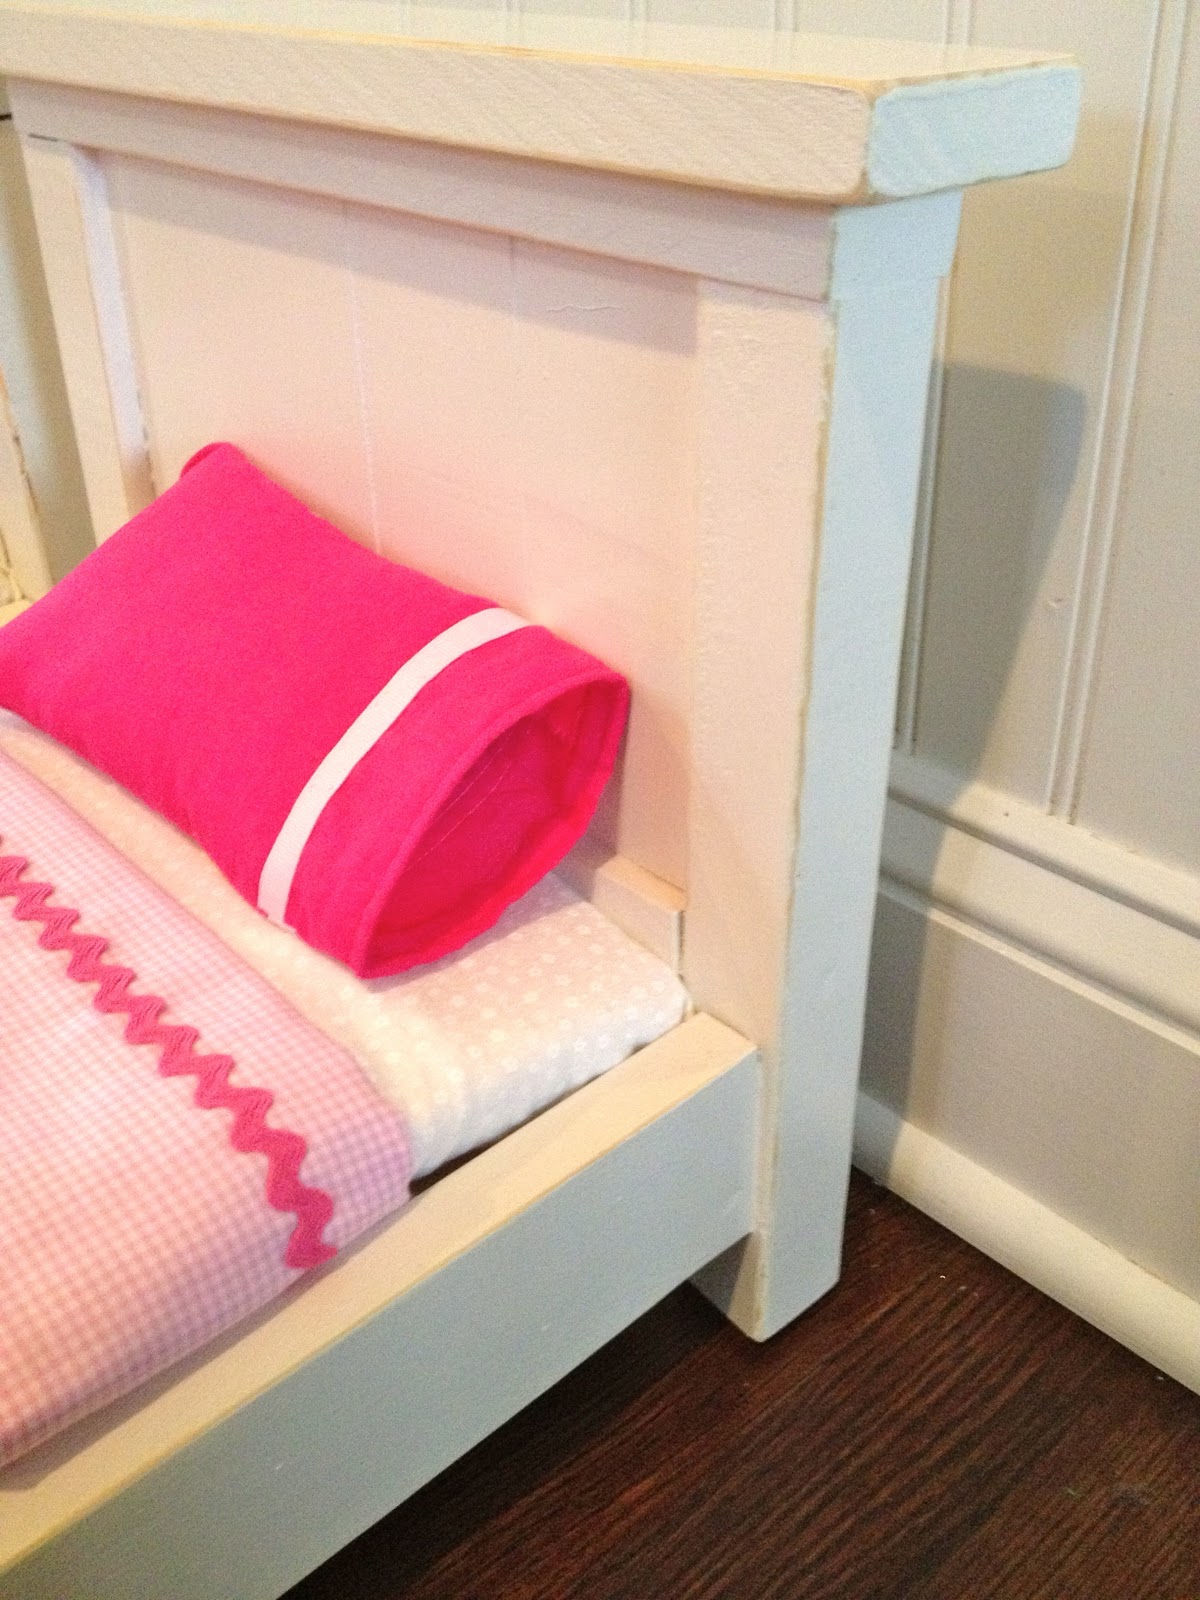
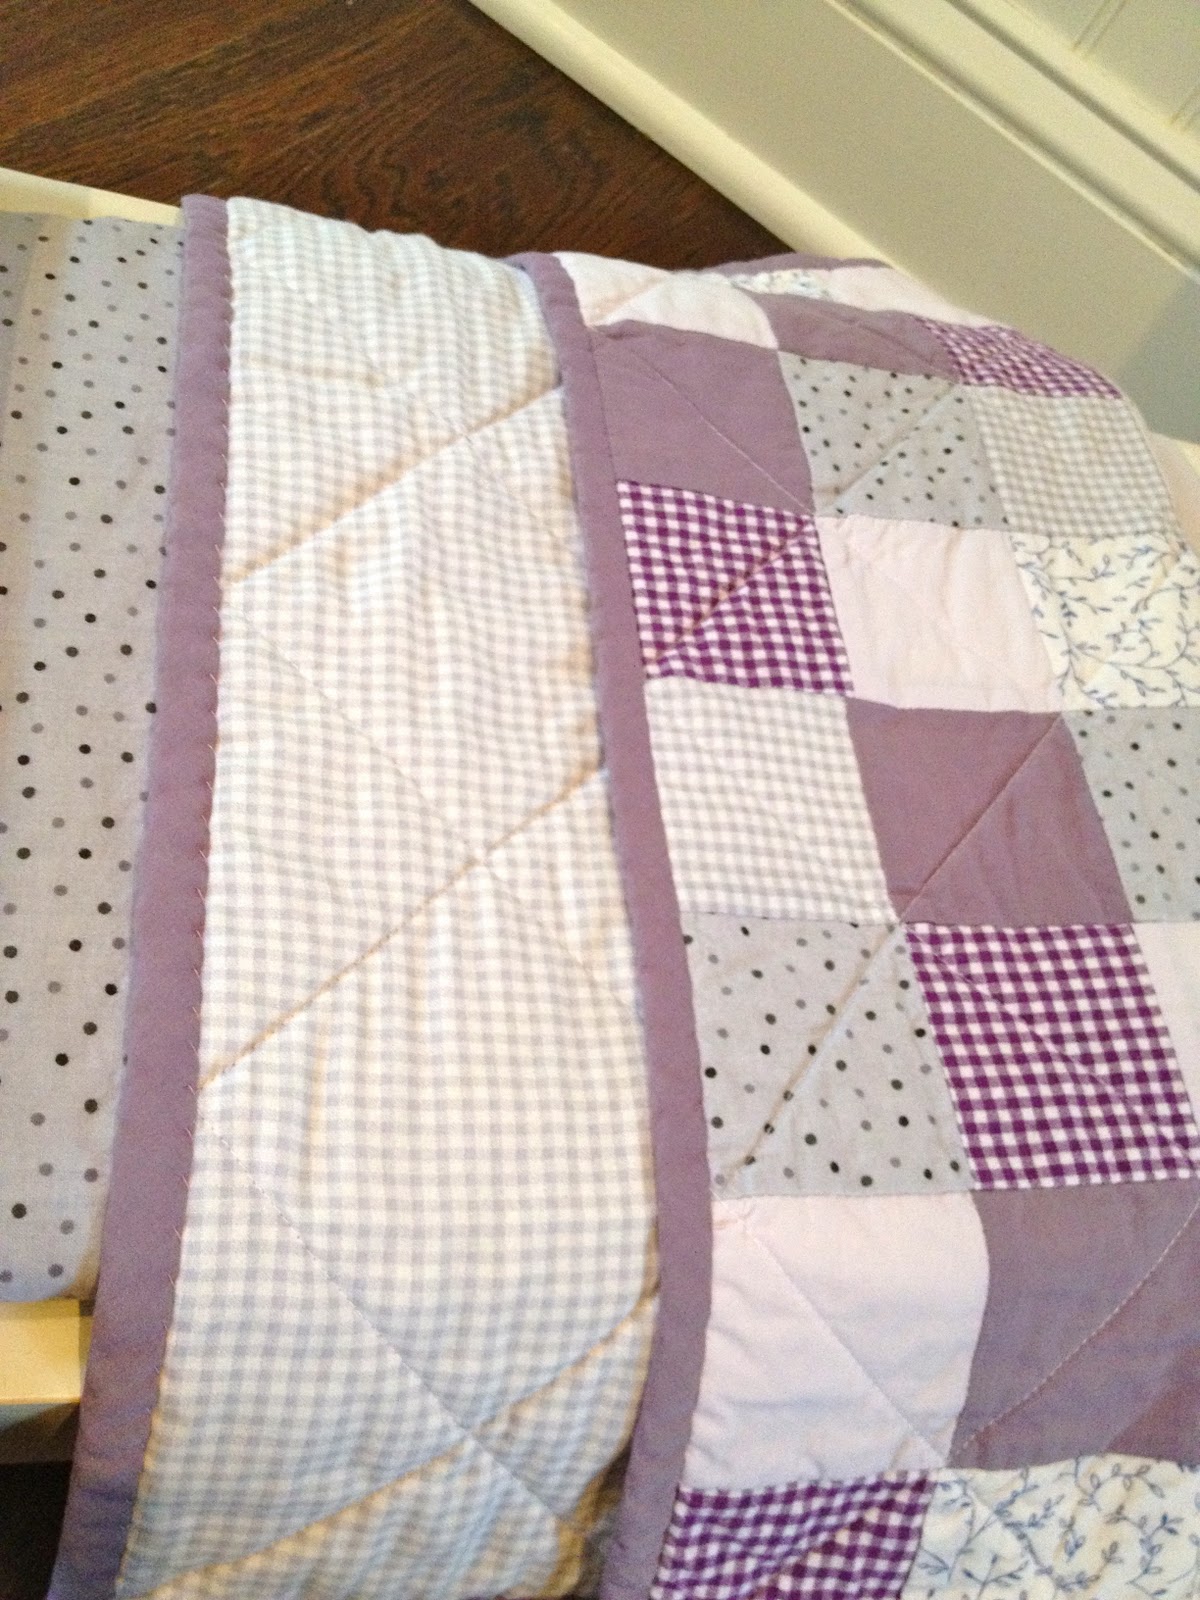
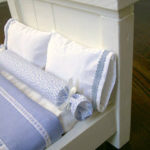
A detail of the purple quilt backing:
Ready for their dolls:

Here’s how I made the bed and bedding:
1. Cut wood pieces using Ana White’s plans here.
** Modify the width one less slat and add an extra mattress support in the middle.

2. Construct, putty screws and sand:
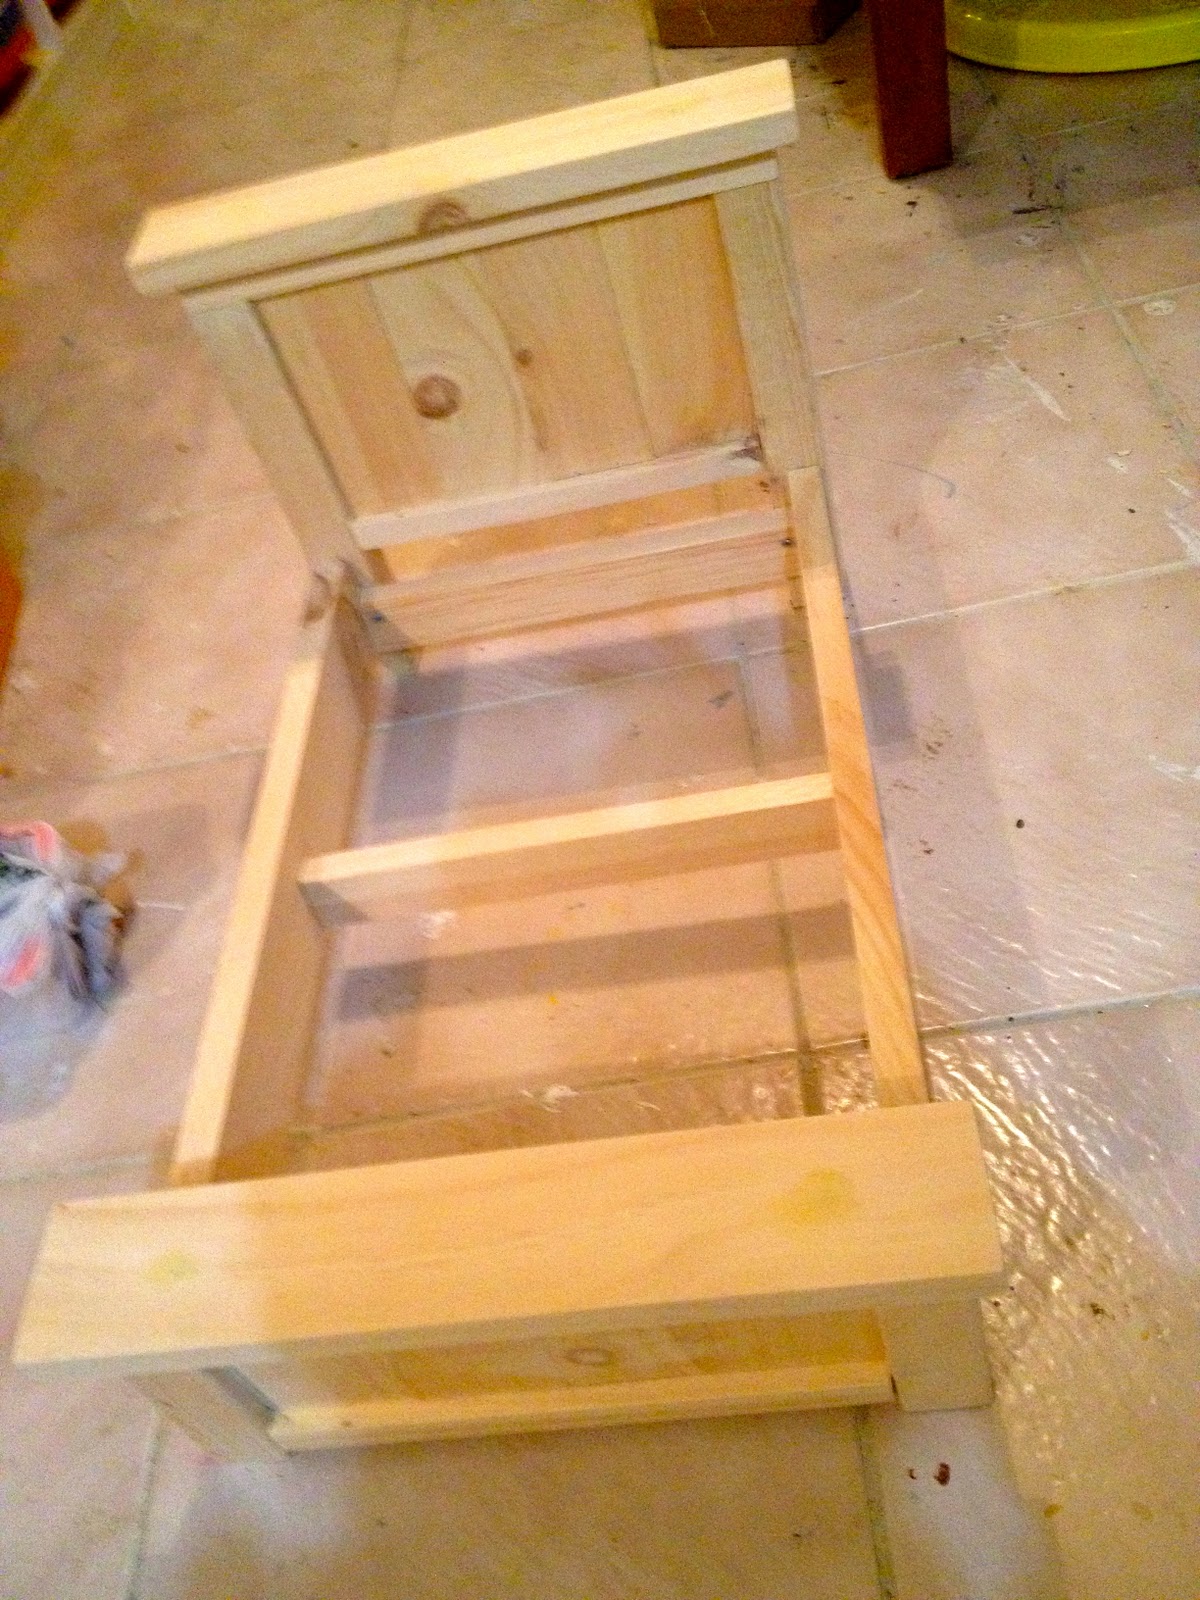
3. Prime one coat then sand again:

4. Paint two coats off white satin, sand to distress then seal with wipe on clear satin poly:

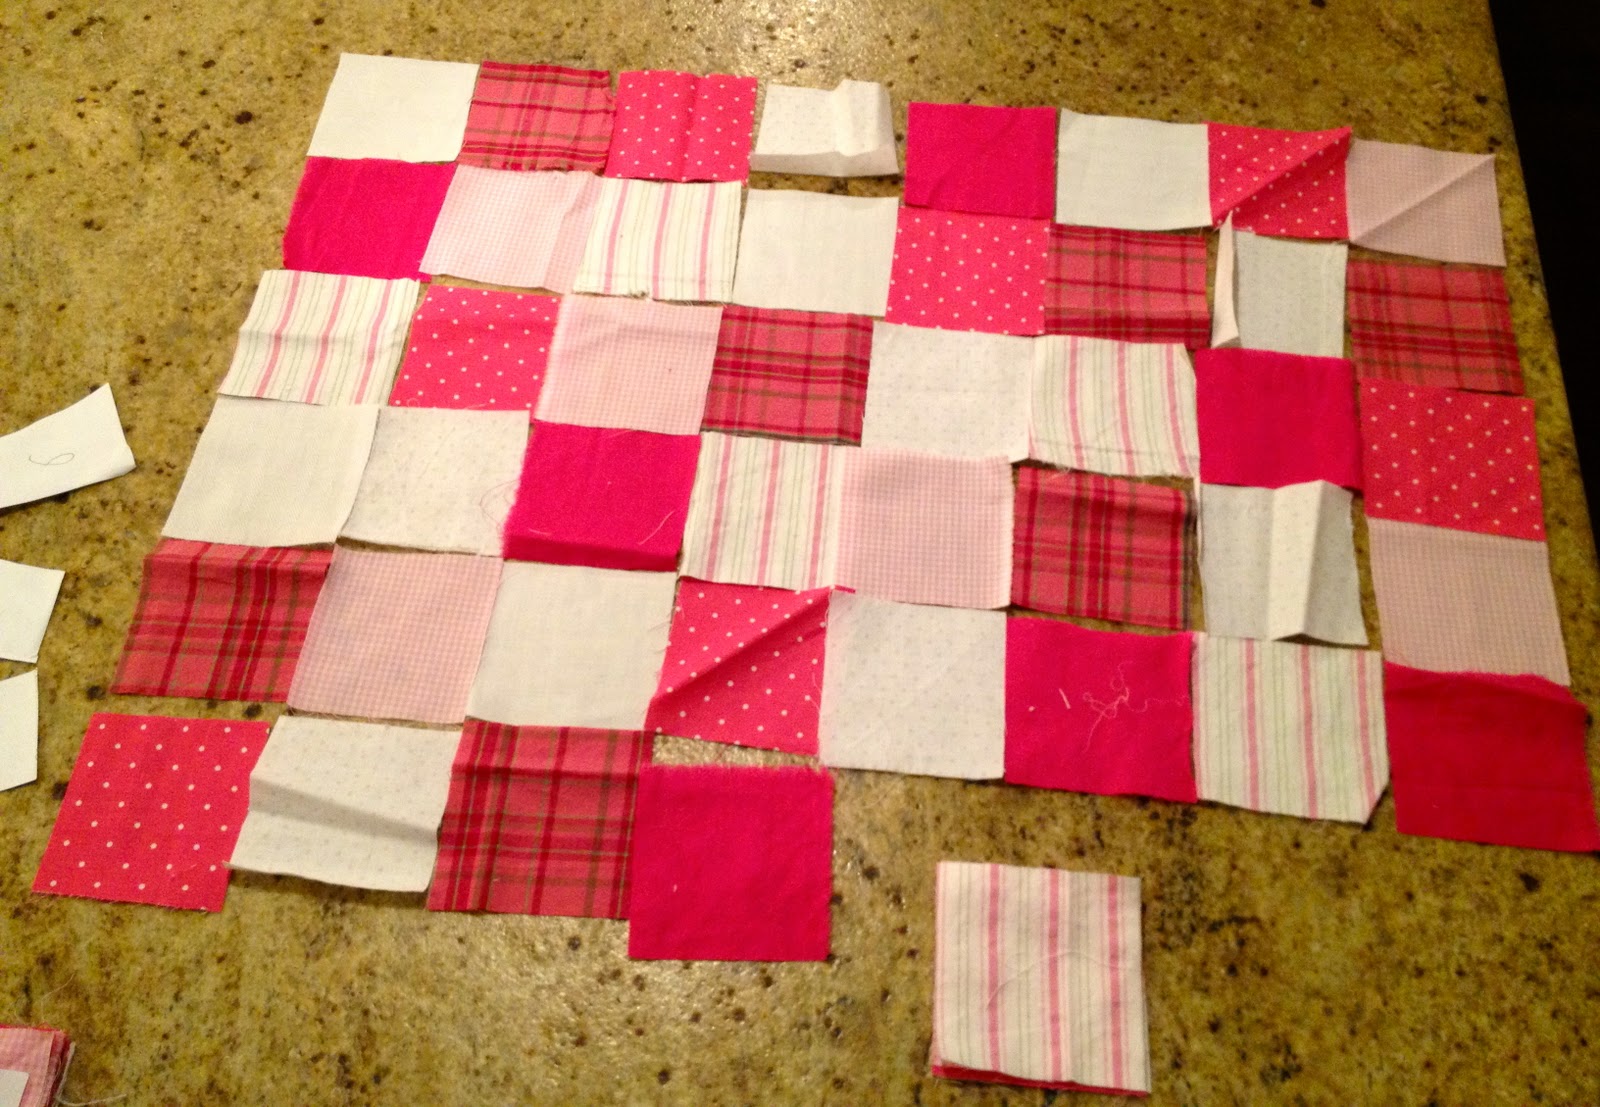
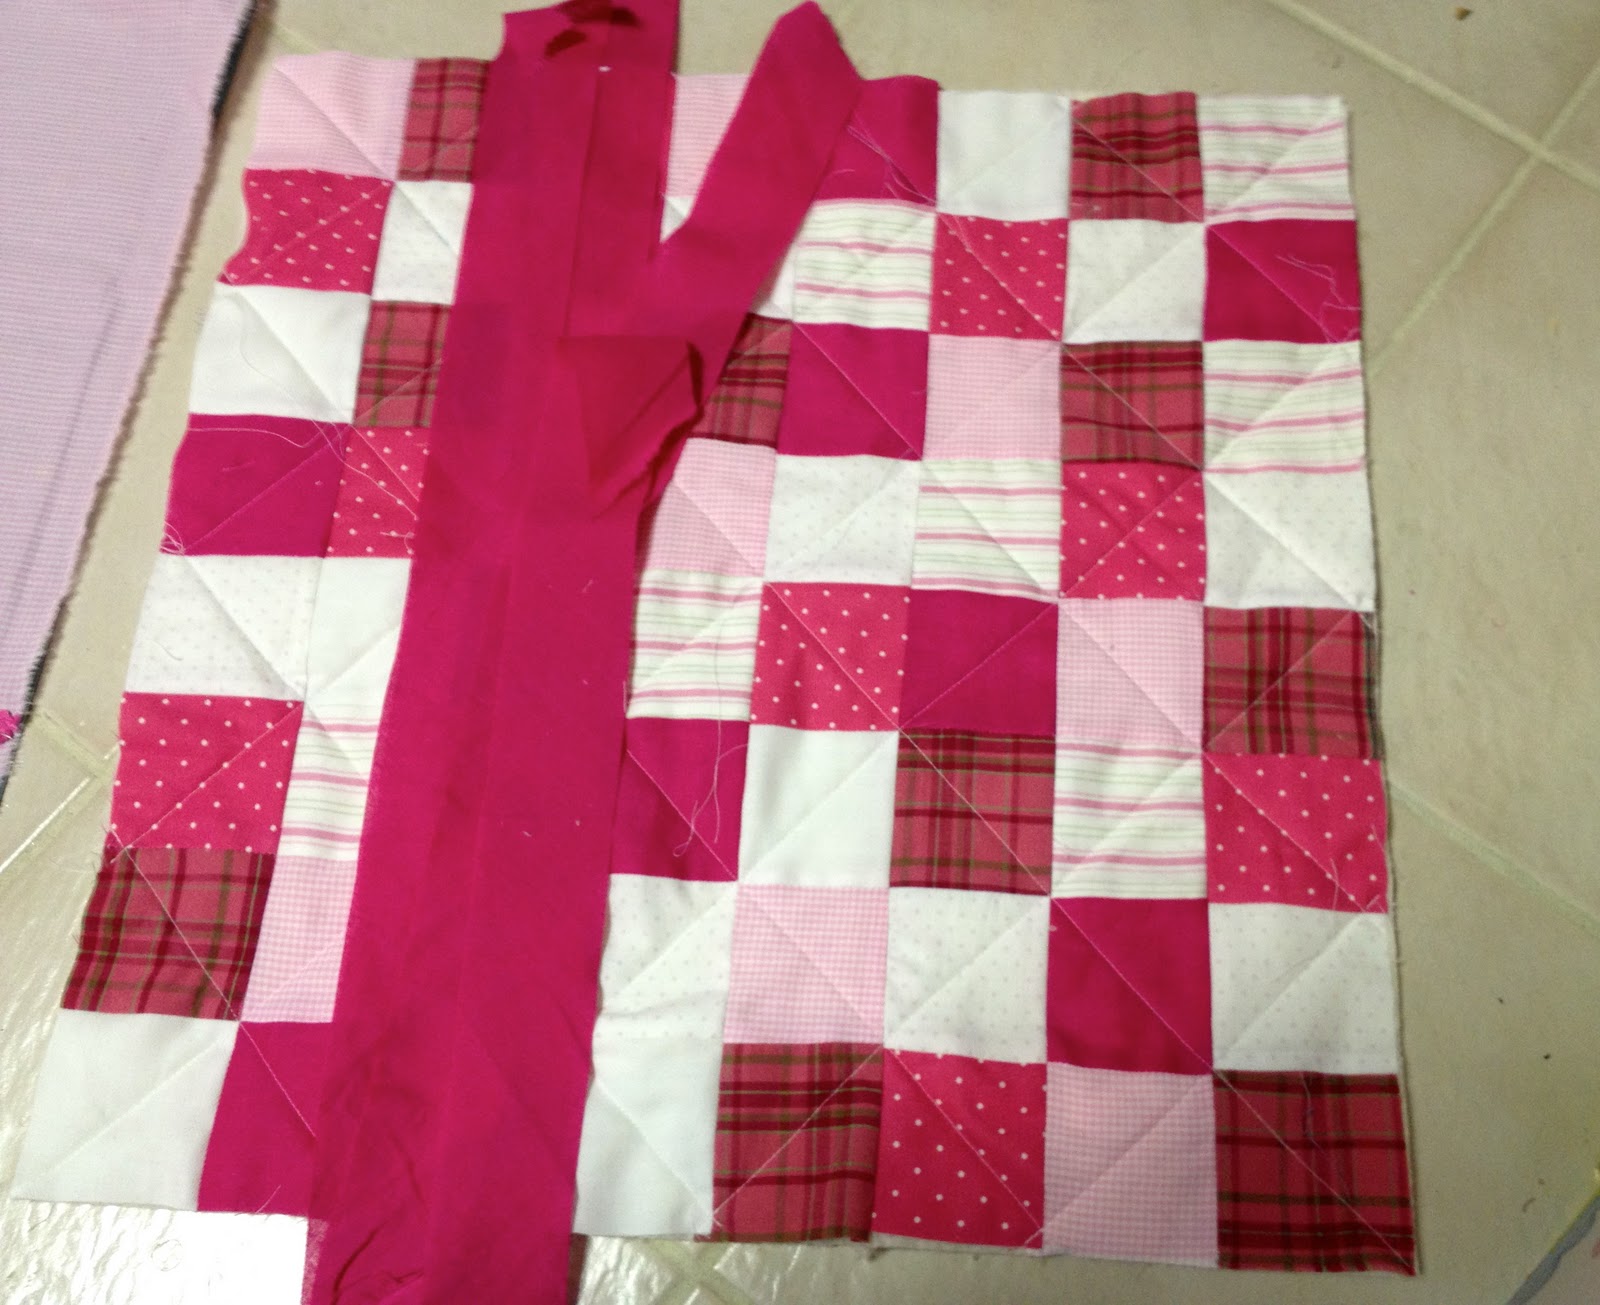
5. For the quilt, cut 3″ squares and lay out:
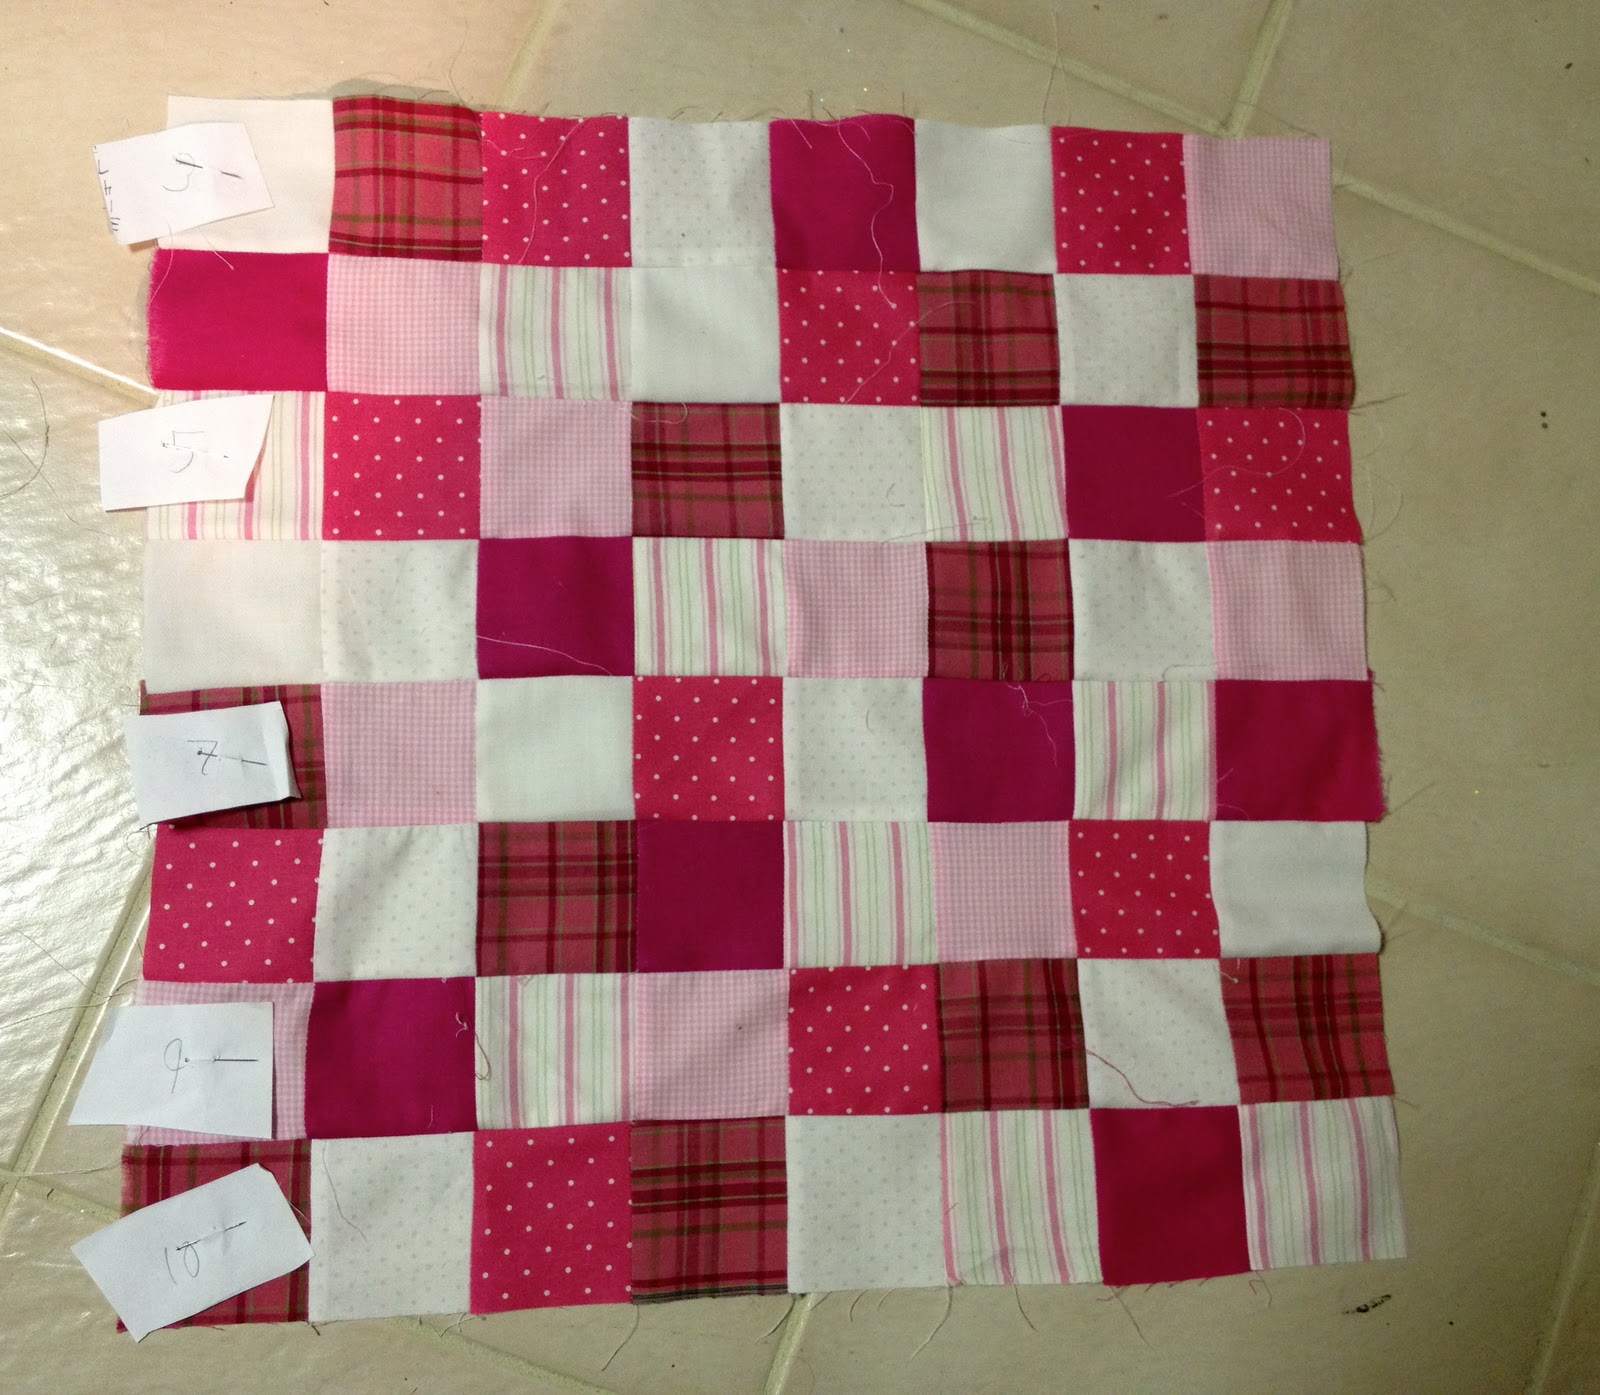
6. Sew rows together:

7. Then sew those rows together:
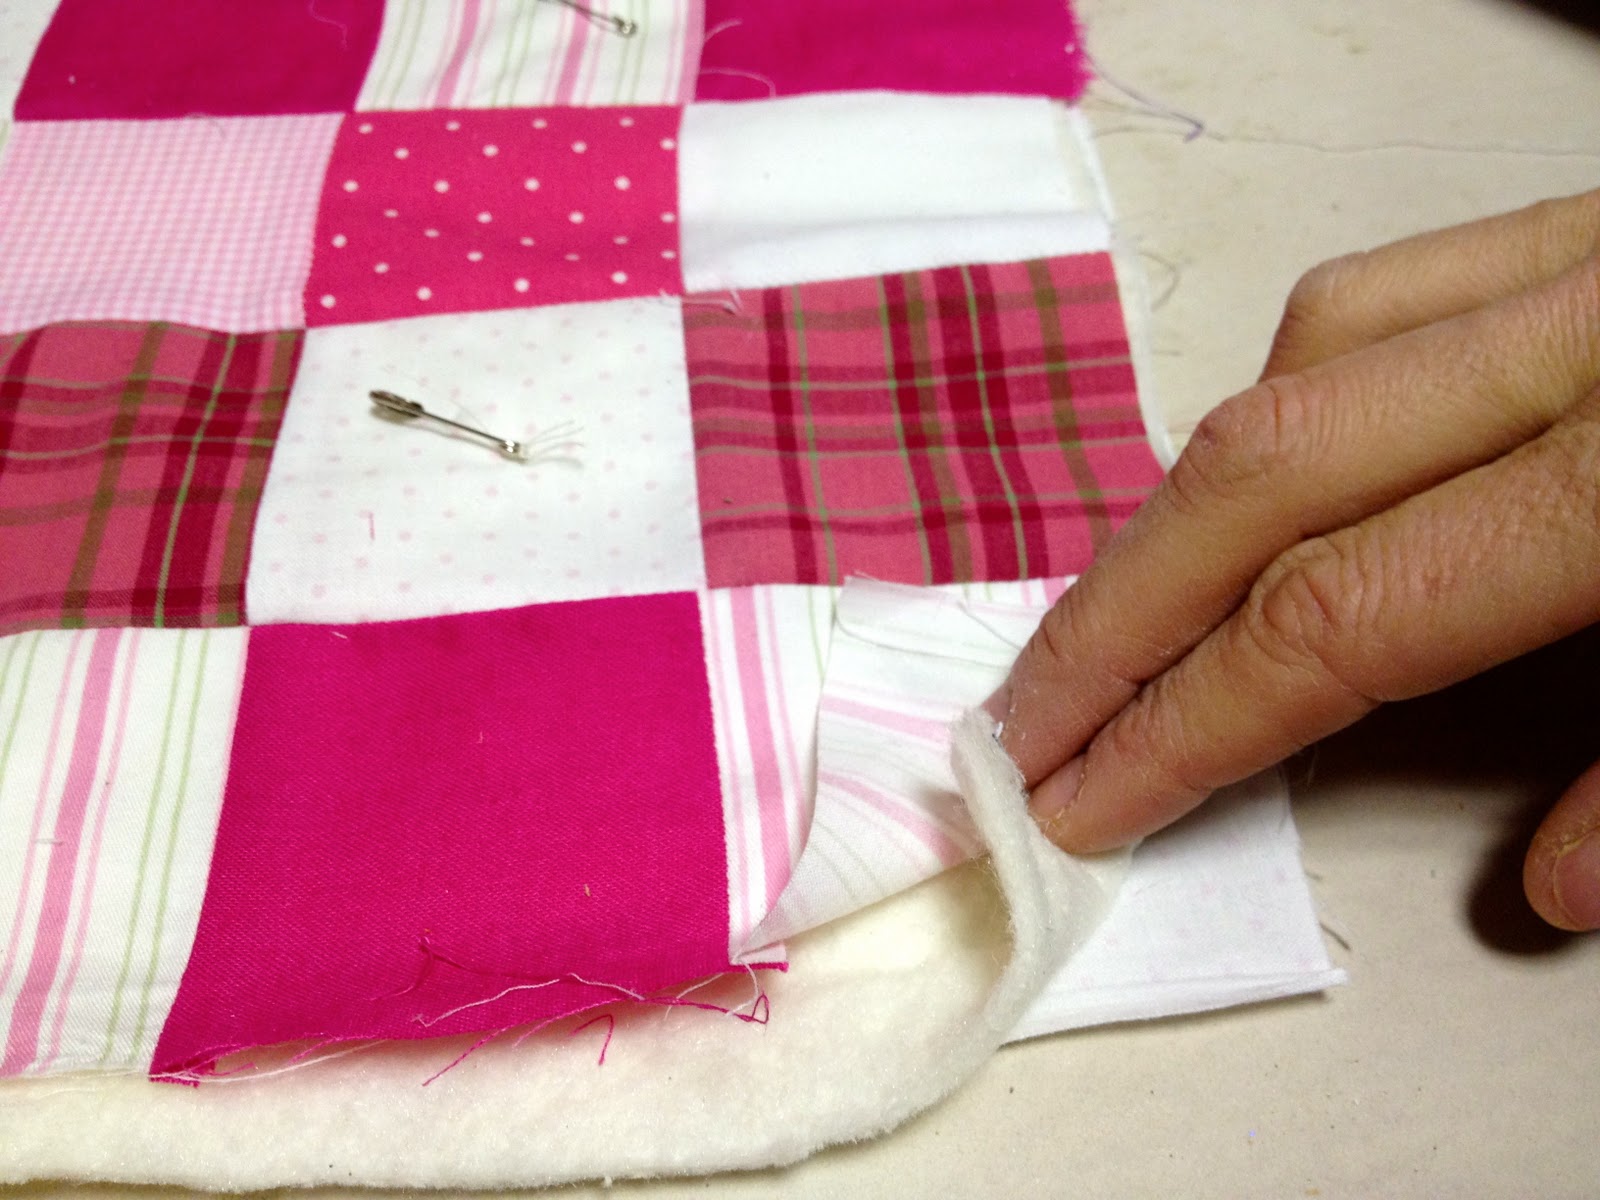
8. Make quilt sandwich: backing, batting, top and safety pin every few inches:
9. Quilt on the diagonal both ways:

14. Trim raw edges and prepare 2″ binding:
15. Attach binding, press over and press in raw edge, hand stitch closed on back:
Then wash and dry for that aged, puckered look.

16. Make the two sided sheet.
Attach ric rac detail first:
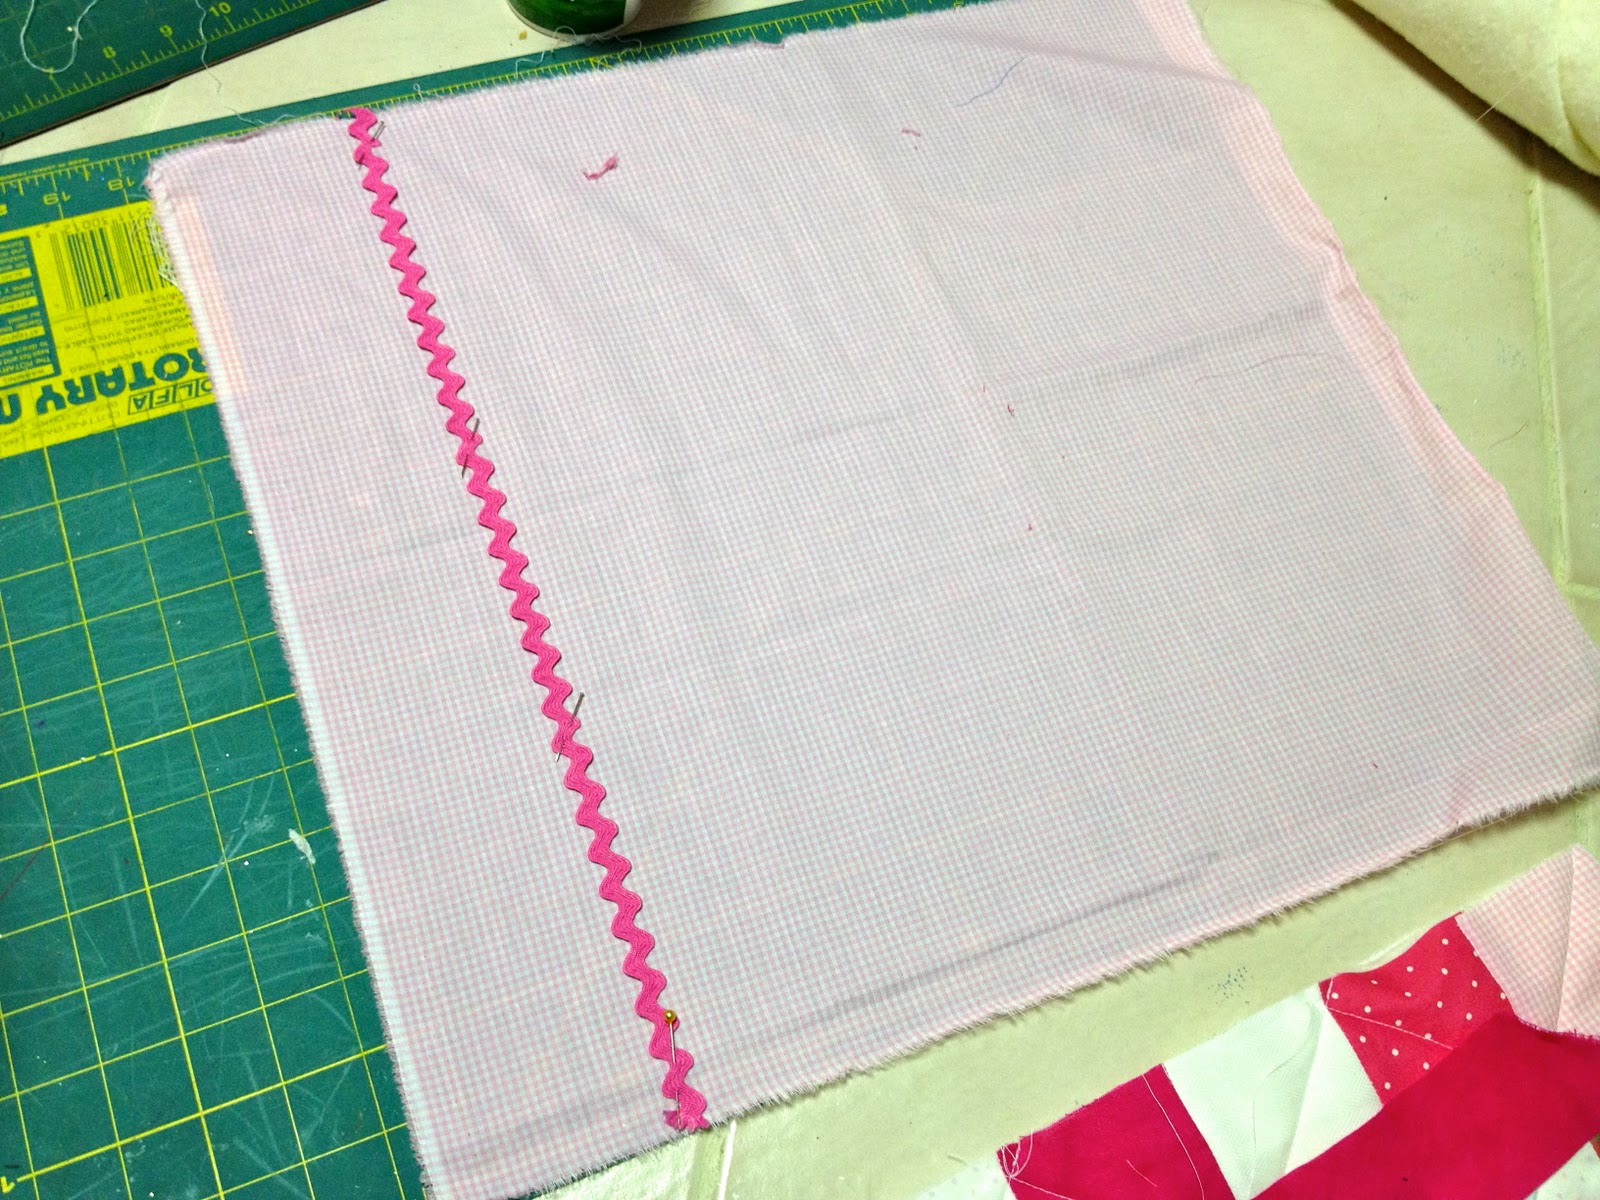
17. Then sew right sides together, leaving a 3″ opening at bottom edge.
Turn right side out, press edges and top stitch for finished look:
18. Mattress is 1″ foam wrapped with batting and covered in cotton sewn shut.
Pillow is simple rectangle with stuffing and pillowcase made to fit.
Wrap quilt and pillow with ribbon:
Then wrap the entire bed in cellophane and ribbon:
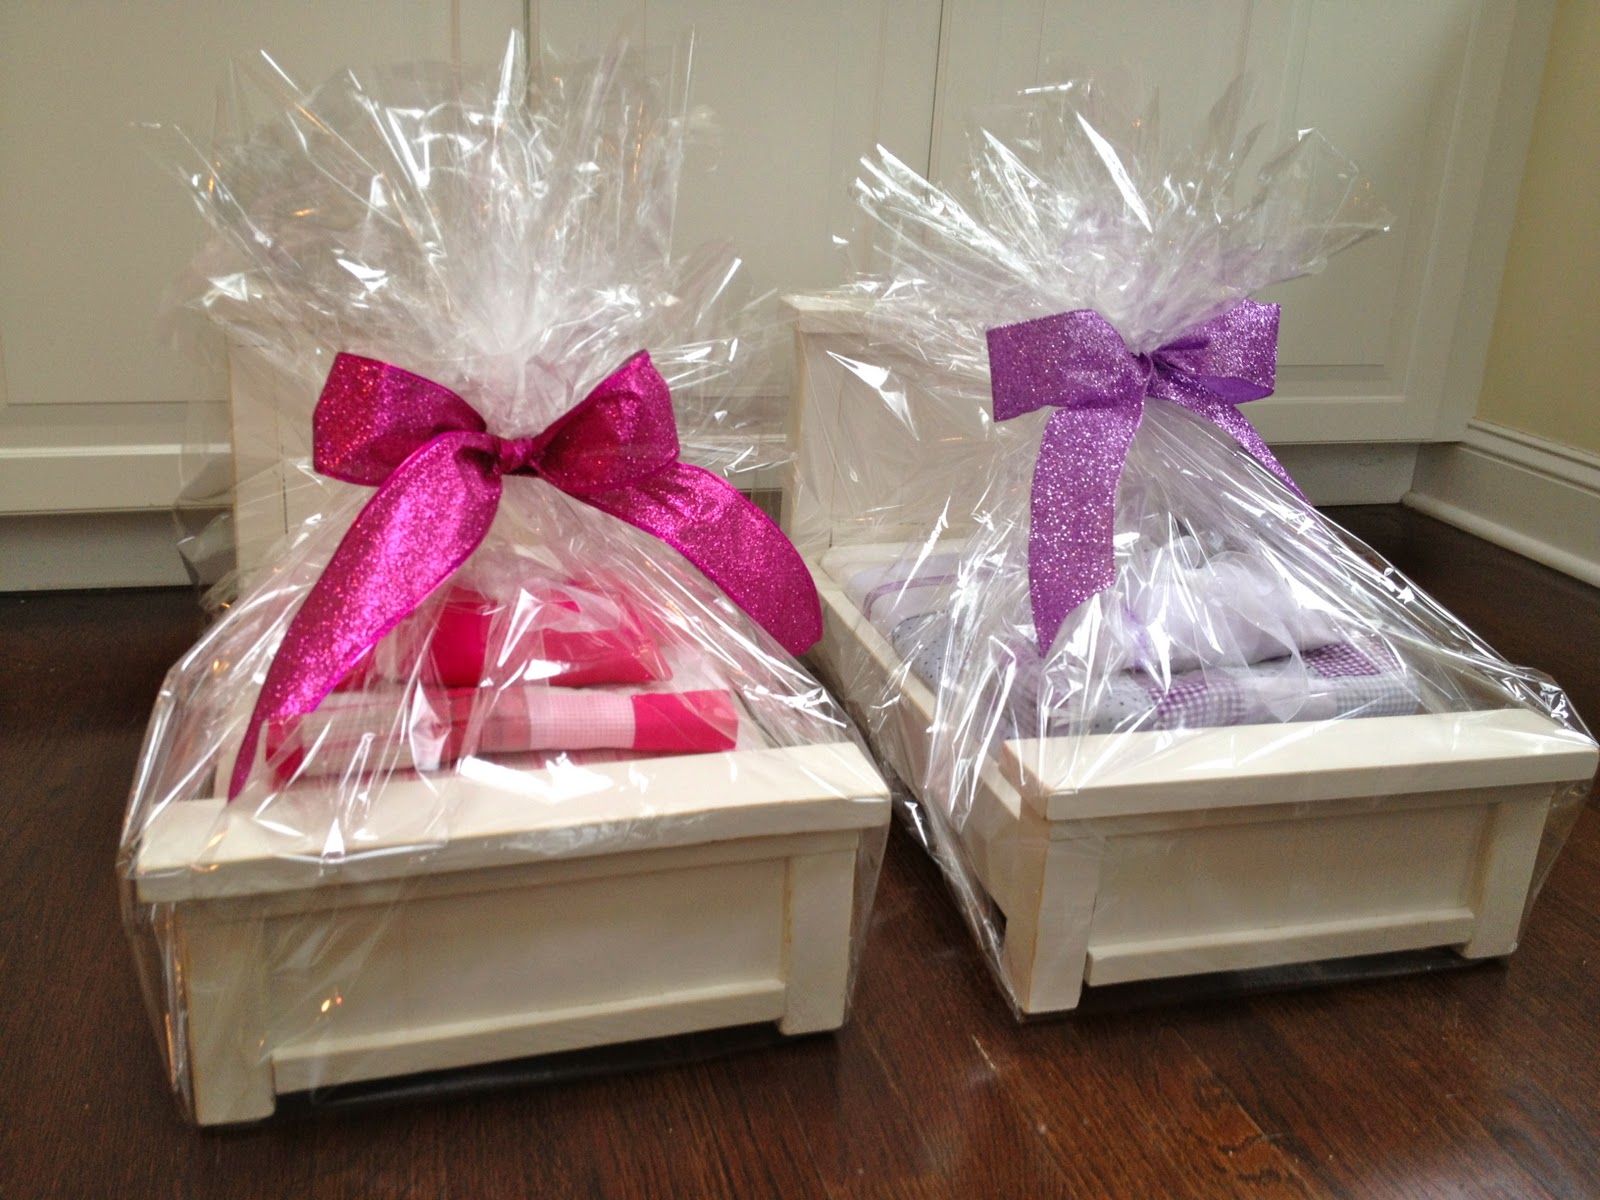
These two cousins will have a cozy place for their dolls come Christmas morning.
I’m linking up to:
Whatcha Got Weekend @ Lolly Jane
SAS @ Funky Junk
Weekend Wrap Up @ Tatertots & Jello
Sundae Scoop @ I Heart Naptime
Sister Sunday @ Sisters of the Wild West
Sunday Showcase Party @ Under the Table & Dreaming
Just Something I Whipped Up @ The Girl Creative
DIY Project Parade @ The DIY Showoff
Made by You Mondays @ Skip to My Lou
Making the World Cuter @ Making the World Cuter
Nifty Thrifty @ Coastal Charm
Tuesday Treasures @ My Uncommon Slice of Suburbia
Tutorials & Tips Tuesday @ Home Stories A to Z
Good Life @ A Beach Cottage
Delightfully Inspiring @ Delightful Order
Transformation Thursday @ The Shabby Creek Cottage
Strut Your Stuff @ Somewhat Simple
Share Awesomeness Thur @ The 36th Avenue
Flaunt it Friday @ Chic on a Shoestring
Tickled Pink @ 504 Main
Frugal Friday @ The Shabby Nest
SAS @ Just a Girl
Feathered Nest @ French Country Cottage
Remodelaholics Anonymous @ Remodelaholic
All Things Furniture @ Perfectly Imperfect
Furniture Feature Friday @ Miss Mustard Seed
POWW @ Primitive & Proper
inspiration board @ Carolyns Homework
Build(hers) Club @ Sawdust & Paperscraps
Furniture Feature Friday @ Miss Mustard Seed
POWW @ Primitive & Proper
inspiration board @ Carolyns Homework
Build(hers) Club @ Sawdust & Paperscraps
oh my goodness!!!! how stinkin' cute are these, jaime?
My first comment on your site.
The only thing that comes to my mind is DARLING !! It looks so great I feel I should be building something !
The little girls receiving the beds will certainly have a Christmas to remember! Those beds are wonderful,and I wouldn't mind having the bedding on my own bed! Your work is astounding!
p.s. I think my sock monkeys would love to slumber in one of those beds fit for a queen!
Prelijepi su ti krevetići za lutke!!!!
Super tutorial!!!
These are just adorable!!! I could get LOST on your page looking at all these cute beds!!! 🙂 I made a baby doll crib last week for my little girl! I used her toddler bed! It was so easy! Here is the link if you want to stop by.
http://jensidea.blogspot.com/2011/12/diy-baby-doll-crib.html
Jeni@ Becoming Martha
Buon Natale!!
Baci
Sabry!!
These are so adorable! I might have to give that plan a go. Cool. I love the bedding and the way you cellophaned everything with a bow. Super cute!!!
I am your newest follower. I love these also.
Thanks so much for sharing your step by steps – whilst I didn't do the patchwork – I did use your quilts as guidelines/inspiration.
http://colourandink.blogspot.ie/2013/01/18-inch-doll-bed-and-bedding_5.html Maybe I will tackle the patchwork on the next one! LOL! Happy New Year.
Those would be great gifts! I love them!
I found your tutorial on Pinterest for the quilts and just made two. Thank you for making it so easy.
Lynn
http://lifeat2540.blogspot.com/2014/01/american-girl-doll-quilts-update-five.html
What are the dimensions of the quilt and the 2-sided sheet??
I believe the quilt is 20" square (made up of 3" squares with 1/4" seam allowance). Same with the sheet, 20" square, cut it larger to allow for hem. Good luck!
Thank You for sharing. You’v been so nice to show everyone what they need to do to make both the beds and the bedding. I just wanted to Thank-You for sharing. I appreciate everything you’ve shown us ❤️
Thank you Marie, so nice to hear from readers who appreciate the work.
whats the mesurement for the bed sheet?